Full fix: Critical_process_died csrss.exe [BSoD]
8 min. read
Updated on
Key notes
- As unusual as it may sound, BSoDs are not really harmful for your PC, even though the ntoskrnl.exe critical_process_died message may scare you.
- If you get a csrss.exe BSoD in Windows 10, you definitely need to update your drivers with our software recommendation from this guide.
- Also, if the critical_process_died error still bothers you, you should use a special repair tool that you can find below.
- However, if the critical process died due to overheating, then find out by reading our article on how to uninstall certain software to fix it.
![How to fix Critical_process_died csrss.exe [BSOD]](https://windowsreport.com/wp-content/uploads/2020/03/Full-fix-Critical_process_died-csrss.exe-BSOD-886x590.jpg)
Computer errors are a common occurrence, and while certain errors are relatively harmless, others can cause you a lot of problems.
Critical_process_died csrss.exe is a Blue Screen of Death error, and since this error will crash your system every time it appears it’s important to know how to fix it on Windows 10.
The Critical_process_died csrss.exe error can be problematic, and speaking of this error, here are some similar issues reported by the users:
- Critical_process_died Windows 10 won’t boot, won’t boot in Safe Mode – If your system can’t boot due to this problem, it’s possible that there’s an issue with your hardware. But before you replace your hardware, you might want to try reinstalling your system.
- Critical_process_died 0x000000ef – Sometimes this error can be followed by an error code. However, you should be able to fix the problem using one of our solutions.
- Critical_process_died ntoskrnl.exe – Sometimes you might get an error message saying which file caused the problem. If that’s the case, simply do a bit of research and remove the application associated with that file.
- Critical process died overclock, overheat – Overclocking and overheating can also cause this problem, and in order to fix it, be sure to remove all overclock settings.
- Critical process died Avast, Kaspersky – Your antivirus can also cause this issue to occur, and to fix the problem, you’ll need to remove or disable your antivirus.
How can I fix the critical_process_died csrss.exe error?
1. Uninstall the problematic software/driver
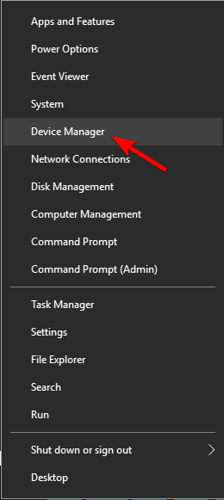
- Press the Windows Key + X, and select Device Manager from the list.

- Locate the driver that you want to remove, right-click it and choose Uninstall.

- If available, check Delete the driver software for this device and click OK.

- After you delete the driver, restart your PC.
Sometimes the critical_process_died csrss.exe error can be caused by certain software or a driver that you have installed.
To fix this issue, users are suggesting to find and remove the problematic software from your PC. Your antivirus is the common cause for these types of errors, therefore be sure to remove it.
In addition to software, certain drivers can cause this issue to appear. Users reported that Intel Rapid Storage Technology is the common cause for this error, therefore be sure to remove it.
2. Use a repair tool
Sometimes, when we don’t know what errors fall on our PC and overwhelm us, we need a powerful repair solution to fix everything effortlessly.
3. Turn off the Sleep mode
- Write power settings in the Search bar, and choose the Power & sleep app.
- Navigate to Additional power settings in the Related settings category.

- Locate your current power plan, and click Change plan settings next to it.

- Click Change advanced power settings.

- Go to the Sleep section, and disable all the options.

- After you’re done click Apply and OK to save changes.
Few users reported that they fixed the critical_process_died csrss.exe error by disabling the Sleep mode. You only have to follow the above steps to get it fixed in no time.
4. Install the latest updates and drivers
4.1 Install the latest updates
- Press Windows Key + I to open the Settings app.
- Navigate to the Update & Security section.
- Click Check for updates button.
Windows will now download the missing updates and install them as soon as you restart your PC.
The simplest way to fix critical_process_died csrss.exe and other Blue Screen of Death errors is to download and install the latest updates through Windows Update.
Many of these updates fix both hardware and software issues, therefore it’s recommended that you install them.
Windows 10 usually downloads the missing updates automatically, but you can always check for updates manually on your own.
4.2 Install the latest drivers
- Press Windows key + X and select Device Manager from the list.

- In Device Manager, expand the proper category for the problematic component.
- Right-click on the driver you want to update and select Update driver.

- Select Search automatically for drivers.

- In a short while, Device Manager will download and install the compatible drivers for the hardware component.
In addition to the latest updates, it’s also recommended to install the latest drivers. Outdated drivers are the common cause for these errors, therefore be sure that you update them.
With little research, you can find which driver is causing this error and update it, but if you can’t find the problematic driver we advise you to update all your drivers.
You can also visit your hardware manufacturer’s website and download the latest drivers for your hardware.
We also recommend a professional tool to automatically download all the outdated drivers on your PC. Outbyte Driver Updater is one of the best options available. It can detect and fix damaged drivers, out-of-date drivers, and missing files on your drivers.
5. Update your BIOS
Your BIOS is in charge of most of your hardware components, and if your BIOS is outdated you might get critical_process_died csrss.exe error. To fix this error users suggest updating your BIOS.
To update BIOS you need to visit your motherboard manufacturer’s website and download the latest version of BIOS.
We have to mention that BIOS update is somewhat an advanced and dangerous procedure, therefore use extra caution if you want to avoid causing permanent damage to your PC.
For detailed instructions on how to update your BIOS, be sure to check your motherboard manual.
6. Remove SATA adapter cradle for your SSD
Some users tend to use SATA adapter cradle for their SSD, but few users reported that SATA adapter cradle can cause this error to appear.
According to users, after removing the SATA adapter cradle and connecting the SSD directly to the motherboard the issue was completely resolved.
7. Perform a System Restore
- Press the Windows Key + S, and type system restore.
- Select Create a restore point from the list of results.

- Click on the System Restore button.

- When System Restore window opens, click Next.

- If available, check Show more restore points option.
- Select the restore point you want to revert, and click Next.

- Follow the instructions on the screen to complete the restoration process.
According to users, you might be able to fix this problem by performing System Restore. After the restoration process is finished, check if the problem is still there.
8. Remove problematic applications
In some cases, third-party applications can cause this issue to appear, so you’ll have to remove them.
If this problem started appearing recently, it’s rather likely that a third-party application caused it, so it’s advised to remove any recently installed applications and check if that helps.
Many applications tend to leave leftover files after you remove them, so it might be best that you use uninstaller software.
Third-party uninstallers can detect and remove any lingering files related to your selected app, thus removing it completely from your system.
Most uninstallers can also forcefully remove stubborn software that can’t be removed with Windows settings. This includes malicious or broken apps.
Uninstaller software includes additional optimization features that help you clean your PC. They can detect and remove useless files, broken files, registry entries, temp files, and more.
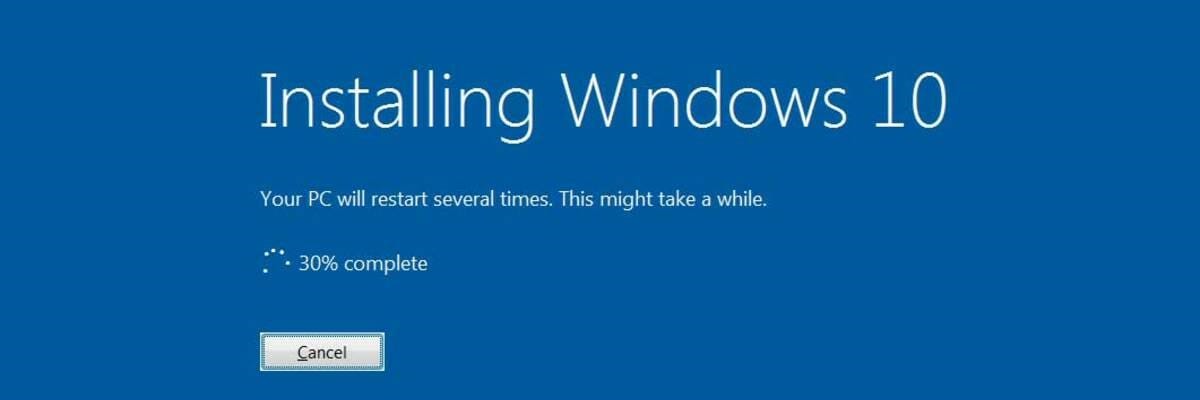
9. Reinstall Windows 10
- Open the Start Menu, click the Power button.
- Press and hold the Shift key and choose Restart.
- Choose Troubleshoot, select Reset this PC, and Remove everything.
- If you’re asked to insert Windows 10 installation media, be sure to do so.
- Select Only the drive where Windows is installed, and select Just remove my files.
- Click the Reset button to start.
- Follow the on-screen instructions to complete the reset.
Once the process is finished, your system will be reinstalled and the problem should be fixed.
According to users, sometimes in order to fix this problem, you need to reset your PC to the default. This process is similar to clean install, so before you perform it, be sure to back up all important files from your system drive.
To perform a reset, you might have to create an installation media, so be sure to do so using Media Creation Tool software.
In case the problem appears after you reset your PC, it’s rather likely that a hardware component is causing this issue.
The most common causes are your RAM and graphics card, so be sure to check them first. If your hardware is the problem, you’ll have to perform a detailed hardware inspection to pinpoint the problem.
Critical_process_died csrss.exe error can cause many problems, but in most cases, you can fix this error by removing the problematic software or by updating your BIOS.
If these solutions don’t work, feel free to try any other fix from this article. Also, leave us your suggestions in the comments section below.


User forum
0 messages