Fix: Troubleshooting Wizard Can't Continue / not Working
Repairing the .NET Framework installation is often effective
Key notes
- This error ruins your ability to troubleshoot some OS problems with the built-in tool.
- For many users, repairing or reinstalling the .Net Framework will come in handy; running an SFC scan also could fix it.

You must have just gotten the error message troubleshooting wizard can’t continue. Here is all you should know.
Troubleshooting wizard has been a part of the Windows operating system for years. This tool lets you quickly check if a particular component of your operating system is working correctly.
Unfortunately, some users reported Diagnostics troubleshooting wizard has stopped working with error messages on their Windows 10 PC.
Since this can be a significant problem, we’ll show you how to fix it today.
Why am I getting Troubleshooting wizard can’t continue message?
For many users, a few factors may trigger this error message. However, in most cases, these are the most common ones:
- Corrupt files – Users sometimes experience this error because important hard disk files are corrupted.
- Issues with .NET Framework – Almost every Windows operating system has .NET Framework installed, but sometimes this framework can cause many problems.
- Malware – The presence of computer malware will trigger many system issues, and this error may be one of them.
- Stopped services – For some users, this Troubleshoot interruption may occur if essential services are not running.
However, no matter the cause, the solutions we suggest should come in handy.
Here are some more examples of similar issues:
- An unexpected error has occurred. The troubleshooting wizard cannot continue – This is another common error message people get when the troubleshooter stops working.
- An error occurred while troubleshooting Windows 7 – If you’re experiencing the problem with Windows 7 troubleshooter, you can still use most of the workarounds presented below.
- Windows Update troubleshooter not working – If we’re talking about a particular troubleshooter, the Update troubleshooter tends to be the most troublesome one.
The solutions we will discuss will help you even if the Troubleshooting wizard is restricted or you get the error messages an unexpected error has occurred the troubleshooting wizard cannot continue 0x80131700, 0x80004003, or 0x80004005.
How can I fix the Troubleshooting wizard can’t continue error?
- Repair or Reinstall the Microsoft .NET Framework
- Scan your PC for malware
- Check if the necessary services are running
- Create and run a batch file
- Run the sfc scan
1. Repair or Reinstall Microsoft .NET Framework installation
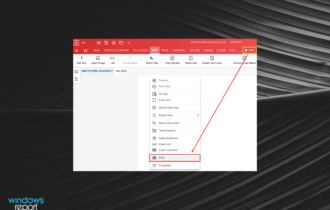
- Press Windows Key + S and enter control, then choose Uninstall a program.

- Look for Microsoft .NET Framework and select it, and from the menu on the top select Change or Repair, then follow the wizard to complete the process.

- Alternatively, click Uninstall in Step 2, download a new .Net Framework file, and install it.
.NET Framework is used for all sorts of applications on the Windows platform, ranging from system applications to video games.
According to users, this framework can be responsible for the Diagnostics troubleshooting wizard has stopped working error message.
You’ll need to repair or reinstall the .NET Framework installation to fix this problem.
2. Scan your PC for malware
- Type Windows Security in the Search bar, and click on the relevant search result.

- Now, click on Virus & threat protection here.

- Click on Scan options.

- Now, select Full scan and click on the Scan now button at the bottom.

Sometimes malicious applications will interfere with core Windows 10 components, and they can also cause the Diagnostics troubleshooting wizard has stopped working error message appears.
If you see this message, perform a detailed scan of your system with your antivirus tool. In addition to your antivirus, you might want to use ESET or a similar tool to check for malware.
3. Check if the necessary services are running
- Press Windows Key + R and enter services.msc. Next, press Enter or click OK.

- When the Services window opens, locate Diagnostic Policy Service and double-click it.

- Set the Service status to Running and the Startup type to Automatic, then click Apply and OK to save changes.

- Now, locate Diagnostic Service Host and Diagnostic System Host services on the Services app. Open their properties and ensure they are both running and their Startup Type is set to Manual.
Like any other Windows component, the Diagnostic Troubleshooting wizard relies on certain services to run correctly. However, if those services aren’t started or if they aren’t properly configured, you might encounter problems with the Diagnostic Troubleshooting wizard.
4. Create and run a batch file
Batch files can be handy since they allow you to run multiple commands almost instantly. Before you can run a batch file, you need to create it, and you can do that by following these steps:
- Open Notepad.
- When Notepad opens, paste the following lines:
@echo offnet stop wuauservcd %systemroot%ren SoftwareDistribution SoftwareDistribution.oldnet start wuauservnet stop bitsnet start bitsnet stop cryptsvccd %systemroot%system32ren catroot2 catroot2.oldnet start cryptsvcregsvr32 Softpub.dllregsvr32 Wintrust.dllregsvr32 Mssip32.dllregsvr32 Initpki.dll /secho Restarting Computershutdown.exe -r -t 00
- Click on File, then Save as.

- Now set Save as type to All Files and set the File name to update.bat. Click Save to save the file.

- Locate the update.bat file you just created, right-click it and choose Run as administrator. After all the commands are executed, your PC will restart.
After your PC restarts, check if the problem is resolved.
5. Run the sfc scan
- Press Windows Key + X and choose Command Prompt (Admin).

- Type the script below and hit Enter:
sfc /scannow - Wait while your computer is being scanned. Then, if there are any problems with your Windows 10 installation, they should be automatically fixed.
This scan will repair any corrupted Windows 10 components and hopefully fix the Diagnostics troubleshooting wizard has stopped working error.
The troubleshooting wizard is a significant part of Windows 10, and if you’re getting Diagnostics troubleshooting wizard has stopped working error message, be sure to try repairing the .NET Framework installation.
If that doesn’t work, try any other solution from this article.
Read our disclosure page to find out how can you help Windows Report sustain the editorial team. Read more


Improve this guide


User forum
0 messages