How to Disable Adobe Acrobat Update Service [Windows & Mac]
Disabling the service can save system resources

If you want to disable Adobe Updater, you’re in the right place. As the name suggests, this service automatically updates your apps while running in the background.
It could be useful, but it can also hog PC resources. So, if you want to stop it from doing that you can disable it.
How can I disable Adobe Acrobat Update Service?
1. Disable Adobe Updater from Task Scheduler (PC)
- Search for Task Scheduler in Cortana and open it.

- Click the Task Schedule Library on the left.

- Right-click the Adobe Acrobat Update Task.
- Hit Disable From the right-side panel.
- Close the Task Scheduler.

2. Disable Adobe Acrobat Update Service from Windows services menu (PC)
- Initialize the run command box by pressing Windows + R and enter Services. Then hit Enter.

- Find the Adobe Acrobat Update Service, right-click on it, and hit Properties.

- Choose Disabled from the Startup type dropdown.

- Click Apply to save the settings and click OK to exit the Window.


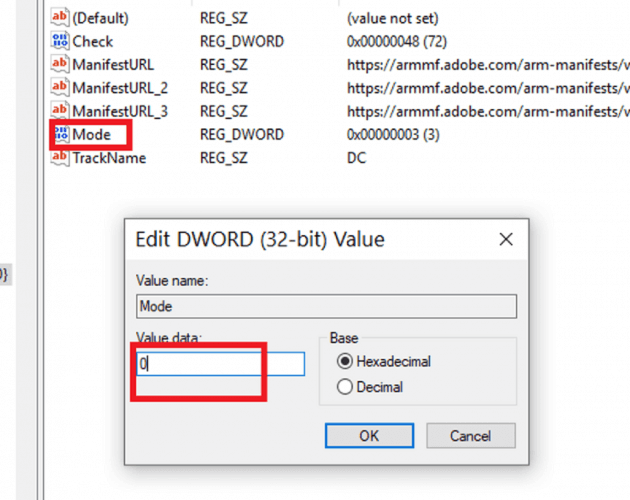
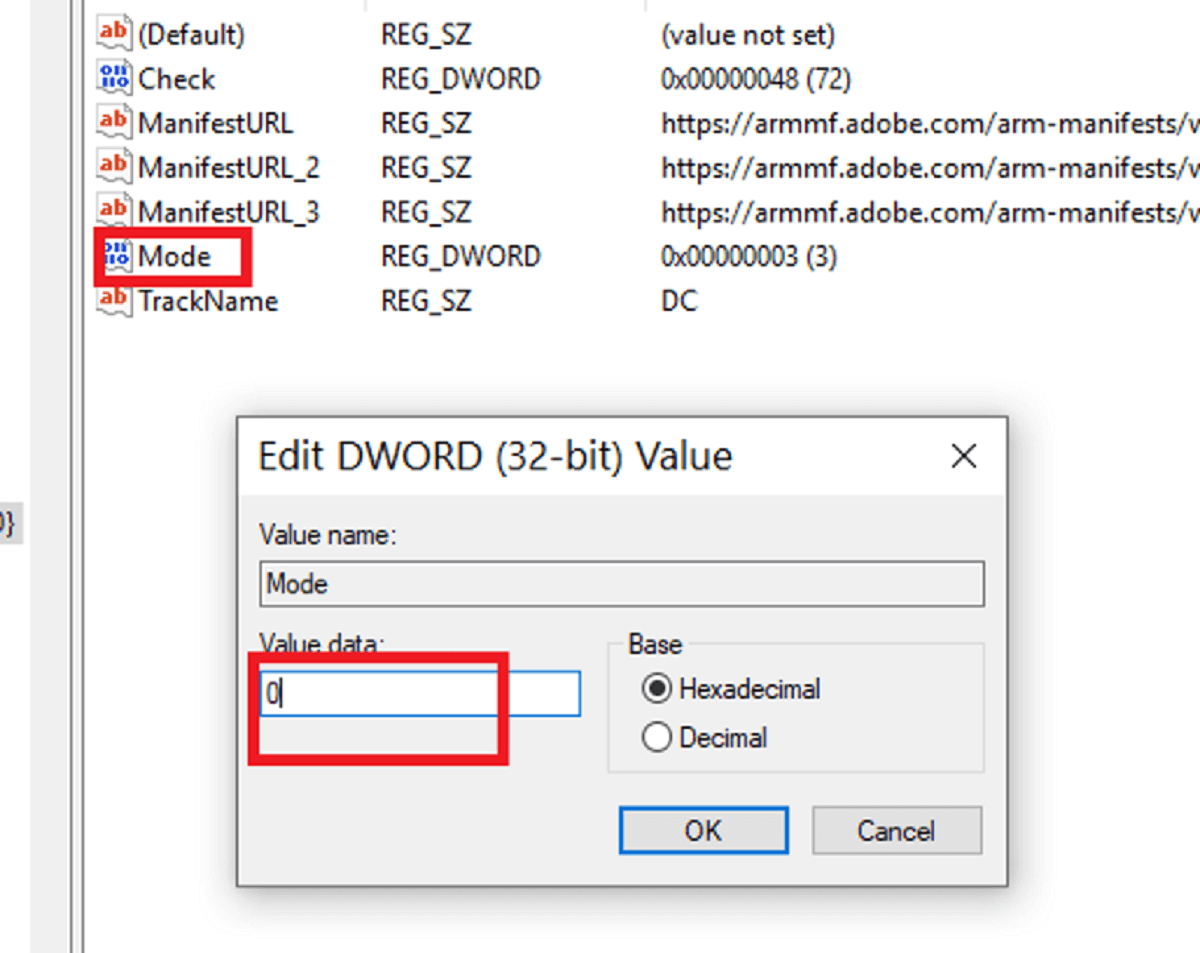
3. Disable Adobe Acrobat Update Service from Registry (PC)
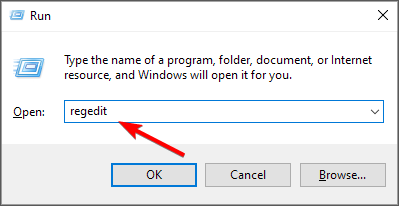
- Press the Windows key + R to open the run dialog box, type Regedit, and hit Enter.

- Navigate to the following location:
HKEY_LOCAL_MACHINE\SOFTWARE\Wow6432Node\Adobe\Adobe ARM\Legacy\Reader(product code)\
- Double-click Mode and then change the Value Data from 3 to 0.


Note: After this process is completed, restart your PC to have the settings take effect.
 NOTE
NOTE
All the methods described above will work on Windows 10 as well as Windows 11. In addition, there is also the possibility to disable adobe acrobat update service via GPO.
4. Create new registry values (PC)
- Uninstall Adobe Reader from your PC.
- Press Windows key + R and enter regedit.
- Navigate to the following path:
SOFTWARE\Policies\Adobe\Acrobat Reader\DC\FeatureLockDown - In case the key from above isn’t available, you’ll have to manually create it.
- Right-click the right pane and choose New and then DWORD (32-bit) Value.
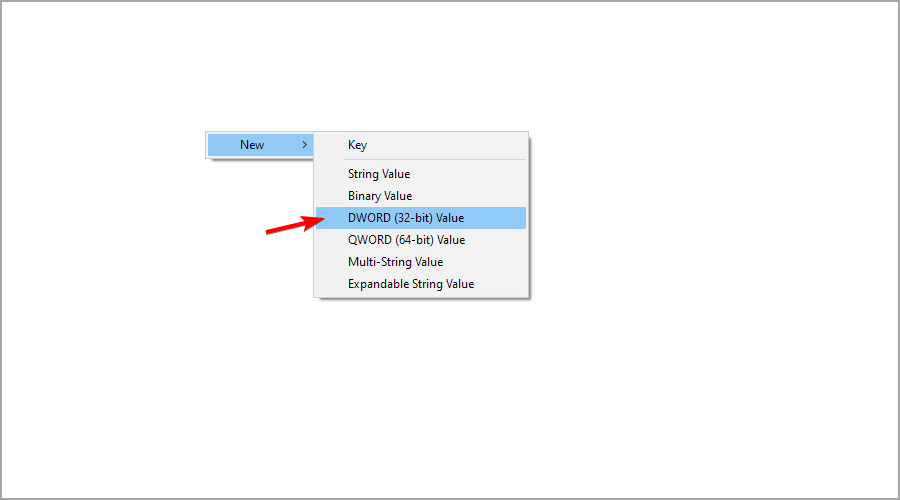
- Set the name to bProtectedMode.
- Create additional two DWORDs and name them bUpdater and bUpdateToSingleApp.
- Next, go to the following key
HKEY_LOCAL_MACHINE\SOFTWARE\WOW6432Node\Policies\Adobe\Acrobat Reader\DC\FeatureLockDown - Create a new DWORD and name it bUpdateToSingleApp
- Now install 32-bit version of the software.
5. Reinstall Adobe Reader with special parameters (PC)
- Remove Adobe Reader completely from your PC.
- Navigate to
C:\Program Files (x86)\Common Files\Adobe\ARM\1.0\Cache - Run the uninstall file if available.
- Next, download the Adobe Reader setup file.
- Press Windows key + S, type cmd and select Run as administrator.

- Now navigate to the directory where the Adobe Reader setup file is located using the cd command. On our PC, we used:
cd C:\Users\WindowsReport\Downloads
- Be sure to replace the setup.exe with the exact name of the setup file and run this command:
"setup.exe" /msi DISABLE_ARM_SERVICE_INSTALL=1
- Follow the instructions to complete the setup.
6. Change Adobe app preferences (Mac)
- Open the Application Manager.
- Click the Preferences button at the bottom of the window.

- Uncheck the option Notify me of new updates on the menu bar.

The steps in this post will help you permanently disable Adobe Updater both on Windows 10 and Mac OS.
NOTE
Adobe Acrobat is a great app, but it’s not short of errors and bugs. Besides the automatic update service, people also deal with app unavailable errors or problems reinstalling.
While these are annoying, with a few smart steps like those outlined above, you’ll be able to come out on top.
If you have any other questions or suggestions, don’t hesitate to leave them in the comments section below.
Read our disclosure page to find out how can you help Windows Report sustain the editorial team. Read more


Improve this guide


User forum
3 messages