Disable spell check in Skype permanently with these solutions
3 min. read
Updated on
Read our disclosure page to find out how can you help Windows Report sustain the editorial team Read more

Spell check and auto-correct are useful features, but sometimes users want to disable spell check in Skype. The main problem with spell check is that it will automatically correct your words to English, even if you’re not using English while typing.
This can be rather annoying, so today we’ll show you how to disable auto-correct in Skype.
How to disable Skype autocorrect on Windows 10?
1. Disable spell check in the Settings app and Skype
In order to disable spell check in Skype, it’s advised to disable spell check in both Settings app and Skype. This is rather simple and you can do it by following these steps:
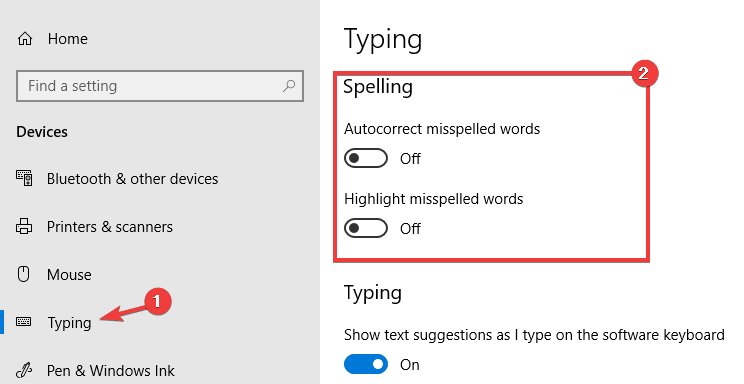
- Open the Start Menu and go to Settings.
- Next, click on Devices and go to Typing.
- Turn off the slider for Autocorrect misspelled words and Highlight misspelled words options.
This procedure works well for Windows 10 since the auto-correct feature is built-in.
After doing that, you can disable spell check in Skype. To do that by following these steps:
- Launch the Skype application.
- Click on Tools, then Options.
- Go to IM & SMS, select IM Settings and click on the Show advanced options.
- Here uncheck Auto correct, then Highlight the misspelled words options.
- Save changes and check if the problem is still there.
2. Modify your registry
With some users, the Typing tab might not be available in the Settings app. This can be a problem when trying to disable spell check in Skype.
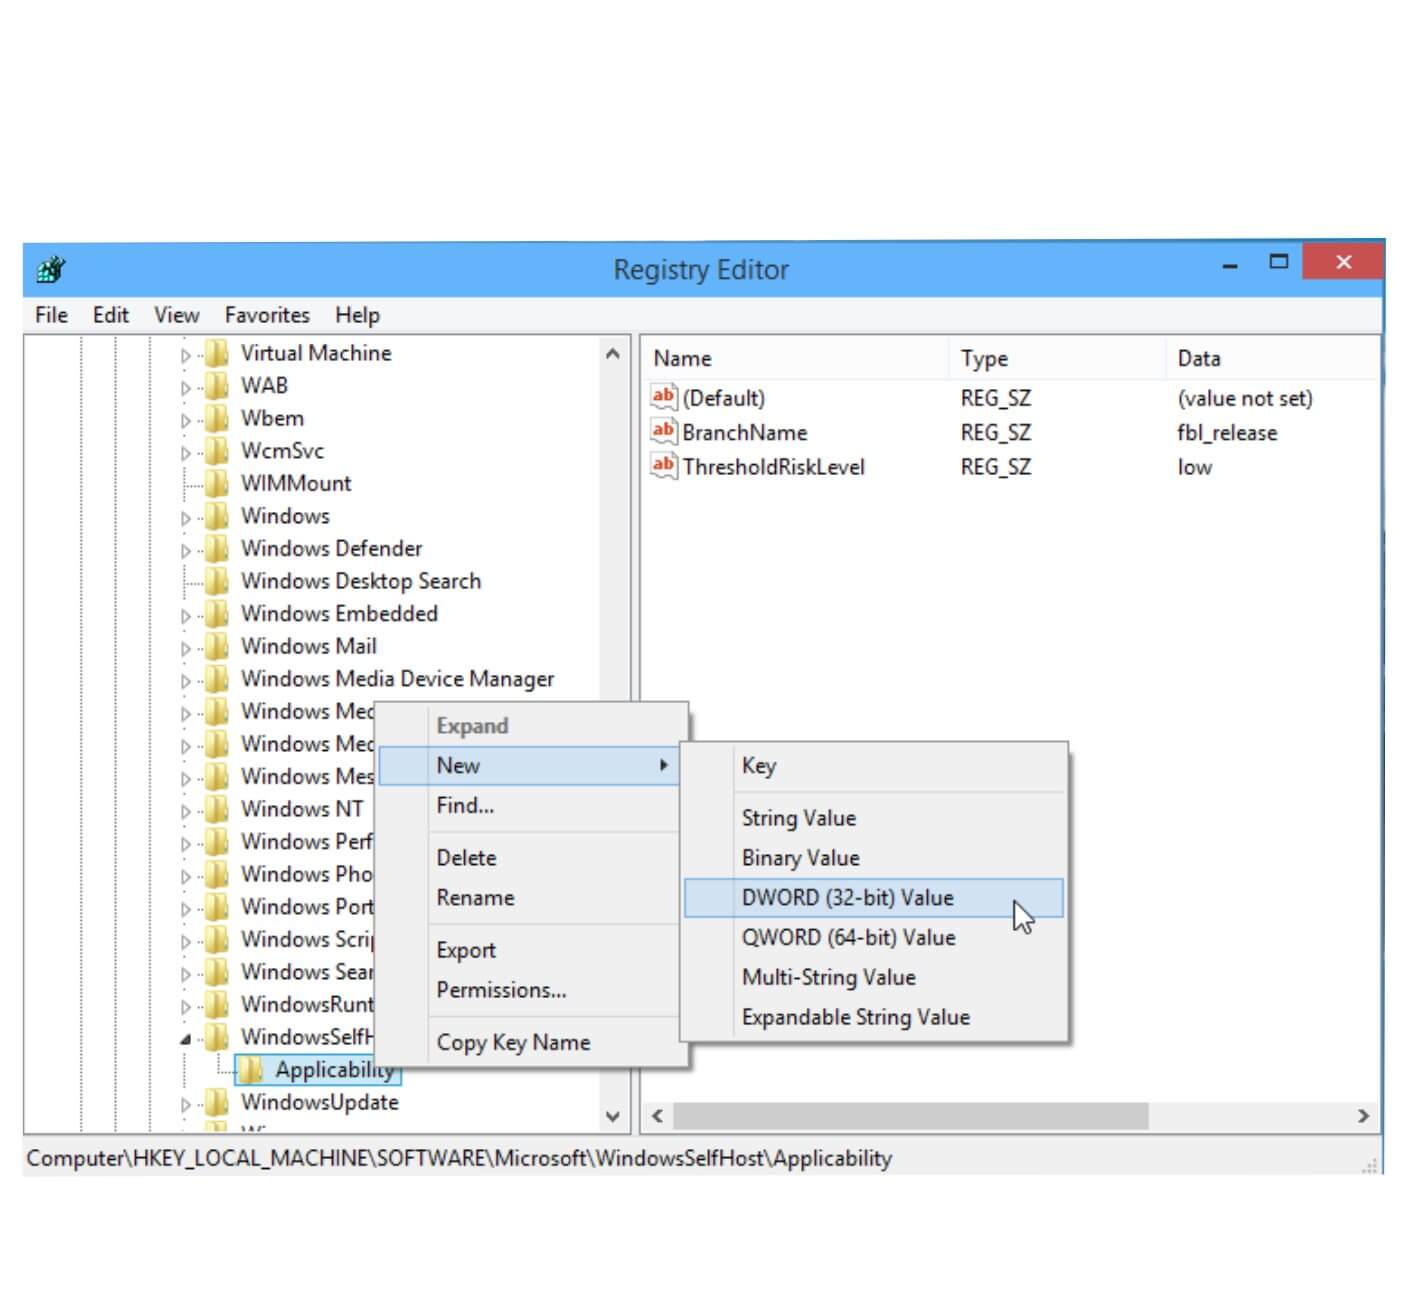
However, you can fix this problem by making a couple of changes in your registry. Bear in mind that modifying the registry is an advanced procedure, so back up your registry before making any changes.
- Press Windows Key + R and enter regedit. Click on OK or press Enter.
- Once the Registry Editor starts, navigate to this key: HKEY_USER\Software\Microsoft\Tablet\Tip1.7.
- Go to the right pane and double click EnableAutocorrection DWORD. Next, set the Value data to 0. The same steps can be used to enable spell checking. If this value isn’t available, create it manually.
- Once done, exit the Registry Editor and check if the issue is resolved.
There you go, these are some of the solutions that you can use to disable spell check in Skype. Be sure to try all of our solutions, and let us know in the comments section which solution worked for you.
READ ALSO:

