Superfetch on Windows 11: How to Disable it in 3 Steps
Learn to get rid of this feature for good
Key notes
- The SuperFetch feature identifies a pattern in which you open apps, and preloads them to the memory.
- However, it's found to hog the resources, and many consider disabling SuperFetch in Windows 11.
- There are three ways you can do that, using the Services app, an elevated Command Prompt, and the Registry Editor.
- Also, find out if you should disable SuperFetch and the cases when the feature doesn't prove much worthy.

There are various services running on the PC dealing with a bunch of activities. One of the critical ones is Superfetch that’s often found to hog the system resources. As a result, several users have been looking for ways to disable Superfetch in Windows 11.
The feature is meant to boost the performance and reduce the loading time for apps but can act quite the contrary by slowing down the Windows. This is generally noticed on PCs with low specifications and with an HDD (Hard Disk Drive) installed.
So, we decided to dedicate this guide to help you understand the feature, and list all the ways to disable Superfetch in Windows 11.
What is Superfetch?
Previously known as SysMain, the Superfetch feature is designed to maintain and improve the system performance over time, at least that’s what the official description reads.
The feature takes note of the pattern in which you open apps, and pre-loads them to the memory beforehand to save time. For instance, if you open a particular program every day at a certain time, Superfetch will automatically have it loaded.
It will only take up the unused part of the memory and if your computer runs out of it, Superfetch will clear some of the loaded apps to free up RAM.
This gives you a basic idea of its functioning. However, several users have experienced considerably poor performance with Superfetch enabled, and want to disable it in Windows 11. If you too are facing the same problem, here are the three ways you can do it.
How do I turn off Superfetch in Windows 11?
1. Use the Services app
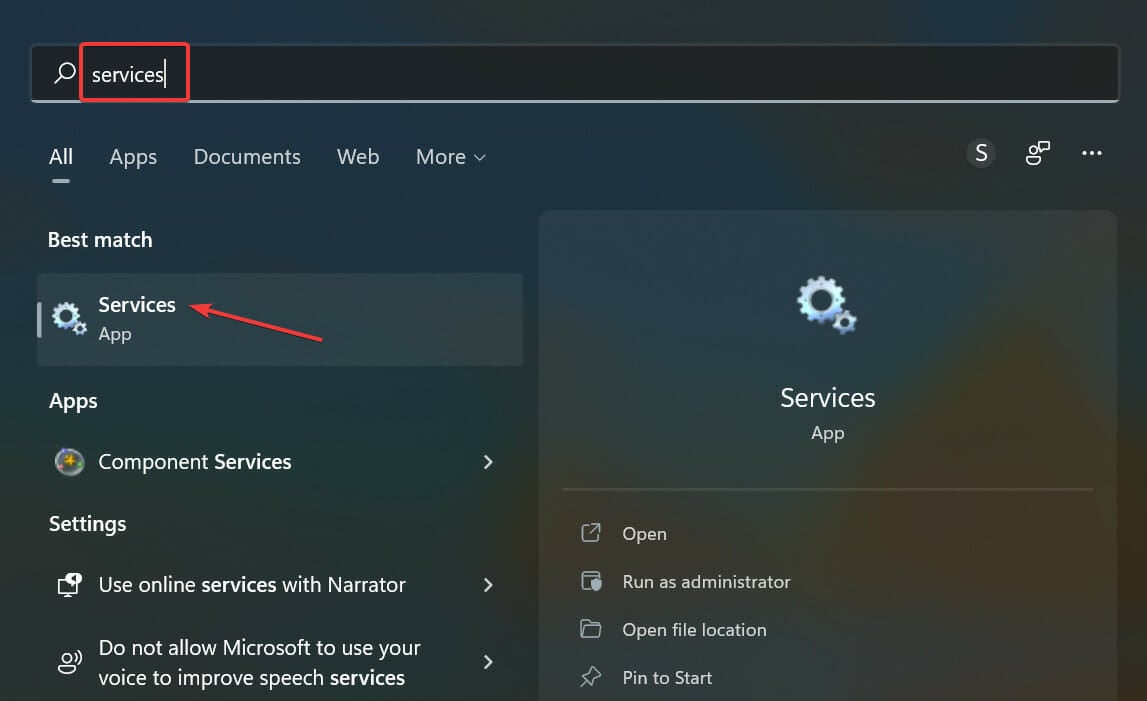
- Press Windows + S to launch the Search menu, enter Services in the text field at the top, and click on the relevant search result.

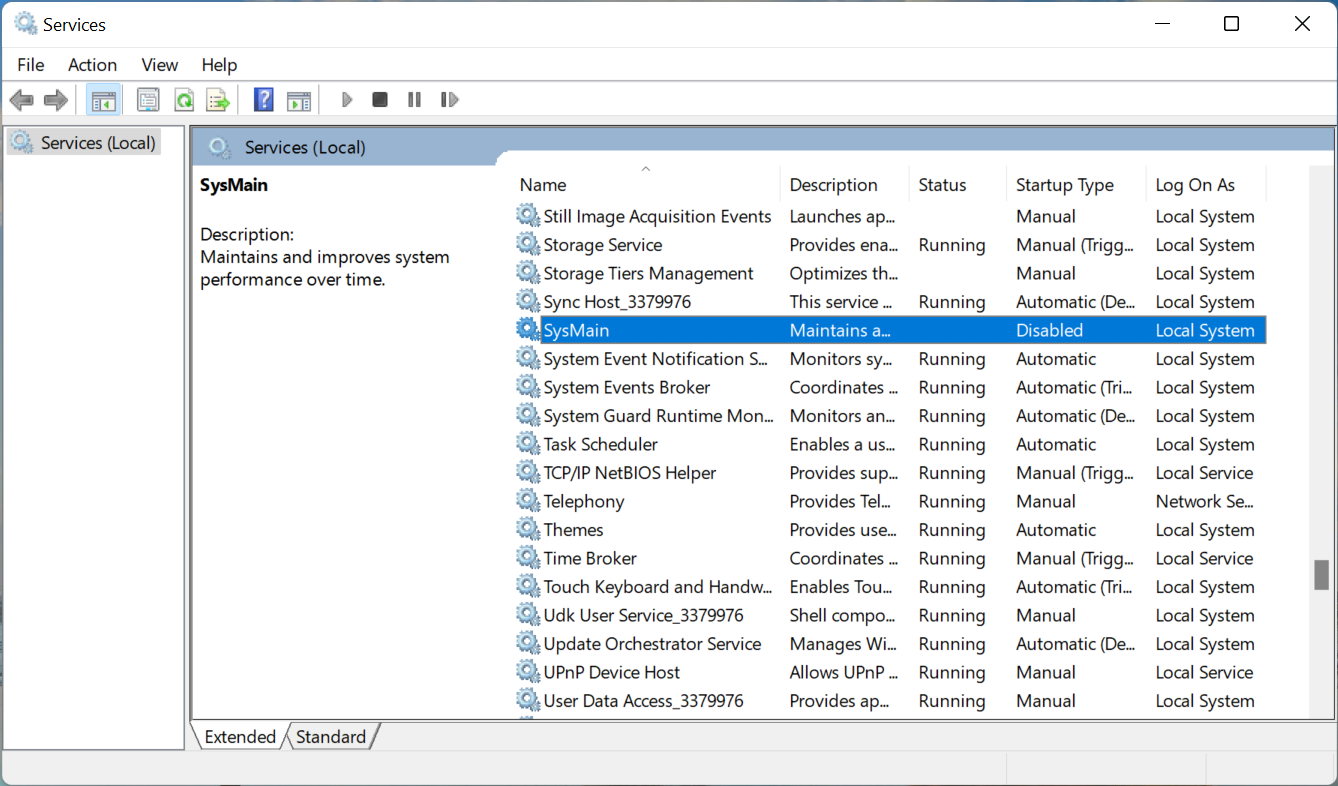
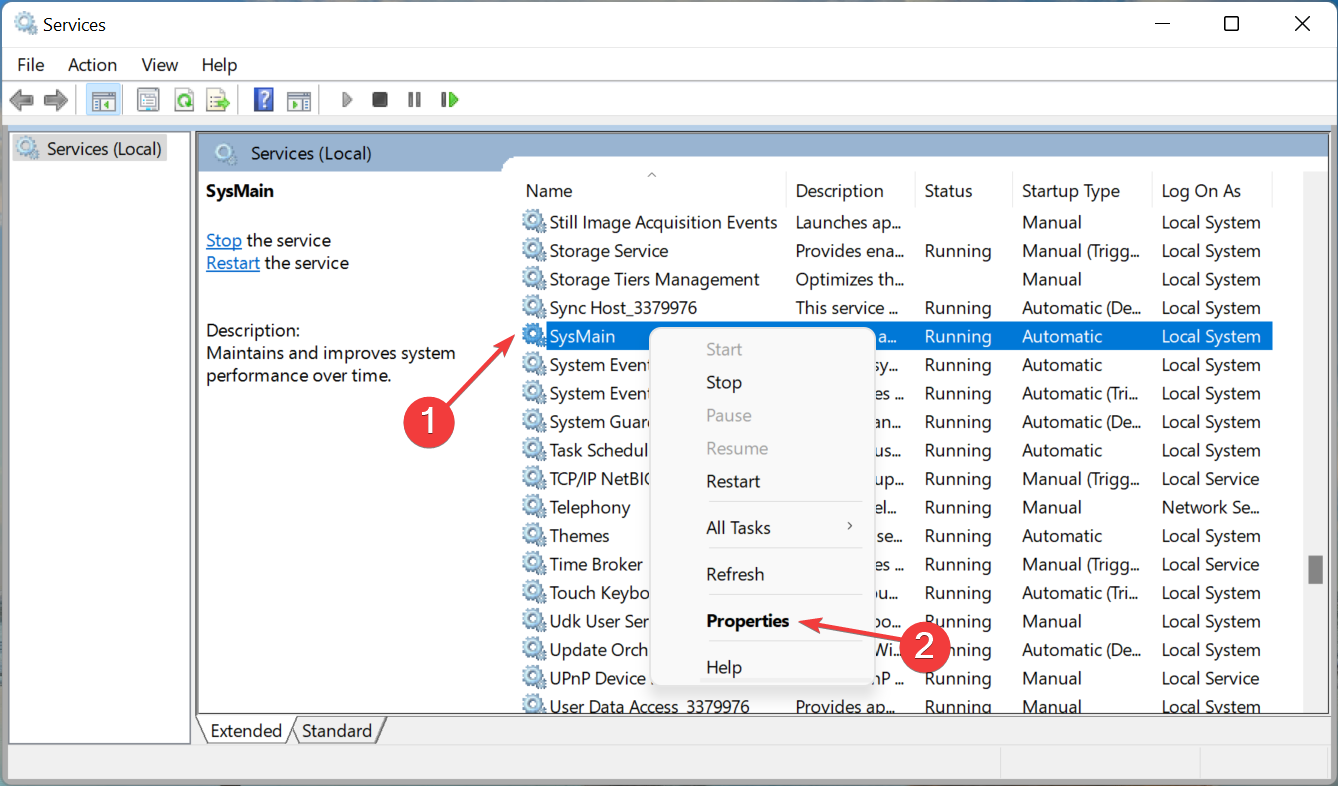
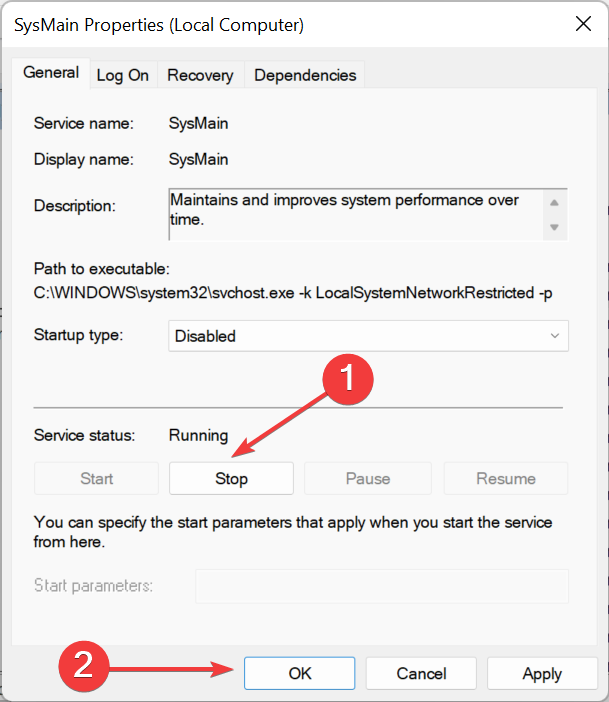
- Locate the SysMain entry here, right-click on it, and select Properties from the context menu. Alternatively, you can double-click on the service.

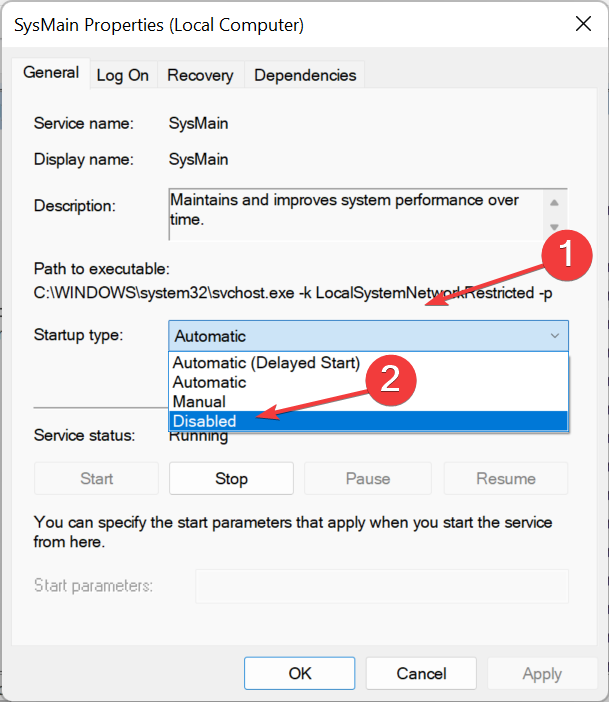
- Now, click on the Startup type dropdown menu, and select Disabled from the list of options.

- Next, click on the Stop button under Service status if it is currently running, and then click on OK at the bottom to save the changes.

- Once done restart the computer for the changes to come into effect.
This is probably the simplest method to disable Superfetch in Windows 11. It’s easy to execute and doesn’t require any intricate commands or modifying the dreaded Registry.
However, if you want to make the change quicker, head to the next method.
2. Use Command Prompt
1. Press Windows + S to launch the Search menu.
2. Enter Terminal in the text field, right-click on the relevant search result, and select Run as administrator from the context menu.

3. Click Yes in the UAC (User Account Control) prompt that pops up.

4. Press on the downward-facing arrow at the top, and select Command Prompt. Alternatively, you can hit Ctrl + Shift + 2 to launch Command Prompt in a new tab.

5. Now, paste the following command and hit Enter to stop the service:
net.exe stop sysmain
6. Next, execute the following command to disable Superfetch from loading at startup:
sc config sysmain start=disabled
For those who prefer using the command line to execute tasks, there is the option to disable Superfetch on Windows 11 PCs via Command Prompt.
What you need to do is input two commands: one for disabling the service, and one for preventing it from loading at Startup.
3. Use the Registry Editor
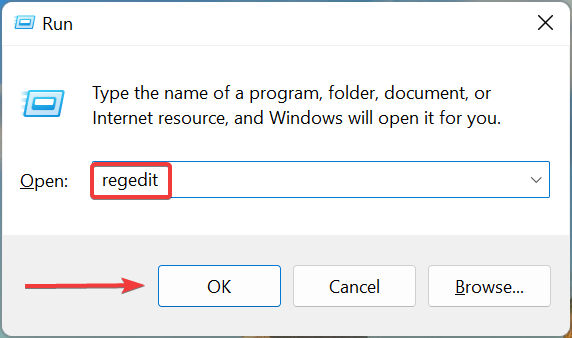
- Press Windows + R to launch the Run command, enter regedit in the text field, and either click on OK or hit Enter to launch the Registry Editor.

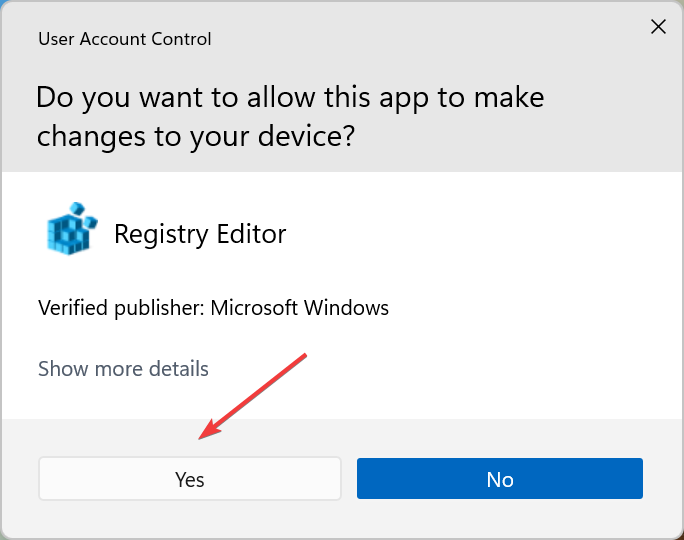
- Click Yes in the UAC prompt that pops up.

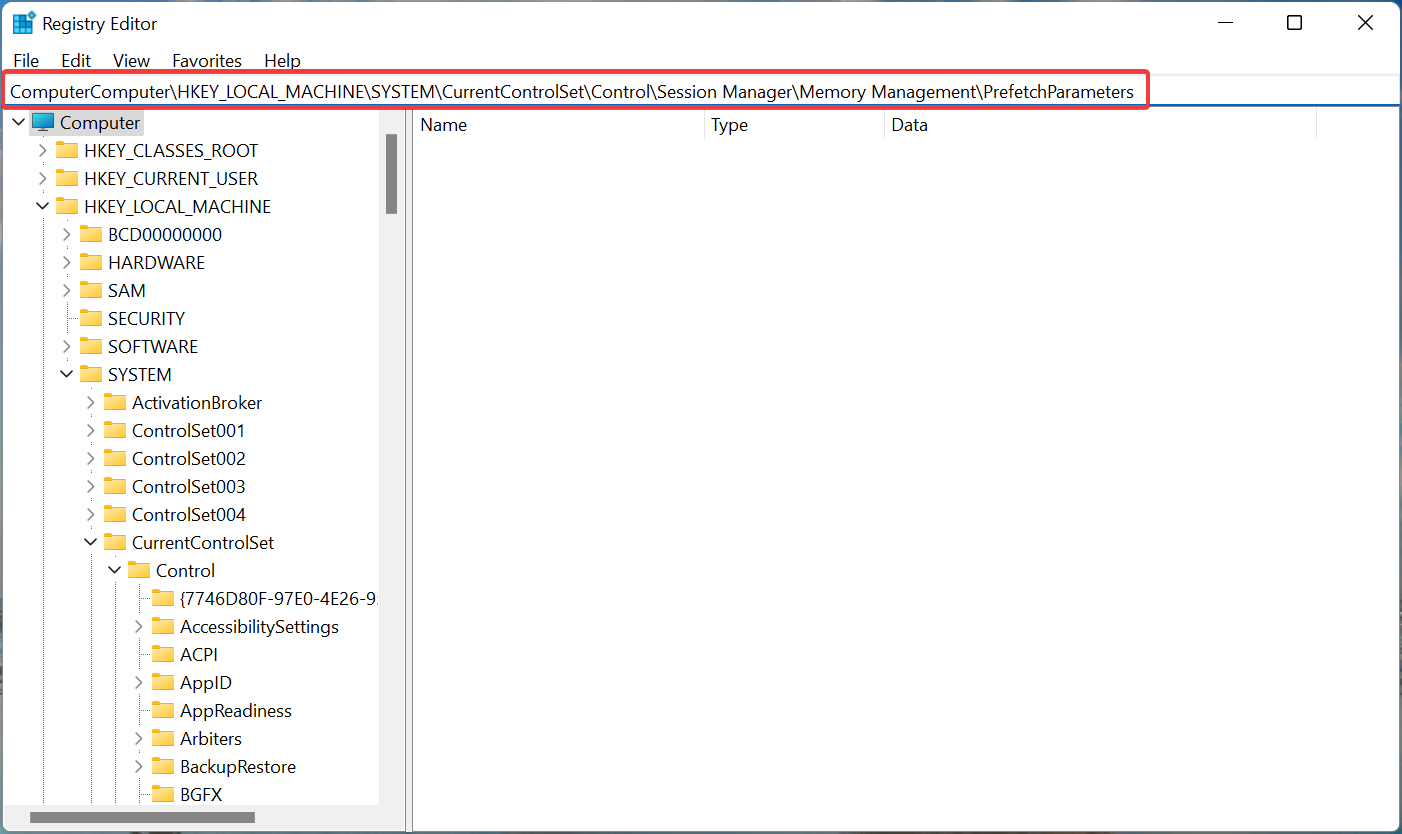
- Now, paste the following path in the address bar at the top, and hit Enter or you can follow it using the navigation pane on the left:
Computer\HKEY_LOCAL_MACHINE\SYSTEM\CurrentControlSet\Control\Session Manager\Memory Management\PrefetchParameters
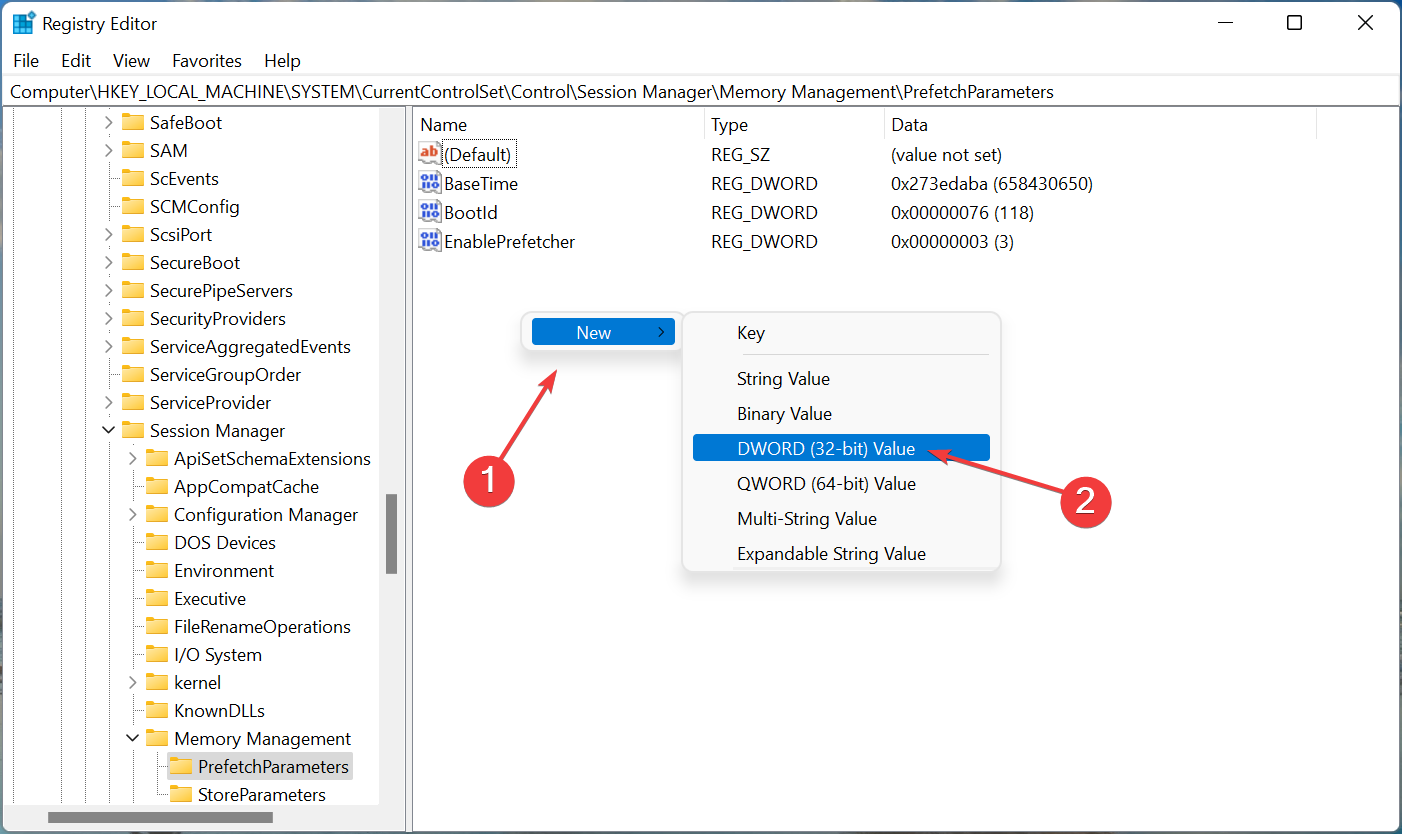
- Right-click on the empty space, hover the cursor over New and select DWORD (32-bit) Value from the context menu.

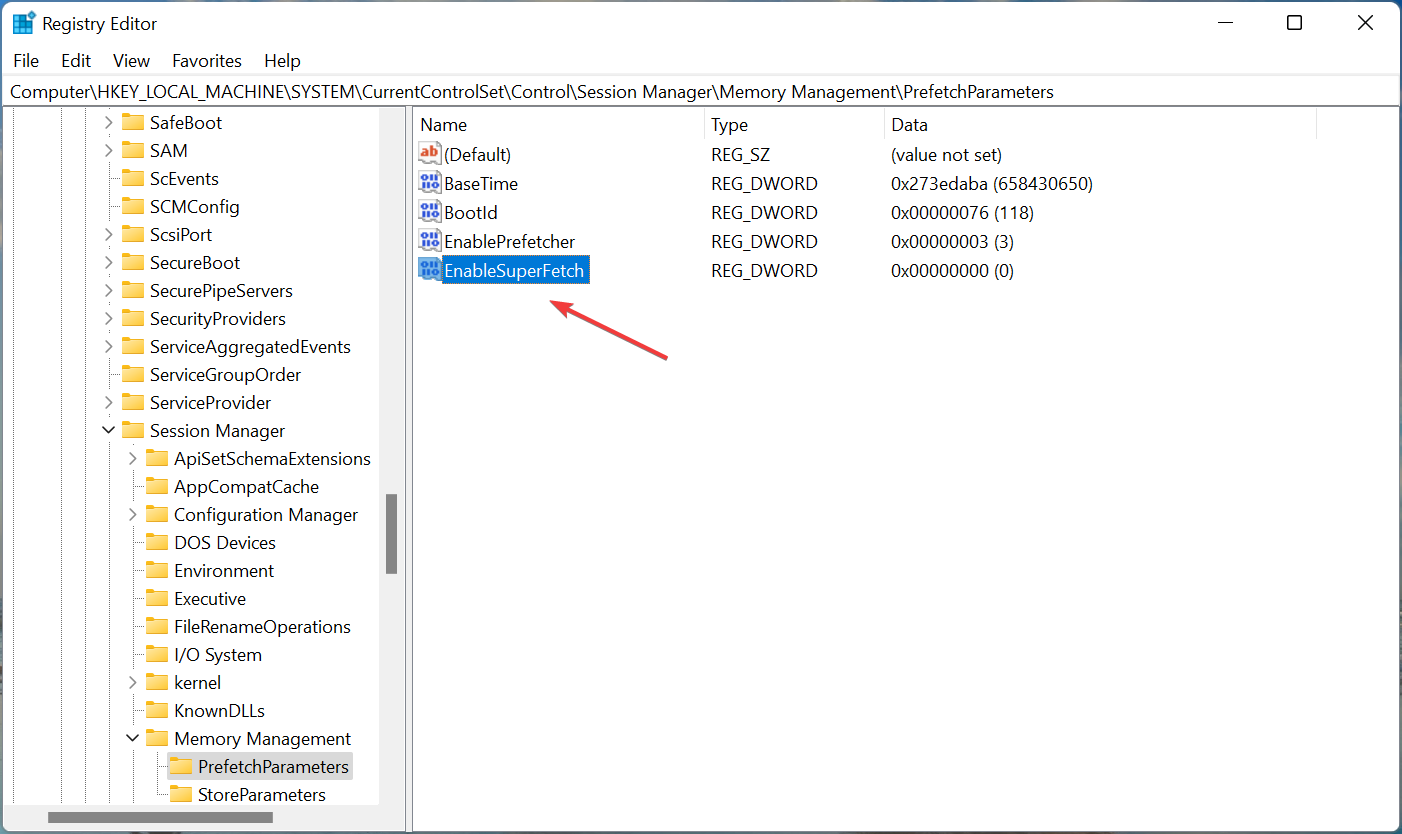
- Name the entry as EnableSuperfetch, and then double-click on it to modify the properties.

- Enter 0 in the text field under Value data and then click on OK to save the changes.

- After making the changes, restart the computer for the changes to come into effect.

Many prefer using the Registry to make changes to the computer, and the steps listed here will help you use it to disable Superfetch in Windows 11.
Though, remember to be cautious during the process and not make any changes other than the ones listed here.
Should I disable Superfetch in Windows 11?
Amongst the many methods to boost Windows 11 performance, disabling Superfetch is generally mentioned somewhere near the top. And the best part, doing so carries no risk.
Also, there are cases when the feature doesn’t offer any considerable benefits. For instance, if you have Windows 11 stored on an SSD, the loading time itself is low, and Superfetch doesn’t play much of a role here.
But, if you notice that the RAM consistently runs full or the Disk usage is high, disabling Superfetch might do the trick. So, disable the feature and check if it works. In case it does, keep it turned off, otherwise, revert the changes.
By now, you know all the ways to disable Superfetch in Windows 11. And, if your PC has been running slow, this would help improve the performance.
Also, discover the best Windows 11 settings for improved performance. These would help ensure optimal resource allocation and consumption.
If you have any other queries, drop a comment in the section below.
Read our disclosure page to find out how can you help Windows Report sustain the editorial team. Read more


Improve this guide


User forum
0 messages