How to Fix The DISM Restore Health Incorrect Function Error?
First, ensure you are using the user account with administrative privileges
6 min. read
Published on
Read our disclosure page to find out how can you help Windows Report sustain the editorial team. Read more
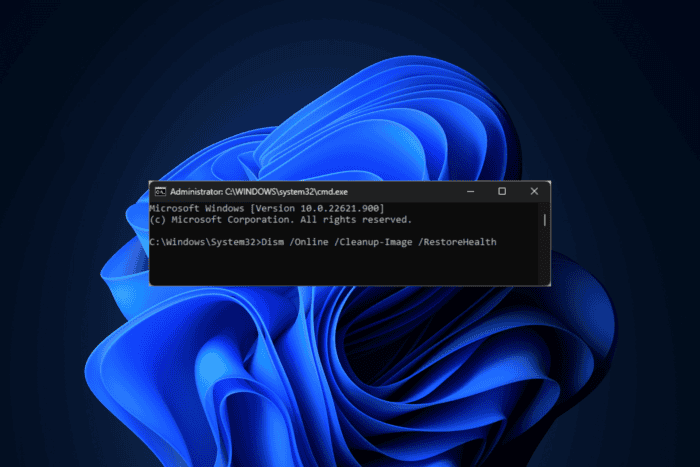
The DISM Restore Health Incorrect Function error usually appears when there are issues with the Windows system or image files. It could be because the tool cannot access & repair the files essential for restoring the system image’s health, mainly due to permission or corruption.
The first thing to do is launch Command Prompt with administrator rights and check the syntax of the command you want to execute, ensuring there are no typos. Also, run a malware scan using reliable antimalware software.
How can I fix the DISM Restore Health Incorrect Function error?
1. Check the Windows Update service
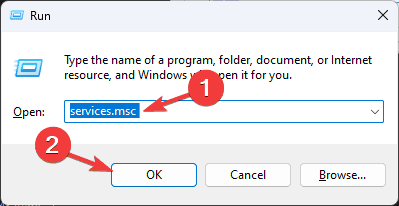
- Press Windows + R to open the Run console.
- Type services.msc and click OK to open the Services window.
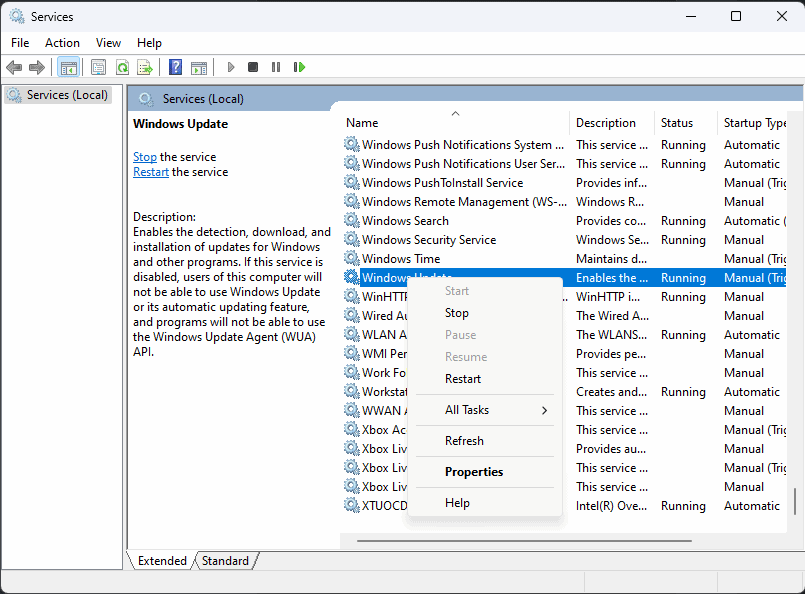
- Locate the Windows Update service, right-click it, and ensure the Start option is greyed out, indicating that the service is running. If it is not, click Start to initiate it.
- Now look for Background Intelligent Transfer Service (BITS) and Cryptographic Services, and do the same for these two.
2. Update Windows
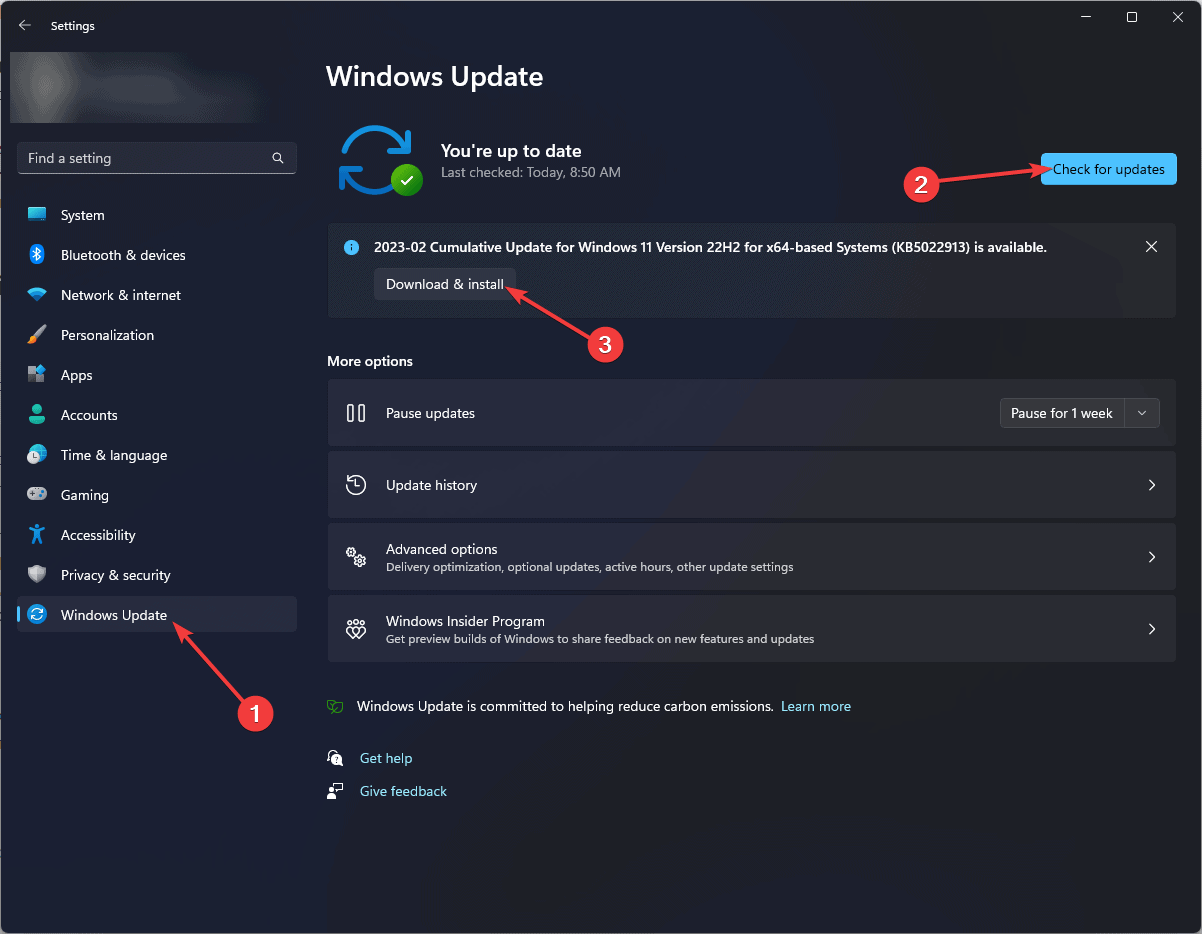
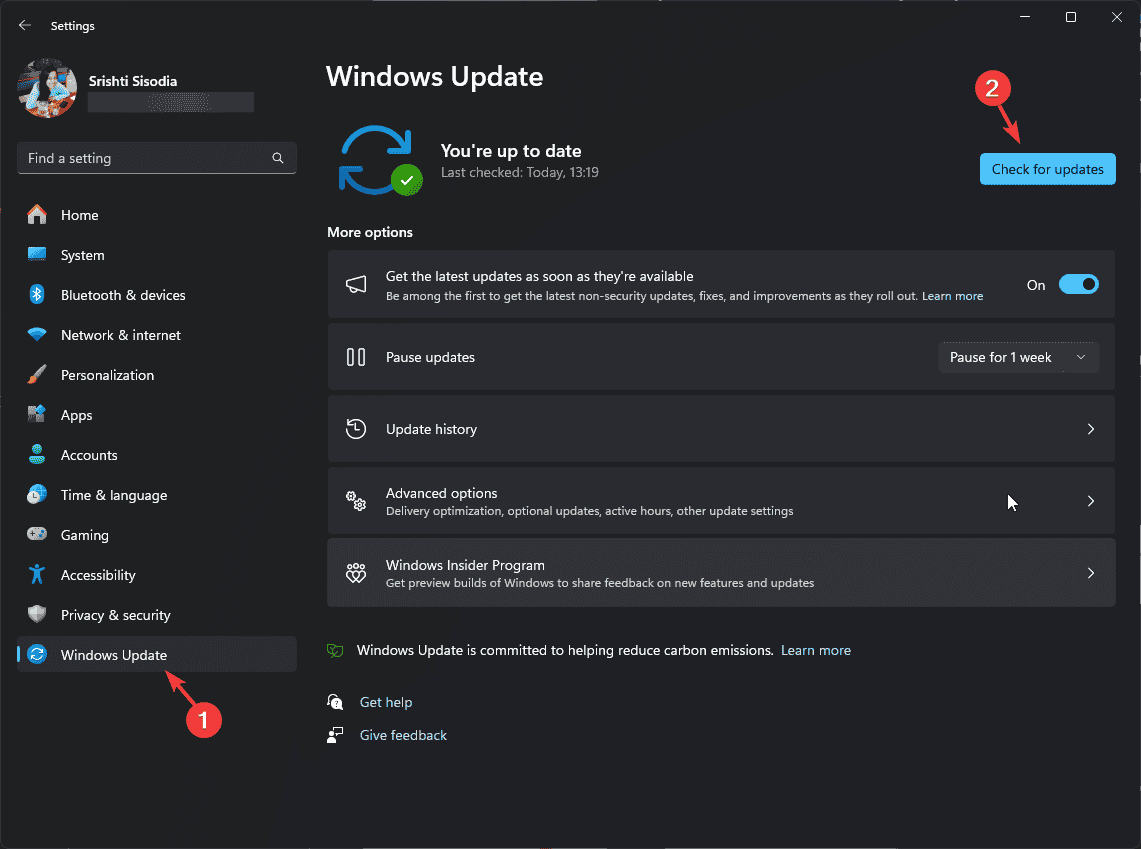
- Press Windows + I to open the Windows Settings app.
- Go to Windows Update, and click the Check for updates button.
- If updates are available, click Download and install to get the latest Windows version.
3. Clean up system image components
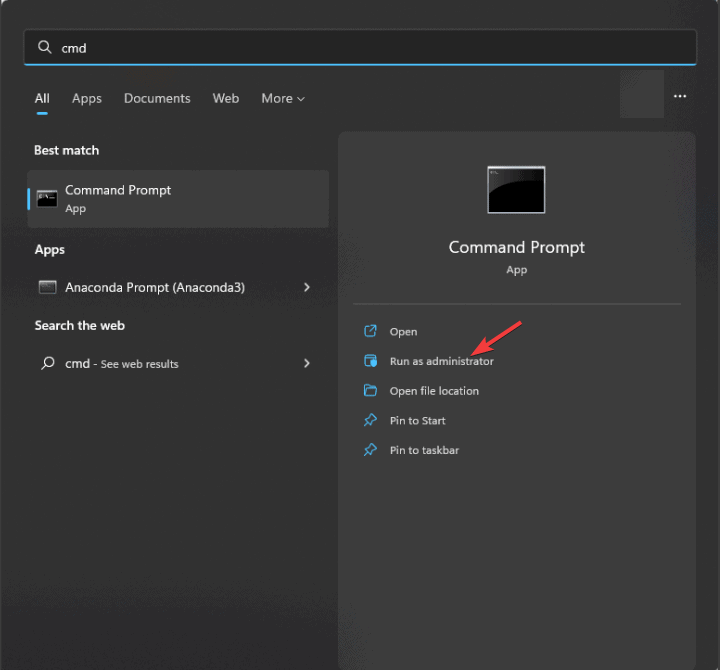
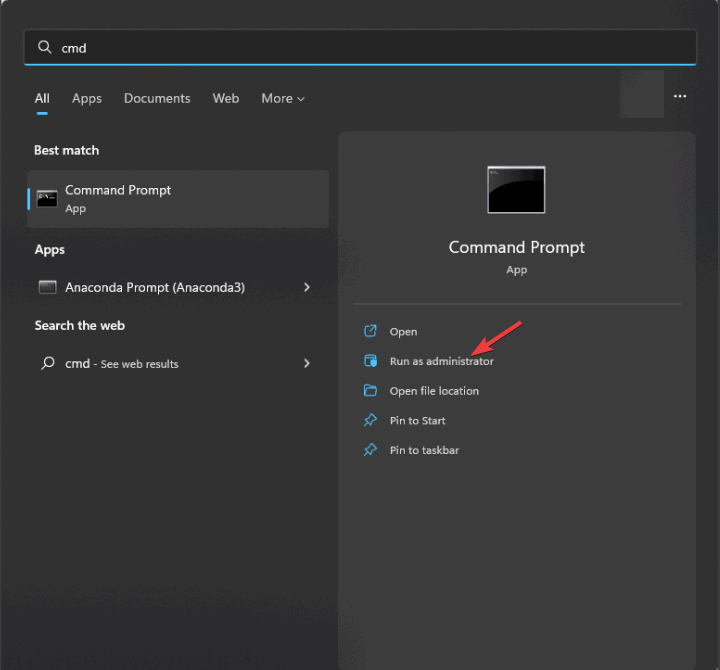
- Press the Windows key, type cmd in the search bar, and click Run as administrator to launch Command Prompt with elevated rights.
- Type the command below and press Enter:
Dism.exe /online /Cleanup-Image /StartComponentCleanup - Wait for the process to finish.
- Try to perform the DISM scan again after running these commands.
- If the DISM still isn’t working, you can also run the following commands:
DISM /Online /Cleanup-Image /StartComponentCleanup
DISM /Online /Cleanup-Image /AnalyzeComponentStore
Dism.exe /online /Cleanup-Image /StartComponentCleanup
Dism.exe /online /Cleanup-Image /StartComponentCleanup /ResetBase
Cleaning system image components can help you fix issues like DISM failure on a Windows PC; read this guide to learn more.
4. Run DISM scan with the Source option
4.1 Create an installation media
 NOTE
NOTE
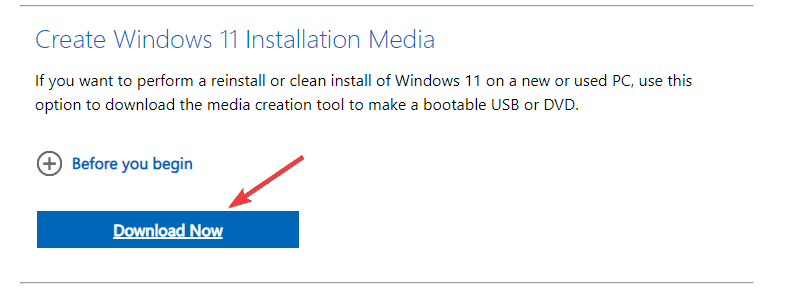
- Visit the Microsoft Windows 11 download page.
- Click Download Now to get the Media Creation tool executable file on your computer.
- Once the download is complete, plug in the USB drive, double-click the Media Creation tool to run it, and click Yes on the UAC prompt to proceed.
- Click Accept to agree to the license terms and agreement.
- Select a language, edition, and architecture (32-bit or 64-bit) for Windows 11, then click Next.
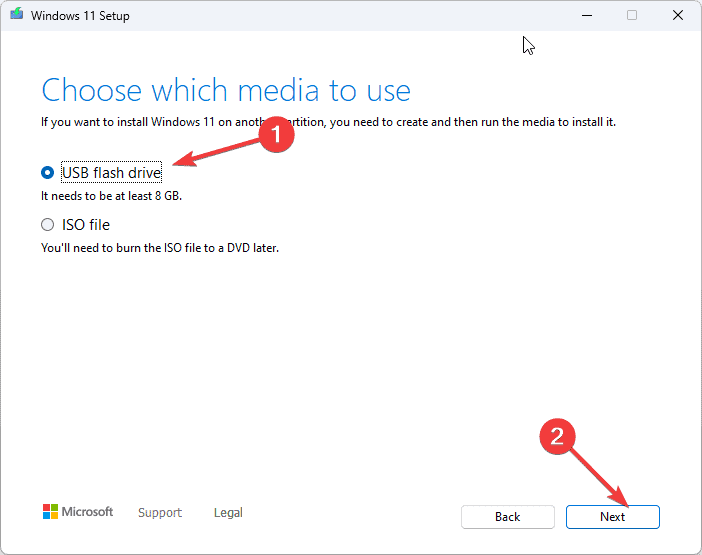
- Choose USB flash drive and click Next.
- On the following page, you will see the drive letter of the USB device you connected; cross-check it and click Next.
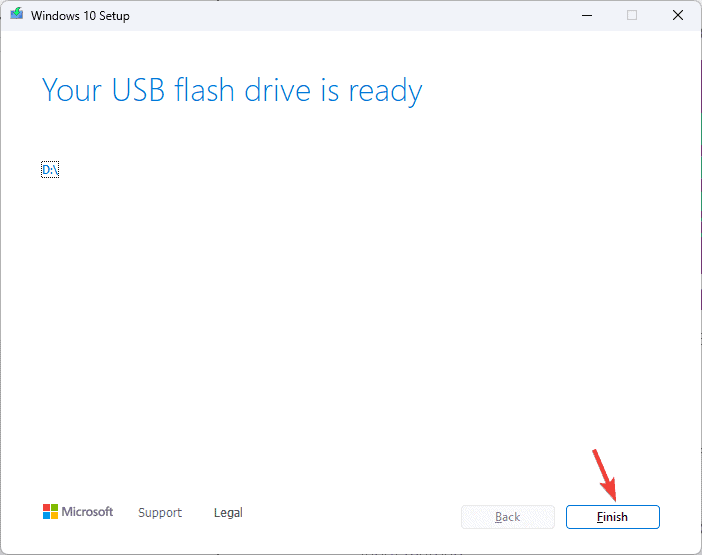
- Follow the on-screen steps to create a USB bootable media, once you see the Your USB flash drive is ready message, click Finish.
4.2 Run the DISM scan
- Plug the USB drive into your computer, then press Windows + E to open Windows File Explorer.
- In the left sidebar, look for This PC, click it to expand, locate the flash drive, and note down the drive letter.
- Press the Windows key, type cmd in the search box, and click Run as administrator.
- Type the following command after replacing the drive letter E with the flash drive letter and press Enter. Using the source means you specify an alternative source of the files needed to repair the Windows image.:
DISM /Online /Cleanup-Image /RestoreHealth /Source:wim:E:\sources\install.wim:1 /LimitAccess - Wait for the command to execute and see if the error appears again.
Running DISM using an alternative source is one of the best methods for fixing DISM errors; if you want to learn other methods, check out this guide.
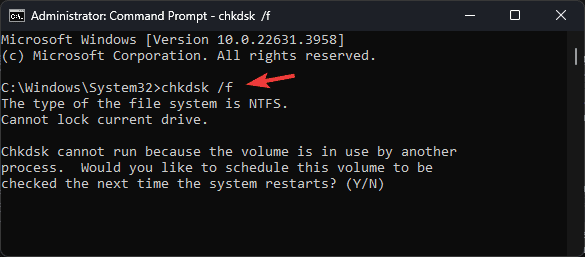
5. Run the CHKDSK scan
- Press the Windows key, type cmd in the search bar, and click Run as administrator to launch Command Prompt with elevated rights.
- Type the following command and hit Enter:
chkdsk /f - Click Y if prompted to schedule the scan when your system restarts.
- Restart your computer to initiate the scan.
6. Run DISM in Windows Recovery Environment
- Press the Power button on your computer to start it.
- When you see the Windows logo at the boot time, press the Power button again to shut down your PC. Repeat the power-on and power-off process three times.
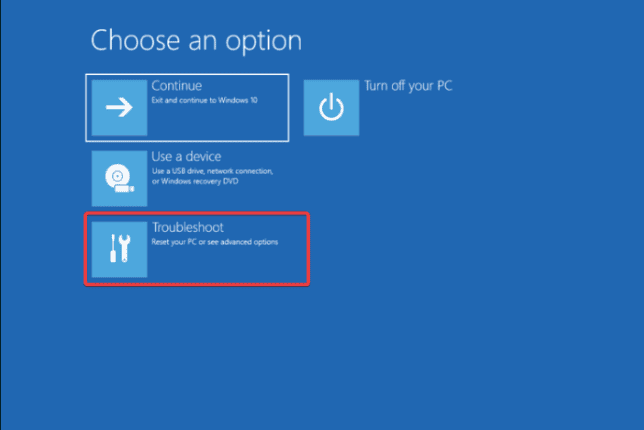
- In the third restart, you will see a blue screen, which means you have accessed the Windows Recovery Environment (WinRE).
- Click Troubleshoot on the Choose an option screen.
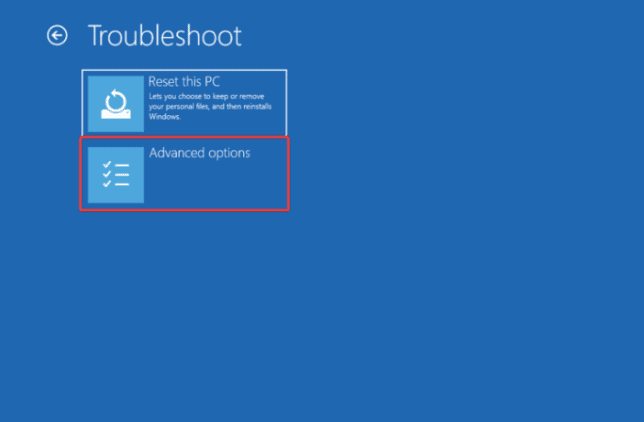
- Click Advanced options.
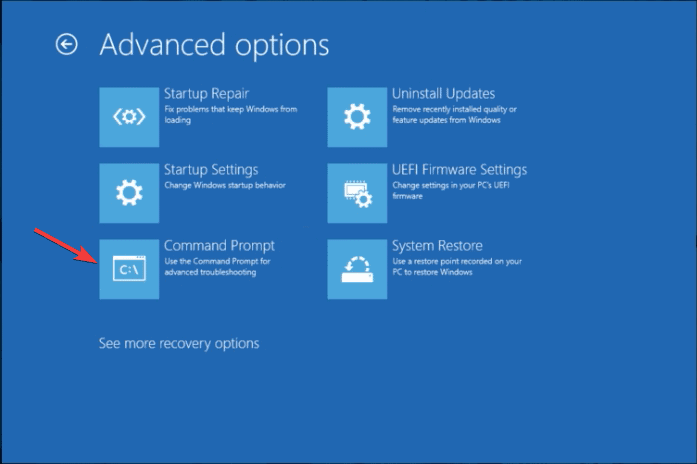
- On the Advanced Options screen, select Command Prompt.
- In the command prompt window, type the following command to run the DISM scan and hit Enter:
dism /online /cleanup-image /restorehealth - Wait for the process to finish, then reboot your computer to let the changes take effect.
7. Run an SFC scan
- Press the Windows key, type cmd in the search bar, and click Run as administrator.
- Copy & paste the following command to repair the Windows system files and press Enter:
sfc /scannow - Wait for the process to finish, then reboot your computer to let the changes take effect.
Running an SFC scan also fixes other DISM errors like Dism /online /cleanup-image /restorehealth is stuck. To learn more, read this guide
8. Perform a clean installation
 NOTE
NOTE
8.1 Install Windows 11
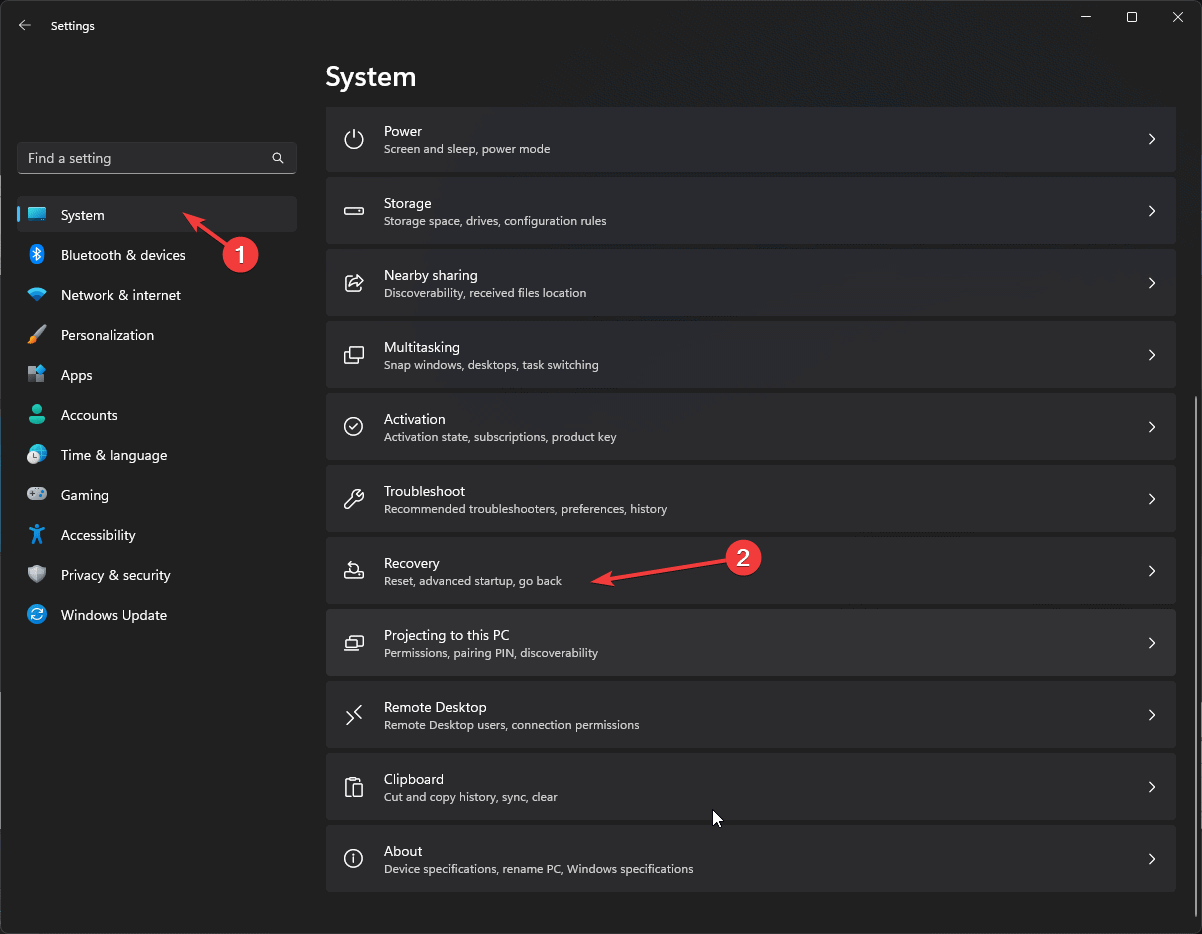
- Plug the USB drive into the targeted computer, and press Windows + I to open Settings.
- Go to System, then click Recovery.
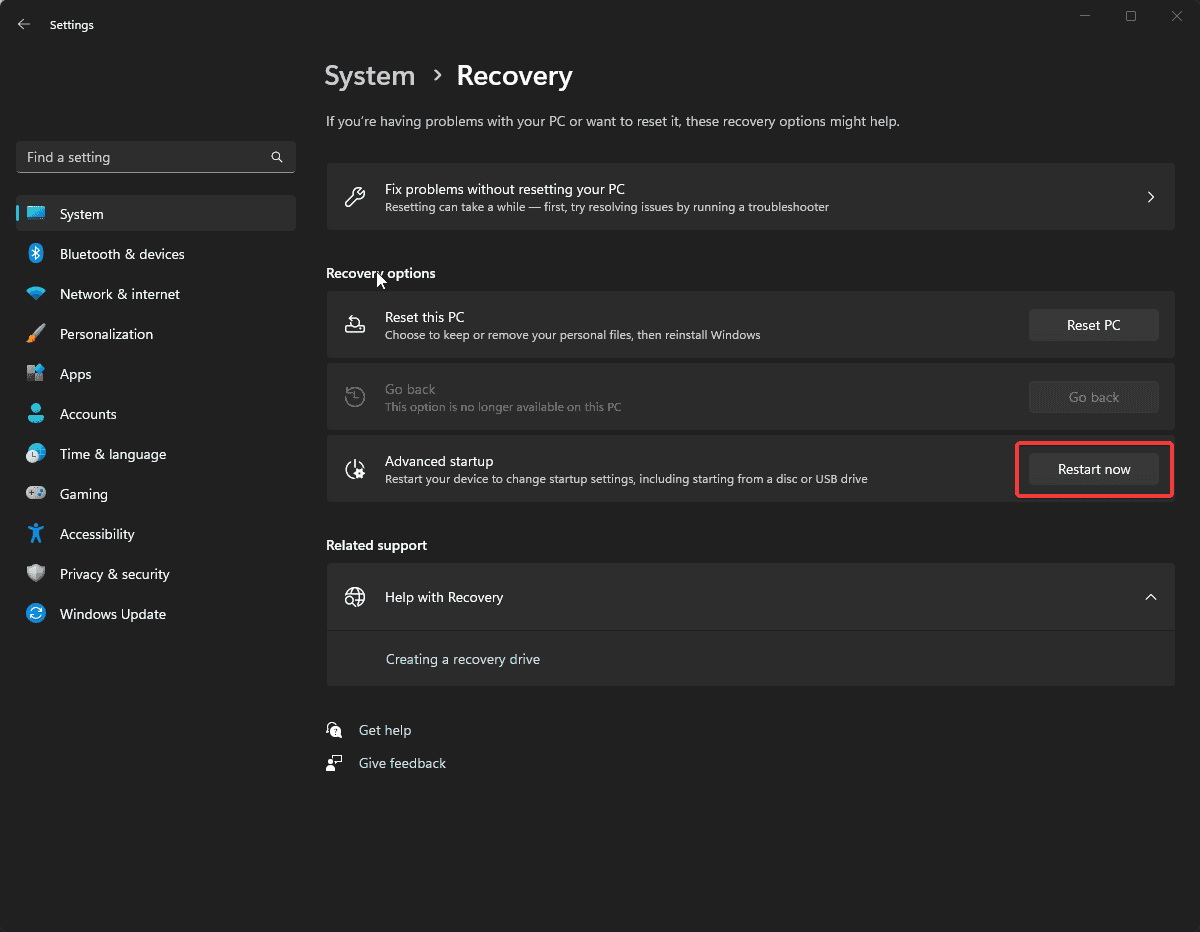
- Go to Advanced startup, and select Restart now.
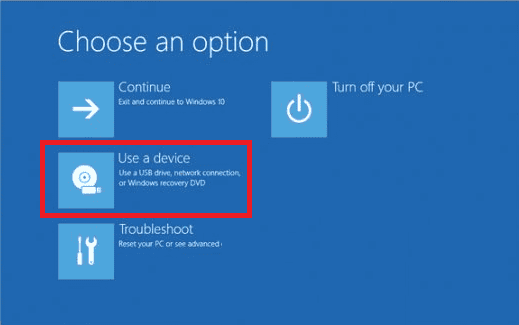
- On the blue screen, choose Use a device. If you don’t find it, you need to boot your computer in BIOS mode and select a USB device to boot.
- Select language and other suitable options on the first screen, and click Next.
- Click Install Now, place a checkmark next to the I accept box, and click Next.
- Choose Custom: Install Windows only (advanced)
- On the following page, you will see a list of drives and partitions. You can select any of them and click Delete to remove them. Once you have done this, click OK if you see a Windows Setup notification.
- Click Next. Follow the on-screen prompts to complete the process.
Installation takes some time, so do not turn off the PC. Once it is complete, you will be greeted with the lock screen.
8.2 Configure Windows settings
- Once the installation is done, select your region and keyboard layout.
- Connect to the Wi-Fi network when prompted.
- Next, sign in with your Microsoft account or create a new one if needed.
- Choose the privacy settings according to your choice, then follow other prompts to set up other features.
- Once the setup is complete, go to Windows + I to open Settings and go to Windows Update.
- Click Check for updates to install the latest updates.
In conclusion, you can fix the DISM error by running the DISM in the Windows Recovery environment, running the SFC scan, updating Windows to the latest version, or reinstalling Windows.
To avoid future DISM errors, always make sure that you are using an administrator account and running Command Prompt with elevated rights.
If you have any suggestions or questions about the DISM restore health incorrect function, feel free to mention them in the comments section below.




User forum
0 messages