System reboot fails after DISM? Fix it with these steps
Key notes
- While a DISM scan is easy to perform, users have sometimes complained about a reboot failure.
- The reboot is usually successful if additional drivers are removed or if some features of your antivirus are disabled.
- If you recently bumped into other booting problems, don't hesitate to check out our dedicated Boot Errors page.
- For even more complete articles like this one, bookmark our special Windows 10 Errors Hub.

While a DISM scan is easy to perform, users have sometimes complained about a reboot failure. A reboot might be required after a DISM scan to enable all the changes. An error at this very last step of the recovery process is rare but possible.
Normally, the system will reboot by itself as the logical final step of the recovery process.
What can I do if the system reboot fails after DISM?
1. Unplug other drives and devices

First of all, before performing the DISM scan, unplug all other external hard drives and devices. They might interfere with the entire repair and restoration process. Then, repeat the scan and see if it works all the way through.
2. Check for updates
- Open the Start menu, click on the Settings app, and then select Update & Security.
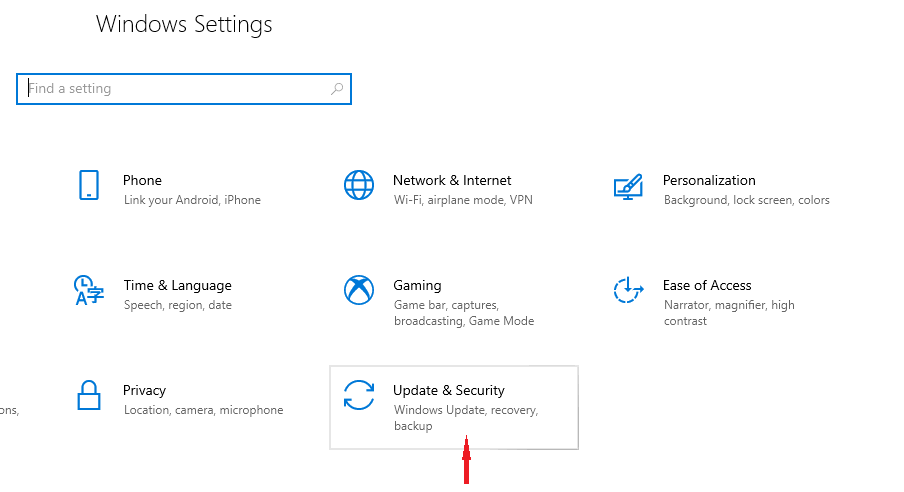
- Click Check for updates.
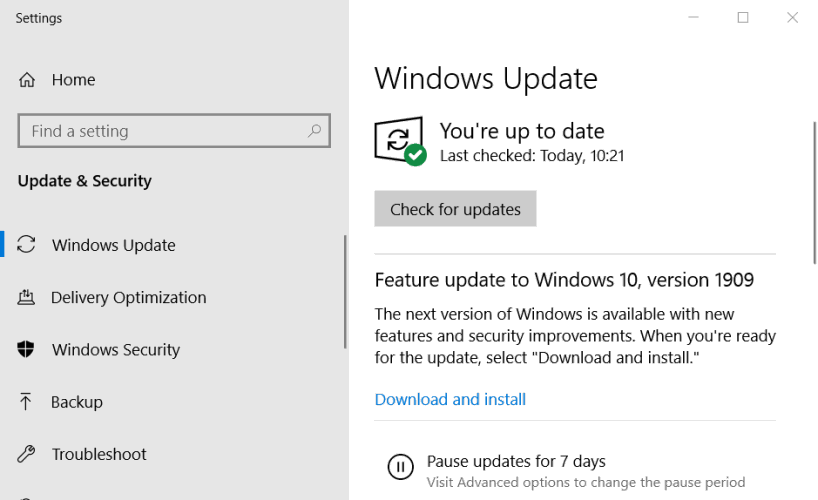
Usually, Windows is updated automatically. But if any updates are missing, this action should solve the problem. Wait for the process to finish and try to run the scan again.
Your Check for updates button is missing in Windows 10? Check this quick guide
3. Check your antivirus

While we advise for the use of a reliable antivirus program, some of its features might interfere with a system repair process. What you need to do in this case is to detect the critical feature(s) and disable it/them.
If you can’t find such a feature, you can also disable the antivirus altogether while performing again the DISM scan.
4. Disable proxy server
- Open the Settings app and go to the Network & Internet option.
- Open the Proxy menu.
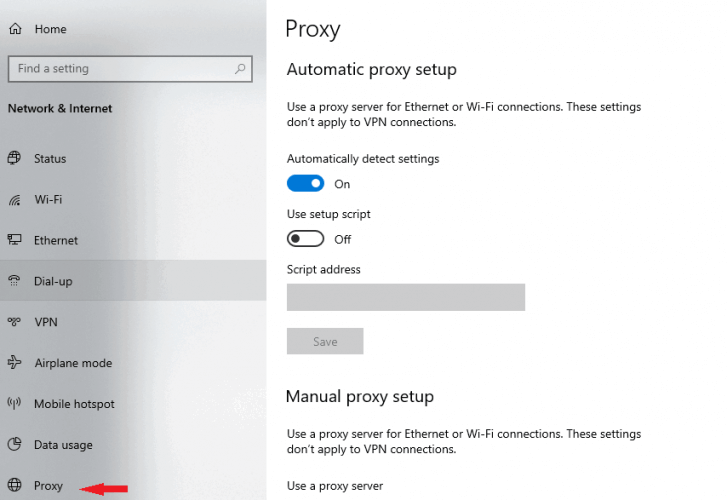
- Disable all settings in the right pane and click Save.
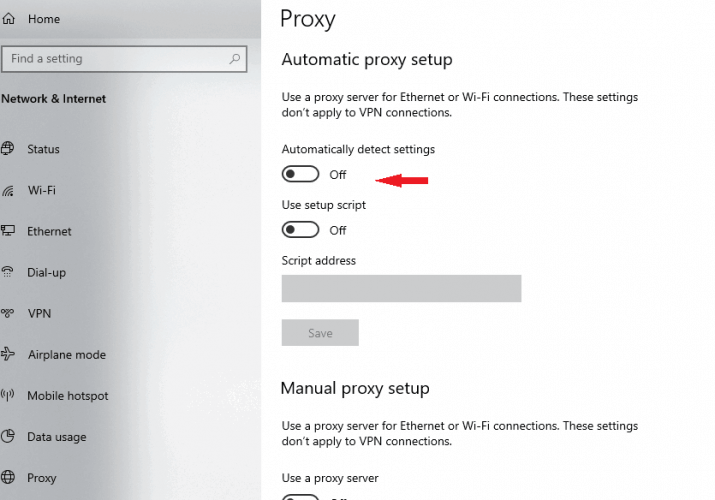
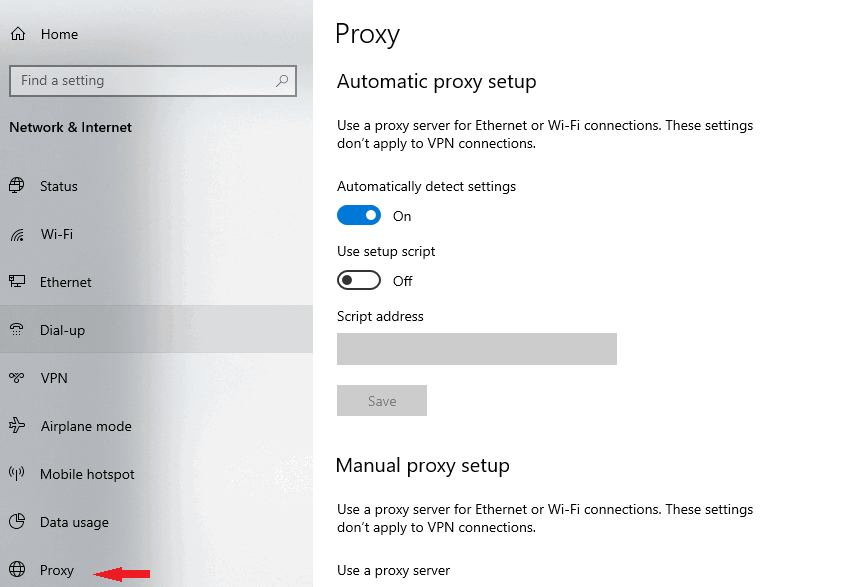
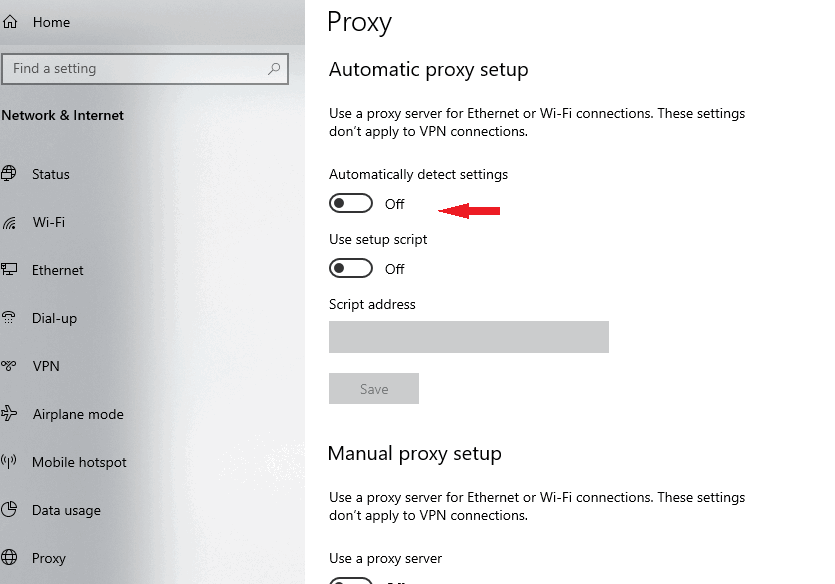
Proxy servers are commonly used to protect Internet connections and provide an increased level of security and privacy while browsing.
On the other hand, a proxy is also known to get in the way of many processes, which is why we made the above recommendation. Perform the DISM scan again and see if your device reboots normally.
Note: If you can’t open Settings on your Windows 10 PC, follow this thorough article and get rid of the problem quickly.
5. Check DISM file for corrupt components

-
- Search for Command Prompt in the search bar and open it.
- Click on Run as an administrator in the right panel.
- Type
DISM /Online /Cleanup-Image /CheckHealth. - Hit Enter and wait for the results.
If the check-up finds something faulty, you will have to recover the DISM.exe file from a Windows 10 ISO file.
Note: If DISM failed on your Windows 10 PC, don’t worry, we’ve got the perfect guide for you.
If you can’t run Command Prompt as admin, take a look at this handy guide to fix the issue.
6. Run the DISM scan from a Windows ISO file

Many systems errors can be solved while working offline. The solution would be to run the DISM scan from the ISO file. This is done by copying the Install.wim file on your hard drive. While you’re doing this, pay attention to a few details:
-
-
- After the file is copied to your hard drive, disable the Read-only option by right-clicking on the file
- Select Properties then uncheck the Read-only option and click OK.
- Open Command Prompt and run the following command:
- After the file is copied to your hard drive, disable the Read-only option by right-clicking on the file
-
DISM /Online /Cleanup-Image /RestoreHealth /source:WIM:X:SourcesInstall.wim:1 /LimitAccess
Here, pay attention to the capital letter for the Install.wim file. Additionally, you have to replace the X with the letter that matches the drive where you installed the file. Try to perform the DISM scan again and it will hopefully be a successful one.
If you have any other questions or suggestions, don’t hesitate to reach for the comments section below.
[wl_navigator]
Read our disclosure page to find out how can you help Windows Report sustain the editorial team. Read more


Improve this guide


User forum
0 messages