DRIVER_USED_EXCESSIVE_PTES: 7 Ways to Fix the BSOD
Updating the problematic driver(s) is the easiest fix
5 min. read
Published on
Read our disclosure page to find out how can you help Windows Report sustain the editorial team. Read more
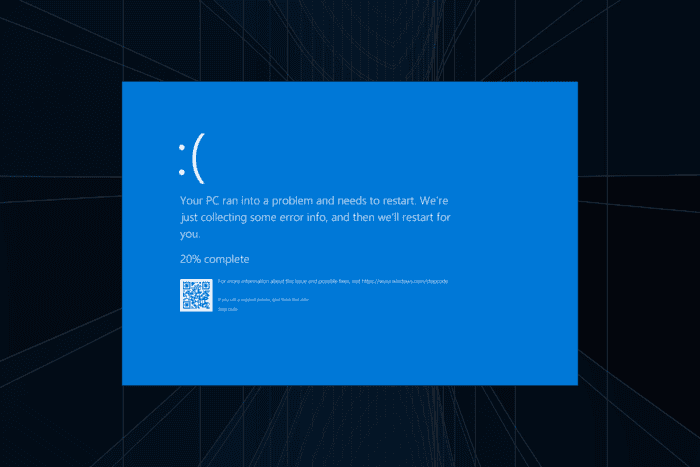
The DRIVER_USED_EXCESSIVE_PTES blue screen error, with code 0x000000D8, appears when the system runs out of PTEs (Page Table Entries). For the unversed, PTEs are key to effective memory management and contain information about mapping between physical and virtual memory!
Common causes behind Driver Used Excessive PTES include outdated or corrupt drivers, resource-intensive applications, corrupt system files, and malfunctioning hardware.
Before you start troubleshooting, install any pending Windows updates, disconnect all non-critical peripherals, and terminate inactive applications.
How do I fix DRIVER_USED_EXCESSIVE_PTES blue screen error?
1. Update the problematic drivers
- Press Windows + X to open the Power User menu, and select Device Manager from the list.
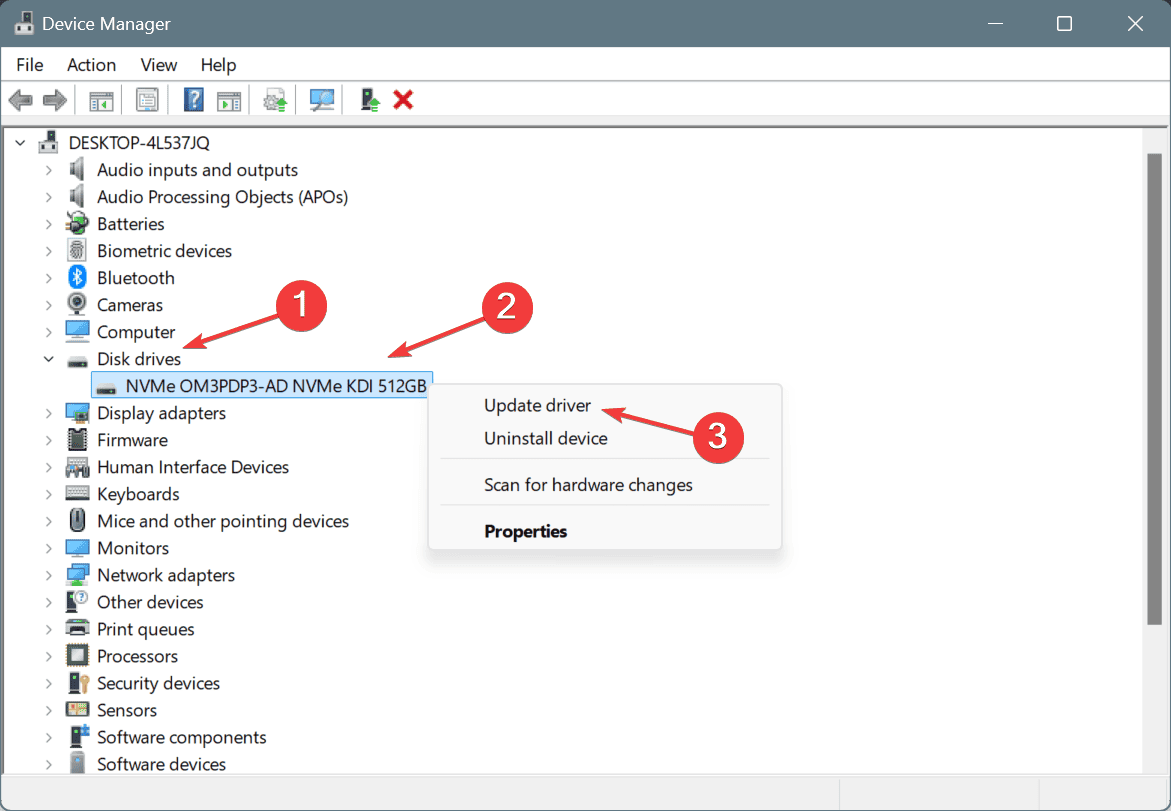
- Expand the different categories, right-click on the device using the problematic driver, and select Update driver.
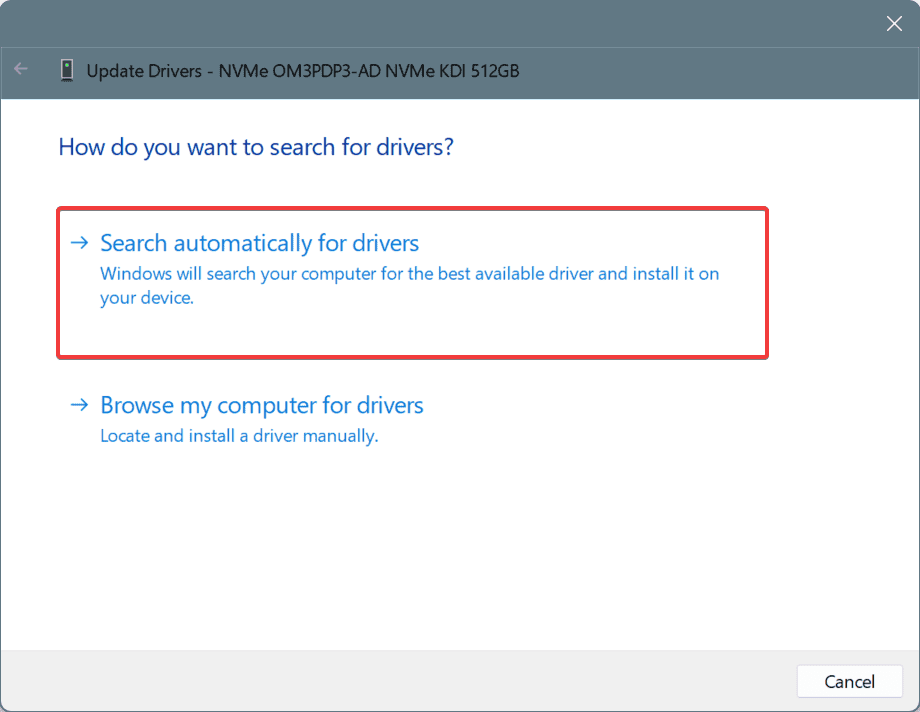
- Click on Search automatically for drivers and wait for Windows to install the best locally available version.
- Finally, restart the computer.
If the Windows blue screen doesn’t tell you anything about the driver not cleaning up its memory use or triggering the bug check, update all the drivers. If a newer version is not available locally, head to the manufacturer’s website, locate the latest version, and then manually install the driver.
For many, windrvr6 was the reason behind DRIVER_USED_EXCESSIVE_PTES and updating it did the trick!
2. Roll back driver update
- Press Windows + S to open Search, type Device Manager in the text field, and click on the relevant result.
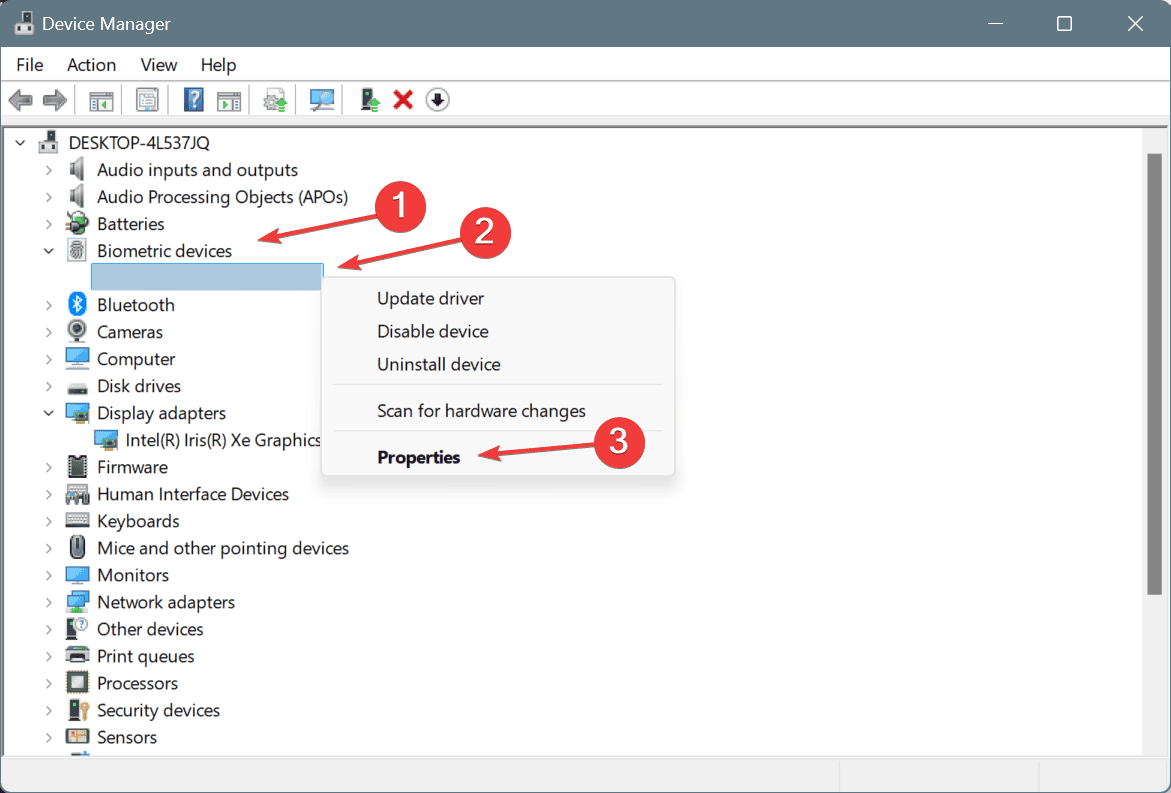
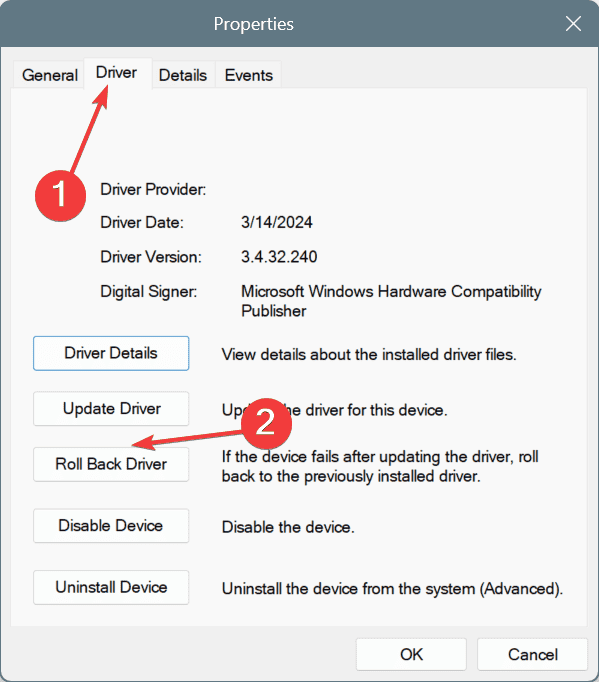
- Expand all the entries here, right-click on the individual devices, and select Properties.
- Now, go to the Driver tab, and click on Roll Back Driver.
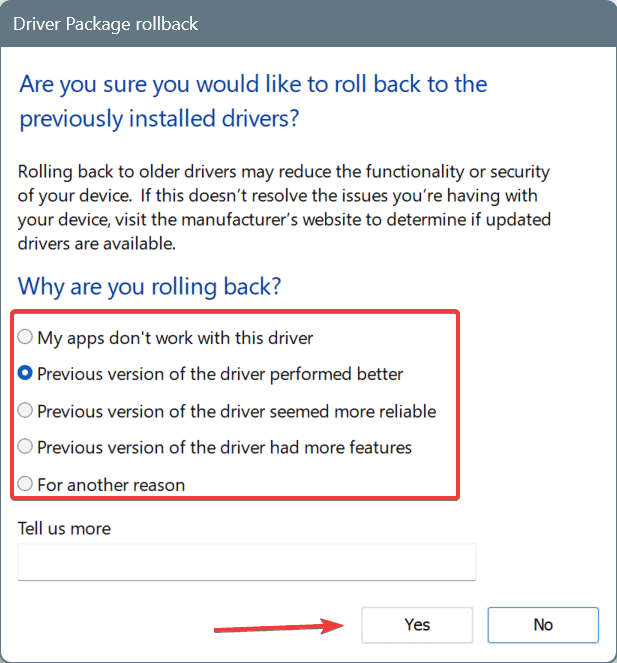
- Choose a reason for rolling back the update, and click Yes to confirm.
- Restart the computer to apply the changes.
If the Roll Back Driver option is greyed out, but you are certain that the driver was recently updated, explore other ways to manually roll back drivers.
3. Uninstall recently added apps
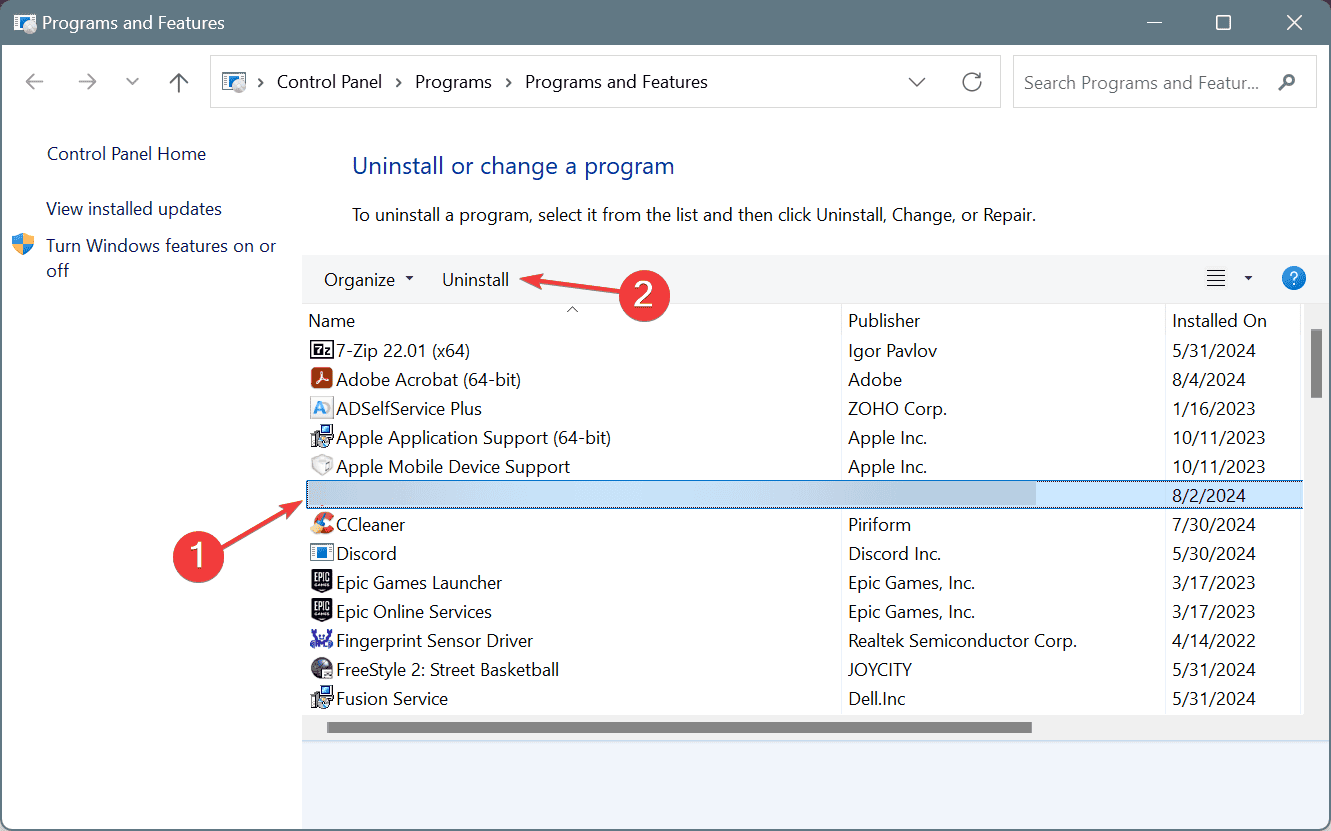
- Press Windows + R to open Run, type appwiz.cpl in the text field, and hit Enter.
- Select any application that was recently added or updated, and click on Uninstall.
- Follow the on-screen instructions to complete the process.
- Similarly, uninstall other recently updated/downloaded apps, then restart the PC and check for improvements.
If the DRIVER_USED_EXCESSIVE_PTES Windows BSOD still appears, it’s possible that the app(s) left behind some files that are triggering the error. For this, use a top-rated software uninstaller, which automatically deletes all the leftover files and Registry entries, thus effectively clearing every trace of the app.
4. Repair the corrupt system files
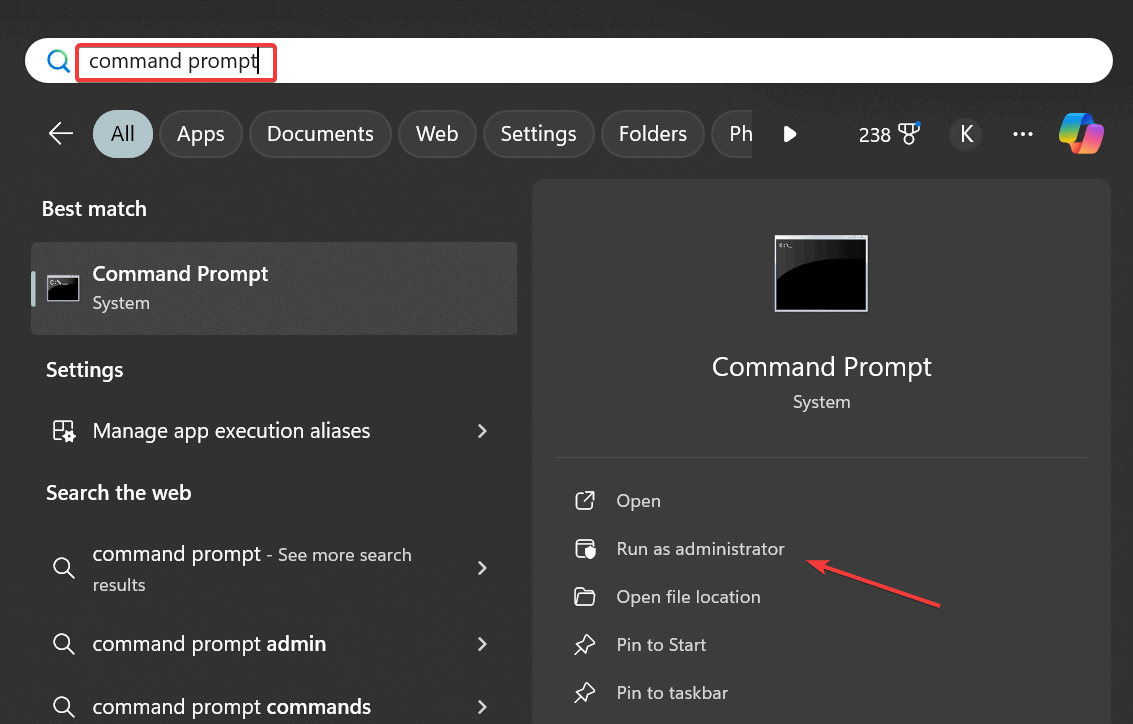
- Press Windows + S to open Search, type Command Prompt, and click on Run as administrator.
- Click Yes in the UAC prompt.
- Paste the following DISM commands individually and hit Enter after each:
DISM /Online /Cleanup-Image /CheckHealthDISM /Online /Cleanup-Image /ScanHealthDISM /Online /Cleanup-Image /RestoreHealth - Next, run this command for the SFC scan:
sfc /scannow - Restart the PC and check for improvements.
5. Check for disk and RAM issues
5.1 Repair the disk
- Press Windows + R to open Run, type cmd, and hit Ctrl + Shift + Enter.
- Click Yes in the UAC prompt.
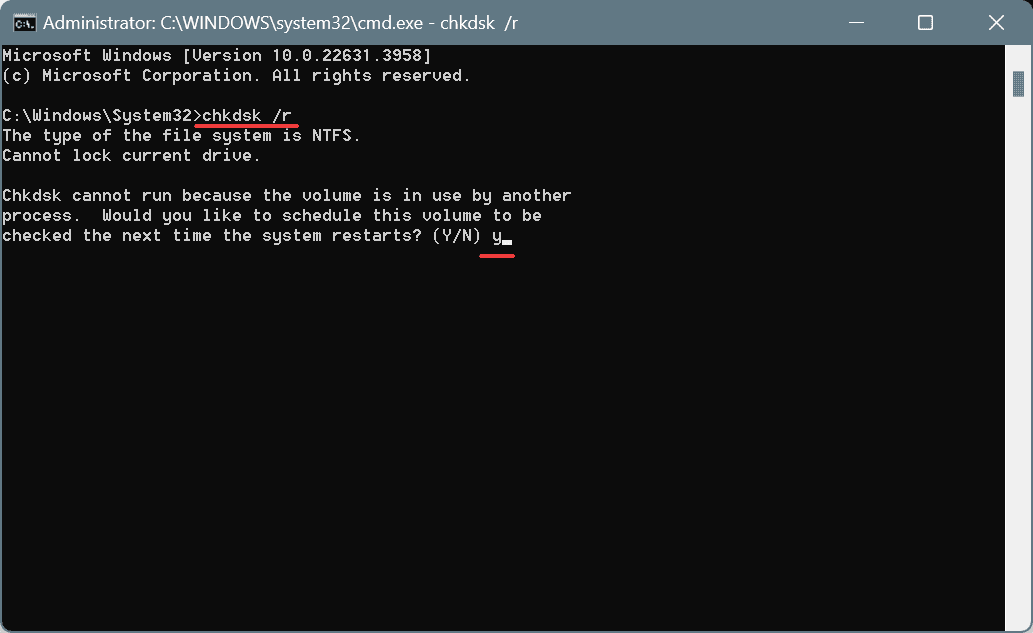
- Paste the following Check Disk command and hit Enter:
chkdsk /r - If asked to schedule the scan for the next restart, press Y, hit Enter, and then reboot the PC.
5.2 Inspect the RAM
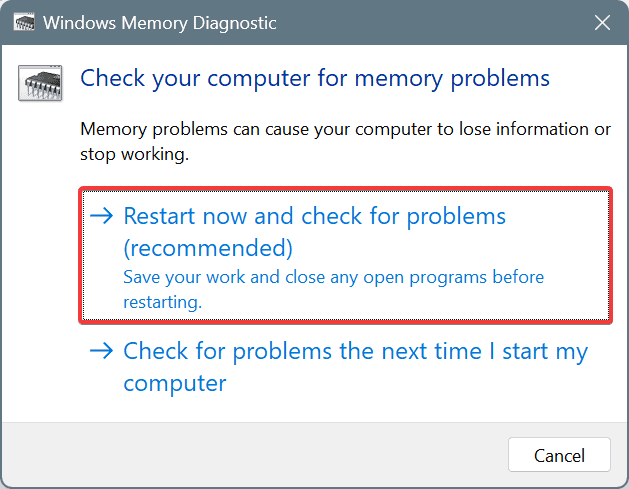
- Press Windows + S to open Search, type Windows Memory Diagnostic, and click on the relevant result.
- Click on Restart now and check for problems.
- When the PC restarts, inspect the mdsched.exe logs and look for any issues.
If Windows Memory Diagnostic doesn’t detect any problems triggering the DRIVER_USED_EXCESSIVE_PTES blue screen error, use Memtest86+, an open-source memory testing tool, to run advanced scans on individual RAM modules and identify even the smallest of the issues.
6. Perform a system restore
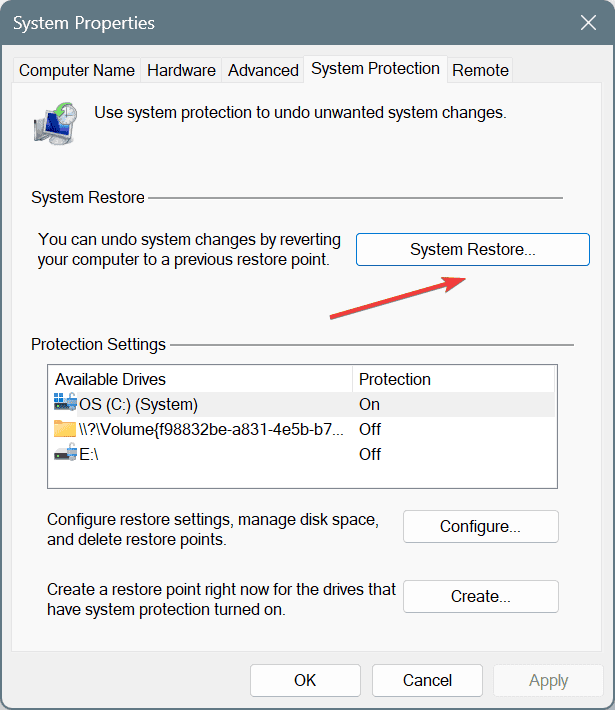
- Press Windows + S to open Search, type Create a restore point, and click on the relevant result.
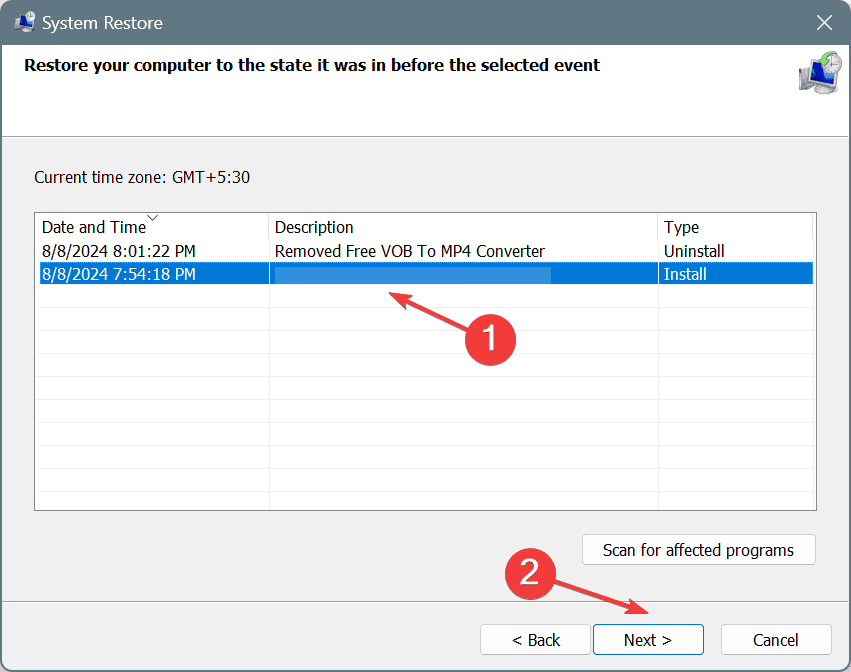
- Click the System Restore button.
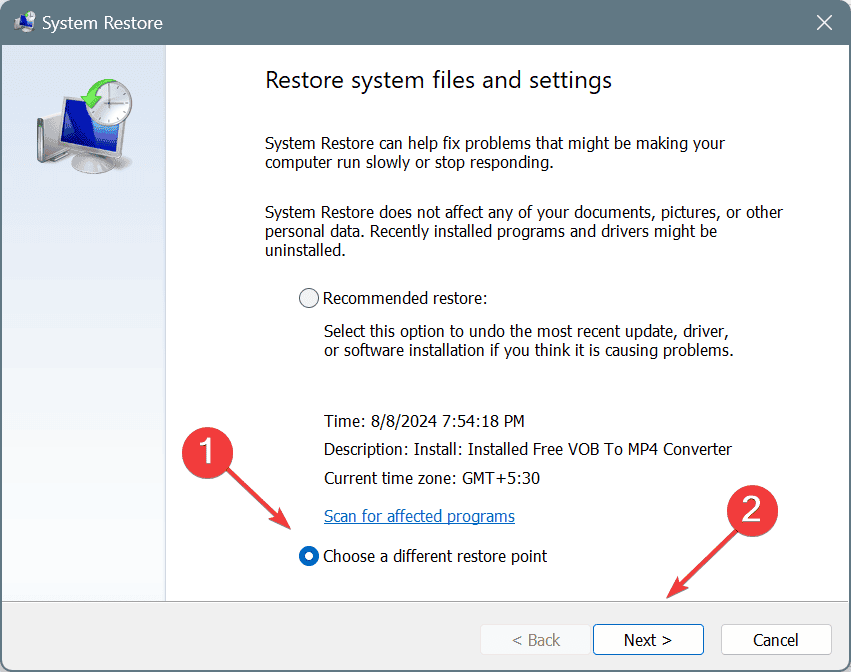
- Select the Choose a different restore point option and click Next.
- Pick the oldest restore point from the list and click on Next.
- Verify the restore details, and click on Finish to start the process.
- Wait for the restore to complete and check whether the error is fixed. It typically takes 10-30 minutes.
7. Reinstall Windows
When nothing else works, the last option is to reinstall Windows. The process is time-consuming but will fix almost every software-based underlying cause behind the DRIVER_USED_EXCESSIVE_PTES Windows BSOD!
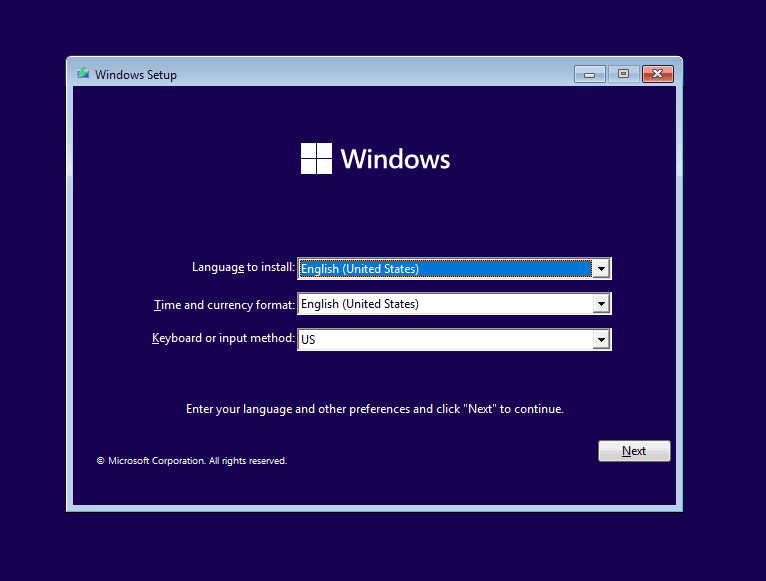
To reinstall Windows 11, plug a formatted flash drive into another PC > go to Microsoft’s official website > download the Media Creation Tool > run it and create a bootable Windows USB > connect the USB drive to the affected PC > change the boot order to the flash drive > run the setup > install Windows.
When it comes to DRIVER_USED_EXCESSIVE_PTES, in 4 out of 5 cases, updating or rolling back the driver does the trick. Or if an app is triggering the error, uninstalling it will fix things. Remember, no matter what someone tells you, never manually increase the number of PTEs, as it may cause major system instability!
Before you leave, discover expert tips to make your PC faster than ever!
For any queries or to share which fix worked for you, drop a comment below.





User forum
0 messages