How to Dual Boot on Separate Hard Drives: 5 Easy Steps
It is always not necessary to use two hard drives for dual booting
5 min. read
Updated on
Read our disclosure page to find out how can you help Windows Report sustain the editorial team Read more
Key notes
- Dual booting on a single drive is not harmful to your computer but may not be as efficient as dual booting on two hard drives.
- Initiating the dual booting process on separate hard drives creates a less cluttered partition table for the two operating systems.
- Ensure the hard drives are bootable and have enough space to accommodate the partitions for the operating systems.
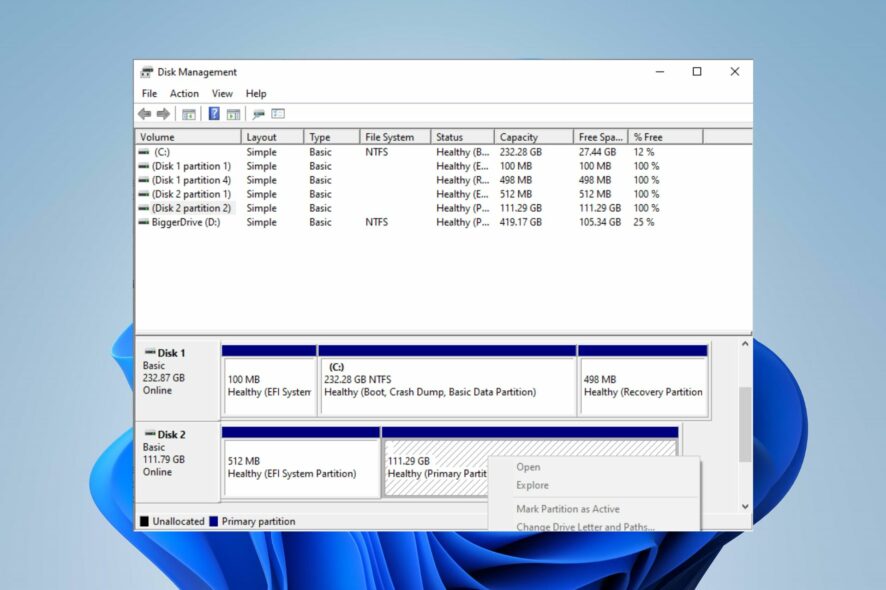
Installing two OS on a computer creates many clustered partitions for running them that can be a mess on the hard drive. Hence, we’ll discuss how to dual boot on separate hard drives on your PC.
Do I need two hard drives for dual boot? Dual booting on your computer doesn’t necessarily require you to have two hard drives available for the process. So, you don’t compulsorily need separate drives, for instance, when dual booting Windows and Linux OS on a single PC.
However, we recommend using two separate hard drives to make the operation easier and smoother. It has many advantages that give it an edge over dual booting from a single drive. Using two drives creates a less cluttered partition table for the two operating systems.
Also, it eradicates the stress of backing up data for the current OS. It prevents partitioning issues liable to occurring.
In short, dual booting by partitioning a single driver doesn’t harm its performance and stability. However, allowing each operating system to have a designated drive to partition makes it more organized.
How can I dual boot on separate hard drives?
Before proceeding with the steps for dual booting on separate hard drives, follow these:
- Get the bootable drives available to be inserted into the PC.
- Ensure you have 50 GB of free space on both drives for an optimal experience.
- Connect to a stable internet network for downloading the ISO image and live USB-creating tool.
- If you don’t want to lose your files in the reset process, create a system image backup to avoid data loss.
 NOTE
NOTE
1. Set a new partition for the new OS installation
- Press Windows + X key and select the Disk Management window.
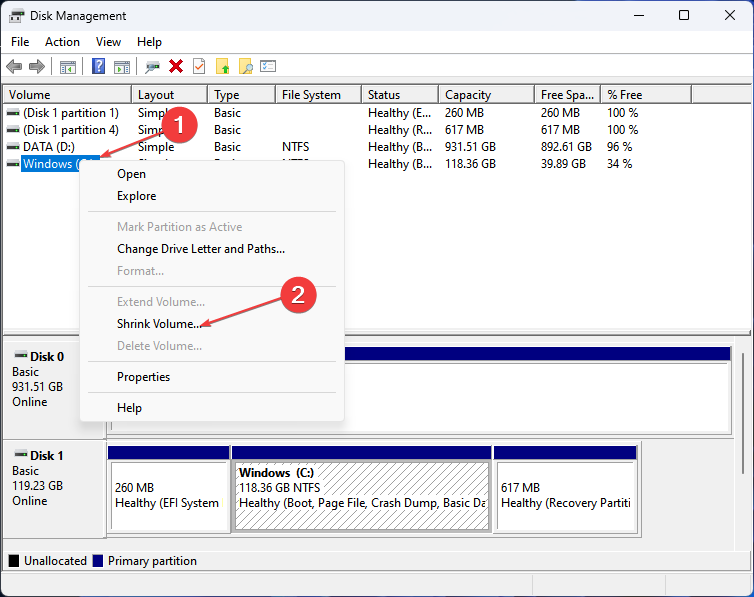
- Find and right-click on the largest partition volume and choose Shrink Volume from the drop-down.
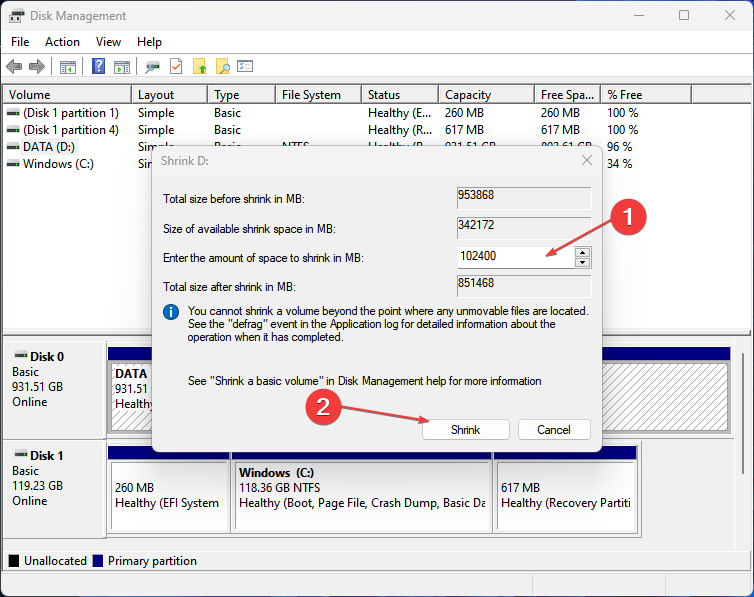
- Go to Enter the amount of space to shrink in MB, enter 102400, and tap Shrink, then 100 GB Unallocated appears.
- Right-click on the Unallocated volume and select New Simple Volume from the drop-down to create a new partition.
- Click Next without modifying any key until you complete the wizard instructions.
Creating a new partition frees up enough disk space for the operating system to be installed.
2. Create a bootable USB for the new OS installation
- Plug in a USB drive to your computer.
- Download the OS installation media creation tool from the official website and run it on your PC.
- On the Setup screen, accept the applicable conditions and license terms, select language and edition, then click the Next button.
- Choose the connected USB drive to create an installation media for the OS, then wait until the installation media is successfully created.
Using the Media creation tool to create a bootable USB drive allows users to download and store the install file for Windows 11.
You can read our article about how to create a bootable USB drive for more steps to take on Windows 11.
3. Install the Operating System on the new partition
- Insert the bootable USB flash/pen/key drive into your computer
- Restart your computer and repeatedly press the F12 to Choose Boot Device.
- Select your USB drive and press Enter, then the computer will boot from the USB drive.
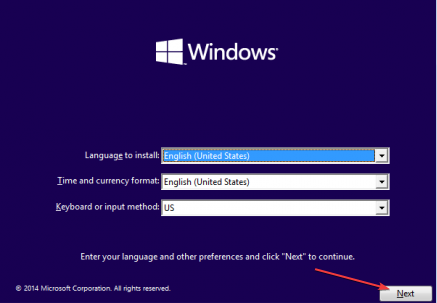
- Follow the on-screen instructions to set up your operating system step by step.
The steps for installing and setting up different operating systems on your PC may vary. So, we recommend you consult a professional for the specific steps for your operating system.
4. Set default operating system for startup
- Press Windows + I key to open the Settings app.
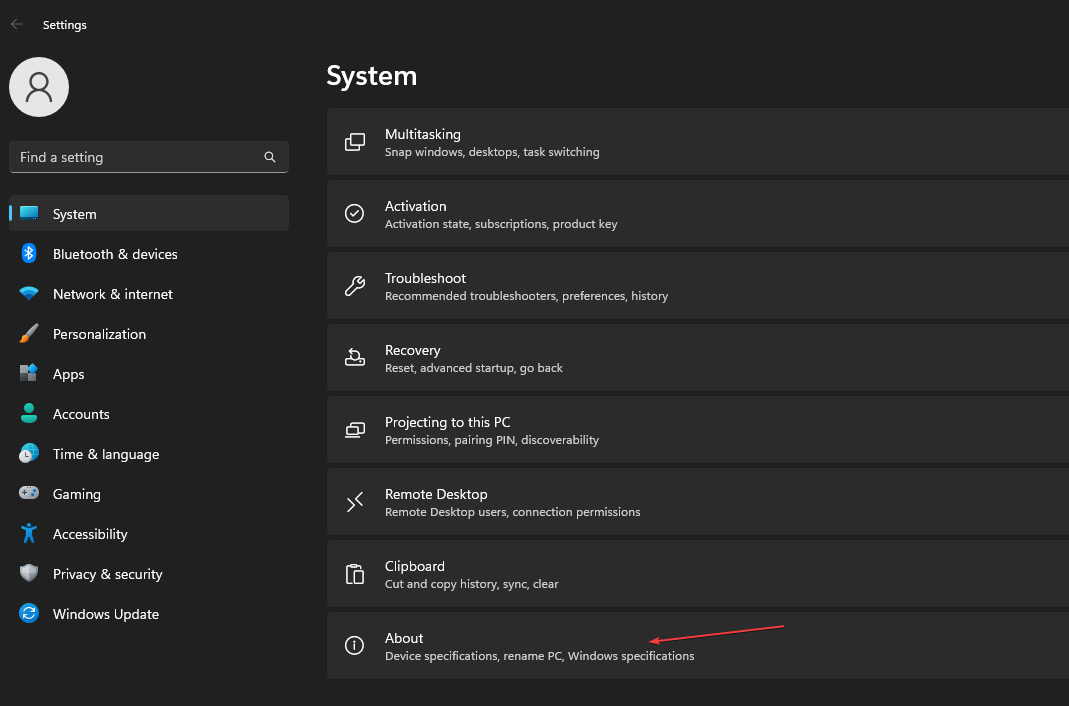
- Go to System and click on the About tab from the left pane.
- Navigate to the Related links menu and click on Advanced system settings.
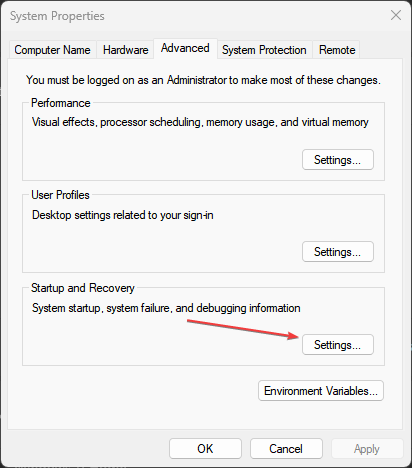
- On the System Properties window, go to the Startup and Recovery tab, then click the Settings button.
- Click the drop-down button for the Default operating system and choose your preferred OS.
- Check the box for Time to display list of operating systems and set it to 30 seconds, then click OK to save the changes.
Setting the default operating system and a time limit to display the list of operating systems allows you to access the dual boot menu. It prompts the select operating system boot menu where you can easily switch between OS on startup.
If you’re interested how to remove Ubuntu from dual boot on Windows 11, the highlighted guide will provide all the solutions.
5. Disable the Windows Fast Startup option
- Left-click the Start button and type control panel, then open it.
- Click on System and Security, then select Power Options.
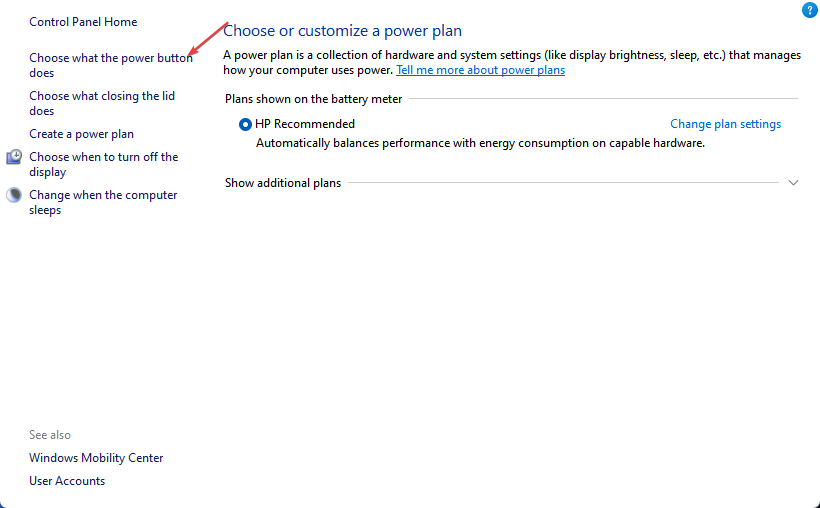
- In the right pane, click on the Choose what the power buttons do option.
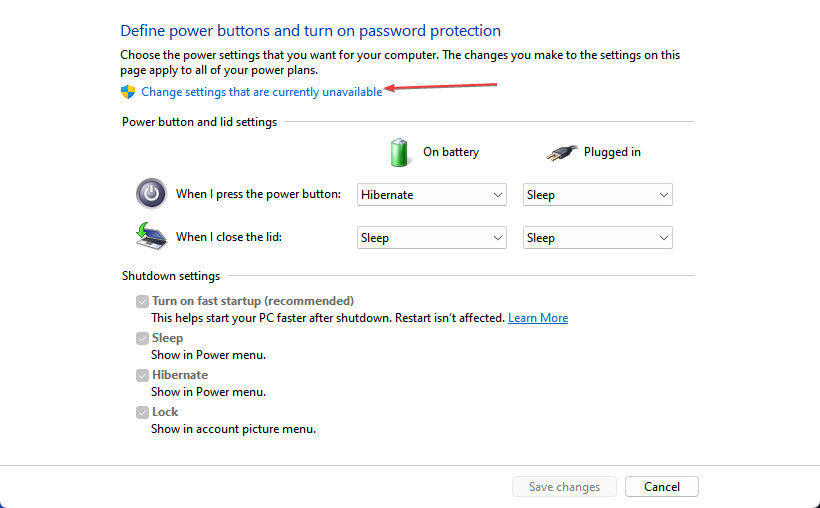
- Click on Change settings that are currently unavailable.
- Under Shutdown Settings, uncheck the Turn on fast startup (recommended) option.
- Click the Save changes button.
- Restart your computer and select a preferred OS from the dual boot menu.
Disabling Fast startup allows your PC to bypass loading the default operating system from the boot and shows the boot menu for selecting Operating Systems. Read how to disable fast startup on Windows 11 for more steps.
In conclusion, our readers can check how to Dual Boot Windows 11 and macOS on a single PC.
Likewise, our readers may be interested in our guide on how to Dual Boot Windows 11 and Linux Mint on one PC. Also, you may be interested in our guide on fixing PC stuck on Choose an operating system prompt.



User forum
0 messages