How to enable Legacy Windows 7 boot menu on Windows 10

How do I enable Windows 7 boot menu on Windows 10?
Are you one of the Windows users who switch from Windows 7 to the Windows 10 operating system on your device?
Well seeing that the bootloader in Windows 10 looks completely different than the one you are used to in the Windows 7 operating system you can find out by reading the tutorial posted below how exactly you can enable the legacy Windows 7 boot menu in Windows 10 as well.
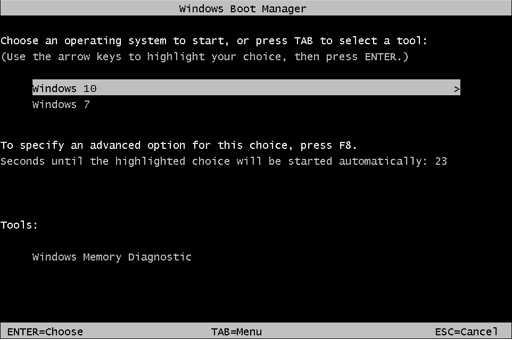
Windows 10 brought a new boot menu that is an improvement over the previous one. This boot menu is graphical, and it allows you to use your mouse, which is a major plus. In addition, it offers more options and it’s more user-friendly.
Despite the aforementioned improvements, some users still prefer the older textual boot menu. One of the main reasons is because the new boot menu will restart your PC if you’re using your PC in dual boot mode. This isn’t the case with the legacy boot menu, and instead of restarting, your PC will boot straight to the select operating system thus saving your time.
Learn more about enabling Legacy Boot in Windows 10 by reading this guide.
Tutorial on how to enable the legacy Windows 7 boot menu using Windows 10
Use bcdedit
- Left click or tap on the search box situated in the Start menu of your Windows 10 operating system.
- In the search dialog box write the following: “cmd.exe” without the quotes.
- After the search has finished you should have an icon with Command Prompt.
- Right click or hold tap on the Command Prompt icon and from the menu that appears left click or tap on the “Run as administrator” feature.
Note: If you are prompt by a user account control window you will need to left click or tap on the “Yes” button to proceed. - Now in the “Elevated Command Prompt” window you just opened write the following: “bcdedit /set “{current}” bootmenupolicy legacy” without the start and end quotes.
Note: If you manually write the command above be very careful on the spaces in the line as the command will not work if you type something wrong. - After you wrote the command above press the Enter button on the keyboard.
- Now in the command prompt window write the following: “Exit” without the quotes.
- Press the Enter button on the keyboard.
- Reboot your Windows 10 operating system and check if the boot menu has switched to the Windows 7 like legacy.
Turn the Windows 10 boot menu on:
- If by any chance you wish to switch back to the Windows 10 boot menu go to the Start button again and in the search box write “Cmd.exe” as you did in the steps above.
- Right click again on the command prompt icon and select the “Run as administrator” feature.
- In the command prompt write the following line: “bcdedit /set {default} bootmenupolicy standard” without the quotes.
- Press the Enter button again in order for the command to execute.
- Close the command prompt window and reboot your operating system.
Read our detailed guide and learn to properly dual-boot Windows 10 with another OS.
Use bootrec
You can try to use bootrec feature in order to enable legacy Windows 7 boot menu on your Windows 10.
It will be the same as fixing Windows 7 boot, but you will arrive to open Windows 7 legacy boot menu with one condition – having your Windows 7 installation CD/DVD. Here’s how you do it:
- Boot from the original Windows 7 installation CD/DVD
- Select the language you prefer; click ‘Next’
- Select the operation System from the list (Windows 7) and then click ‘Next’
- When ‘System Recovery Options’ screen appears, click on ‘Command Prompt‘
- In Commander type the following command ‘bootrec /fixmbr’ (without the quotes) and press ‘Enter’
- Type ‘bootrec /fixboot’ (without the quotes) and press ‘Enter’
- Type ‘bootrec /ScanOs’ (without the quotes) and press ‘Enter’
- Type ‘bootrec /rebuildBcd’ (without quotes) and press ‘Enter’
- Eject Windows 7 installation CD/DVD
- Type ‘exit’, press ‘Enter’ and reboot your PC
And there you go, some quick methods on how to change the new boot menu in Windows 10 to the legacy Windows 7– like boot menu you are used to.
Also if you are having trouble doing the steps above you are welcomed to write us in the comments section situated a little bit below these lines and I will help you further as soon as possible.
Read our disclosure page to find out how can you help Windows Report sustain the editorial team. Read more


Improve this guide


User forum
0 messages