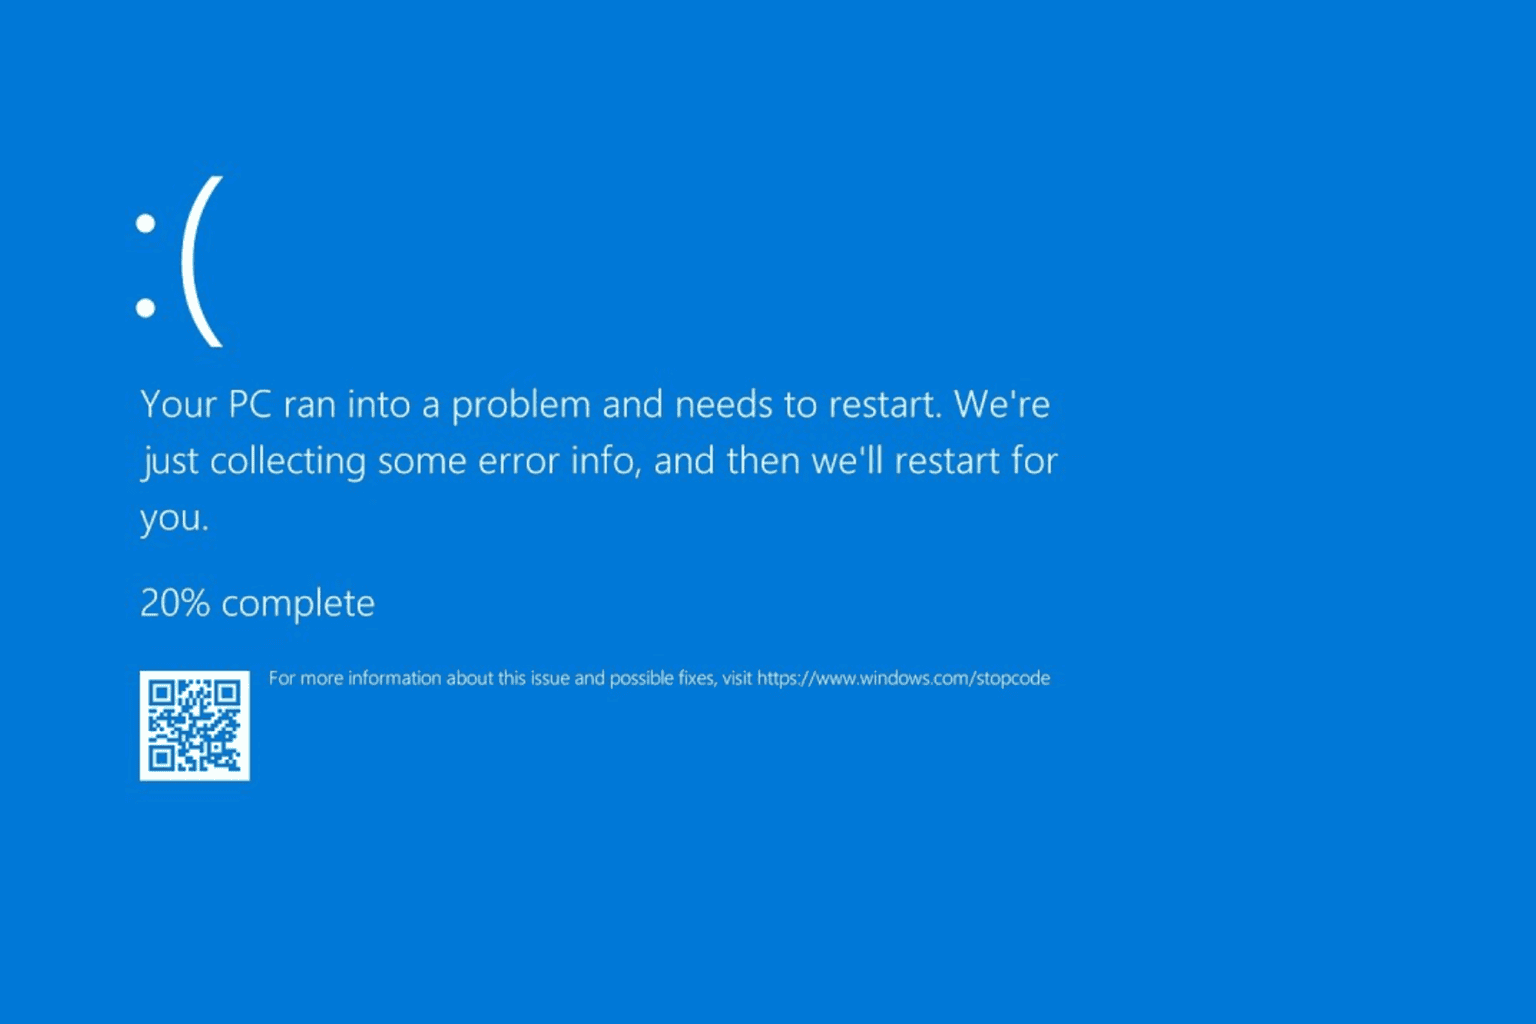
Solved: 0x00000098 END_OF_NT_EVALUATION_PERIOD
Ensure the time & date matches the current time & date
![]() 4 min. read
4 min. read
![]() Published on
Published on
Share this article
Improve this guide
Read our disclosure page to find out how can you help Windows Report sustain the editorial team. Read more
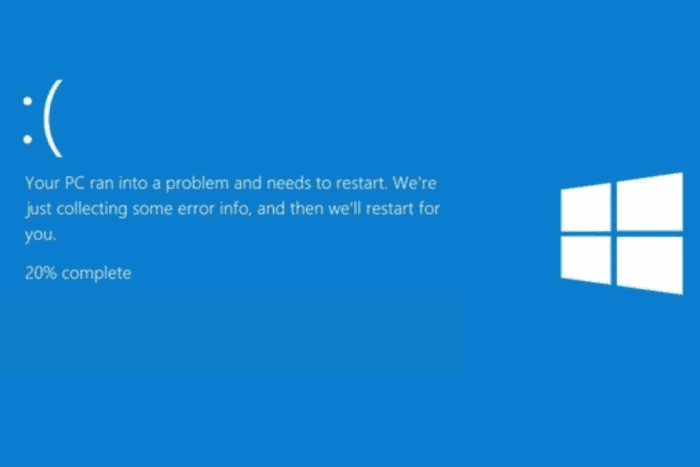
If you have encountered the 0x00000098 END_OF_NT_EVALUATION_PERIOD on your Windows Server, this guide is for you. This bug indicates that the trial period for the Microsoft Windows NT Server has ended.
The issue might occur if the evaluation period has expired, causing the system to become non-functional. Other potential causes include an incorrectly set system clock or activation with a trial key that has now expired.
How can I fix the END_OF_NT_EVALUATION_PERIOD issue?
1. Extend the evaluation period
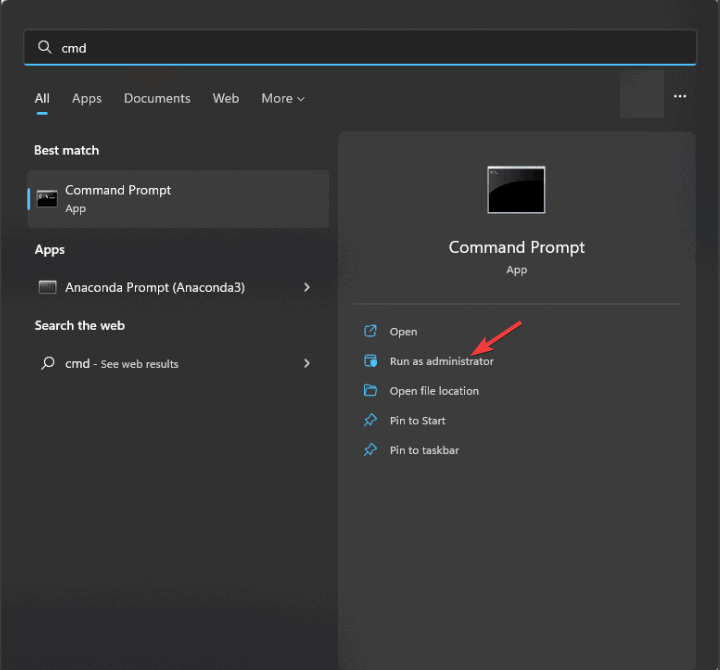
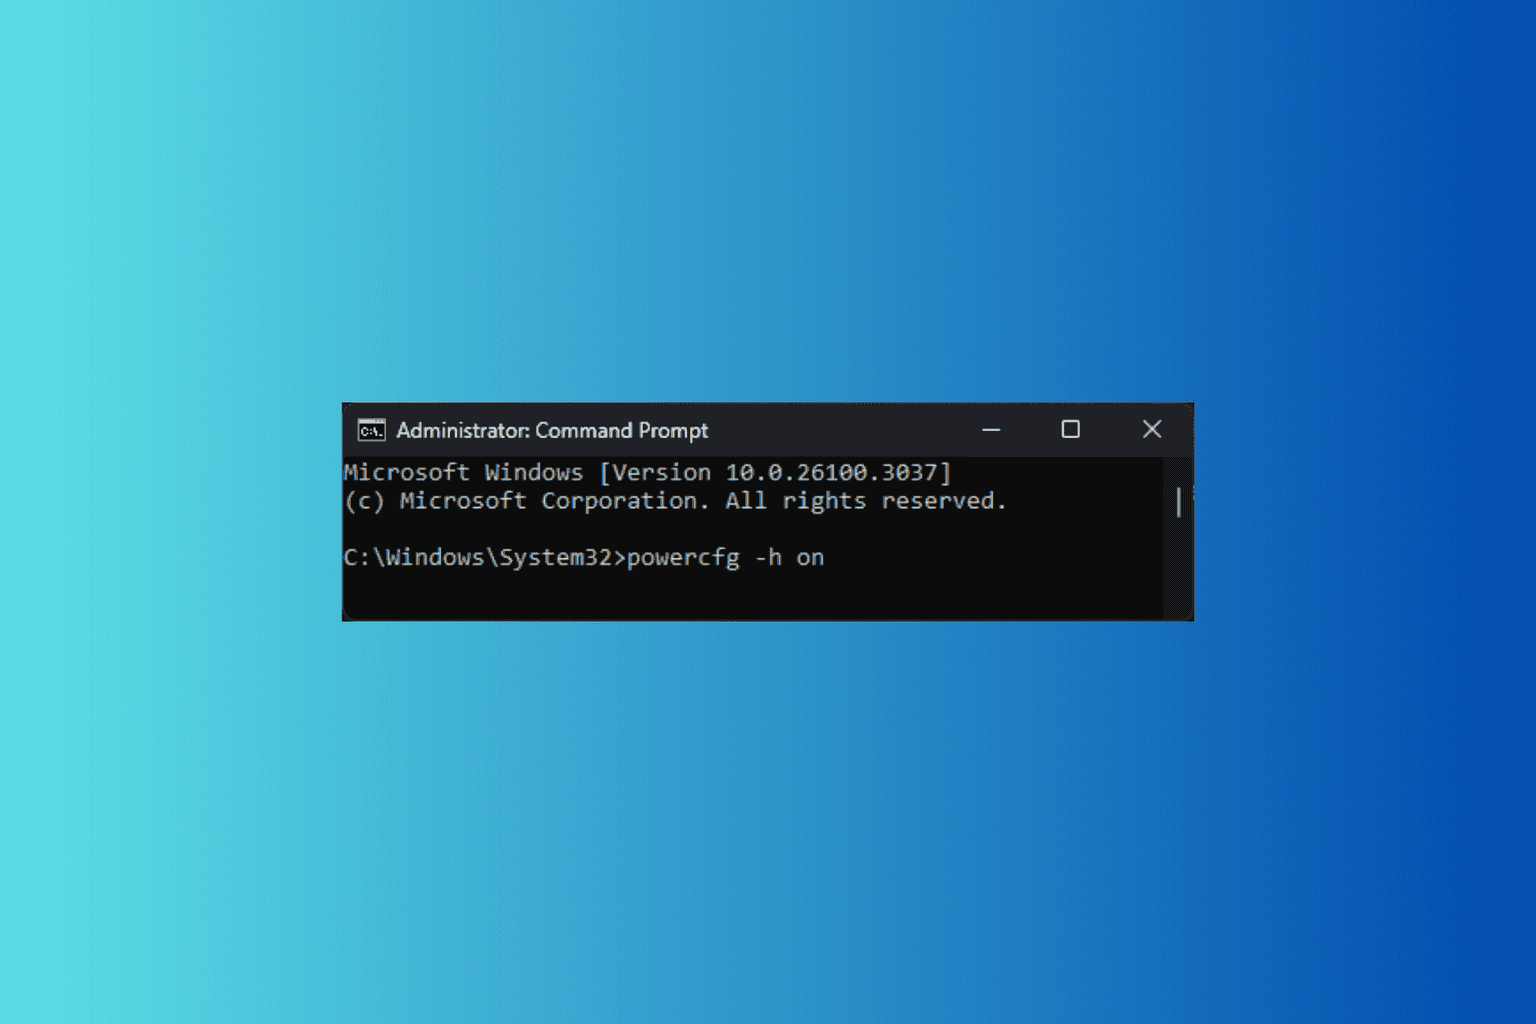
- Press the Windows key, type cmd in the search box, and click Run as administrator.

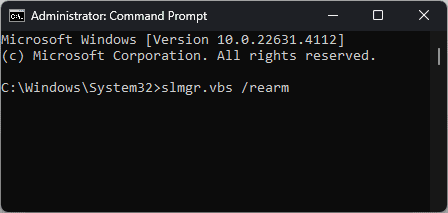
- In the Command Prompt window, type the following command to extend the evaluation period and hit Enter:
slmgr.vbs /rearm
- This command will reset the evaluation period. Once done, you will see a confirmation message.
- Now restart your server to save the changes.
2. Activate with a license key
- Press the Windows key, type cmd in the search box, and click Run as administrator.
- To install the license key, copy & paste the following command after replacing Your license key with the license key in the Command Prompt window and press Enter:
slmgr.vbs /ipk [your license key] - After installing the license key, you need to activate it; for that, type the following command and hit Enter:
slmgr.vbs /ato - This command will connect to Microsoft activation servers and will activate your Windows server/ Once done, you will get a confirmation message.
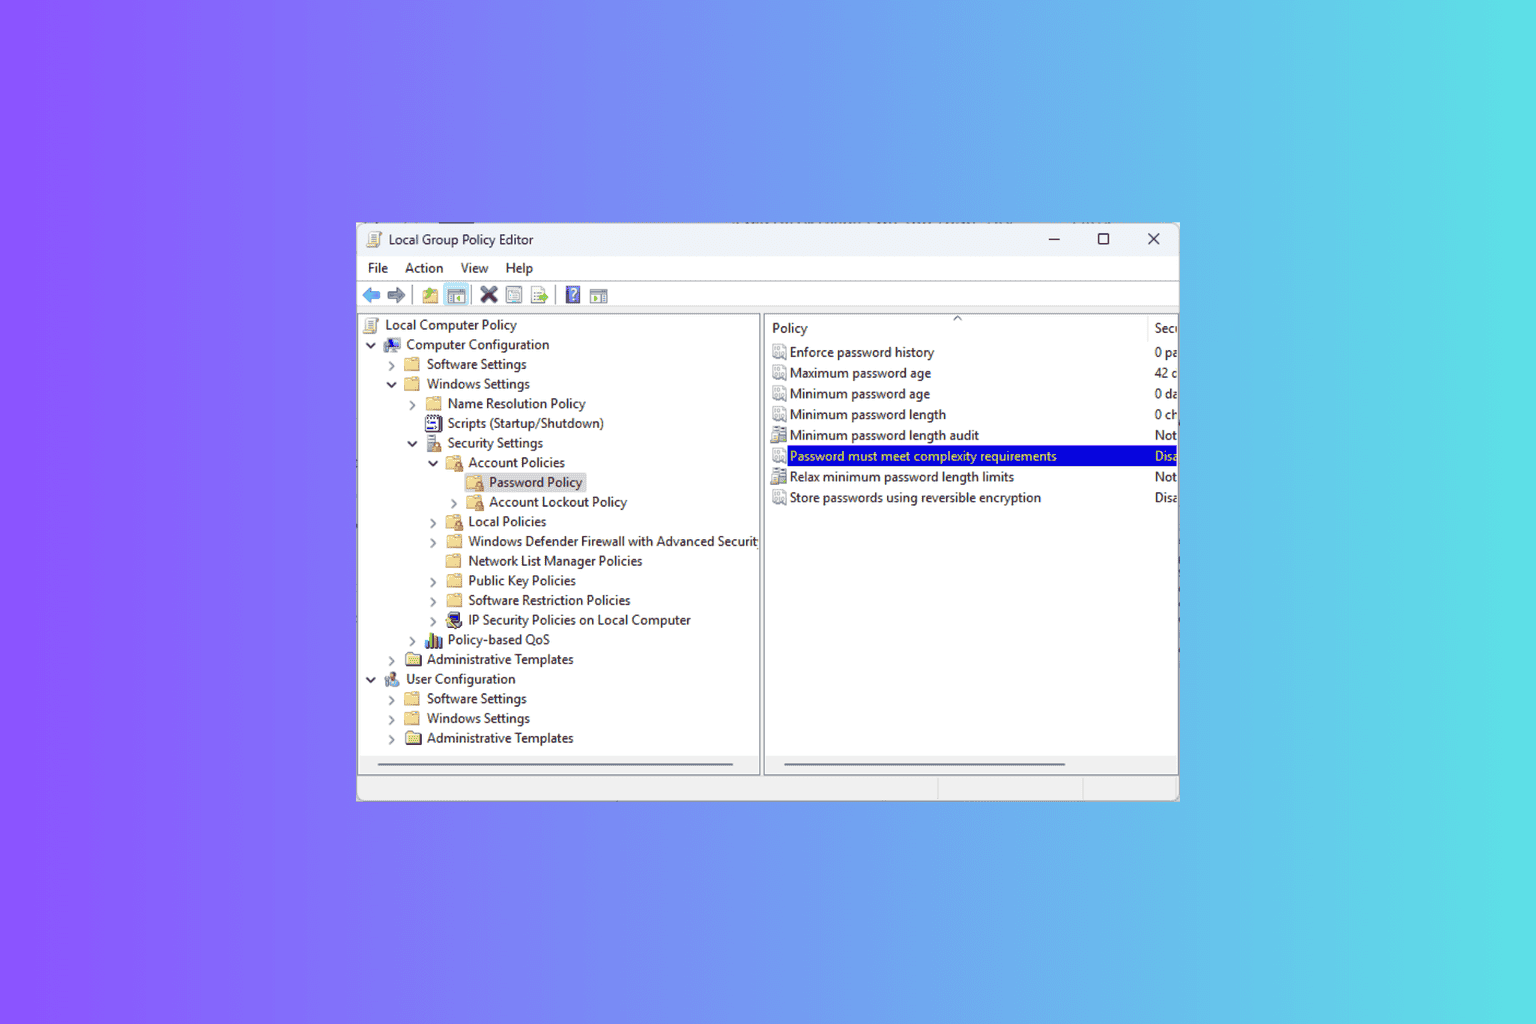
3. Set the correct date and time
- Press the Windows key, type cmd in the search box, and click Run as administrator.
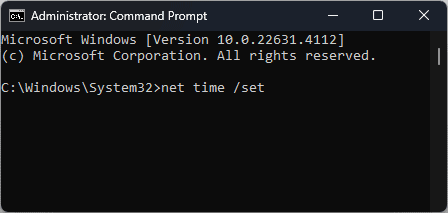
- To synchronize the system clock, copy & paste the following command and press Enter:
net time /set - Once executed, the command will sync the system clock with a network time server, ensuring the server’s date and time are correct.
- To check if the time is correct, press the Windows key, type control panel in the search box, and click Open.
- Select Small icons for View by and click Date and Time to check the date, time, and time zone.
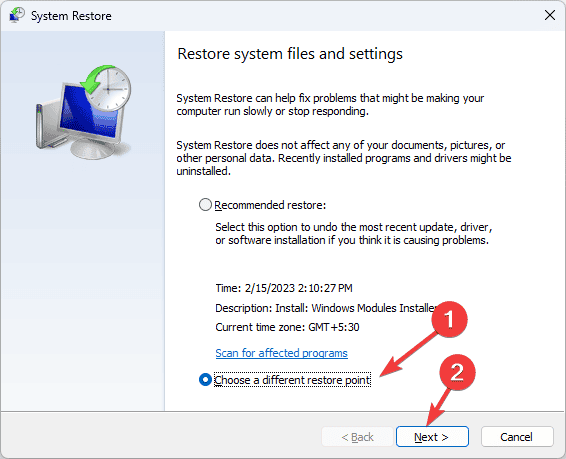
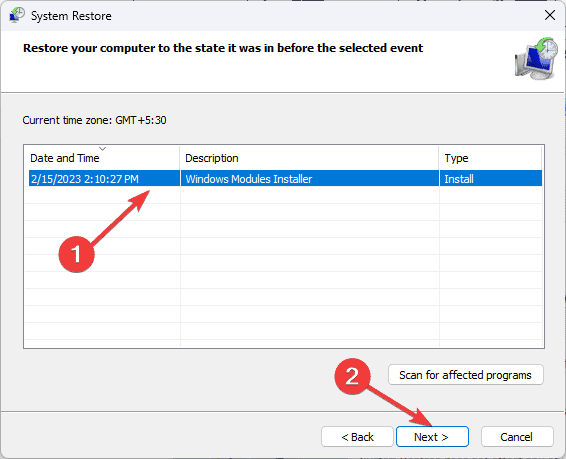
3. Perform a System Restore
- Click Start.
- Select All Programs.
- Navigate to Accessories > System Tools > System Restore.
- In the System Restore window, select Restore my computer to an earlier time, then click Next.
- Select a restore point from the list provided and click Next.
- Click Finish to start the restoration process.
- Next, click Yes to confirm the action.
4. Restore or repair your server
 NOTE
NOTE
4.1 Preparing the device
- Insert the Microsoft Windows NT Server CD into the CD-ROM drive and reboot the server.
- Press Ctrl+I when you are prompted during Boot.
- Choose Advanced Functions.
- Select Boot CD-ROM and INT13 Extensions.
- Set the BIOS Support for the Bootable CD-ROM to Yes.
- Select Exit three times, and power down the server.
- Press F6 when you see Setup is inspecting your computer’s hardware configuration message.
- Press S to specify mass storage media device, select Other, and press Enter.
- Next, press F8 at startup to start from the installation media.
4.2 Repairing or restoring the server
- Select your language and other preferences after the Windows Server files load, and click Next.
- On the following page, click Repair your computer. Remember not to select Install now as it will delete all configuration settings and all data on the system drive, then perform full system installation.
- On the Choose an option page, click Troubleshoot.
- Choose the current system.
- On the Select a system image backup page, choose one of the options and click Next:
- Use the latest available system image (recommended)
- Select a system image
- Follow the on-screen instructions to complete the process.
- After the server is successfully restored, remove the installation DVD and restart the server.
If you face this problem on Windows 10 and want to fix it via a clean install, check out this quick guide to performing a Windows 10 repair upgrade.
In case nothing works for you, and you still see the END_OF_NT_EVALUATION_PERIOD error, we advise you to contact Microsoft Support and tell them detailed information about the issue and mention all the troubleshooting steps you tried to take to get further help.
To avoid these issues in the future, you should always ensure that you have activated Windows after reinstallation of Windows or after installing a new piece of hardware.
If you have any suggestions or concerns about the END_OF_NT_EVALUATION_PERIOD Blue Screen of Death error, feel free to mention them in the comments section below.

User forum
0 messages