Solved: Epson FastFoto ff-680w images not showing
Reset scanner to default settings
4 min. read
Published on
Read our disclosure page to find out how can you help Windows Report sustain the editorial team. Read more

If your Epson FastFoto ff-680w images are not showing when scanned, it’s probably a case of unsupported image formats, outdated drivers, or corrupt files.
When scanning, ensure you’ve set the correct image folder path to prevent your images from getting lost and avoid trouble locating them.
What can I do if my Epson FastFoto ff-680w images are not showing?
1. Check your connection status
- Reboot your scanner by turning it off, waiting 10 seconds, and then unplug the power cable from your scanner.
- Then, turn off your computer.
- Reconnect the scanner power cable and turn the scanner on again.
- Next, unplug the power cable from your network router and wait 10 seconds before connecting it back again.
- When your Internet connection is back again, turn on your computer.
- After that, reconnect your scanner and this time, try connecting to a different USB port in case the previous one was faulty.
If the issue is cable or USB port-related, consider a wireless printer option.
2. Run the Printer troubleshooter
- Hit the Windows key and click on Settings.
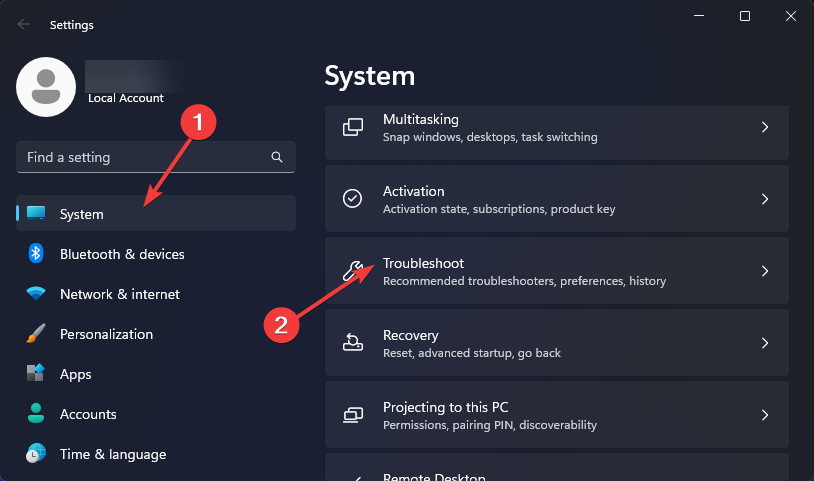
- Select System on the left pane, then click Troubleshoot on the right.
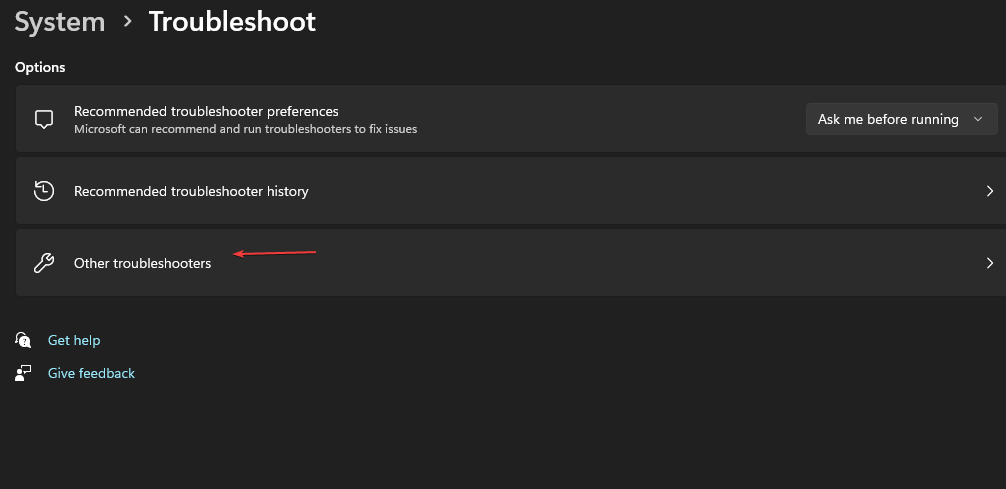
- Click on Other troubleshooters.
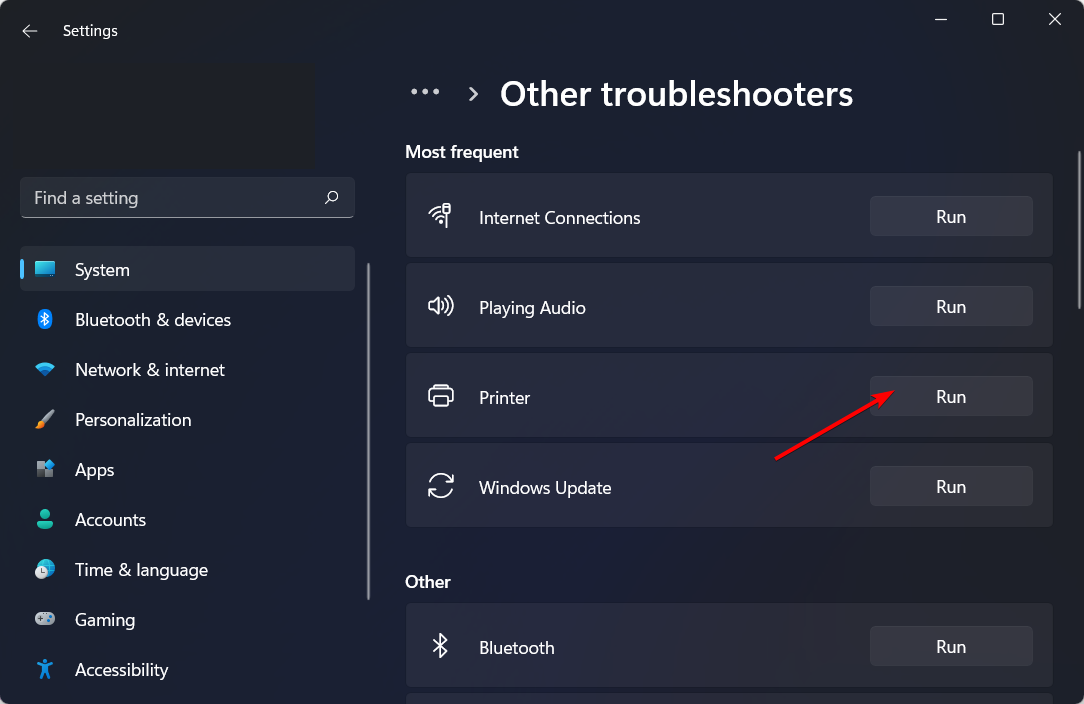
- Find the Printer troubleshooter and click the Run button next to it.
3. Check for Windows updates
- Hit the Windows key and click on Settings.
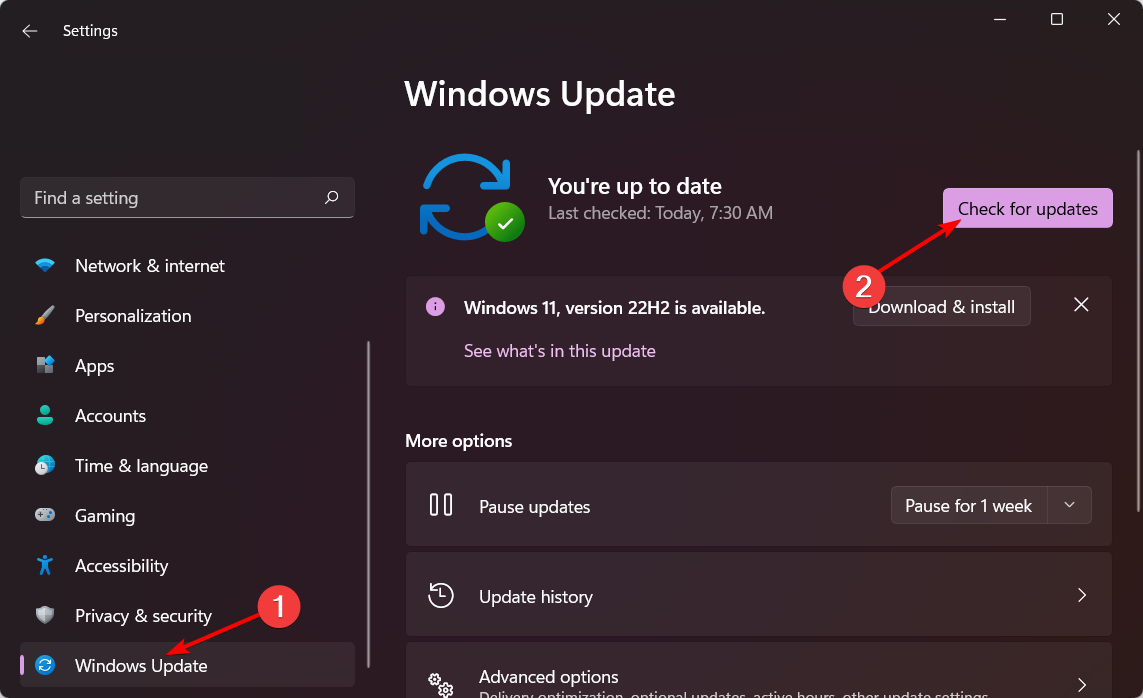
- Click on Windows Update and select Check for updates.
- Download and install if available.
It is possible that your Epson images are not showing because your PC doesn’t have the latest version of Windows making the software incompatible. Some printers fail to print after a Windows upgrade so you may have to rollback an update or use older drivers.
4. Update scanner drivers
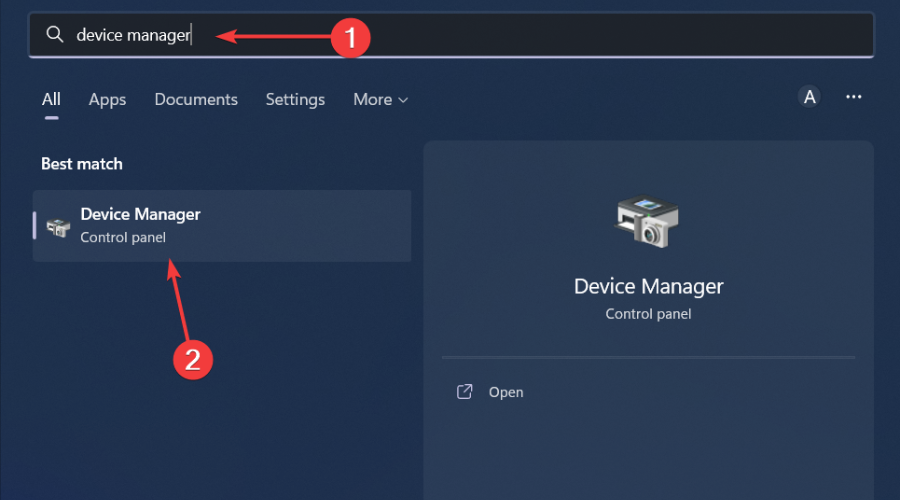
- Hit the Windows key, type Device Manager in the search bar, and click Open.
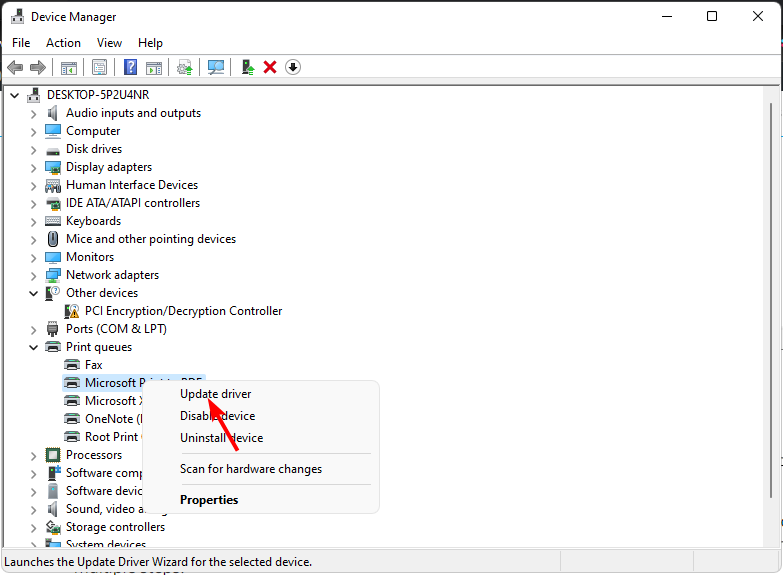
- Navigate to Imaging devices and locate your Epson FastFoto ff-680w scanner.
- Right-click on it and select Update driver.
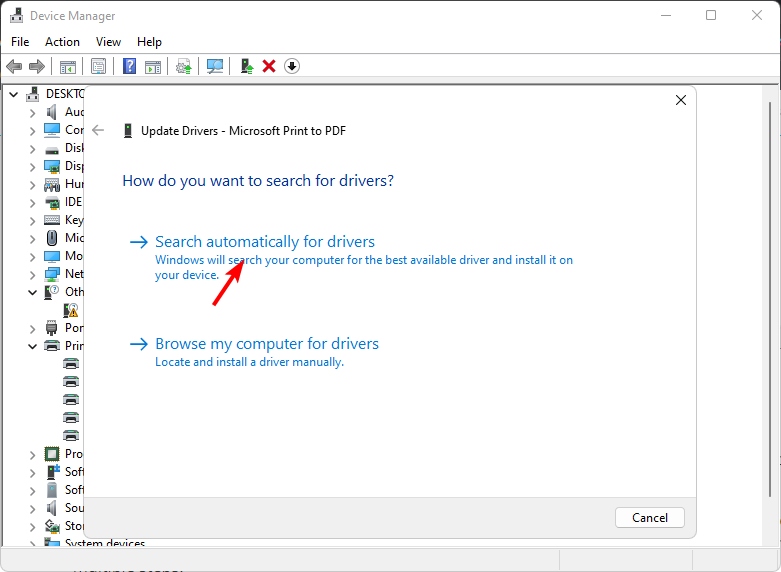
- Select Search automatically for updated drivers.
- Windows will find the most suitable driver and recommend you install it.
5. Disable your antivirus/firewall temporarily
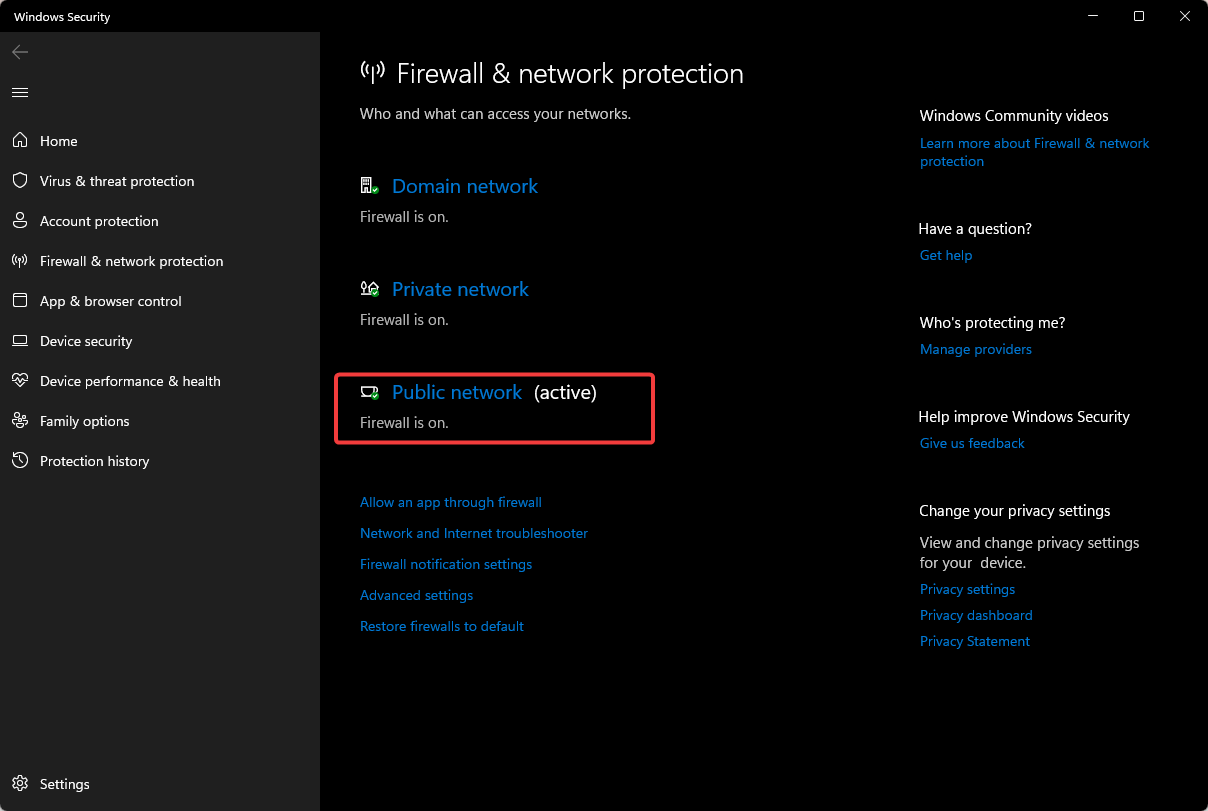
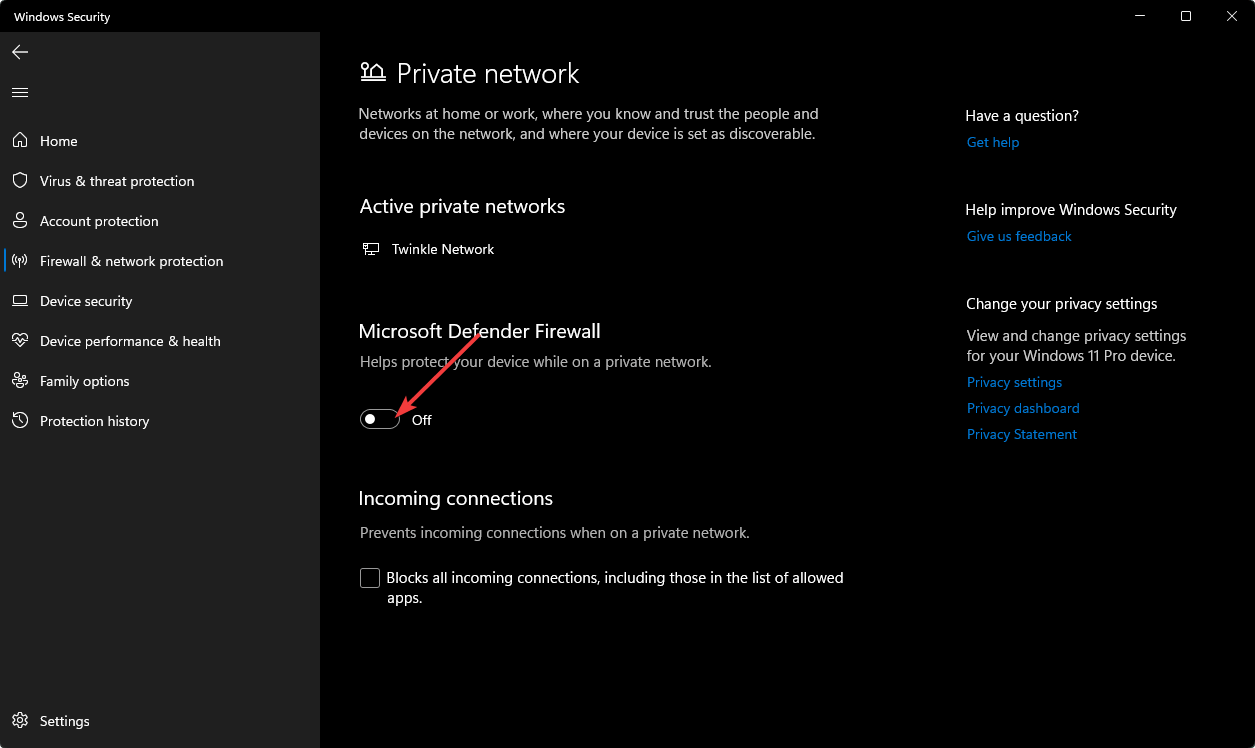
- Hit the Start menu icon, type Windows Security in the search bar, and click Open.
- Click on Firewall & network protection, then select Public network.
- Locate Microsoft Defender Firewall and toggle the off button.
If disabling the firewall doesn’t fix the issue, check out other ways to resolve your firewall blocking your printer connection.
6. Reinstall the FastFoto software
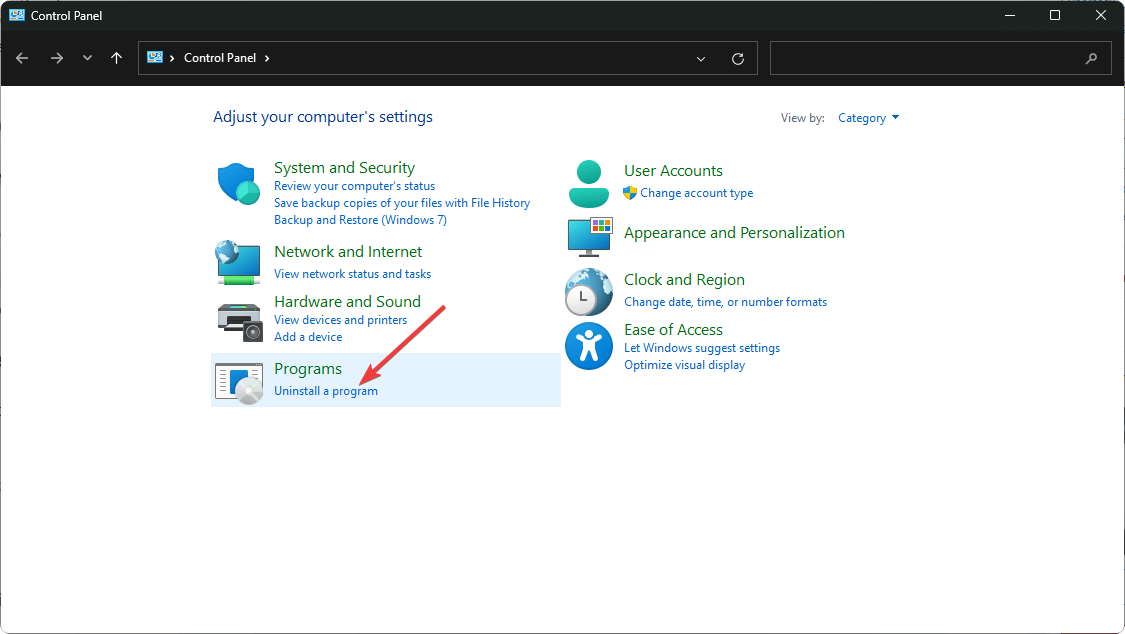
- Click on the Start Menu icon, type Control Panel on the search bar, and click Open.
- Select Uninstall a Program under Programs.
- Find the FastFoto app,click on it, and select Uninstall.
- Confirm uninstallation in the next pop-up. Also, remove software leftovers before installing the app again.
- Go to the Epson website and download the app again.
7. Remove and re-add the Epson scanner
7.1 Remove scanner
- Press the Windows key + I keyboard shortcut for opening Settings.
- Click Bluetooth & devices on the left of Settings then select Printers & Scanners to view your added printers.
- Double-click the Epson FastFoto ff-680w scanner you want to remove to open settings for it then press the Remove button.
- Click Yes to confirm you want to remove the scanner.
7.2 Re-add the scanner
- Click the taskbar’s magnifying glass icon.
- Type Control Panel within the search tool that opens and select Control Panel to open that window.
- Next, select Large Icons on the View by drop-down menu.
- Click Devices and Printers in the Control Panel.
- Then press the Add a printer button.
- Choose the Epson FastFoto ff-680w scanner on the Add a device window, and press the Next button to install it.
- Press the Finish button after the scanner has been added.
If removing and re-adding the scanner doesn’t resolve the connection issue, reset the scanner to default settings.
8. Reset the Epson scanner
- Turn the scanner off.
- Press and hold the reset button on the back of the scanner. The reset button could also be at the front depending on your scanner model.
- Still holding the reset button, turn on the scanner.
- Wait for the warning printout, then release the reset button.
- A few seconds later, another sheet will print out with the default IP address, and your Epson scanner will have been successfully reset.
- Try connecting again and see if it is now connecting to your PC.
Hopefully, one of these solutions will help you recover your images and view them when scanned. Elsewhere, if you connect your printer to your PC but the printer fails to print, see what to do in our dedicated article.
Aside from your scanner not showing images, network printers also fail to connect to your Wi-Fi at times so check out our detailed article on how to fix this issue.
That’s a wrap from us but do let us know which of the above solutions worked out for you in the comment section below.







User forum
0 messages