Epson setup cannot find the printer? Here’s what to do
6 min. read
Updated on
Read our disclosure page to find out how can you help Windows Report sustain the editorial team. Read more
Key notes
- If the setup file is corrupted or missing, the Epson printer setup cannot find the printer.
- Note that you have to download the setup from the official Epson website.
- Internet connection is needed to register and use the setup locally successfully.
- Before you register a printer or create an account, you are required to connect the printer to the network so that it can be used from your PC.
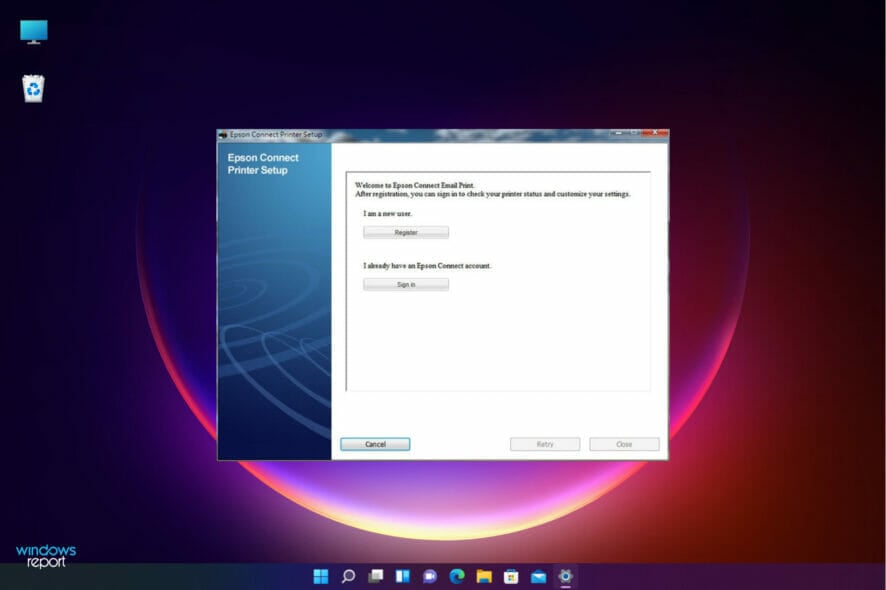
Some users fail to register the Epson printer setup correctly when installing Epson printers on their systems. This makes them not have the best user experience.
Whether it’s a wired or wireless printer not connecting to your Windows PC, the problem can be due to technical issues during the setup.
Additionally, you can experience this inconvenience while setting up a connection, and some users might wonder why they can’t use it on Windows 11. Luckily, there are several ways you can resolve the issue.
Why does the Epson printer setup cannot find the printer on Windows 11?
The reasons why your printer setup is not connecting to the printer can range from technical to network issues and here we are to show you how to fix them. Here are some of them:
➡ The Epson printer is not connected
Perhaps it’s a simple solution that we always ignore. Your printer might be turned off, or it’s not correctly connected to the power source.
The best way to know if the printer is connected is a green light that it illuminates, or if it’s locally shared, you will see the connection icon on your Windows 11’s taskbar.
➡ Outdated or corrupted software
The print software is a communication conduit between your printer and the computer. Note that it tells the printer which documents to print. This software can be a problem, especially for network printers.
Without the printer software driver, you can’t send document data for printing. Therefore, it is crucial to check the printer driver and see if it’s updated. If you recently updated your OS, you must also update the printer driver.
➡ Disabled File and printer sharing option
The File and printer sharing option is disabled on Windows 11. So, you need to enable it to allow Epson printer setup to detect the printer – there is no way a computer can access the printer if this option is disabled.
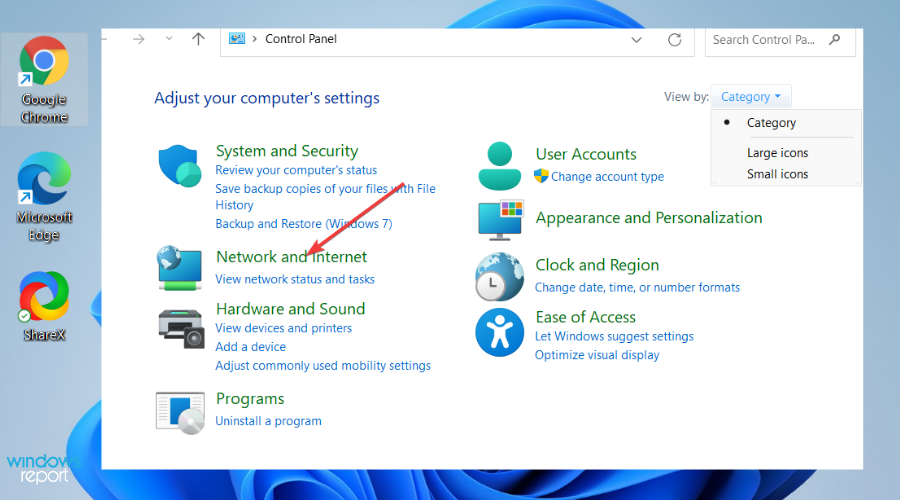
To turn on File and printer sharing option, use the following steps:
- On the left side of the window, you will see View by. Just choose Category from the drop-down menu.
- Select Network and Internet.
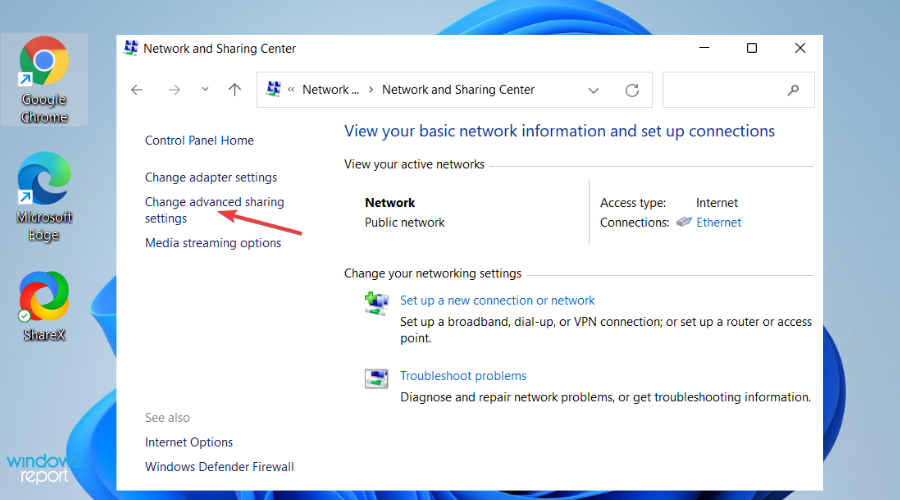
- Double click on the Network and Sharing Center, then Change Advanced Sharing Settings.
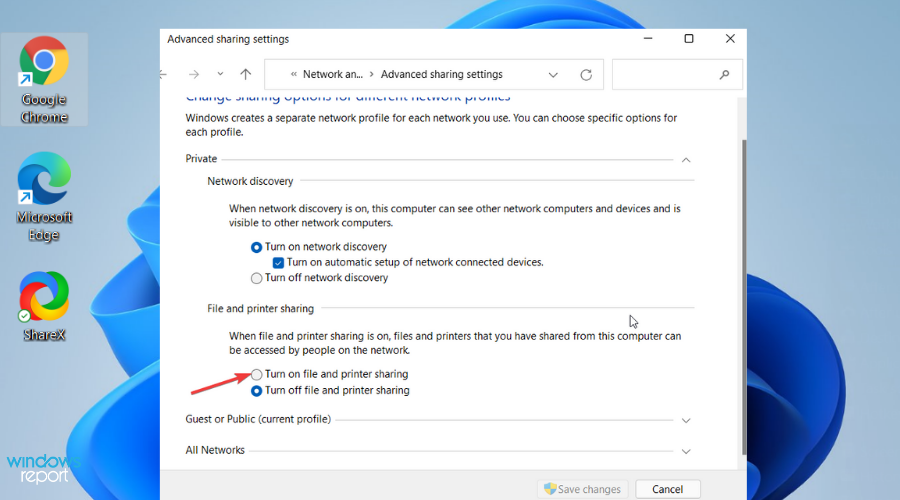
- On this page, navigate to Private.
- Under the private option, click on the File and printer sharing to enable it.
Do not enable File and printer sharing for the public network. This will expose your computer data to other users on the same shared network, inviting malicious attacks and data theft.
➡ Not connected to the local network
Maybe the reason why your Epson printer setup cannot find a printer is disconnected WiFi or cables. Ensure all cables are correctly connected, your Wi-Fi is on, and that your password hasn’t changed.
What can I do if the Epson printer setup cannot find the printer?
1. Uninstall and reinstall your printer
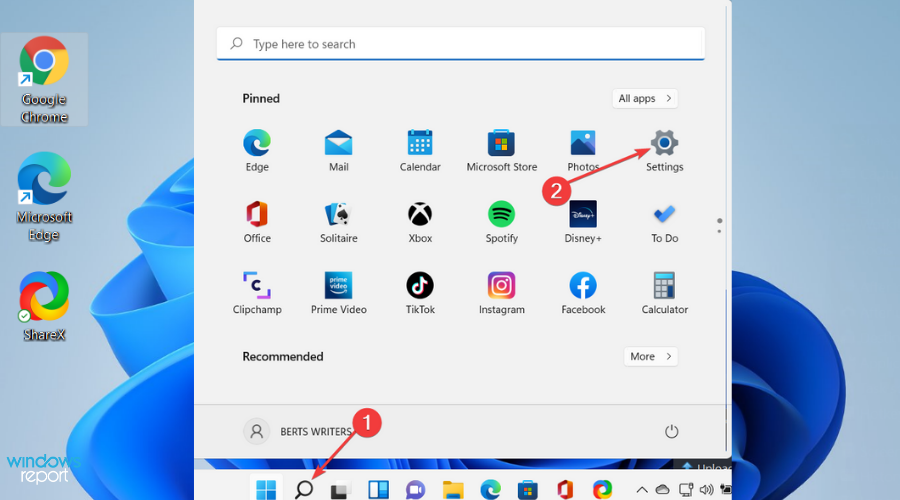
- Click on the Start button and select Settings.
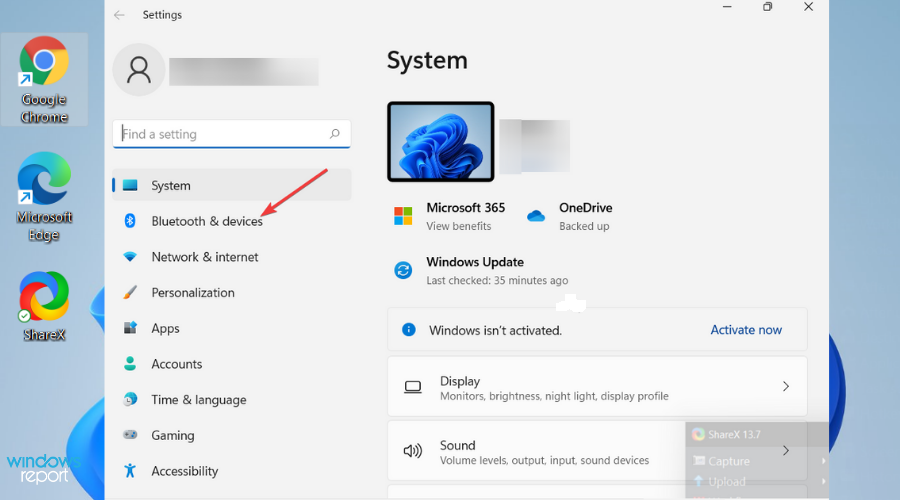
- Choose Bluetooth and Devices on the Settings window.
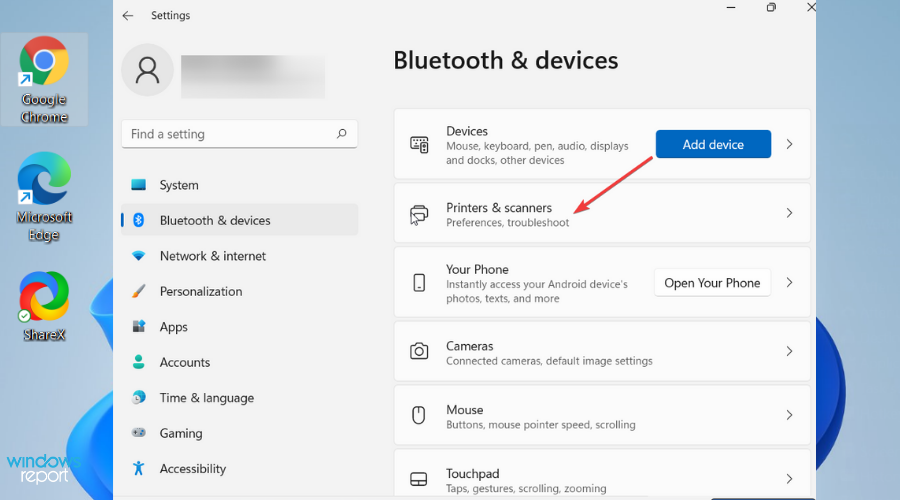
- On the left side, select Printers & Scanners.
- Select your printer on the Printers and Scanners window and click on Remove device.
To reinstall your wireless printer on Windows 11 PC:
- Click on the Start button. Select Settings and then choose Bluetooth and Devices.
- Select Printers & Scanners on the left side of your screen.
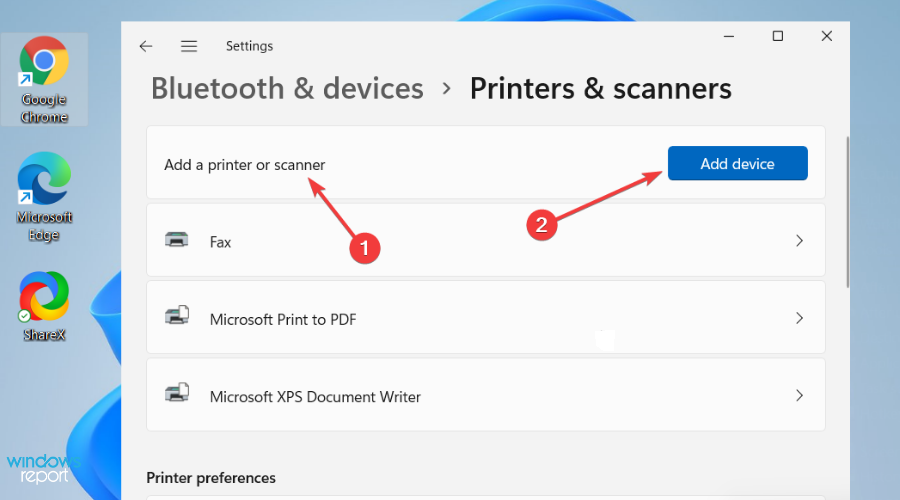
- Select Add a printer or scanner. Wait for your PC to find available printers. Choose the one you want and click on Add device.
Your Windows 11 PC should find all the printers that are turned on and connected to your network. The available printers on your network include wireless printers, Bluetooth printers, or those connected to a computer on the shared network.
However, you might need permission to install some printers on the network connection.
Make sure your computer is connected to the same network as the printer, especially if you use wireless access points, multiple wireless routers, or extenders with different SSIDs. To test if your printer is working, you can print a test page to ensure it’s working correctly.
To reinstall your local printer on Windows 11 PC:
- Click on the Start button. Select Settings and then choose Bluetooth and Devices.
- Select Printers & Scanners on the left side of your screen.
- Select Add a printer or scanner. Wait for your PC to find available printers. Choose the one you want and click on Add device.
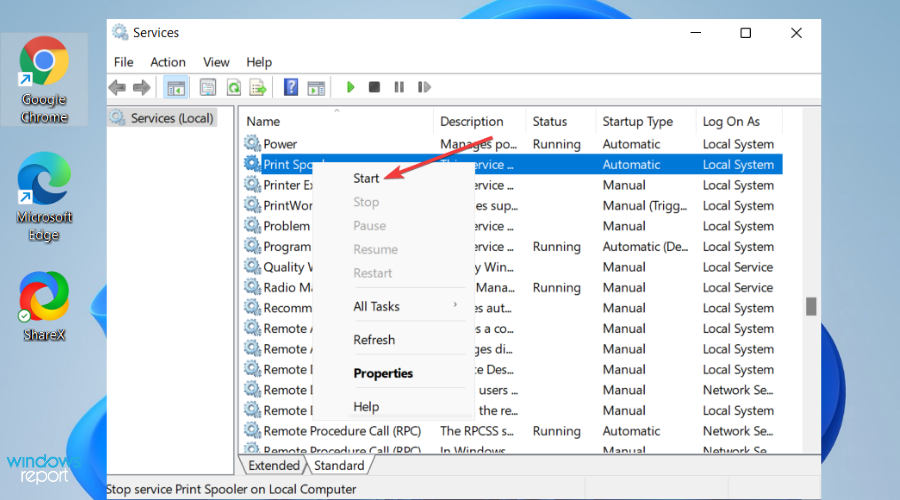
2. Clear and reset the print spooler
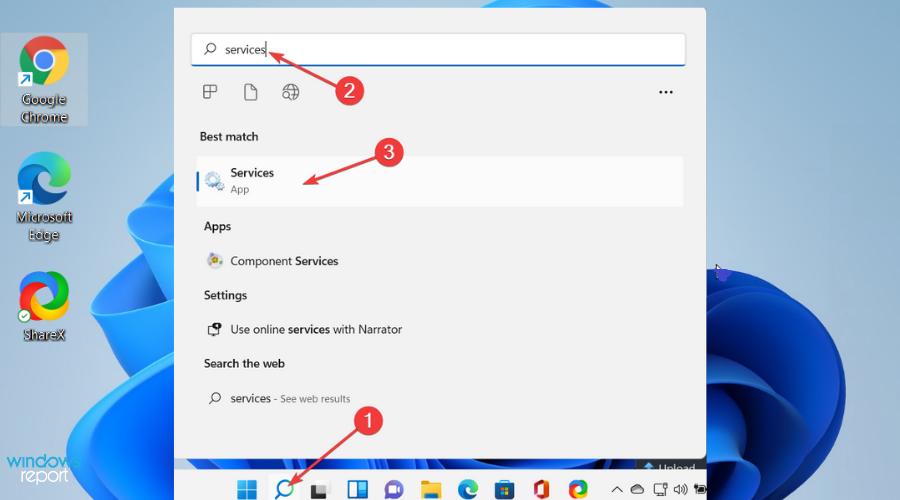
- Type Services on the search box. Select Services on the search results.
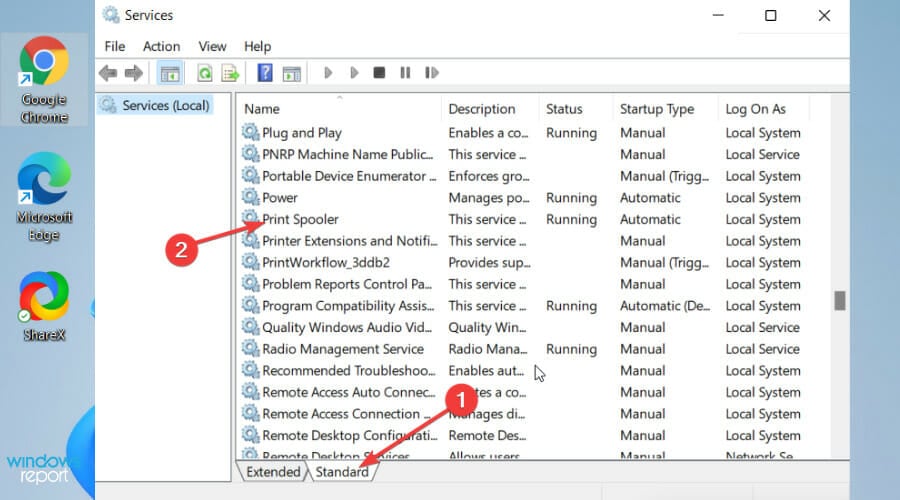
- Click on the Standards tab, then double-click on the Print spooler on the list.
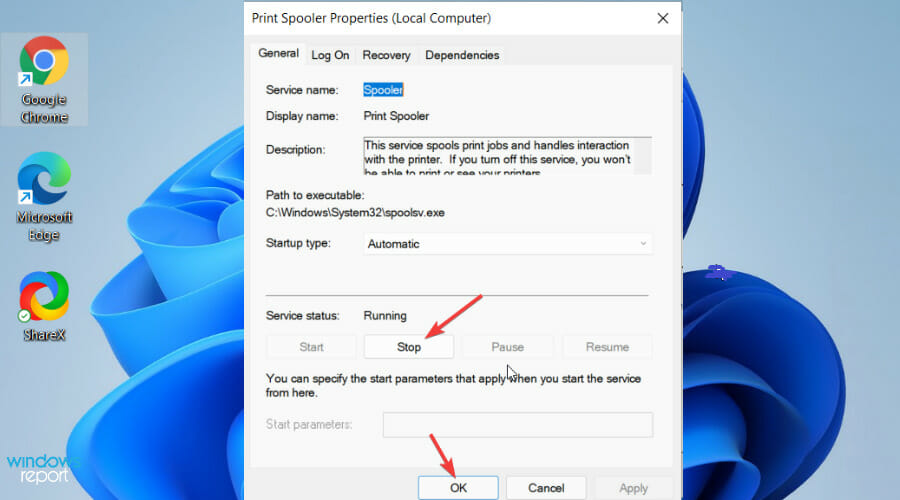
- Click Stop and then choose OK.
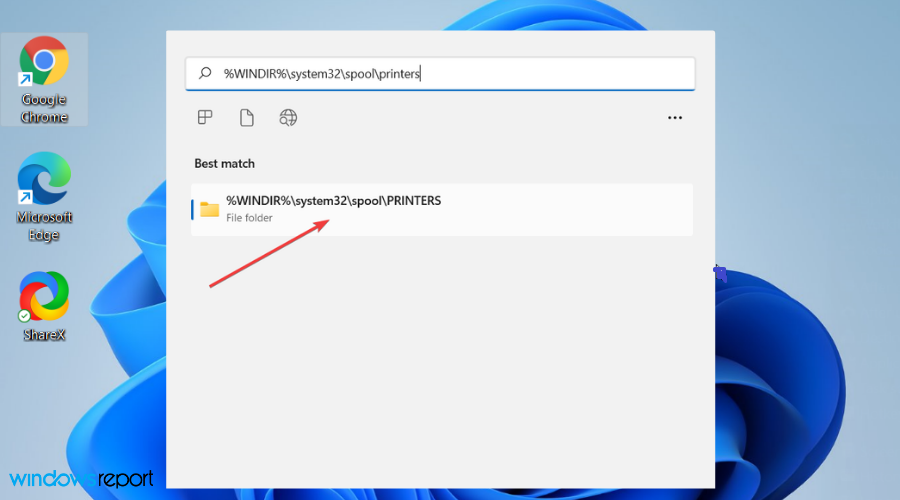
- Enter the following in the search and then select the correct result:
%WINDIR%\system32\spool\printers - Type Services on the search box. Select Services on the search results.
- Click on the Standards tab, then double-click on the Print spooler on the list.
- Click Start and select Automatic in the Startup type dialog box. Click OK.
Find out more about the Epson printer setup on Windows 11
As we mentioned earlier, some users have had problems with the Epson printer setup because they didn’t install the software correctly. Here is the best way to correct that:
- Ensure the Epson printer is connected to the Wi-Fi or Ethernet before proceeding with this setup.
- Press the power button on your printer to switch it on, then open the official Epson website to download the Epson printer setup utility.
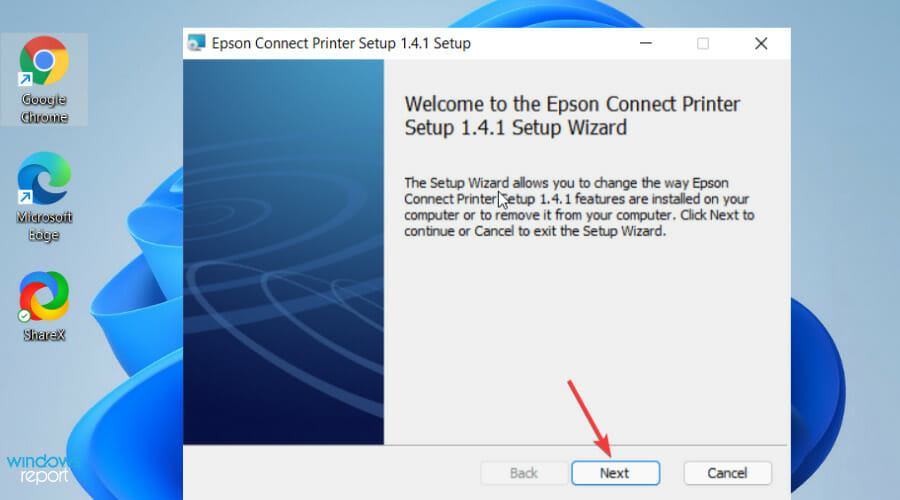
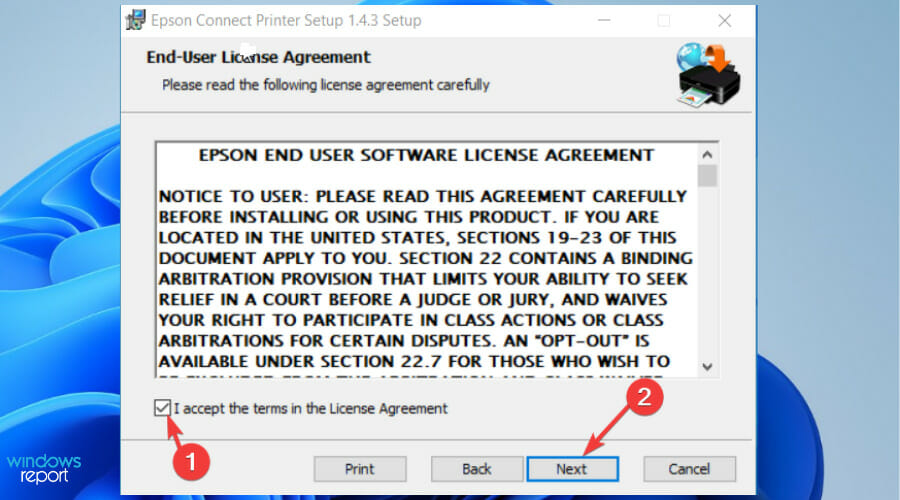
- Once the file is downloaded, open and run it. The End-User Licence Agreement will show up— check the box against I accept the terms in the License Agreement button. Click Next to continue.
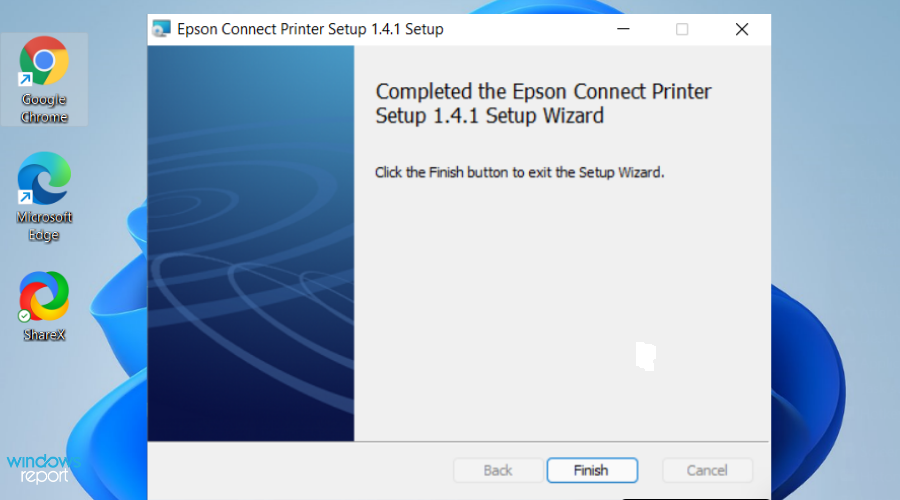
- Click Install, then Finish. Once the installation is over, open the program.
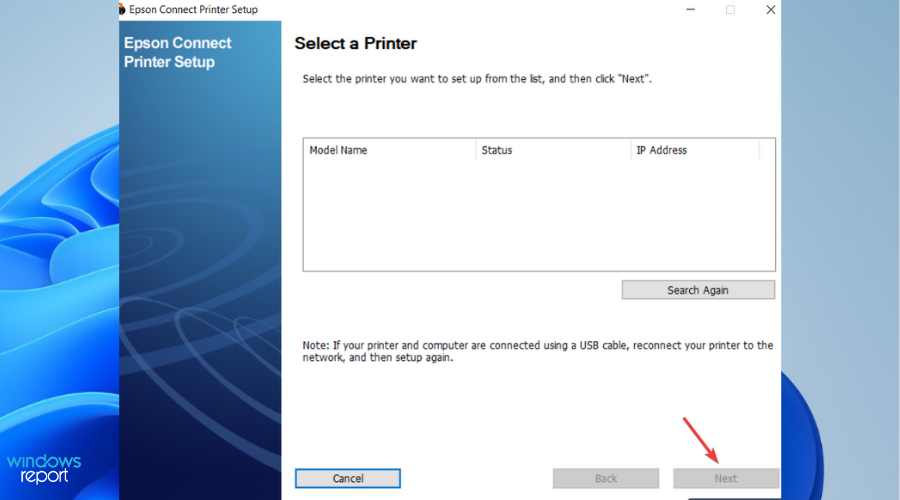
- On the setup window, choose Epson product from Select a Printer.
- Click Next and then Printer Registration on the new window. Click Next.
- Accept the License agreement and privacy statement by clicking Agree. Hit on Next.
- Follow the onscreen direction by clicking Next and Finish.
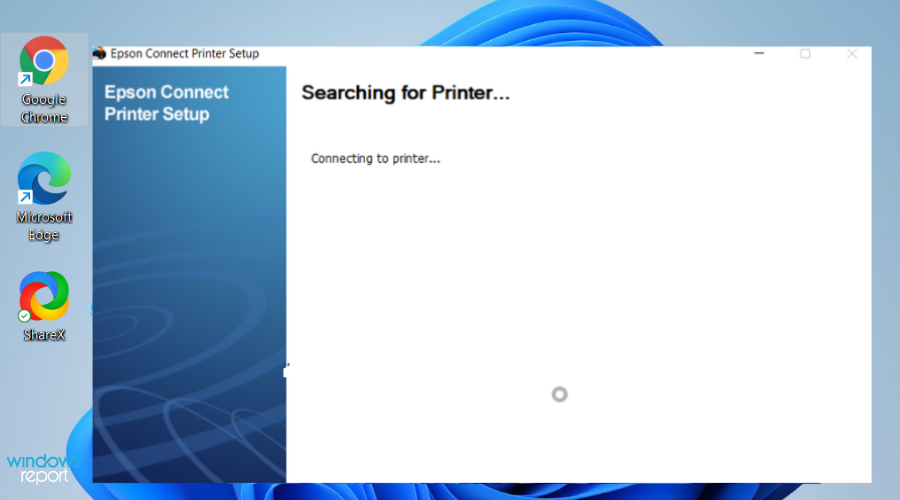
- Epson Connect setup will search for all available printers on your network. Click on your preferred printer from the list then Next to connect and start printing.
You may also be interested in knowing why your printer is not working on Windows 11 or what to do if the printer is not responding.
We hope the solutions in this article solved your problem. We would love to hear from you so don’t hesitate to use the comments section below.





User forum
0 messages