What is Error 0x800701b1 & How to Fix it
Try deleting the faulty boot entry or run CHKDSK for the USB drive
Key notes
- The error 0x800701b1 is an installation error that pops up when installing Windows OS.
- It can also appear when you are performing normal tasks such as copy or pasting.
- You can try connecting the USB drive to a different port or convert the disk to GPT.

So, there are a bunch of user reports that claim to have come across the error 0x800701B1 in two scenarios.
Some users have reported facing this issue when they perform normal tasks such as copying/pasting, moving files from their PC to HDD, etc., whereas there are some who have reported facing this issue when installing a new Windows update or installing the OS.
What is causing error 0x800701B1 on my Windows PC?
After some research, we have found a bunch of reasons why users are facing the error code 0x800701B1 on their PCs:
- Faulty port: Chances are the port where you have connected your USB drive, or HDD is faulty.
- The USB port is not sufficient: You might have connected the HDD or the USB drive to a USB 2.0 port, which is causing low transfer speeds and power output.
- BIOS settings are changed: You might be booting your PC in a different BIOS mode.
- Outdated disk driver: Outdated software for the disk drive that you have connected might be pretty well behind the error 0x800701B1.
- System file error: Some important system files might have gone missing or corrupt, which is causing the issue.
How can I fix the error 0x800701B1 on my PC?
Here are a few solutions that we would advise you to apply before jumping onto the advanced ones:
- Try connecting the HDD or the USB drive to a different port and check if this resolves the issue or not.
- Perform a simple restart, as it can fix temporary glitches or bugs without you needing to put in much effort. Restart issues are unpleasant, but if that’s the case, rest assured that you can solve them.
- Remove other accessories connected to your PC that might be causing a conflict.
- Scan your PC for a virus or malware. You can check out our guide that lists some of the best antiviruses for your PC.
Now let us move on to the advanced troubleshooting methods that would surely help you resolve the error 0x800701B1.
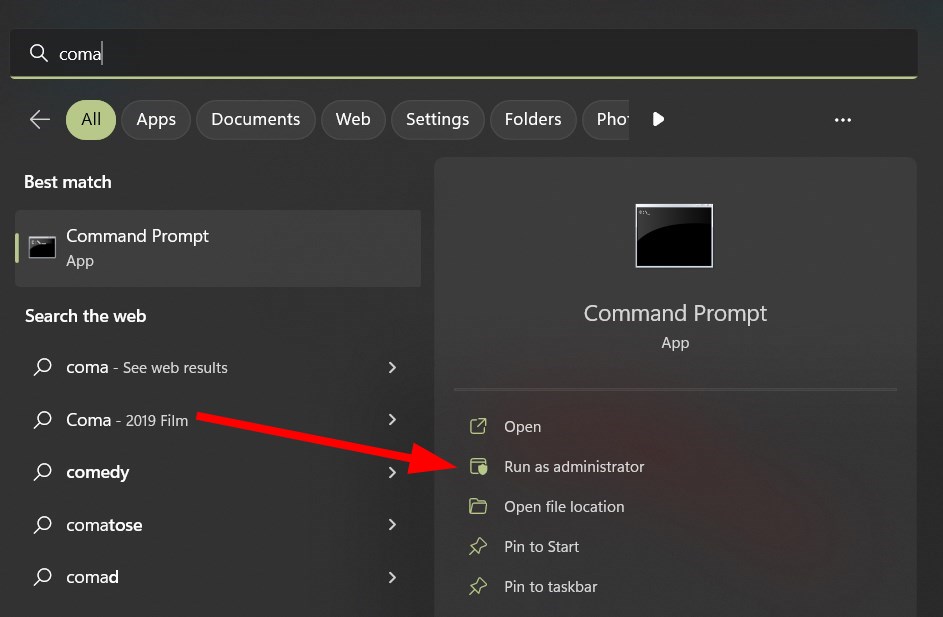
1. Delete the faulty boot entries
- Open the Start menu.
- Search for Command Prompt and run it as an administrator.

- Type in the below command and press Enter.
bcdedit /export c:\boot_config_backup.bcd
- After executing the above command, type the below and press Enter. This will load all the bootloaders currently on your system.
bcdedit /v
- If you can locate more than one Windows installation, then you need to select the identifier of the bootloader and execute the below command.
bcdedit /delete {identifier} - Restart your PC and check if this resolves the issue or not.
2. Convert the disk to GPT
For users facing the error during Windows installation
- Force shutdown your PC.
- You can press the F8 key to enter the Advanced Troubleshooting mode or restart your PC 3-4 times to let it automatically enter the mode.
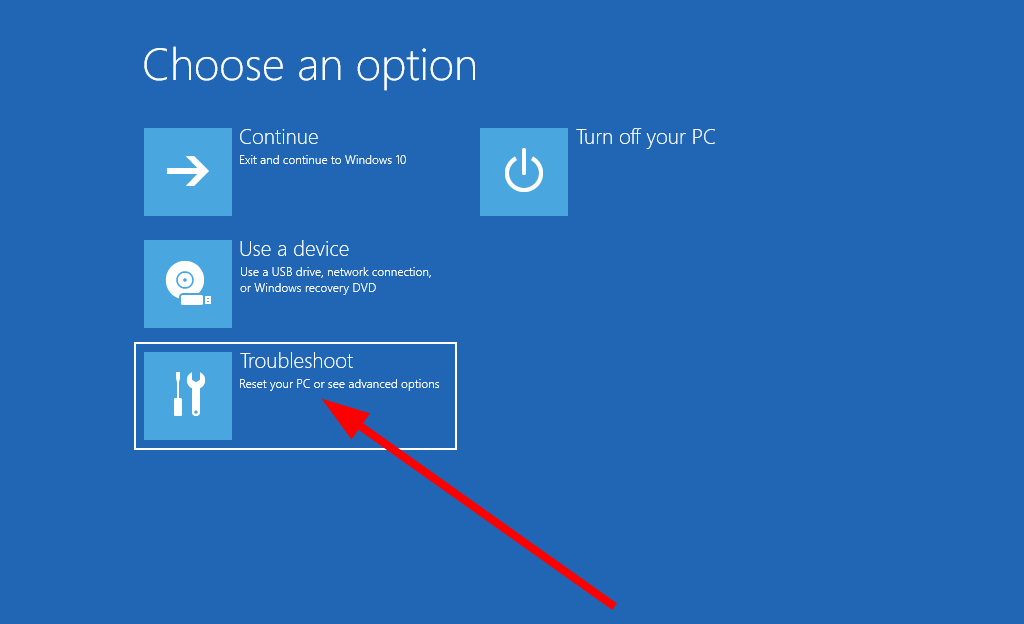
- Choose Troubleshoot.

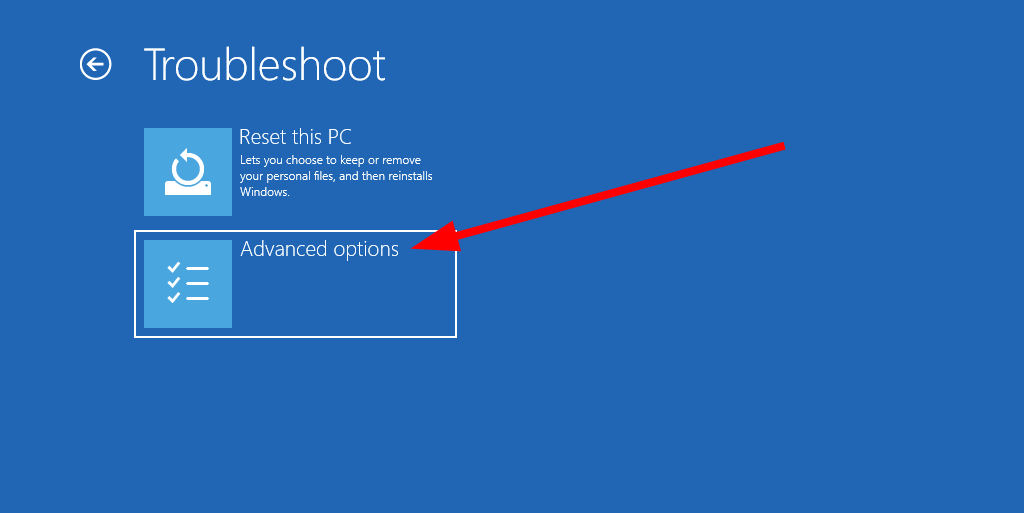
- Select Advanced options.

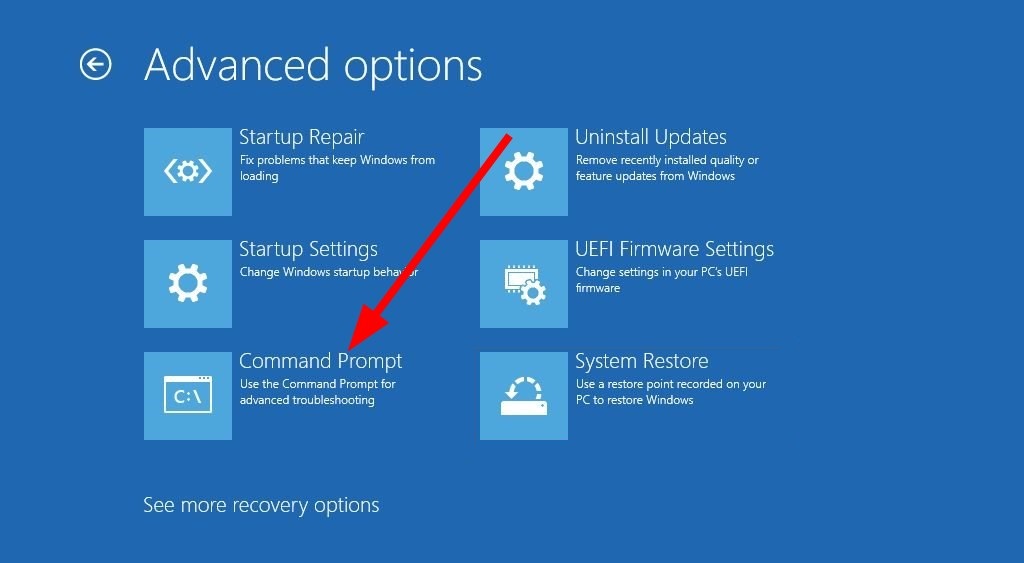
- Select Command Prompt.

- Type the below commands and hit Enter after each.
diskpartlist disk - Execute the below command.
select disk #(replace the # with the number of the disk drive you wish to convert) - Type the below commands and press Enter after each.
cleanconvert gpt - Exit the command prompt and let your PC boot up.
For other users
- Open the Start menu.
- Search for Command Prompt and run it as an administrator.
- Type the below command and hit Enter.
diskpartlist disk - Execute the below command.
select disk #(replace the # with the number of the disk drive you wish to convert) - Type the below command and press Enter.
cleanconvert gpt - Exit the command prompt and restart your PC.
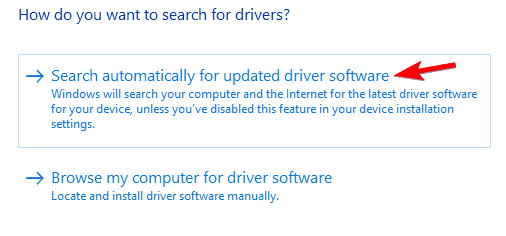
3. Update the driver
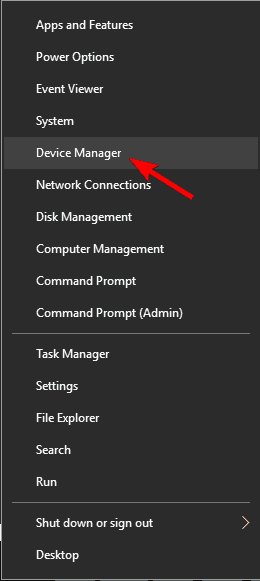
- Open the Start menu.
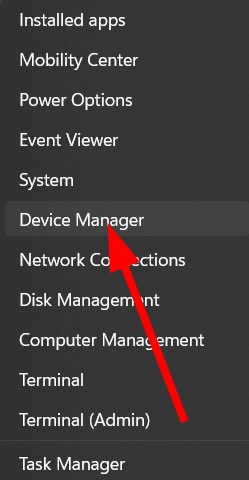
- Open Device Manager.

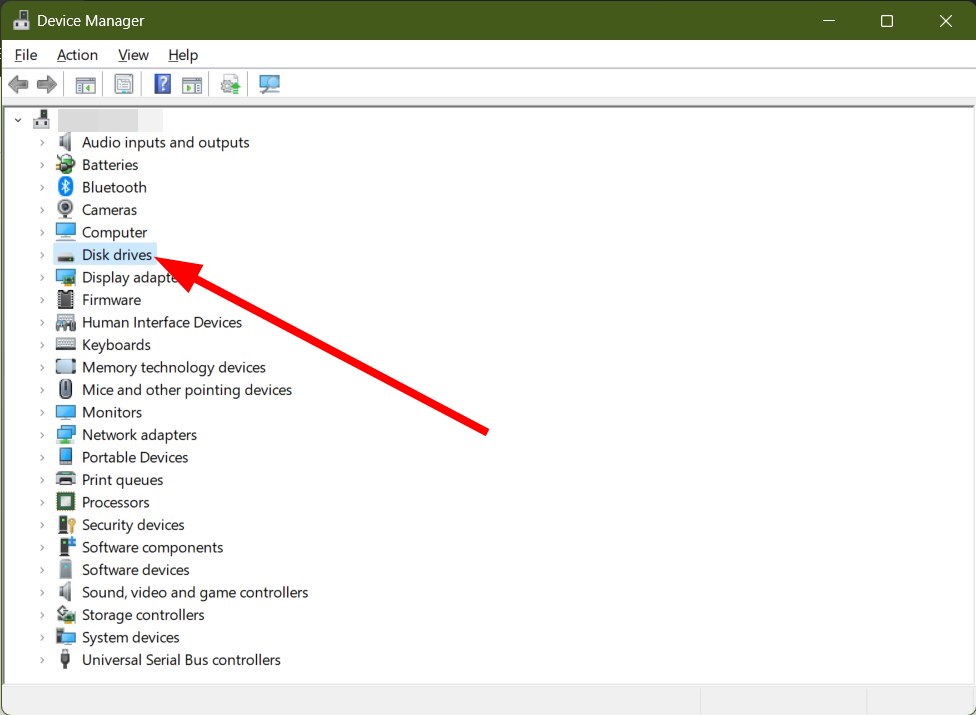
- Expand the Disk drives section.

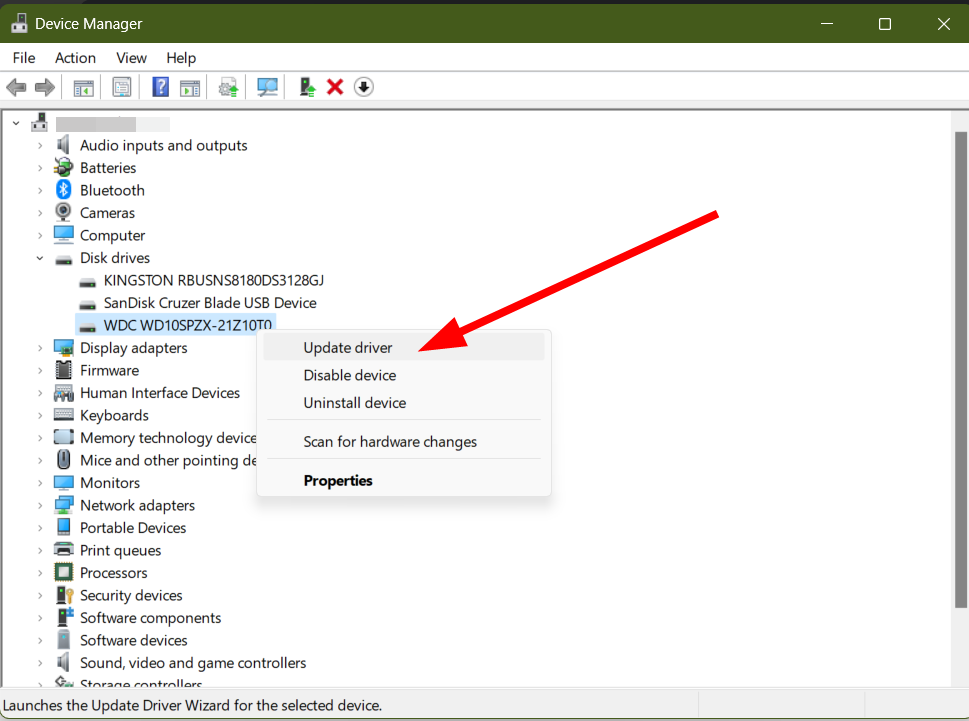
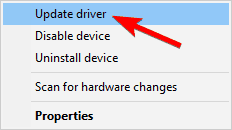
- Right-click the device and choose Update Driver.
- Select Search automatically for driver software.

- Your system will check if there is a new update available for the drive and prompt you to install it in case it finds one.
You can also visit the manufacturer’s website for the latest drivers. After you have updated the driver, see if this resolves the issue or not.
Alternatively, to ease out the process of manually updating drivers on your PC, you can use third-party software called Outbyte Driver Updater. Outbyte Driver Updater is a great solution to keep all drivers up-to-date with just a few clicks.
It not only helps you update drivers but helps restore missing or corrupt drivers, creates driver backups, and much more.

Outbyte Driver Updater
Get the best driver updates automatically with Outbyte Driver Updater.4. Perform CHKDSK for the USB drive
- Open the Start menu.
- Search for Command Prompt and open it as an administrator.
- Type the below command and press Enter.
chkdsk *: /f(Replace the * with the drive letter of your USB drive)
- Wait for the process to get complete.
- Restart your PC and check if you are still getting the error 0x800701B1 or not.
Running the CHKDSK utility will help you fix the corrupt or missing system file errors. It is easily accessible via CMD, and you can do it by following the above steps.
5. Tweak your drive’s security settings
- Open the File Explorer.
- Right-click on the problematic drive and select Properties.

- Switch to the Security tab.
- Click on Advanced.

- Click on Change in front of owner.

- Hit Advanced.

- Select Find now.

- Double-click on your username and click OK.
- Check the box for Replace All Child Object Permission Entries with Inheritable Permission Entries from This Object.
- Click on Apply and OK.
That is it from us in this guide. If you are facing Windows update error 0x8007371b, then you can check out our guide that lists some effective solutions to resolve it.
We also have a guide for fixing update error 0x80070026 in Windows 11. Let us know in the comments below which one of the above solutions resolved your issue.
Read our disclosure page to find out how can you help Windows Report sustain the editorial team. Read more


Improve this guide

User forum
0 messages