Here's how to fix error 0x800f080d on Windows 10/11
8 min. read
Updated on
Read our disclosure page to find out how can you help Windows Report sustain the editorial team Read more
Key notes
- Some users reported that the 0x800f080d error prevents them from updating Windows to the latest version.
- Remove problematic applications by using a reliable uninstaller software.
- Check your antivirus, as it may interfere with your system and cause this problem to occur.
- Reset Windows Update components by following our step-by-step guide below.

0x800f080d error usually appears when trying to install Windows Updates. Since this error prevents the installation of updates, it can be problematic, and in today’s article, we’re going to show you how to fix it.
Error 0x800f080d can be quite problematic, and it can prevent you from updating Windows to the latest version. Speaking of this error, here are some similar problems that users reported:
- DISM error 0x800f080d – Sometimes this error can appear while trying to run DISM scan. To fix it, create a new user account and check if that helps.
- 0x800f080d Windows 10 – There are many reasons why this error can appear in Windows 10, but if you encounter it, check your antivirus and make sure that it’s not interfering with Windows Update.
- 0x800f080d Windows Update –Sometimes Windows Update components aren’t working properly, and that can lead to this problem. To fix the problem, you just need to reset them using the Command Prompt.
0x800f080d error, how to fix it?
- Check your antivirus
- Try performing a Clean Boot
- Remove problematic applications
- Create a new user account
- Reset Windows Update components
- Perform a System Restore
Solution 1 – Check your antivirus
If you’re getting error 0x800f080d while trying to install the latest updates, the issue might be your antivirus. Having a good antivirus is important, but third-party antivirus can sometimes interfere with your system and it can cause this problem to appear.
To fix the issue, it’s advised to open your antivirus settings and try disabling certain antivirus features. In case that doesn’t work, it’s suggested to disable your entire antivirus altogether. If the issue is still present, try removing your antivirus completely and check if that helps.
Bear in mind that Windows 10 has its own antivirus, Windows Defender, so even if you choose to remove your antivirus, you will remain protected. If removing the antivirus solves the problem, we suggest that you consider switching to a different antivirus solution.
There are many good options available with plenty of up-to-date security features that protect your system on all fronts. We recommend you get an antivirus with a high detection rate so threats have no time to damage your system.
Solution 2 – Try performing a Clean Boot
Sometimes error 0x800f080d can occur due to third-party applications on your PC. Certain applications can interfere with your system, and that can lead to this and many other problems. Many applications will start automatically with Windows, so the issue will appear as soon as your system starts.
To find out which application is causing the problem, it’s advised to perform a Clean boot. This will basically disable all startup applications and services and allow you to pinpoint the cause. To perform a Clean boot, do the following:
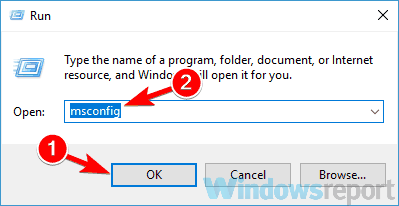
- Press Windows Key + R to open the Run dialog. Now enter msconfig, and click OK or press Enter.
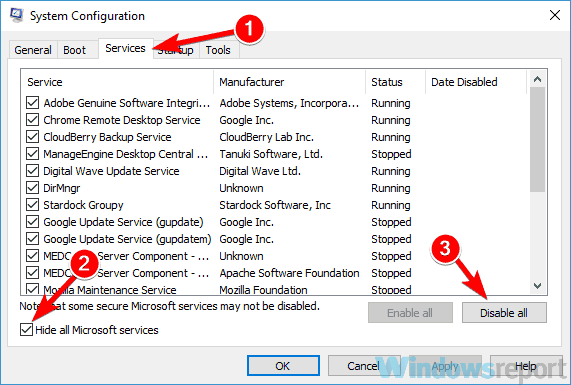
- When System Configuration window opens, go to the Services tab and check Hide all Microsoft services check box. After doing that, click Disable all button to disable all services on the list.
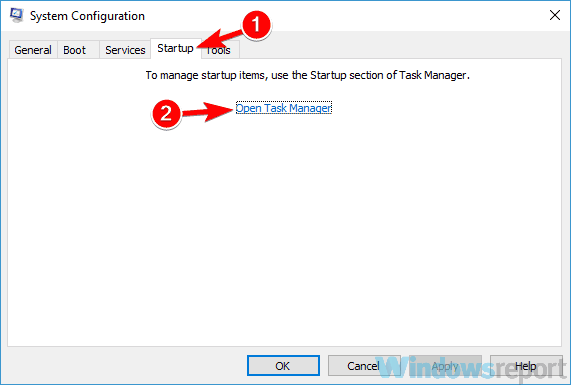
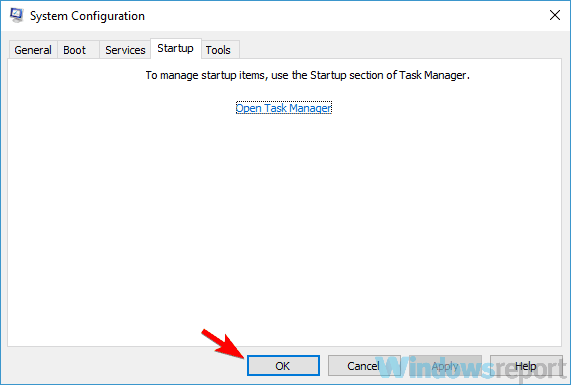
- Navigate to the Startup tab. Select Open Task Manager.
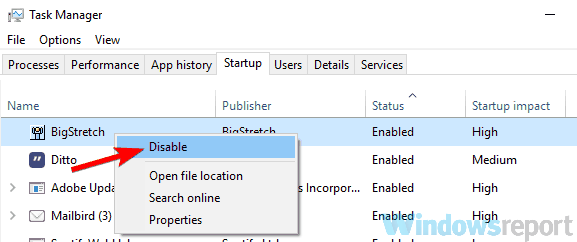
- Task Manager will appear, and you’ll see a list of startup applications. Right-click the first entry on the list and select Disable from the menu. Repeat this step for all startup applications.
- Once you disable all startup applications, head back to the System Configuration window. Click Apply and OK to save changes and restart your PC.
Once your PC restarts, check if the issue is still there. If the problem doesn’t appear, it’s rather likely that one of the startup applications was causing it. To pinpoint the cause, you need to enable applications and services one by one or in groups until you manage to recreate the issue and pinpoint the cause of the problem.
Once you find the problematic application, keep it disabled or remove it.
Solution 3 – Remove problematic applications
As we mentioned in the previous solution, sometimes third-party applications can cause error 0x800f080d to appear. If this problem started occurring recently, it’s possible that a third-party application is causing it.
To fix the problem, you need to check the list of all installed applications and look for any application that you don’t remember installing. Once you find such an application, uninstall it and check if that solves the problem.
Almost any application can cause this problem, but usually, the issue is caused by security or system optimization applications, so keep an eye out for those.
As for removing of applications, the best method to remove an application is to use dedicated uninstaller software.
In case you don’t know how uninstallers work, they remove all files and registry entries related to the application you want to uninstall.
By doing so, there won’t be any leftover files that can interfere with your system, and it will be as if the application was never installed.
Solution 4 – Create a new user account
Sometimes 0x800f080d error can appear if your user account is corrupted. This can happen for various reasons, and since there’s no straightforward way to repair a corrupted account, the best solution is to create a new user account. This is quite simple, and you can do it by following these steps:
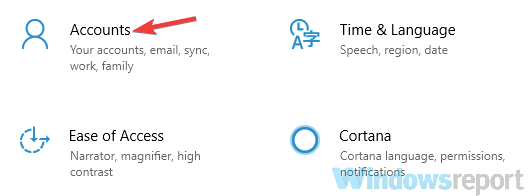
- Open the Settings app and head over to the Accounts section. To open the Settings app quickly, you can use Windows Key + I shortcut.
- Select Family & other people in the left pane. In the right pane, select Add someone else to this PC.
- Now choose I don’t have this person’s sign-in information > Add a user without a Microsoft account.
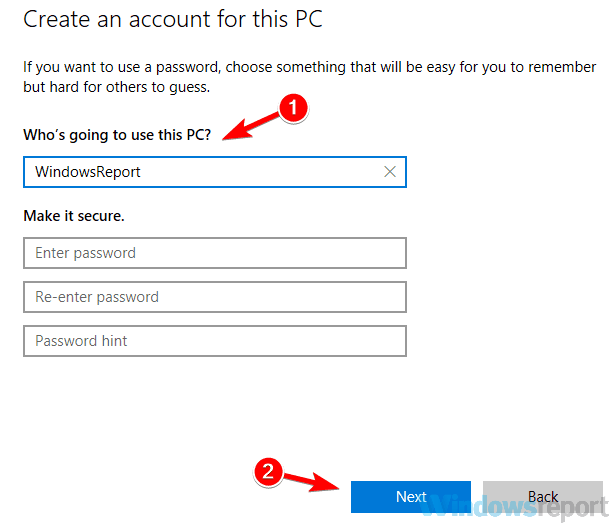
- Enter the desired username for the new account and click Next.
Once you create a new account, you’ll need to upgrade it to the administrative account. To do that, follow these steps:
- Open the Settings app and navigate to Accounts > Family & other people.
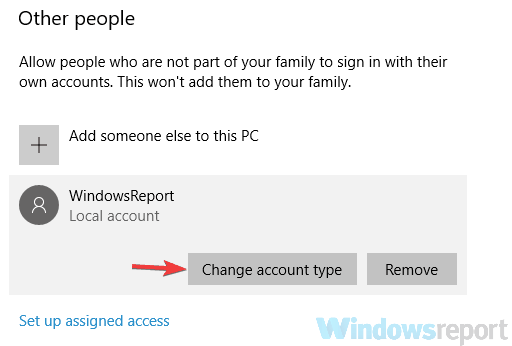
- Select the new user account and choose Change account type.
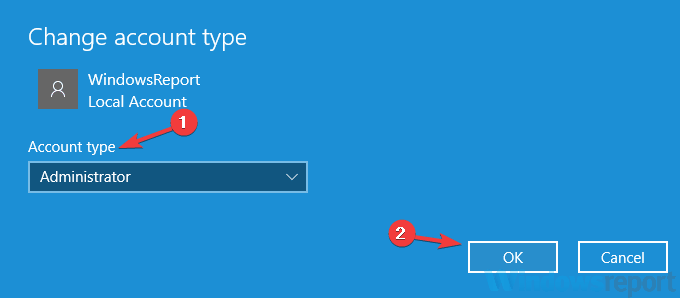
- Now change the Account type to Administrator and click OK.
After creating a new administrative account, switch to it and check if the problem is still there. If the issue doesn’t appear on the new account, move your personal files to it and start using it instead of your old account.
Solution 5 – Reset Windows Update components
If you’re having issues with Windows Update and you’re getting error 0x800f080d, perhaps you can fix the problem by resetting Windows Update components. In order for Windows Update to work properly, certain services need to be running, and if one of these services is having issues, you won’t be able to use Windows Update properly. However, you can fix this issue simply by resetting Windows Update components by doing the following:
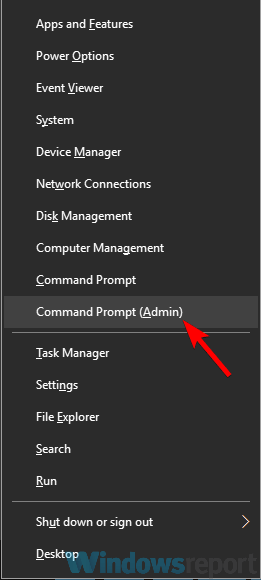
- Start Command Prompt as administrator. To do that, right-click the Start button and choose Command Prompt (Admin) or Powershell (Admin) from the menu.
- Once you start Command Prompt, run the following commands:
- net stop wuauserv
- net stop cryptSvc
- net stop bits
- net stop msiserver
- ren C:WindowsSoftwareDistribution SoftwareDistribution.old
- ren C:WindowsSystem32catroot2 catroot2.old
- net start wuauserv
- net start cryptSvc
- net start bits
- net start msiserver
- pause
Once the commands have been executed, check if the problem is still there. If you don’t want to run all these commands one by one, you can also create a Windows Update reset script and use it to automatically perform all these commands.
If the previous method didn’t work for you, you can also try running these commands in Command Prompt:
- REGSVR32 WUPS2.DLL /S
- REGSVR32 WUPS.DLL /S
- REGSVR32 WUAUENG.DLL /S
- REGSVR32 WUAPI.DLL /S
- REGSVR32 WUCLTUX.DLL /S
- REGSVR32 WUWEBV.DLL /S
- REGSVR32 JSCRIPT.DLL /S
- REGSVR32 MSXML3.DLL /S
By running these commands you’ll reregister Windows Update DLLs and that should hopefully fix the problem.
Solution 6 – Perform a System Restore
If you’re still having 0x800f080d error, perhaps the best course of action would be a System Restore. In case you’re not familiar, System Restore is a built-in feature of Windows that will restore Windows to an earlier state and fix many problems along the way. To perform a System Restore, do the following:
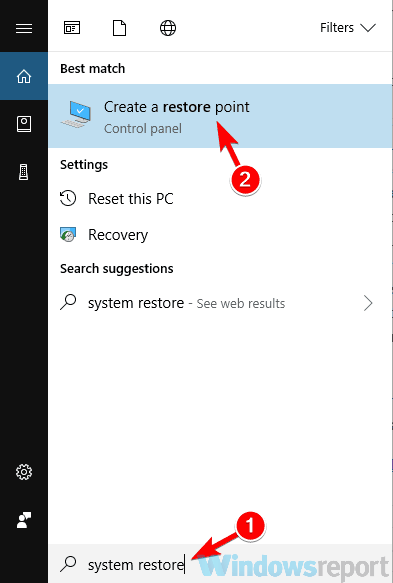
- Press Windows Key + S and enter system restore. Select Create a restore point from the list of results.
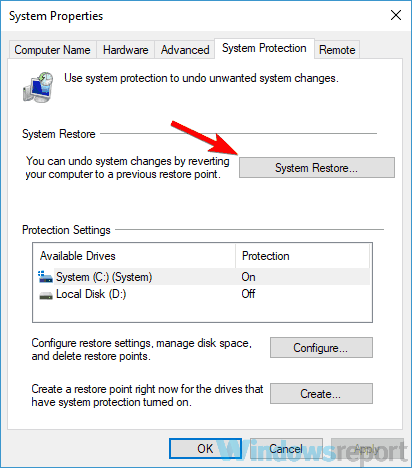
- Once the System Properties window appears, click the System Restore button.
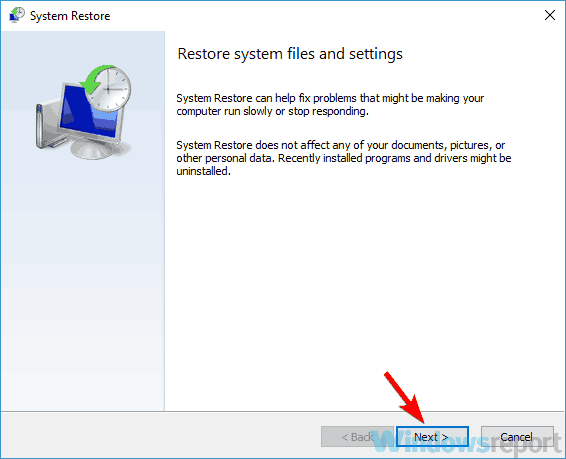
- System Restore window will appear. Click the Next button to proceed.
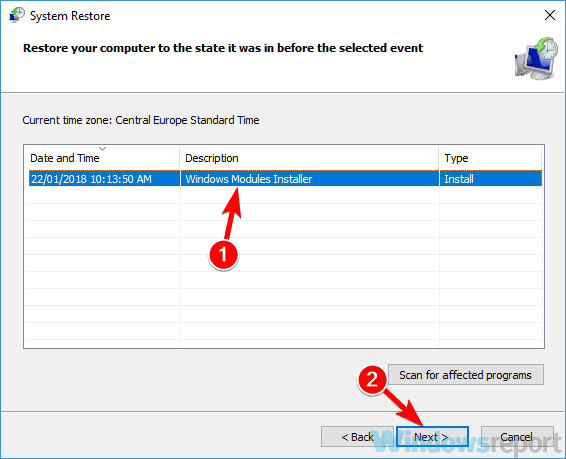
- Check the Show more restore points option, if it’s available. Select the restore point you want to revert back to and click Next.
- Follow the instructions on the screen to complete the restoration process.
Once the process is finished, your system will be restored to an earlier state and the problem should be resolved.
Error 0x800f080d can prevent you from updating Windows to the latest version, but we hope that our solutions helped you solve this problem.

