How to Fix BSoD Error 777 Failure Operating System
Learn how to quickly fix the BSOD by repairing system files
Key notes
- Error 777 is a Blue Screen of Death error caused by messing with registry files or malware.
- Running antivirus software and downloading the latest Windows Update should fix the problem.
- If that doesn't work, you may need to perform an automatic repair for Windows 11.
Error 777 is the dreaded Blue Screen of Death (BSoD), indicating a total system error where the computer completely crashes because it can no longer operate normally.
When this happens, Windows will immediately fix itself and restart. Most of the time, this is all that needs to be done. However, if the BSoD keeps happening, you have a serious problem.
What causes the Blue Screen of Death on Windows?
If you’ve used a Windows computer for any extended period of time, you’ve most likely run into the Blue Screen of Death. We also know that soul-crushing feeling of having your unsaved work wiped out.
But what causes it in the first place? Well, as it turns out, there are numerous culprits behind the BSoD; all of which are easily avoidable.
- Your computer is infected with a virus – Malware is the most common culprit behind the BSoD. Immediately download some antivirus software to clean your hard drive.
- Corrupt files are messing up your system – Even if you clear out malware, the damage it causes can linger. That’s why you should run an SFC scan to clear up the corruption.
- You changed or deleted files in the Registry Editor – The Registry Editor is a powerful Windows 11 that lets you manage system files, but messing them can cause various computer problems.
How can I fix this Blue Screen of Death error?
There are several things that you can do to fix the BSoD, assuming that it keeps happening regularly. This is not an extensive list, but it should give you a good launching point.
- Run some antivirus software to get rid of the infecting malware, then restart your computer. After that, you should be good to go. MalwareBytes and SUPERAntiSpyware are good choices.
- To prevent getting infected with malware, be sure to install an adblocker to your browser to stop those annoying popups. They are a common vector for viruses.
- Make sure your computer stays up to date with its updates. Microsoft frequently rolls out fixes and updates to ensure devices are protected against bad actors.
- Also, be more mindful of what you click on the internet. Clicking random ad banners, popups, or hyperlinks can result in malware being installed without your knowledge.
- And if all else fails, reinstall Windows 11. This is a last-ditch effort to fix the problem by performing a clean installation to restore the default Windows settings.
1. Download the latest hardware drivers
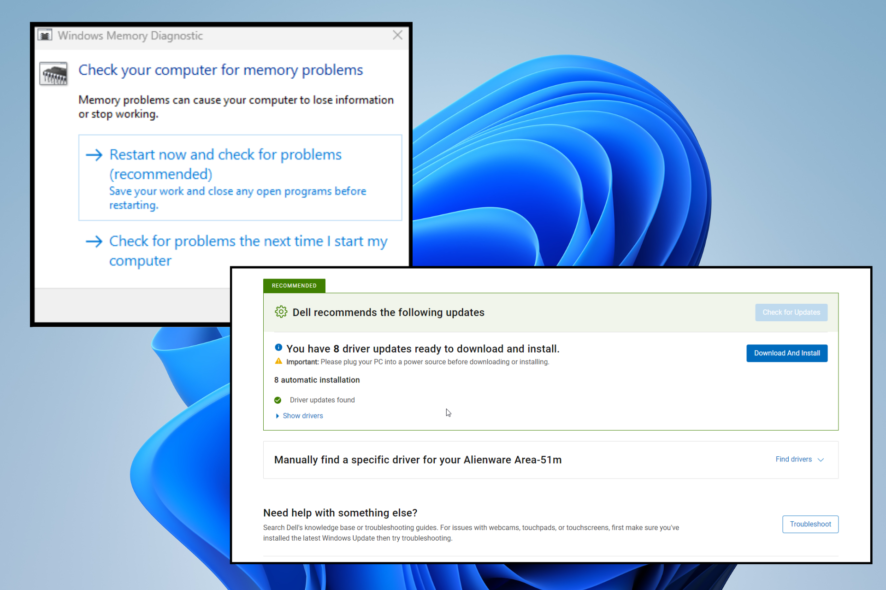
- Go to the website of your computer’s manufacturer. In this example, it’s Dell.
- Identify your PC using the manufacturer’s on-page tools.

- Select the Check for Updates button, if there’s one available.

- After checking, download and install the drivers. Reboot your computer when done to finish the process.

2. Perform an automatic repair
- There are two ways to do this, depending on the severity of the problem. First, create a bootable USB drive for Windows 11.
- Turn off your computer, insert the USB drive, then power on your PC.
- The following window will appear. Select Repair your computer to open the Advanced Settings menu.

- Additionally, you can press and hold the Shift key and then restart your computer.
- Now in the Advanced Settings, click Troubleshooting, Advanced options, and then Startup Repair in that order.

- Give Windows 11 ample time to finish its process. Once done, sign into your account.

- Startup Repair will begin fixing the problem. Once done, restart your computer.
A bootable USB drive must come with Windows 11 ISO on it. If you don’t have this, be sure to check out our guide on how to create the ISO.
3. Reboot into Safe Mode with Networking
- Like in the previous solution, hold the Shift key, then restart your computer to enter Advanced Settings.
- Follow a similar path as before by clicking Troubleshooting, then Advanced options.
- But this time, select Startup Settings.

- Click Restart on the following page.
- Press the F5 key to restart Windows 11 into Safe Mode with Networking.
Safe Mode with Networking launches Windows using only a limited amount of files and drivers. Use this time to troubleshoot apps that weren’t working previously or uninstall recent software.
See what is working and what isn’t working. Uninstall any problematic third-party software you come across.
4. Reset browser settings
- On Microsoft Edge, click the three dots in the upper right-hand corner. Select Settings in the menu.
- Click Reset settings in the left side menu.

- Select Restore settings to their default values in the middle of the screen.
- In the new window, select Reset.

- On Google Chrome, click the three dots in the upper right-hand corner and choose Settings.
- Select Reset and clean up on the left side menu, then select Restore settings to their original defaults.

- Click Reset settings in the new menu that appears.
- On Firefox, click the three lines in the upper right-hand corner, select Help, then choose More troubleshooting information.
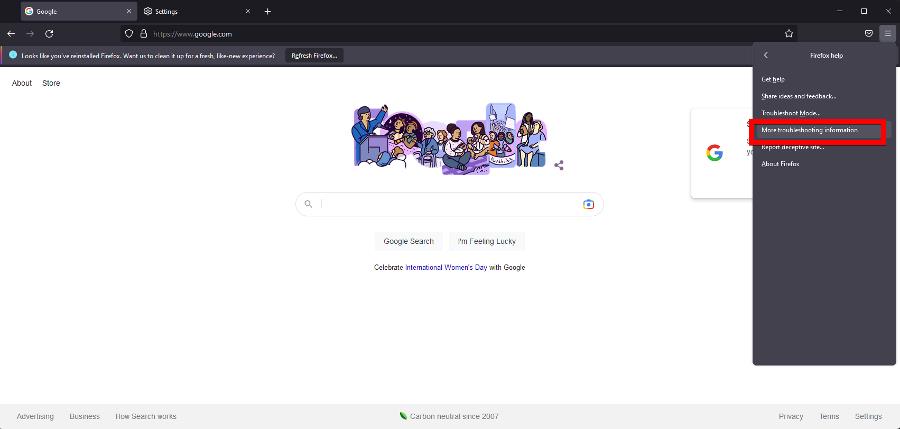
- Click Refresh Firefox on the new page.

- Select Refresh Firefox in the new small window that pops up.
5. Restore your computer via Command Prompt
- If running an SFC scan didn’t work, you have other options. First, bring up Command Prompt on the Windows Search bar and select Run as Administrator.
- Type in the following command and press Enter on your keyboard:
DISM.exe /Online /Cleanup-Image /Restorehealth
- Next, enter the following command:
chkdsk /f /r /x
- If that doesn’t work, press the Y key so that the drive can be scanned the next time you restart your computer.
- Now, search for the Windows Memory Diagnostic in the search bar. Click Run as administrator on the left.
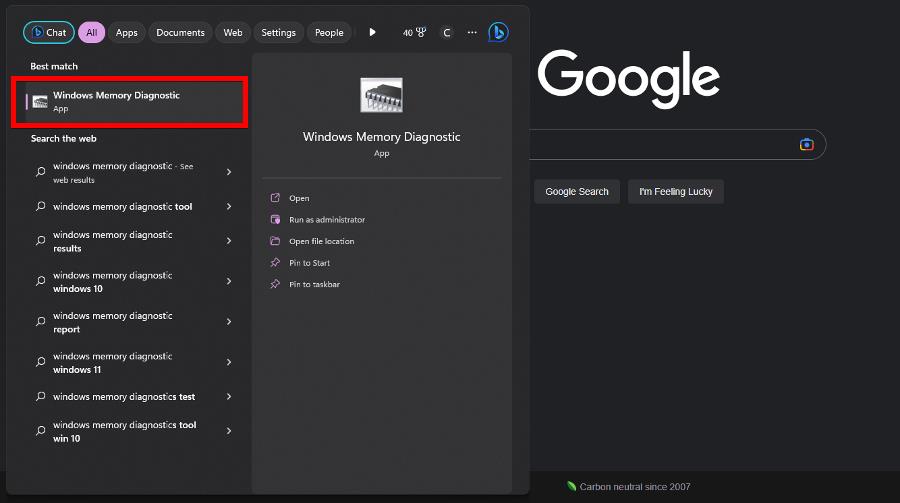
- Select Restart now and check for problems.

- Now try running the SFC scan again.

What can I do if I have BSoD error 0x0000001a on my computer?
On the surface, all Blue Screen of Death errors might look the same to most people since they always result in the same thing, but there are differences. A different error might cause each one.
For example, error 0x0000001a is caused by computer tasks suddenly failing or outdated device drivers on your Windows 11 computer. To fix this, it’s recommended that you do two things.
First, you update your system drivers, then run an SFC scan to repair all damaged files. You should also learn how to address error 0x00000124 caused by overclocking your computer.
Disabling overclocking and removing overclocking software are the first things you should do. Afterward, update your computer, then repair the system files with an SFC scan.
Feel free to comment below if you have questions about other BSoD errors. Also, leave comments about reviews you’d like to see or information on other Windows 11 functions.
Read our disclosure page to find out how can you help Windows Report sustain the editorial team. Read more


Improve this guide


User forum
0 messages