How to Fix ERROR_NO_PAGEFILE
First, recover disk space by removing unwanted files and apps
5 min. read
Updated on
Read our disclosure page to find out how can you help Windows Report sustain the editorial team. Read more
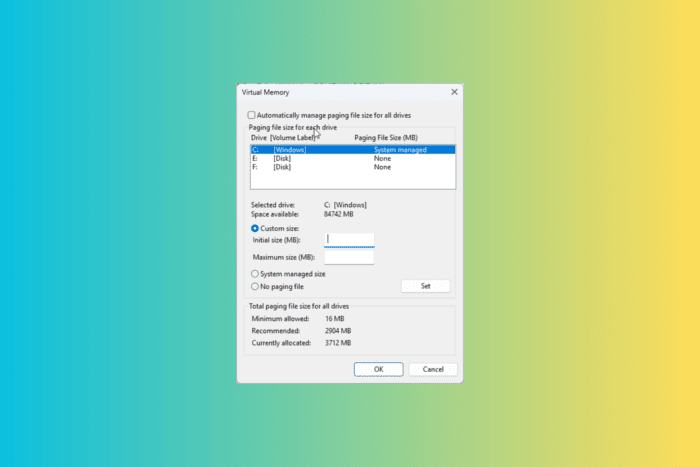
The ERROR_NO_PAGEFILE with error code 578 (0x242) and description {No Paging File Specified} No paging file was specified in the system configuration, indicates that your device is not able to locate a paging file, which is important for virtual memory management.
The paging file extends the physical RAM, allowing your operating system to swap data between hard disk and RAM.
How can I fix ERROR_NO_PAGEFILE?
1. Set the paging file manually
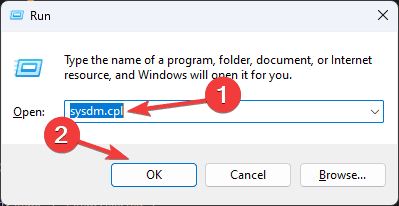
- Press Windows + R to open the Run window.
- Type sysdm.cpl and click OK to open the System Properties window.
- Switch to the Advanced tab, go to the Performance section, and click Settings.
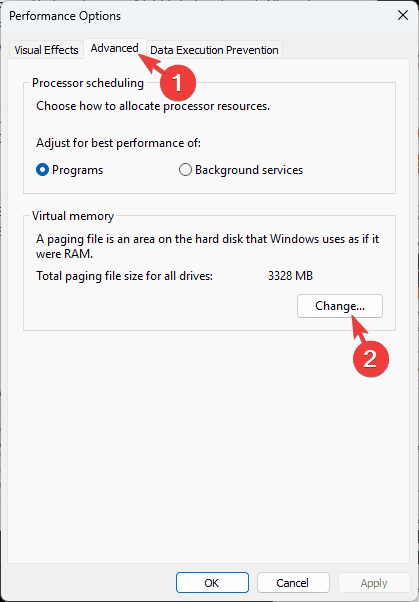
- In the Performance Options window, go to the Advanced tab.
- Locate the Virtual Memory section and click Change..
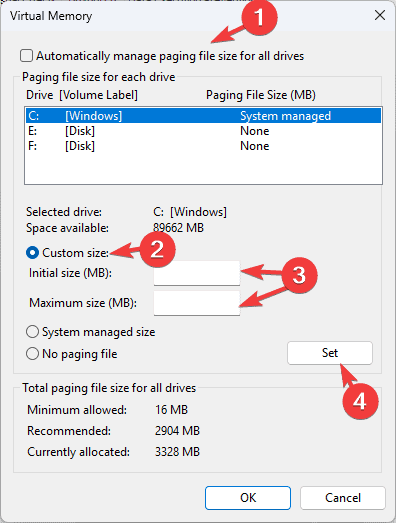
- On the following page, remove the checkmark from the Automatically manage paging file size for all drives option.
- Choose C or the system drive letter you want to use for the paging file, then select the Custom size option
- Set the Initial size equal to the installed RAM size and the Maximum size 1.5x to 3 times more than the physical RAM.
- Click Set.
- Click OK, then restart your computer to apply the settings and check if ERROR_NO_PAGEFILE persists.
2. Enable paging files via Registry Editor
- Press Windows + R to open the Run window.
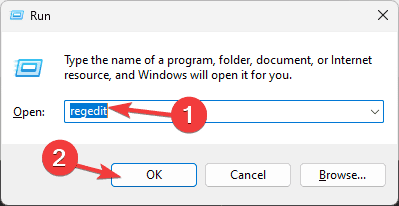
- Type regedit and click OK to open Registry Editor.
- Before making any changes, back up registry entries. To do so, go to File>Export and save the .reg file to a desired location.
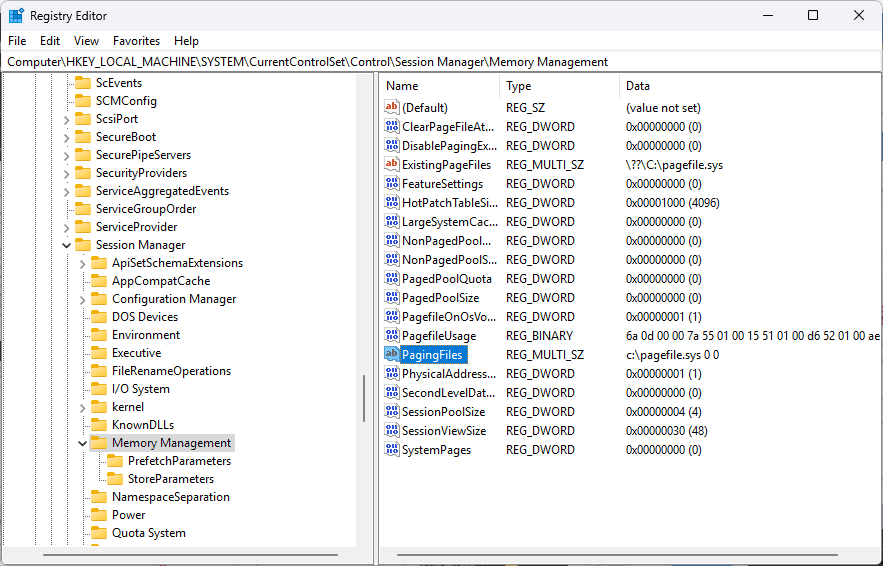
- Navigate to this path:
Computer\HKEY_LOCAL_MACHINE\SYSTEM\CurrentControlSet\Control\Session Manager\Memory Management - Look for PagingFiles and double-click to open the Edit Multi-String window.
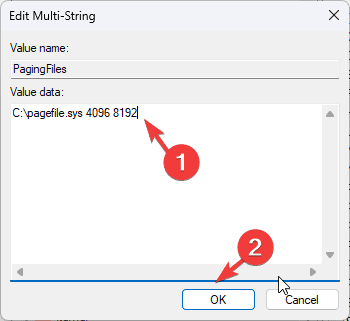
- Now copy & paste the following and paste it under Value data, and click OK:
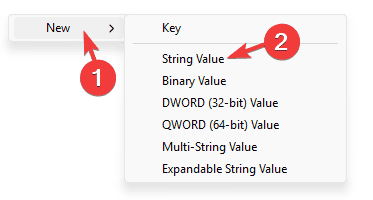
C:\pagefile.sys 4096 8192 - If you can’t find PagingFiles, right-click on the empty space, click New, and select String Value. Then name it PagingFiles. Then, edit the string value data using steps 5 and 6.
- Restart your computer to let the changes take effect.
3. Run the CHKDSK scan
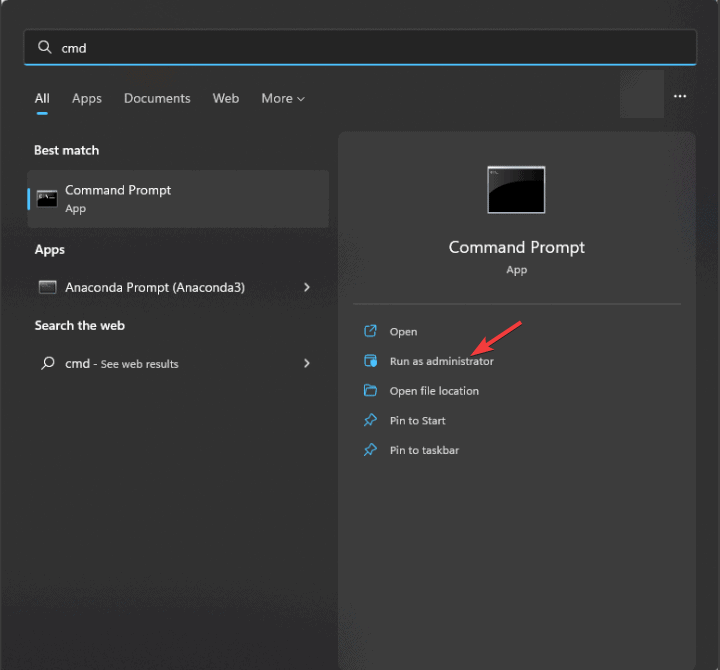
- Press the Windows key, type cmd in the search box, and click Run as administrator from the list of options to launch Command Prompt with admin rights.
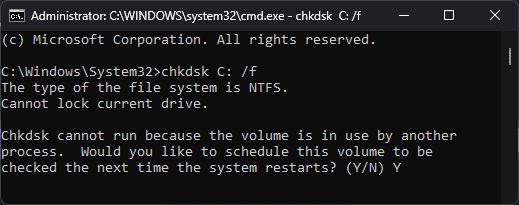
- Copy & paste the following command to run the chkdsk utility on the affected drive to scan and repair any file system issues. Don’t forget to replace the Letter C: with the affected drive letter, then hit Enter:
chkdsk C: /f - If the drive is in use, you will be prompted to schedule a scan after the restart; type Y and hit Enter.
- Now save all your work and restart your computer to initiate the chkdsk scan.
4. Free up the disk space
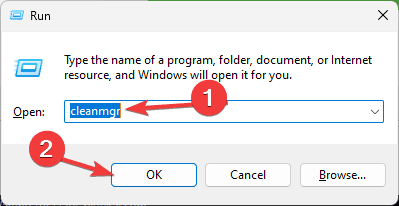
- Press Windows + R to open the Run console.
- Type cleanmgr and click OK to open the Disk Cleanup window.
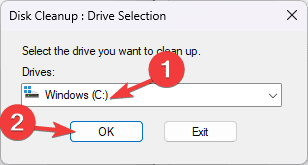
- On the Disk Cleanup: Drive Selection window, choose the Drive and click OK.
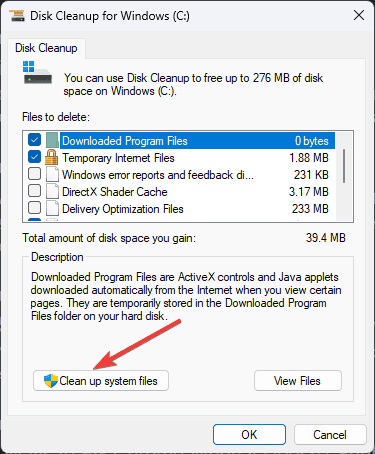
- Click the Clean up system files button.
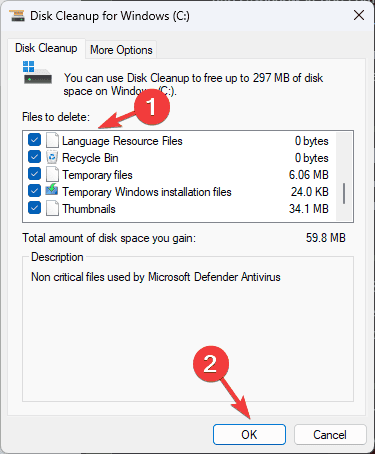
- You will get the Disk Cleanup: Drive Selection window again, choose the drive and click OK.
- Select all the items listed under the Files to delete field and click OK.
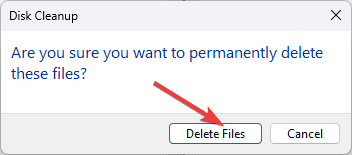
- Click Delete Files on the following window to confirm the action.
If the drive is still low on storage and you see ERROR_NO_PAGEFILE, open it, go through each folder, and move or delete unwanted files, such as media files or unused software installers, from this drive to another one.
However, if you are dealing with a system drive, don’t move or delete the essential Windows folders, usually in C:\Windows or C:\Program Files. If you mistakenly migrate an important app or system folder to another drive, your system may not function properly. You should only move files or subfolders like documents and downloads from your user account folder, i.e., (C:\Users\[Your Username]). If you are unsure, avoiding moving files from system-related folders is safer.
5. Remove all unwanted apps
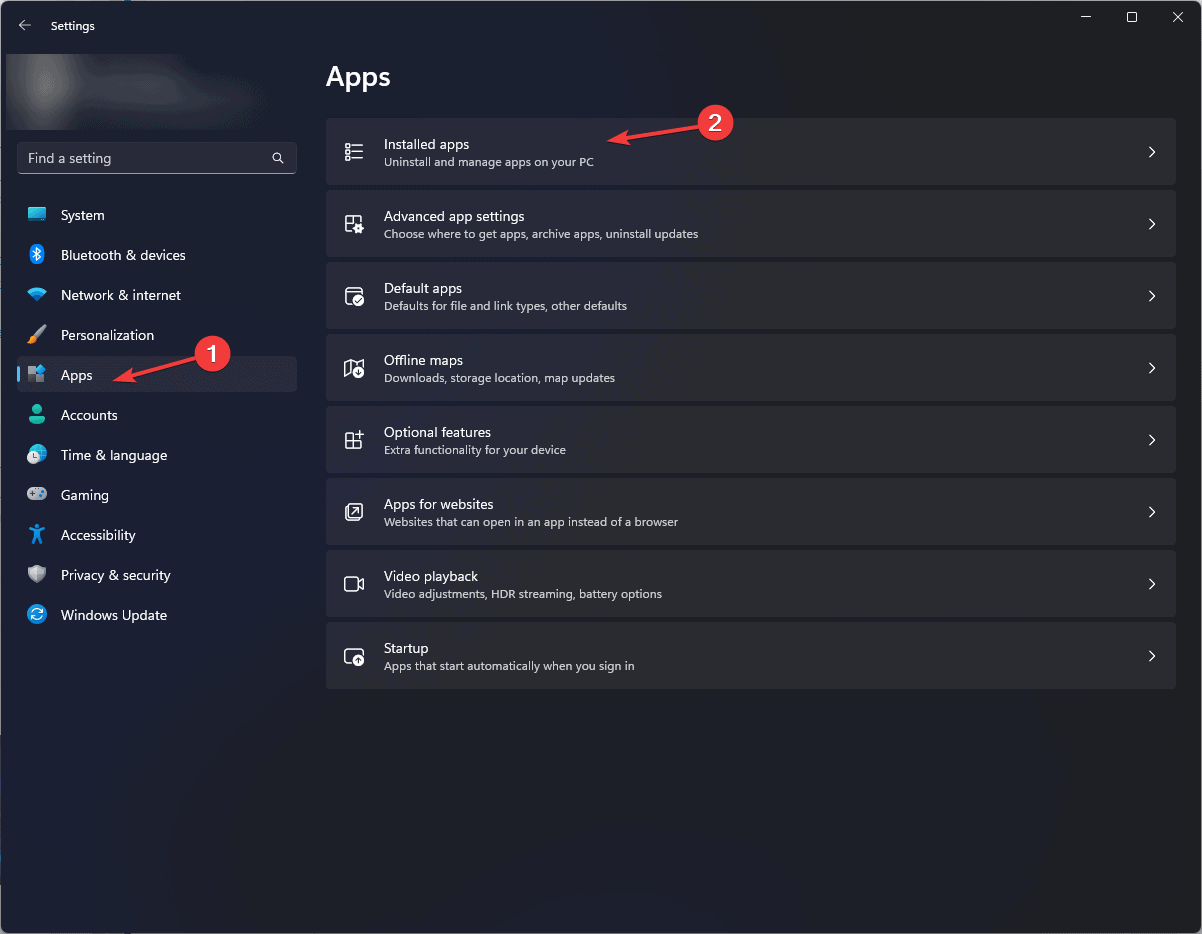
- Press Windows + I to open the Settings app.
- Locate and select Apps from the left pane, and click Installed apps.
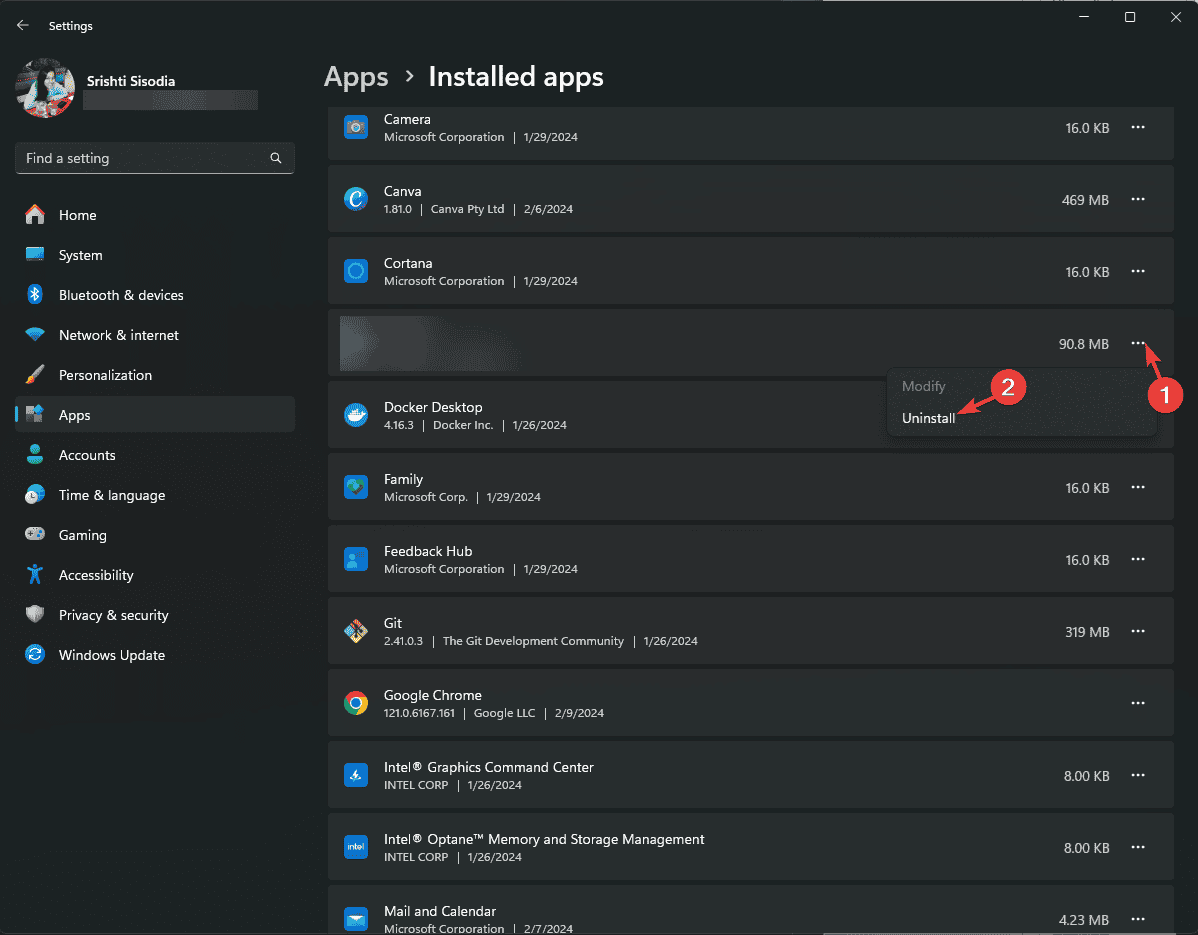
- Go through the list of apps, locate unwanted apps one by one, click the three-dot icon, and select Uninstall from the context menu.
- Click Uninstall.
- Next, go to the app’s official website and reinstall the application.
4. Move the paging file to another drive
- Press Windows + I to open the Settings app.
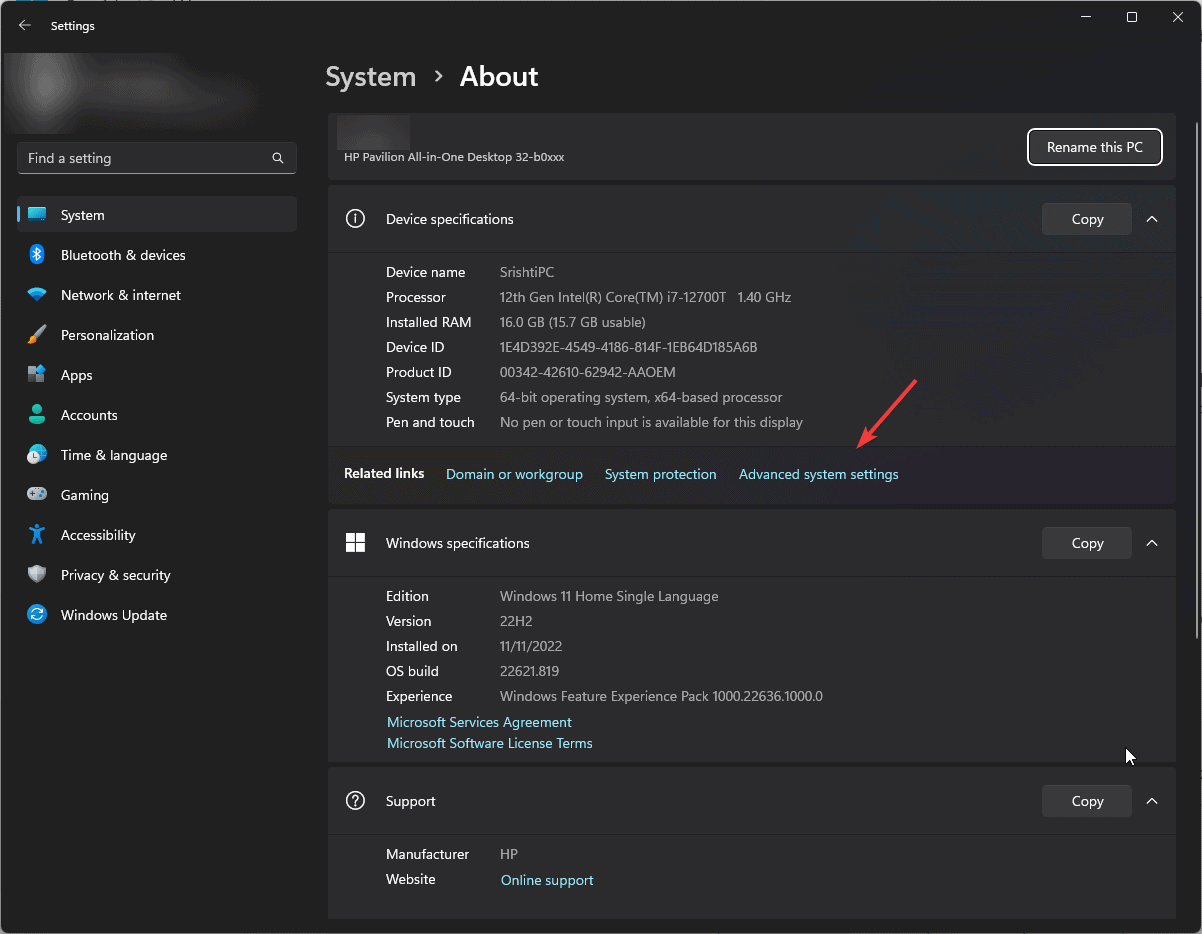
- Go to System and click About.
- Click Advanced system settings under Device specifications section.
- On the Advanced tab, look for Performance and click Settings.
- Under the Virtual memory section, click Change.
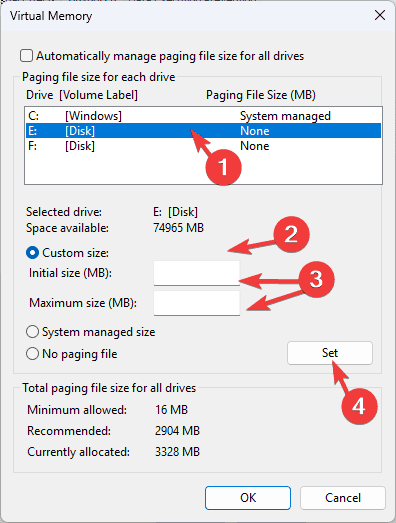
- Remove the checkmark next to Automatically manage paging file size for all drives.
- Under Paging file size for each drive, choose the desired drive.
- Select Custom size.
- For the Initial size option, you can set 1.5x your physical RAM size, and for the Maximum size, you can set 3x your RAM size.
- Click Set.
- Click OK, then reboot your computer to apply the settings.
Changing the paging file location can also help you fix the ERROR_PAGEFILE_QUOTA_EXCEEDED; read this guide to learn more.
In conclusion, to fix the ERROR_NO_PAGEFILE, you can manually set the paging file value, change the drive for paging files, free up disk space, remove unwanted apps, use the registry editor to enable paging files, or run the CHKDSK scan.
In case you often encounter BSoD errors, you should know how to check the blue screen error log to understand them. We also have a guide on ERROR_PAGE_FAULT_DEMAND_ZERO so don’t miss it.
Before leaving, don’t miss our ERROR_PAGE_FAULT_PAGING_FILE guide for more information. Did we miss a step that helped you fix the BSoD error? Feel free to mention it in the comments section below. We will add it to the list.








User forum
0 messages