Fix: ERROR_PRINT_CANCELLED (63 (0x3F)
Re-add your printer to finish the print job
![]() 4 min. read
4 min. read
![]() Published on
Published on
Share this article
Improve this guide
Read our disclosure page to find out how can you help Windows Report sustain the editorial team. Read more
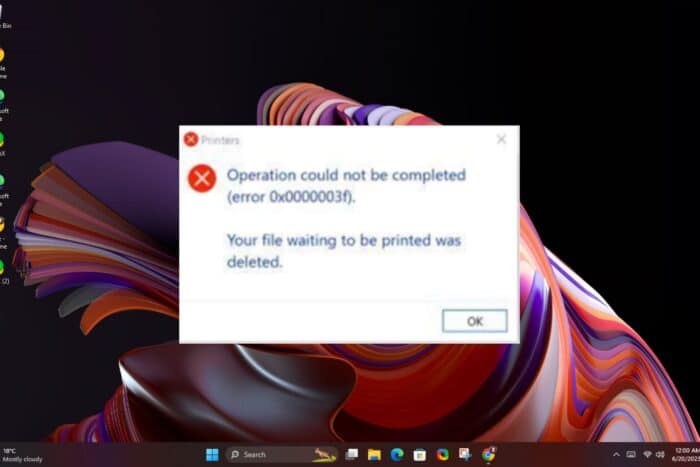
The ERROR_PRINT_CANCELLED can manifest in different ways but the most common one is your printer failing to print jobs sent to the print queue. The error may be accompanied by the Your file waiting to be printed was deleted message.
The triggers behind this error include incompatible printer drivers or issues with the print queues. It is also possible that your printer settings have been misconfigured.
How do I fix the ERROR_PRINT_CANCELLED?
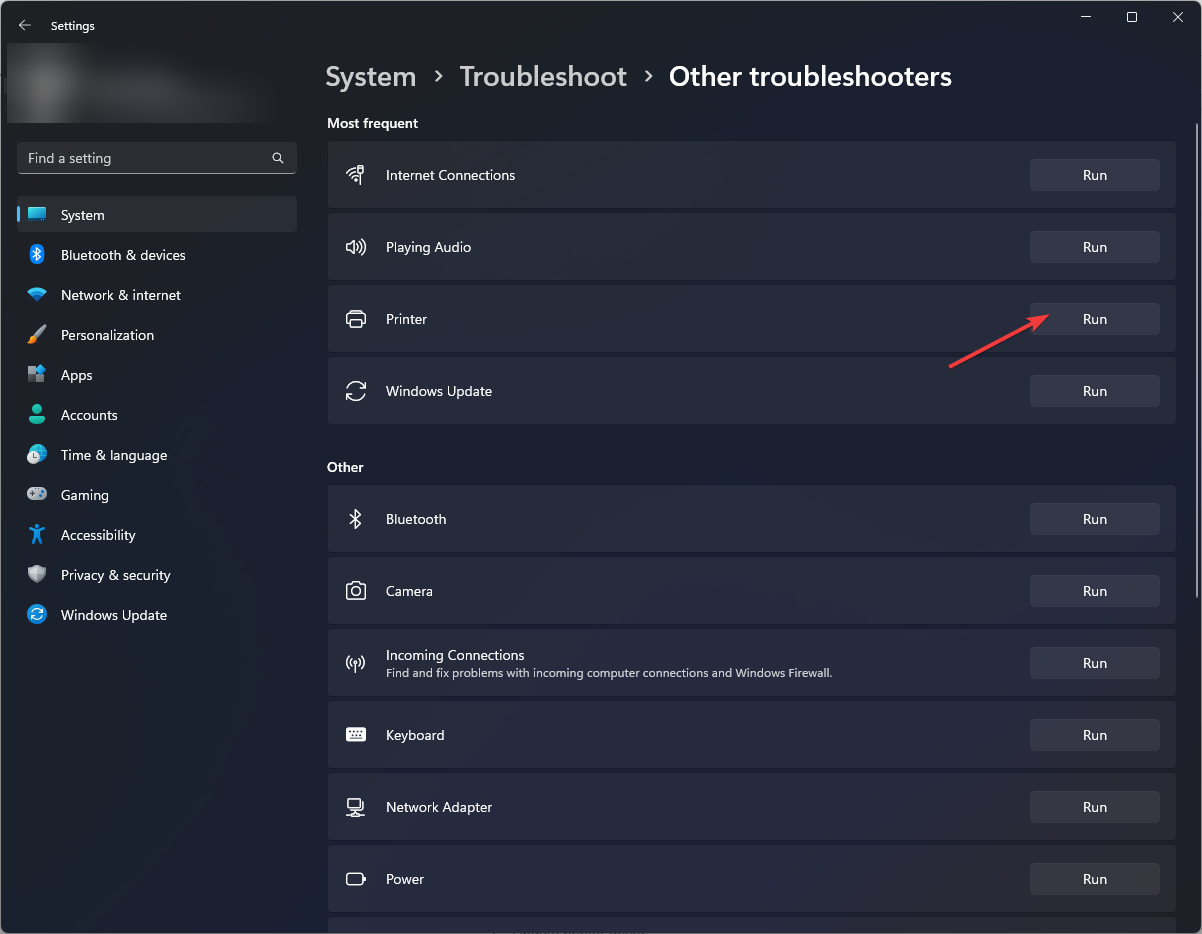
1. Run the Printer troubleshooter
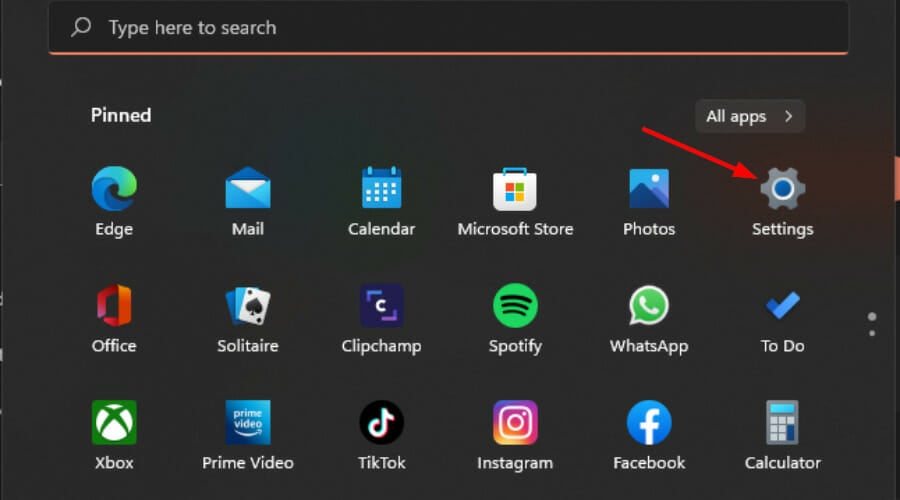
- Hit the Windows key and click on Settings.

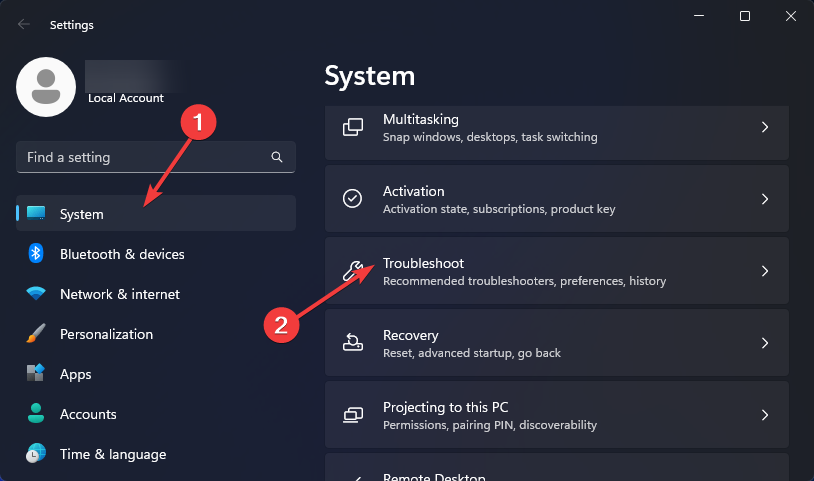
- Select System on the left pane, then click Troubleshoot on the right.

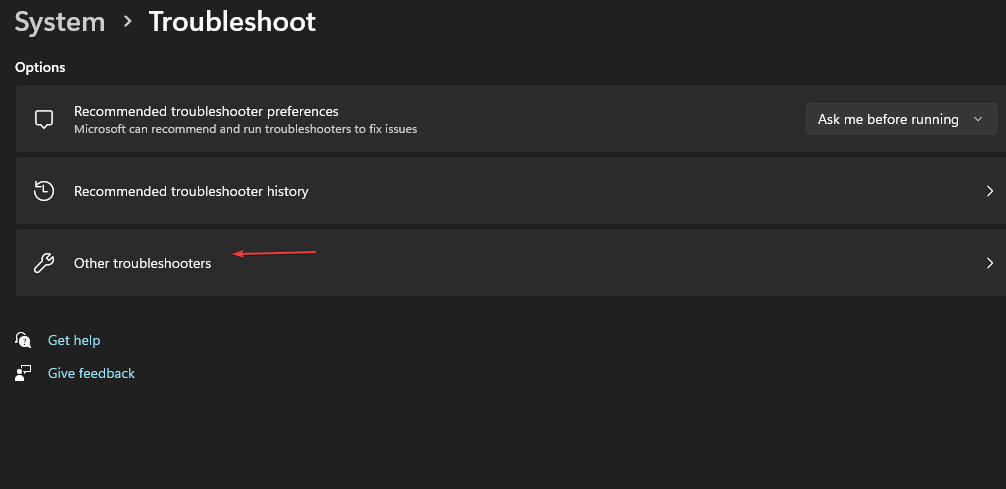
- Click on Other troubleshooters.

- Find the Print troubleshooter and click the Run button next to it.

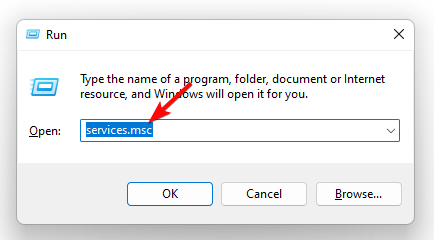
2. Restart the Print Spooler service
- Hit the Windows + R keys to open the Run command.
- Type services.msc in the dialog box and hit Enter.

- Locate the Print Spooler service, right-click on it and select Stop.

- Right-click on it again, then select Restart.

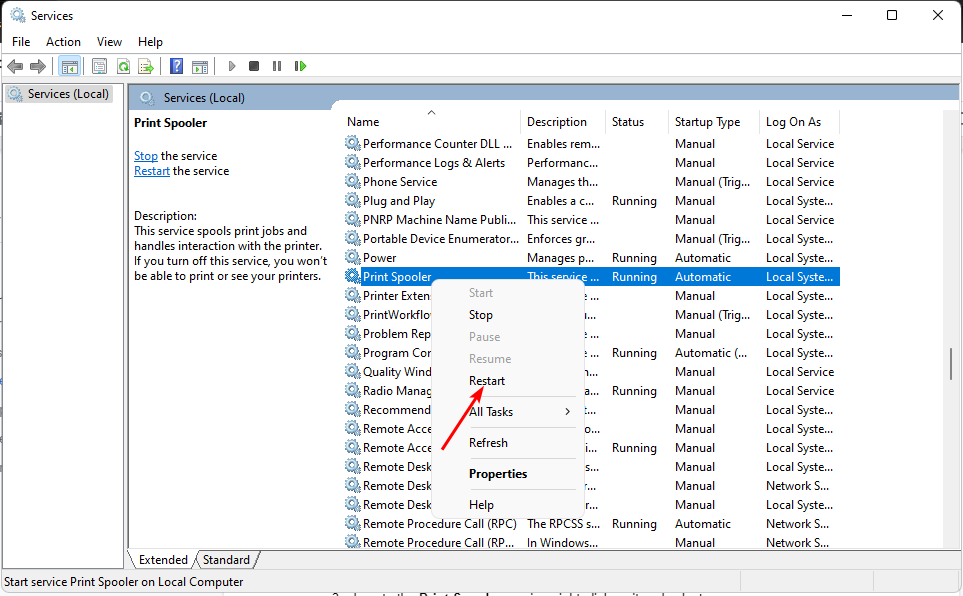
The Print Spooler may stop if there are too many print jobs or your printer drivers are out-of-date.
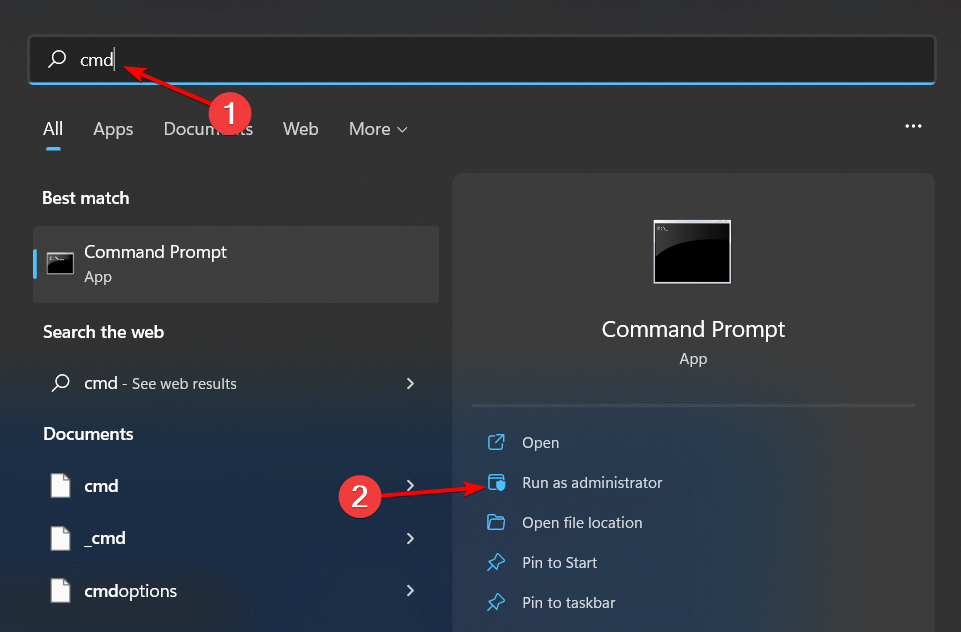
3. Clear the print queue
- Press the Windows key, type cmd in the search bar and click Run as administrator.

- Type the following commands and press Enter after each one:
net stop spoolerdel %systemroot%System32spoolprinters* /Qnet start spooler - Exit the command window.
4. Update the Printer drivers
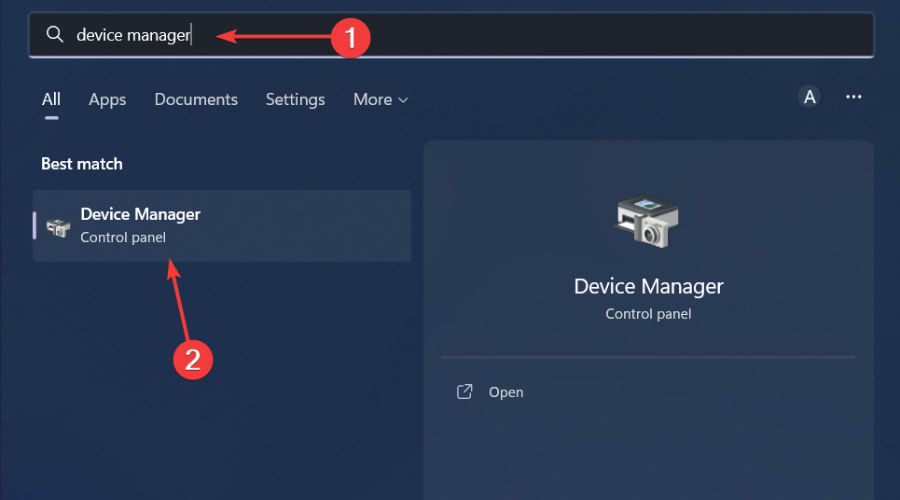
- Hit the Windows key, type Device Manager in the search bar and click Open.
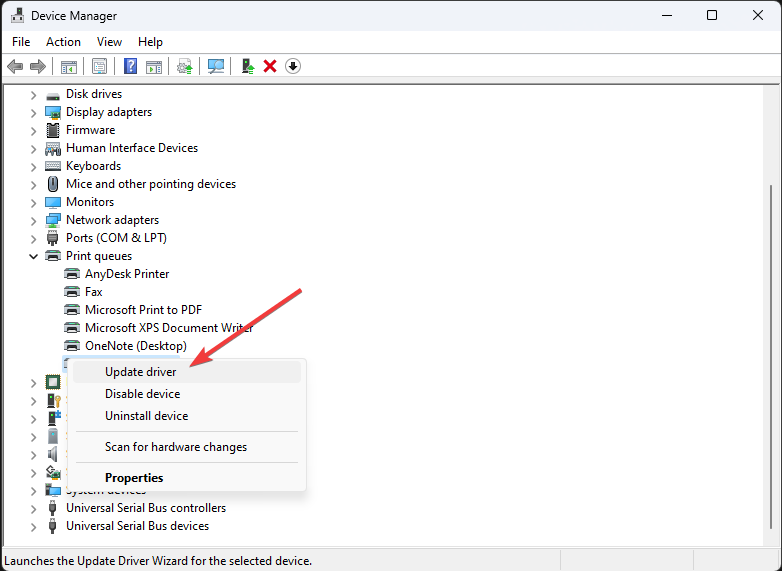
- Navigate to Print queues and locate your printer.
- Right-click on it and select Update driver.

- Select Search automatically for drivers.

- Windows will find the most suitable driver and recommend you install it.

5. Reinstall the printer drivers
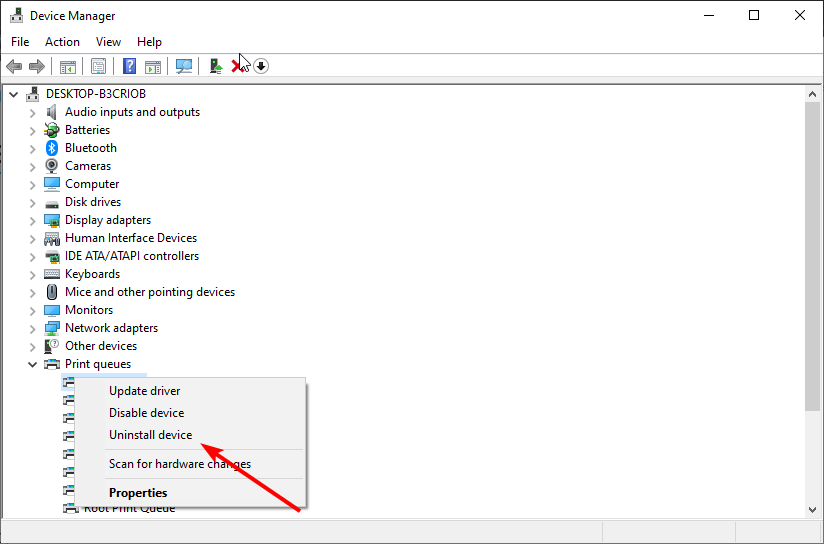
- Hit the Windows key, type Device Manager in the search bar and click Open.
- Navigate to Print queues and locate your printer.
- Right-click on it and select Uninstall device.

- Confirm uninstallation in the next prompt, then restart your device.
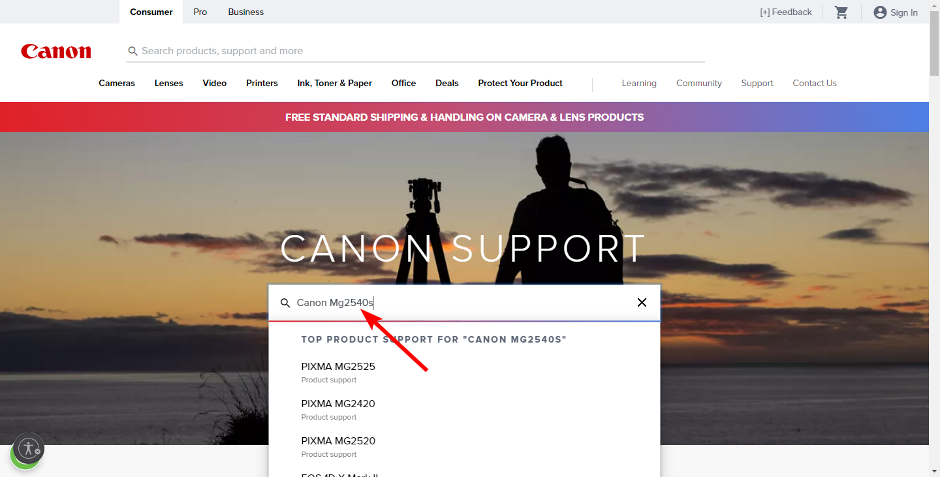
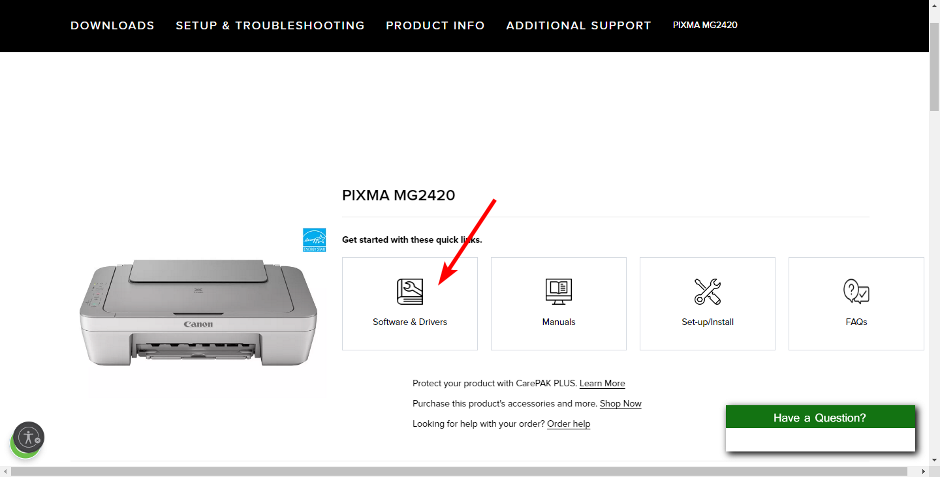
- Navigate to your browser, go to your printer’s manufacturer’s site. In this case, Canon official site, and type in the Canon printer model.

- Select Software & Drivers.
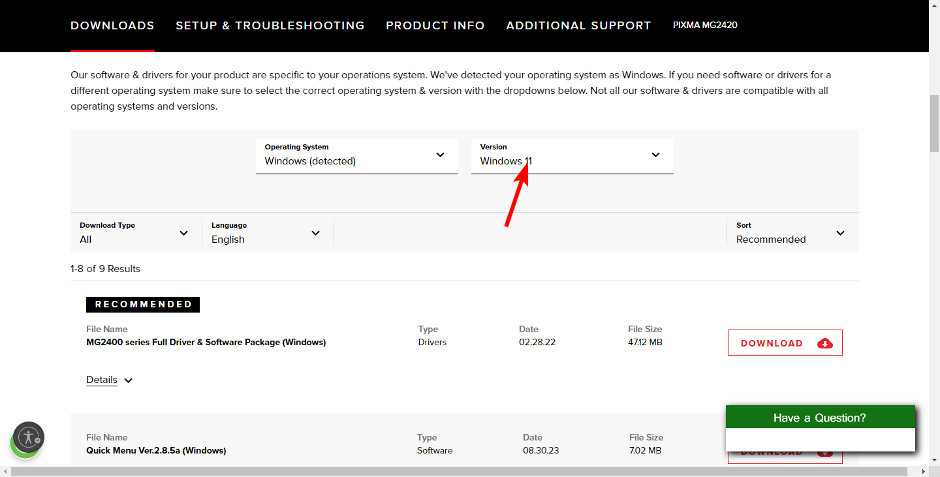
- Choose your Windows version from the drop-down menu, select your printer driver from the results and hit the Download button.
- Locate the exe file in your Downloads folder, double-click on it to run then follow the on-screen prompts to install it.
- Restart your PC for the changes to take effect.
6. Remove and re-add the printer
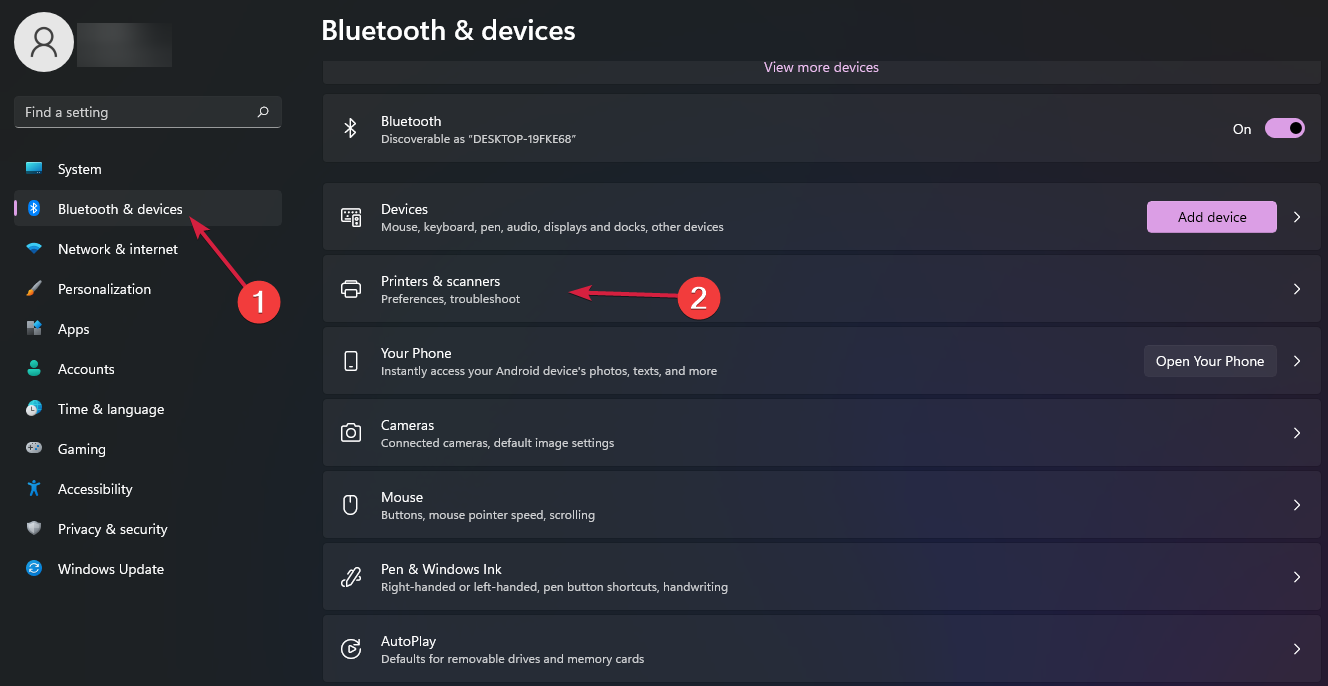
- Press the Windows key + I keyboard shortcut for opening Settings.
- Click Bluetooth & devices on the left of Settings then select Printers & Scanners to view your added printers.

- Double-click the added printer you want to remove to open settings for it then press the Remove button.

- Click Yes to confirm you want to remove the printer.
- Go back and click the taskbar’s magnifying glass icon.

- Type Control Panel within the search tool that opens and select Control Panel to open that window.
- Next, select Large Icons on the View by drop-down menu.

- Click Devices and Printers in the Control Panel.
- Then press the Add a printer button.

- Choose a printer on the Add a device window, and press the Next button to install it.
- Press the Finish button after the printer has been added.


You can also check whether your printer’s manufacturer has a troubleshooting tool and run it to see if it detects any problems. It’s not uncommon for documents to disappear from the print queue but once you discover the root cause of the issue, it is easy to recover them.
In future, always check that the files you send to the printer are not corrupted otherwise you’ll end up with a myriad of print issues. As a good rule of thumb, also back up your files to avoid irreversible loss.
If you have encountered the ERROR_PRINT_CANCELLED before and have a solution not mentioned here, feel free to let us know in the comment section below.

User forum
0 messages