Failed to Initialize SmartAudio: 7 Ways to fix Audio Error
Reinstalling your audio driver should fix this issue
Key notes
- The failed to initialize SmartAudio error message usually appears during Windows startup.
- A faulty or outdated audio driver can cause this error.
- One quick and effective is to uninstall the Conexant SmartAudio software and driver.

The Failed to initialize SmartAudio error message pops up during Windows startup that pertains to the Conexant High Definition Audio software.
Conexant High Definition Audio comes preinstalled with most modern laptops and desktops. Unfortunately, some users lose sound when that error message pops up. In this guide, we will show you how to fix this error effortlessly.
Why does the Smart Audio error appear?
Listed below are some of the reasons for the failed to initialize SmartAudio error:
- Outdated drivers: One of the major causes of the Conexant SmartAudio failing to initialize in Windows 10 error is an outdated driver. Updating the driver to the latest version should solve the problem.
- Issues with other audio devices: If you have more than one audio device on your PC, they might interfere with the Conexant software. It would be best if you disabled the other devices to solve this problem.
How can I fix Failed to initialize SmartAudio error?
1. Update the Conexant driver
- Press the Windows key + X and select Device Manager.

- Double-click the Sound, video, and game controllers option to expand it and right-click the Conexant device.
- Now, select the Update driver option.

- Finally, select Search automatically for drivers and install the available updates.

Some users have stated on forums that updating the Conexant SmartAudio HD driver has fixed the Failed to initialize SmartAudio error for them.
As Conexant does not provide drivers on its website, it’s probably better to update the drivers with the Windows driver updater.
To make things easier, we strongly recommend Outbyte Driver Updater for that job because it will do that automatically in only a few seconds and clicks.
Outbyte Driver Updater will automatically scan for and list outdated drivers after you download and install it.
Then you can press the Update All button to update the drivers. Alternatively, click the box from the left of the Conexant audio driver and press the Update button from the right.

Outbyte Driver Updater
Updating your drivers quickly with Outbyte Driver Updater will definitely improve your PC's performance.2. Open the Playing Audio troubleshooter
- Press the Windows key + I and select the Update & Security option.

- Select Troubleshoot in the left pane and click on Additional troubleshooters.

- Now, choose Playing Audio and click the Run the troubleshooter button.

Windows 10 includes a Playing Audio troubleshooter that can fix numerous audio issues. As such, that might provide a fix for the failed to initialize SmartAudio error message.
3. Disable all other audio device drivers
- Launch the Device Manager and expand the Sound, video, and game controllers option.
- Right-click all the audio devices listed there, except Conexant SmartAudio HD, and select Disable device.

- Now, click the Yes button.

- Finally, restart your PC.
4. Remove Conexant SmartAudio HD from the Windows startup
- Suppose Conexant SmartAudio HD is not your default audio driver and manager. Please remove it from the Windows startup.
- Press the Windows key + X and select Task Manager.

- Now, select the Startup tab.
- Next, right-click the Conexant SmartAudio HD and choose Disable.

- Finally, restart your PC.
If you are getting the failed to initialize SmartAudio, the application will now exit error; it might be because the device is initialized correctly on startup. Disabling the app in Task Manager should do the trick.
5. Disable Audio Enhancements for the Conexant Audio Device
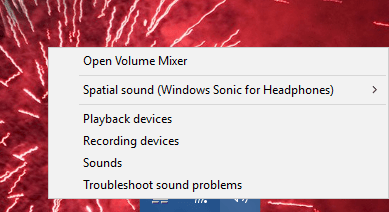
- Right-click the speaker system tray icon and select Playback devices.
- Right-click the Conexant audio device listed on the Playback tab and select Properties.
- Now, select the Enhancements tab.
- Select the Disable all enhancements (or Disable all sound effects) option.

- Press the Apply button, followed by OK.
If you are facing the failed to initialize SmartAudio error, it might be because of the audio enhancement features. The solution to this is to disable all audio enhancements.
6. Reinstalling Conexant Audio software and driver
- Launch the Device Manager and expand the Sound, video, and game controllers option.
- Right-click the Conexant SmartAudio device and choose Uninstall device.

- Now, check the box for Delete the driver software for this device and click the Uninstall button to confirm the action.

- Next, press the Windows key + R, type appwiz.cpl, and click OK.

- Right-click the Conexant SmartAudio HD software, select Uninstall, and follow the onscreen instructions to complete the process.

- Finally, you can now download the latest version of the software from official sources.
7. Perform a clean boot
- Press the Windows key + R, type msconfig, and click OK.

- Select Services, check the Hide all Microsoft services box, and click the Disable all button.

- Now, click the Startup tab and select Open Task Manager.

- Right-click each of the apps there and select Disable.

- Next, go back to the System Configuration window and click Apply, followed by OK.

- Finally, restart your PC.
Once your PC restarts, check if the Failed to initialize SmartAudio error message is still there. If it doesn’t appear, it means that one of the disabled applications or processes was causing the problem.
In this case, you must keep the service or app disabled to prevent the error message.
Those resolutions will probably resolve the Failed to initialize SmartAudio error message. Aside from those resolutions, rolling Windows back to a restore point with System Restore or restarting the audio service might also fix the issue.
Feel free to let us know the solution that helped you solve the problem in the comments below.
Read our disclosure page to find out how can you help Windows Report sustain the editorial team. Read more


Improve this guide


User forum
0 messages