Fix: Conexant ISST Audio not Working in Windows 10/11
These are the easiest ways to fix the audio issue
4 min. read
Updated on
Read our disclosure page to find out how can you help Windows Report sustain the editorial team. Read more
Key notes
- Did you notice a Conexant ISST Audio with no sound after a Windows 10 update?
- The same might occur for Conexant SmartAudio HD drivers, unfortunately, and it’s quite common.
- The main causes for Conexant ISST Audio issues are outdated drivers or some audio settings.
- Using the right software to keep your computer up to date is crucial to avoid this kind of issues.
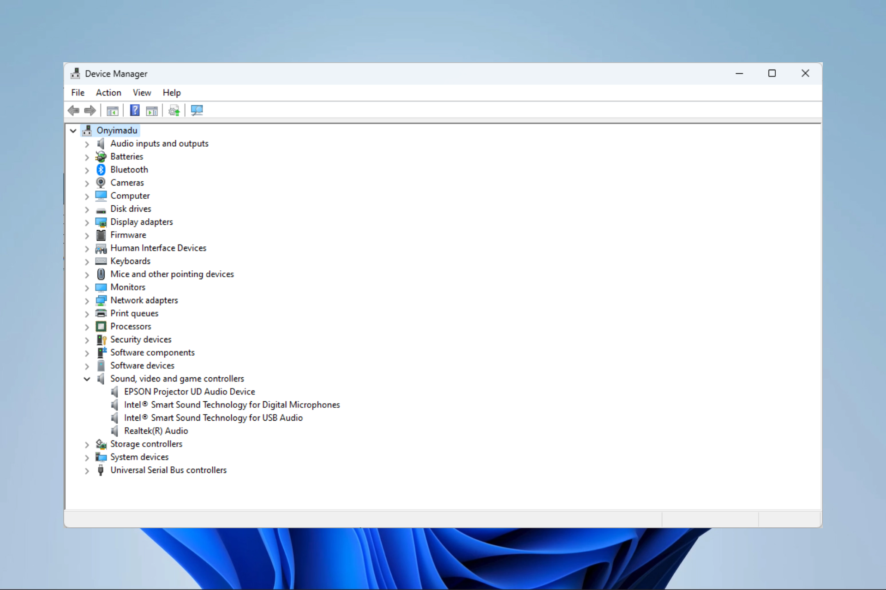
Depending on your sound card or the current version of the sound driver, you can face some sound problems in Windows 10.
For example, users of Conexant SmartAudio HD Audio or Conexant ISST Audio noticed sound issues after upgrading to Windows 10.
If you’re one of them, we’ve compiled a few workarounds for this problem. Let us know which one worked for you.
What does Conexant ISST audio mean?
Conexant Systems, Inc. created the software Conexant ISST Audio.
The operating system receives instructions from a software package, which includes the audio driver. The instructions enable your sound card, speakers, and microphone to process sound inputs and outputs from your operating system.
With almost 98% of all installs now running this version, 9.0.134.1 is the most popular. UIU64a.exe is the primary program executable. The software installer consists of 3 files and is typically 9.64 MB in size.
Why am I having issues with Conexant ISST Audio driver on Windows 11?
If Conexant HD audio microphone driver isn’t working is not working on Windows 11, it’s possible that the driver is corrupted, so it needs to be reinstalled.
Static noise in Windows can also indicate a driver issue, so you might have to update your drivers to the latest version and check if that helps.
It’s also possible that you have issues with the sound card, and if that happens, you’ll get Failed to play test tone message on your PC.
What can I do if Conexant ISST Audio is not working?
- Update your drivers
- Disable audio enhancements
- Change maximum memory
- Change the default sound format
- Run the Audio Troubleshooter
1. Update your drivers
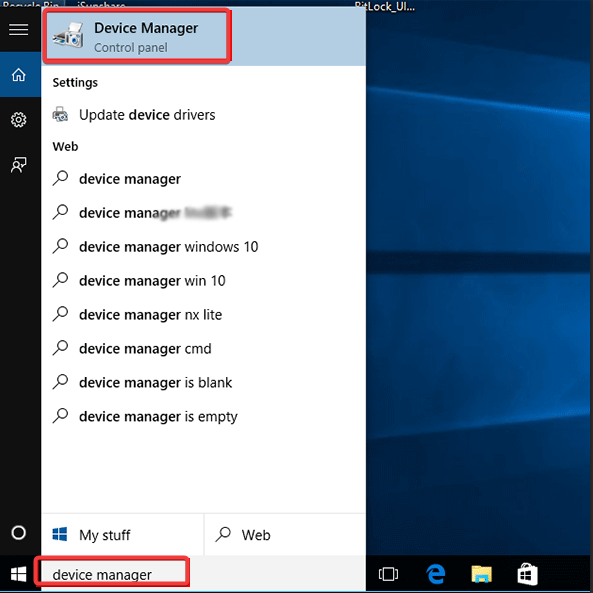
- Go to Search, type device manager, and open Device Manager.
- Expand Sound, video and game controllers, right-click on your Conexant SmartAudio driver and select Update driver.
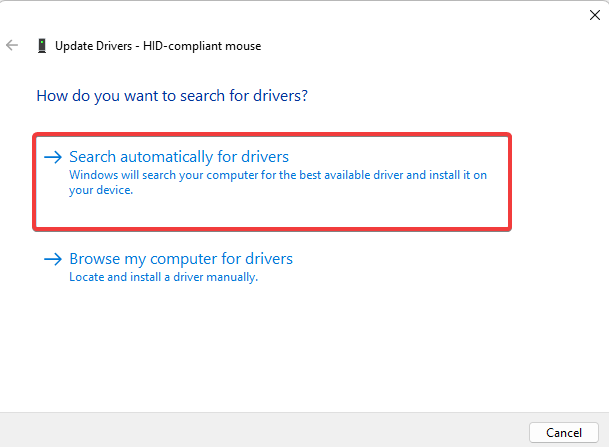
- Click on Search automatically for drivers.
If you haven’t updated your drivers, we recommend you to head to the Device Manager and check for the updates of your drivers.
You can choose to search automatically for an updated driver or browse the computer if you have a driver file.
Follow the on-screen instructions, and don’t forget to restart your computer. Sometimes, a restart is required for the new driver to work.
Alternatively, you can use dedicated software that does this job while recommending the right updates. Remember that such a tool will be useful for future similar scans.
⇒ Get PC HelpSoft Driver Updater
2. Disable audio enhancements
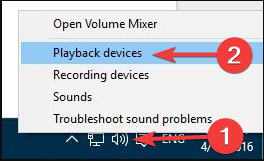
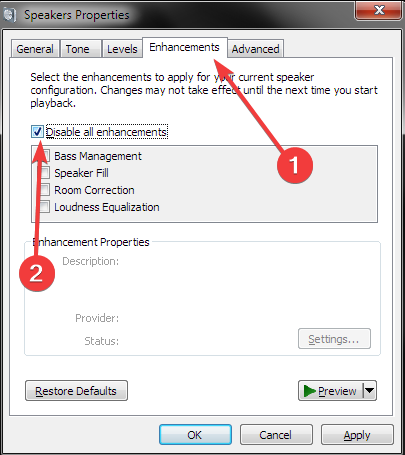
- Right-click on the Speakers icon in the taskbar and open Playback devices.
- Open your default playback device by double-clicking on it.
- Go to Enhancements tab and check Disable all enhancements.
- Click OK and restart your computer.
Now try if your Conexant HD Audio works, if not, try some of the following solutions.
3. Change Maximum memory
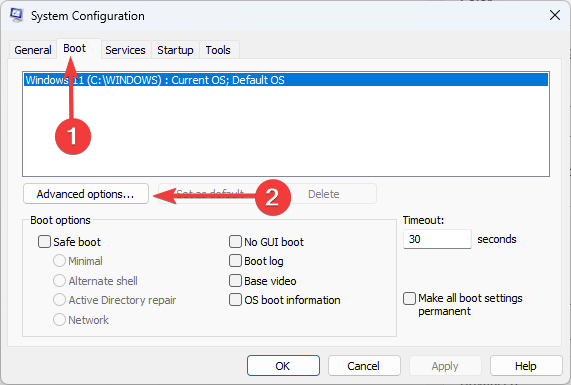
- Go to Search, type msconfig, and open System Configuration.
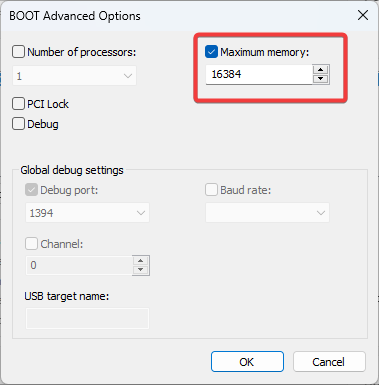
- Go to the Boot tab, and click Advanced options.
- Set Maximum memory to 3072 (this happens to be the best option).
- Restart your computer.
4. Change the default sound format
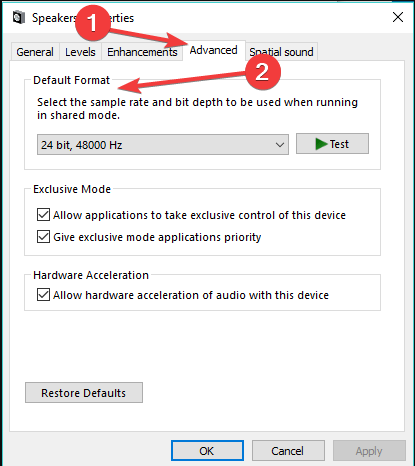
- Right-click on the Speakers icon in the taskbar and open Playback devices.
- Open your default playback device by double-clicking on it.
- Go to the Advanced tab, and change the bitrate under Default sound format until you find the one that’s working.
- Click OK.
5. Run the Audio Troubleshooter
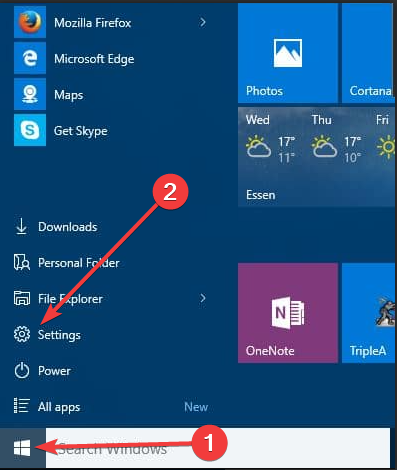
- Click on the Start menu and select the Settings app.
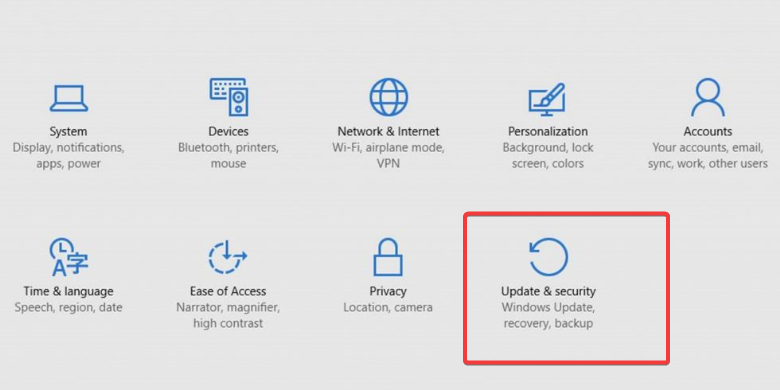
- Click on Update & security.
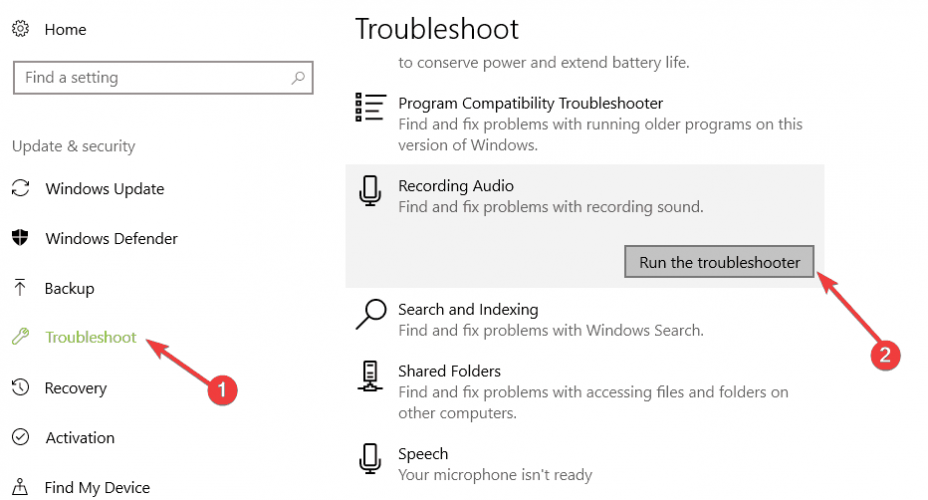
- Choose Troubleshoot from the left pane, and click on Run the troubleshooter under the Recording Audio option.
How can I fix Conexant ISST Audio if it’s not working on Windows 11?
The techniques to fix this error on Windows 11 are fairly similar.
You must remember that both operating systems have a lot of similarities, and aside from sporadic UI variations, there won’t be many visually obvious distinctions.
As a result, we advise that you pick a solution and implement it on any Windows 11 devices you own.
Can I uninstall Conexant Isst audio?
Yes, it is possible to uninstall this driver. But you must note that drivers play a special function; once installed, the hardware they control would no longer function properly.
You simply have to look for and launch Device Manager in Windows. Select Uninstall device from the context menu when you right-click the Conexant High Definition SmartAudio driver.
That’s it, we’ve already shown you how to solve Conexant HD microphone problems, and now, I hope this article will help you solve sound problems.
These solutions will work if Cconexant isst audio is not working, is not connected, has no sound in HP, or if Conexant isst audio headphones do not work on your PC.
Let us know what solution has worked for you, and remember you do not need to try out all the solutions, simply test what seems most appropriate to you.




User forum
4 messages