Fix: Firestick Says Network Disconnected but Internet Working
Forget your network if it's playing hide and seek on your Firestick
Key notes
- If your internet is working, but your Firestick is not connecting, simply forget your network and restart your Firestick.
- You can also check for available firmware updates for both your Firestick and streaming device.
- Keep reading for more of these solutions.

Your Firestick may say the network is disconnected even when there is indeed a working internet connection available. If this sounds familiar, this article will explain why it happens and possible solutions.
Why does my Firestick say no Internet when there is?
- A weak Wi-Fi signal or your Firestick may be too far away from your router.
- Outdated or corrupted software on your Firestick or streaming device.
- Network configuration issues that don’t augur well with your Firestick.
How do I fix my Firestick when it says network disconnected?
Start off with the following basic solutions:
- Consider repositioning your router or Firestick to improve the signal strength, then restart your Firestick.
- Power cycle your router and try with another HDMI port and high-speed HDMI cable.
- Forget and reconnect to your network, or try another connection if available.
 NOTE
NOTE
1. Reconnect your Firestick
- Make sure your TV set is OFF and remove the Firestick from the HDMI port of the TV.
- Unplug the power cord from the stick.
- Wait at least 5-10 minutes, and then re-plug the power cord to the Amazon Fire TV stick and wait for 5 minutes.
- Turn on your TV and reconnect the Fire TV stick with the HDMI port.
- Press any button on the Fire TV remote. Wait for a few seconds after each input. It might take time to execute the commands.
2. Check for updates
2.1 Firestick
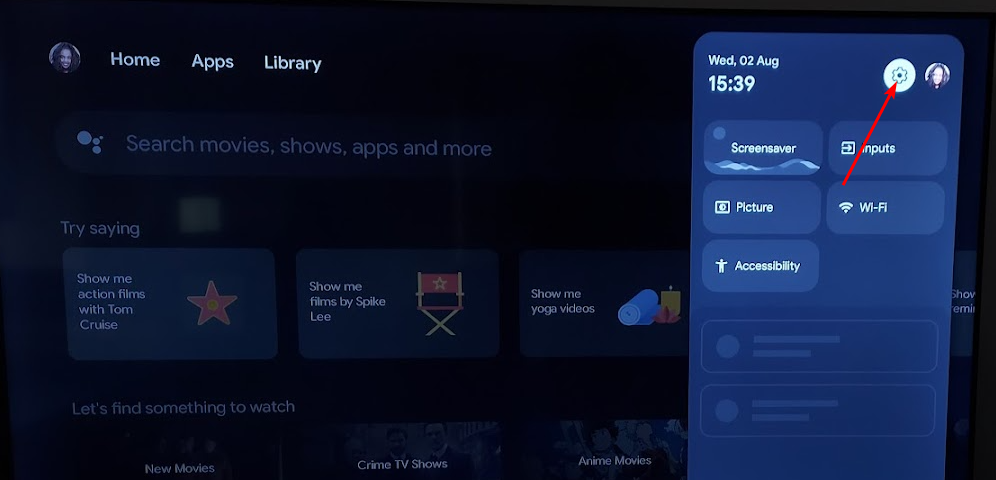
- Go to the Home page and click the Gear icon.
- Select the My Fire TV option.

- Now, select About.

- Finally, click the Update option.
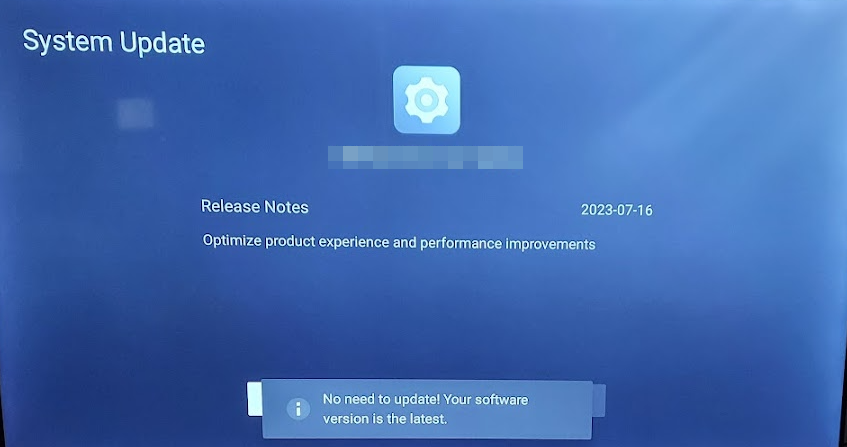
2.2 TV firmware
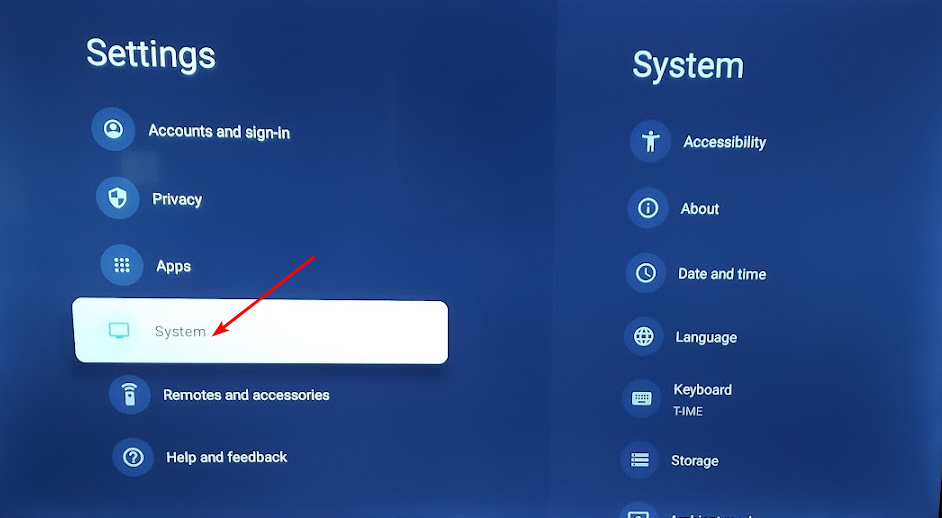
- For this solution, we shall be using the TCL model.
- On your TV, find your Settings.
- Go to System.
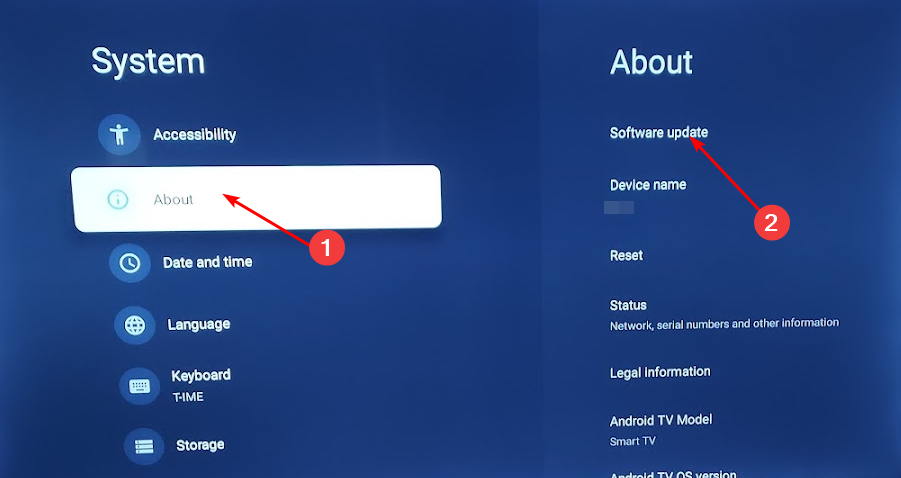
- Click on About then select Software update.
- Select Network update and click on System update.
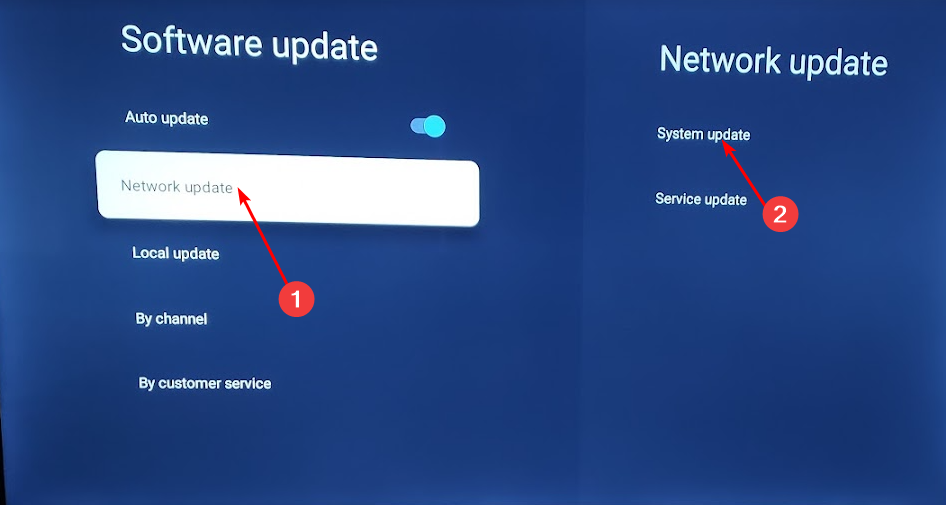
- Now click on Check Update. Your system will scan for any available updates.

- You’ll either start downloading updates or get a message that your TV is already up to date.
If you’re using your Windows PC, also check for updates and download if available.
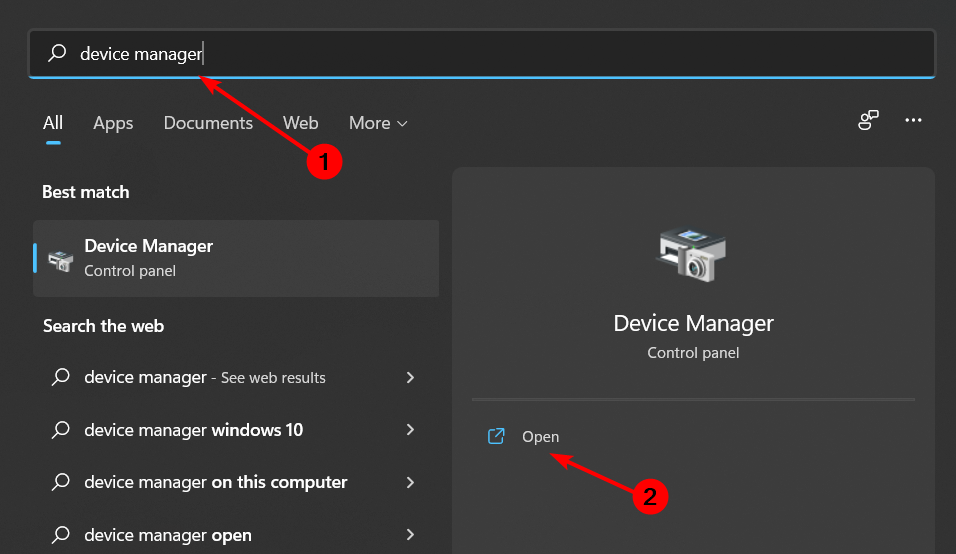
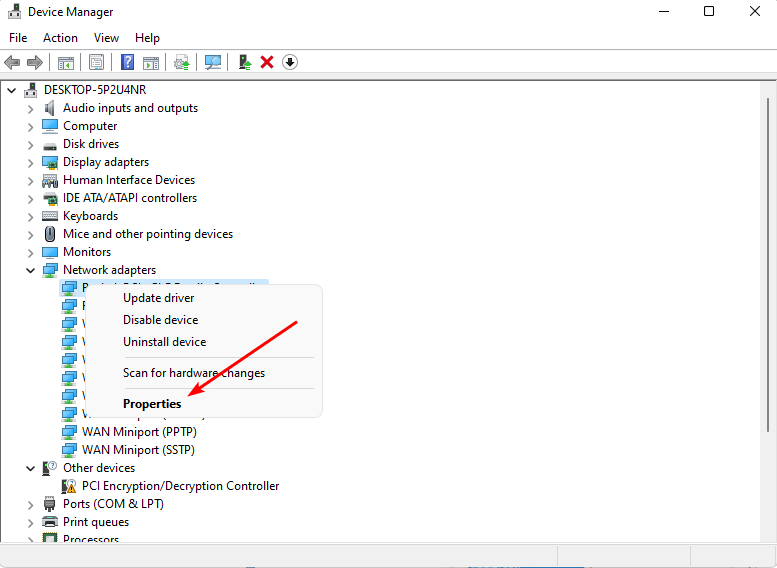
3. Change your network band
- Hit the Windows key, type Device Manager in the search bar, and click Open.
- Navigate to Network adapters and double-click to expand.
- Right-click on your network adapter and select Properties.
- Click on the Advanced tab and locate the Preferred Band.
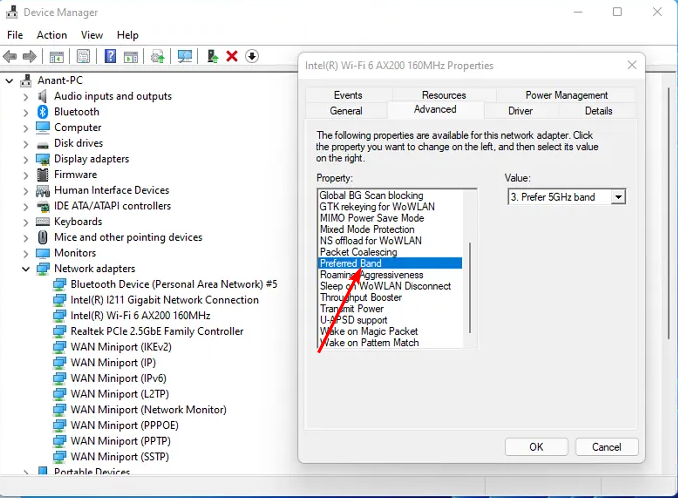
- In the Value drop-down menu, select Prefer 5GHz band then hit Enter.
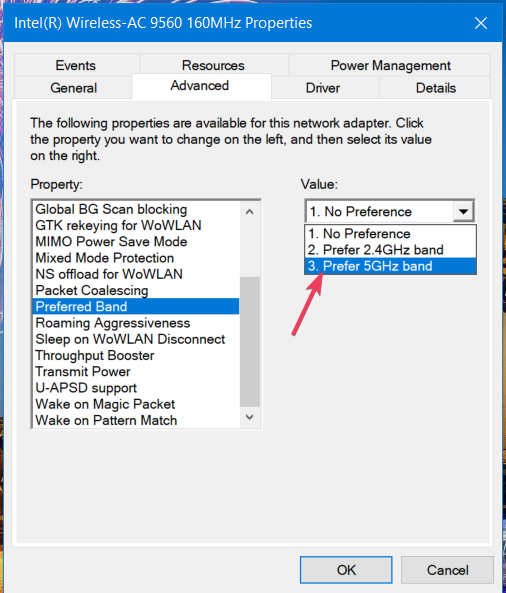
- Restart your PC.
If you have an older TV model or earlier Firestick, the 2.4GHz mode band will work better. It’s worth noting that changing the network band may not always work as it depends on your router configuration and how well your Firestick is able to detect and connect to your network.
4. Reset your Firestick
- Go to the Home page and select the Settings option.
- Select My Fire TV.
- Now, click the Restore to Factory Defaults option and follow the onscreen instructions to complete the process.

- The message You are about to reset your Fire TV to its original factory settings. Your sign-in information and personal preferences will be lost will appear. Click on the Reset button.

- The restore process will take approximately 5 to 10 minutes. Wait for your Amazon Fire TV to reset.
In case your Amazon Firestick fails to boot up after the reset, it may be a power issue, so check our article on what to do.
5. Perform a Network reset
- Hit the Windows key and click on Settings.

- Navigate to Network & internet.
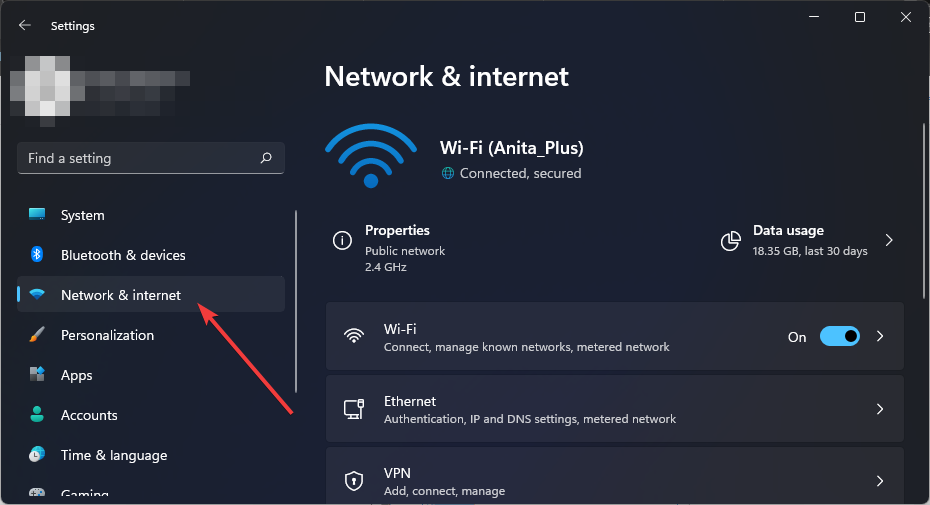
- Select Advanced network settings.
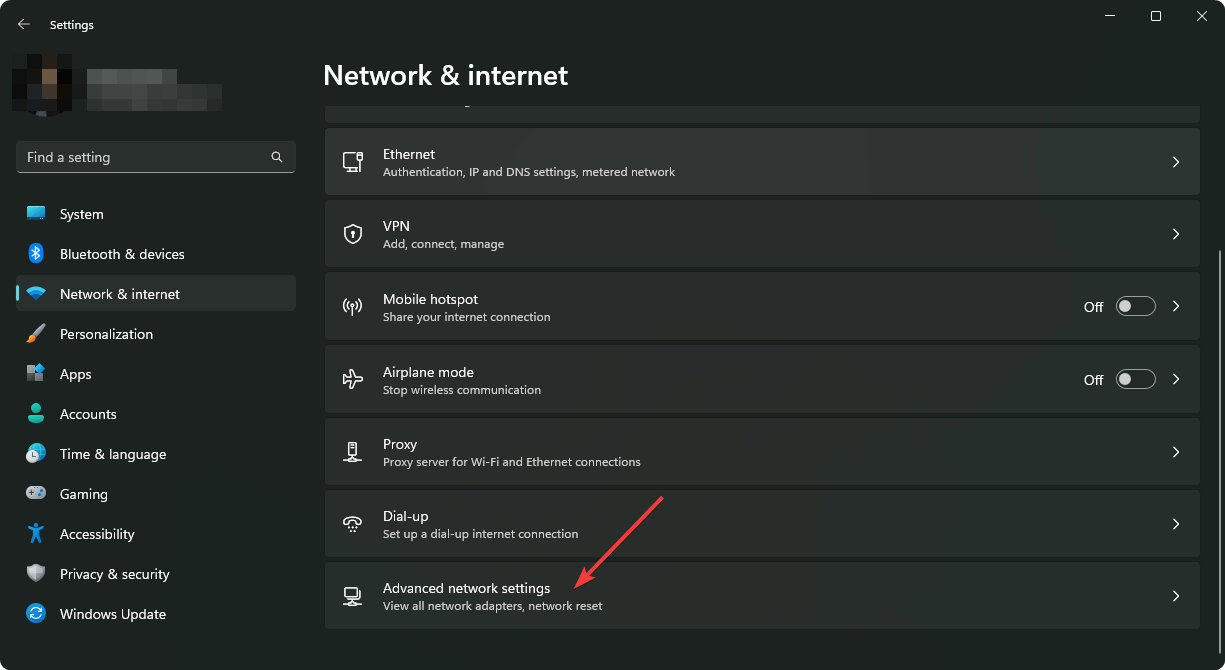
- Click on Network reset.
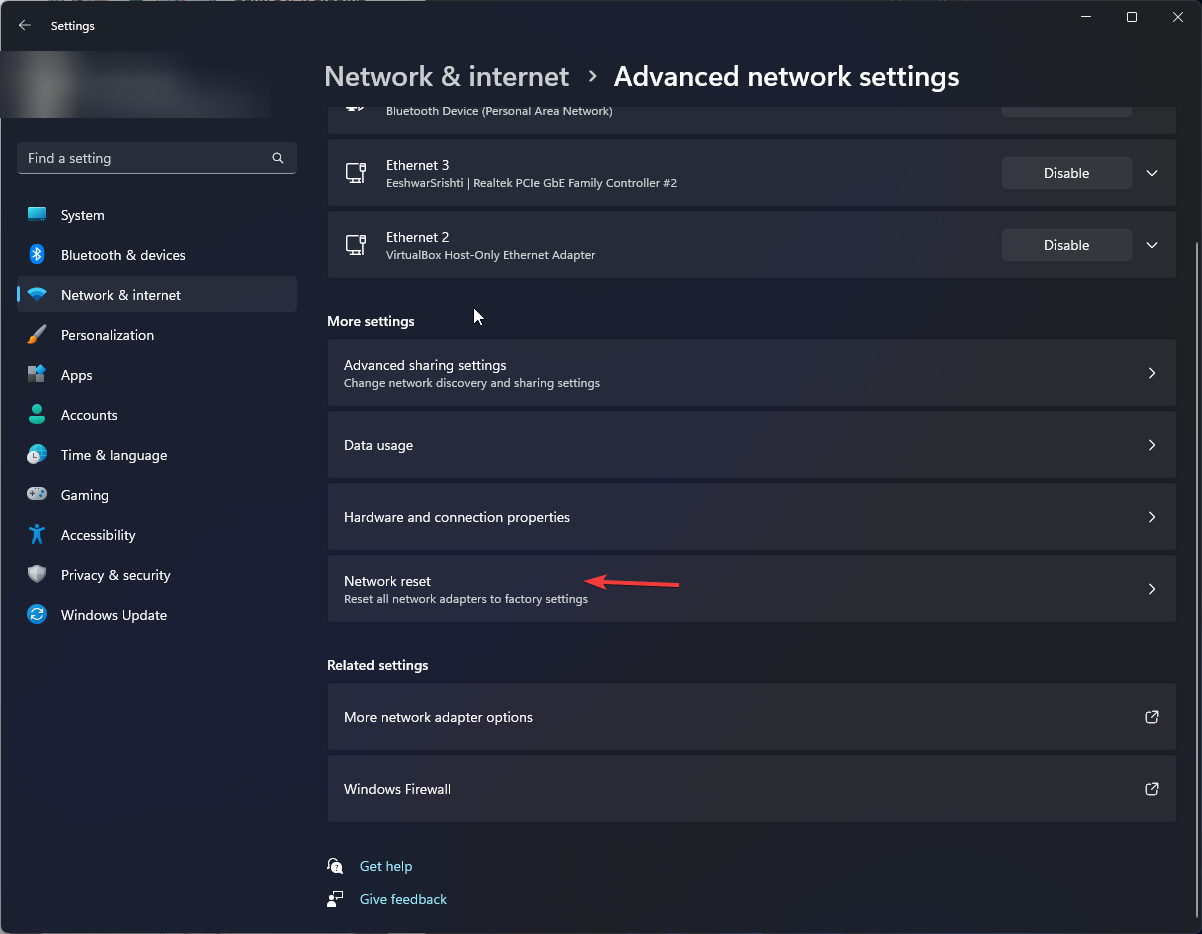
- Next, hit the Reset now button.
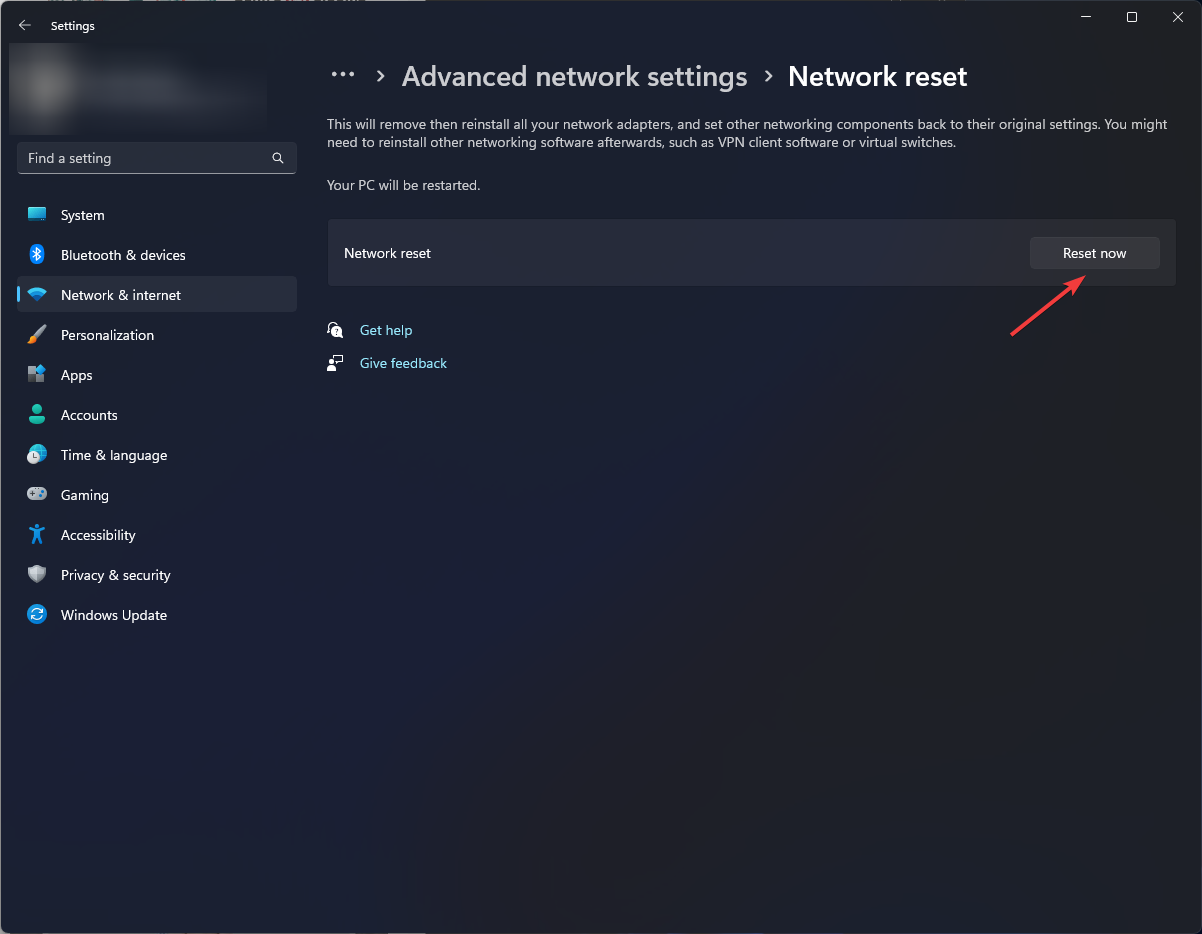
Resetting your network will remove all saved Wi-Fi networks and require you to enter the network credentials again. This way, if you had tampered with the network settings unknowingly, this will help you re-establish the connection.
Tips to keep your Firestick connected at all times
- Keep your Firestick updated with the latest software version to help improve its stability and connectivity.
- Place your router in a central location in your home, away from obstructions, and use an Ethernet connection where possible.
- Ensure you always have sufficient bandwidth by minimizing the number of devices connected to your network, or consider upgrading your internet plan to accommodate all your devices.
Aside from your Firestick not connecting to your Internet, you may also encounter a situation where it is not connecting to your TV. This may be an issue with your VPN as Firestick doesn’t work well with VPNs.
Still, it shouldn’t be too hard to resolve as we’ve come up with clever ways to bypass such restrictions. Hopefully, one of the above solutions has resolved your connectivity issues with Firestick.
We’d love to get your feedback on this problem so do leave us a comment with any additional thoughts.
Read our disclosure page to find out how can you help Windows Report sustain the editorial team. Read more


Improve this guide


User forum
0 messages