FIX: Windows 10/11 Firewall is blocking Skype [SIMPLE GUIDE]
3 min. read
Updated on
Read our disclosure page to find out how can you help Windows Report sustain the editorial team. Read more

Windows Firewall comes pre-installed with the Windows OS and offers extra layer protection again malware and other threats. However, at times this protection program can create issues with VoIP services like Skype.
Some users have reported the Windows Firewall is blocking skype application or some functionalities of the app on the Microsoft Answers forum.
My firewall is blocking some features of Skype. What do I have to do to allow access so I can use Skype?
Fix this by following the steps below.
How do I allow Skype through my Firewall on Windows 10?
1. Add Skype to Exception List in Firewall
- Press Windows Key + R to open Run.
- Type firewall.cpl and press OK to open Windows Firewall settings.
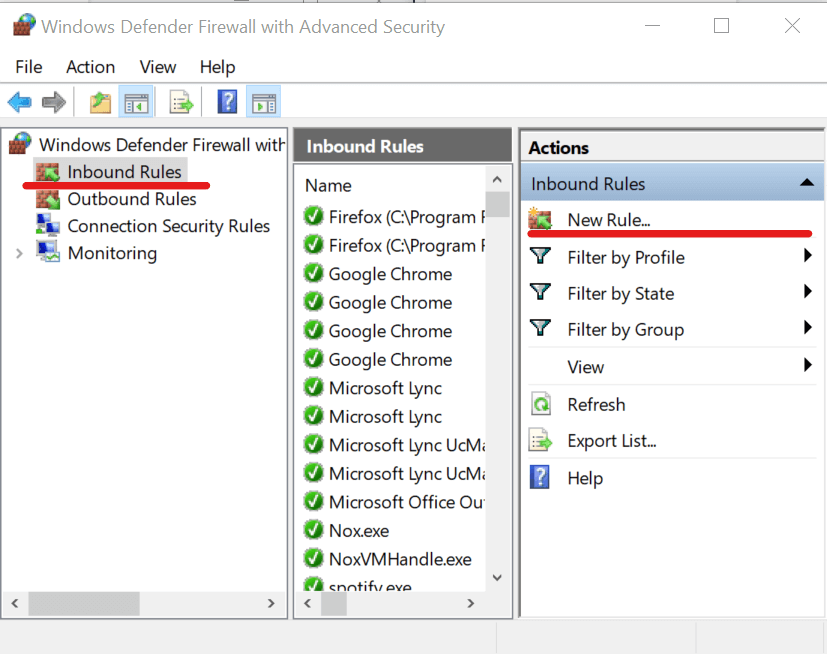
- From the left click on Advanced Settings. This will open Windows Fender Firewall with Advanced Security window.
- In the new window, select Inbound Rules option.
- From the right pane click on “New Rule” option.
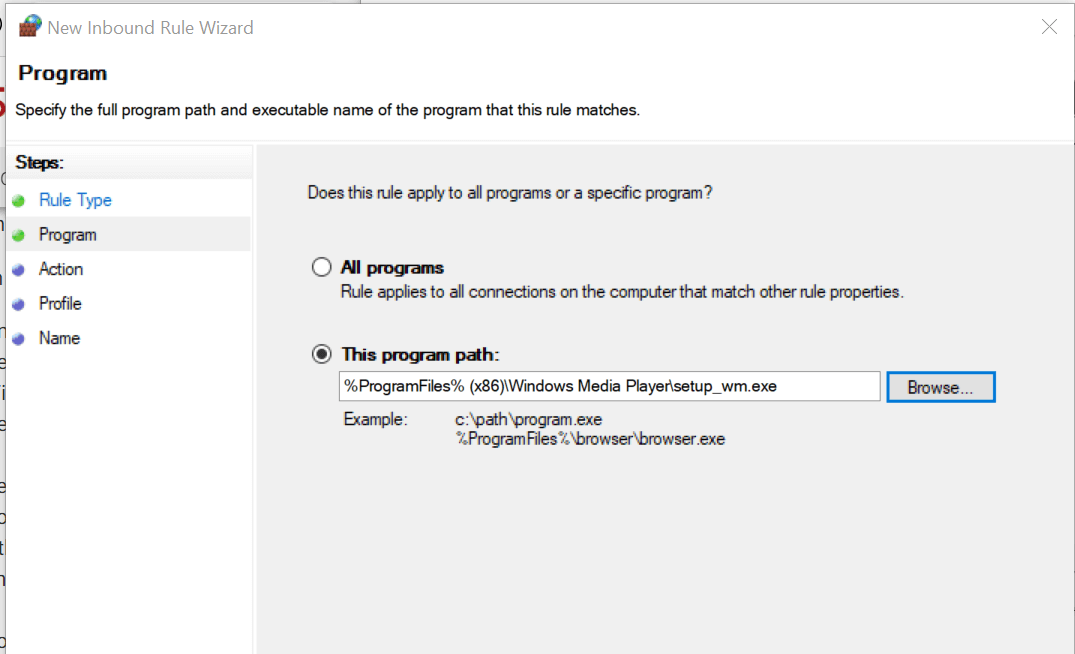
- In the Inbound Rule Wizard, select “Program” option and click Next.
- Select “This program path:” and click the Browse button.
- Navigate to your Skye installation folder which by default should look like this: C:>Program Files (x86)>Skype>Phone
- Select the skype.exe file and click Next.
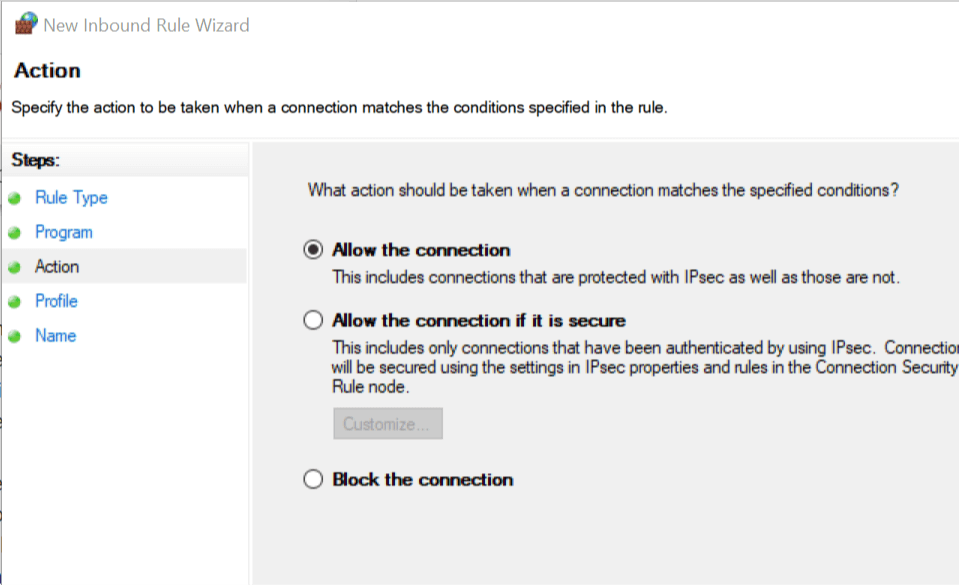
- In the next page keep all the option as it is and click on Finish.
- Note that you can only add Skype to exception list if you have Skype classic installed. If you have installed Skype from the Windows Store, you won’t able to access the required .exe file.
- Close the Windows Defender Firewall window and check if the error with your Skype application is resolved.
Learn what exact program or port is blocked by Firewall in this dedicated guide.
2. Change Network Location Awareness Properties
- Press Windows Key + R to open Run.
- Type services.msc and press OK to open the Services window.
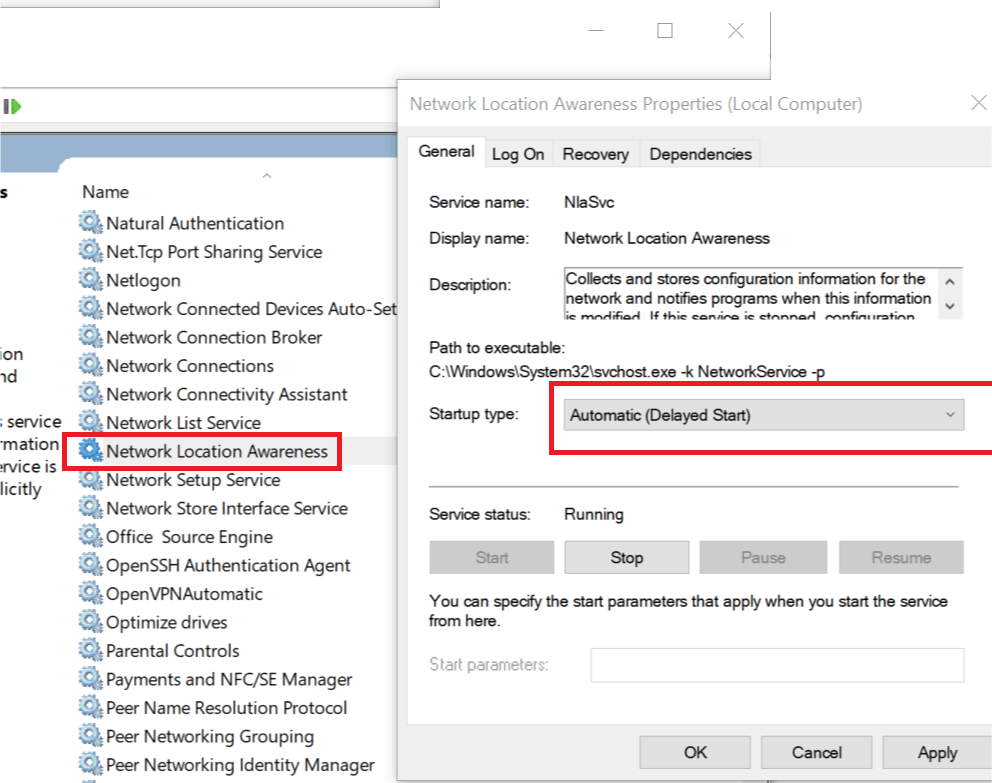
- In the Services window look for Network Location Awareness Properties.
- Right-click on Network Location Awareness and select Properties.
- For the start-up type, select the drop-down menu and set it to “Automatic Delayed”.
- Click Apply and OK to save the changes.
- Close the Services and check if you are able to connect to your Skype account.
- Changing the Network Location Awareness Properties will help if the issue has occurred due to a slow connection between the SQL servers etc.
3. Issues with Third-party firewall
- If you are using a third-party Firewall then you need to make changes accordingly. Since there are so many antivirus and firewall programs, you need to find the right settings to add Skype to the exception list by the searching for your Firewall program.
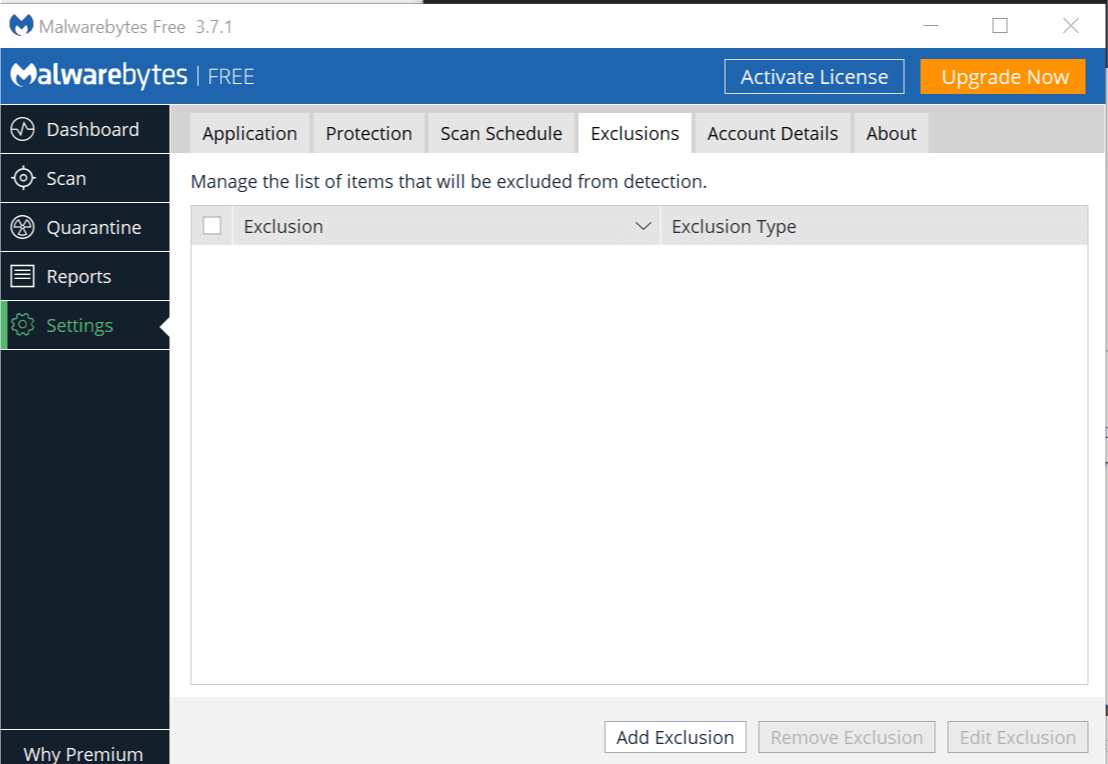
- For Malwarebytes users, you can find the appropriate option in the Settings tab.
- Go to Settings and click on the Exclusion tab.
- Click on Add Exclusion, select “Exclude an application that connects to the internet” and clicks Next.
- Then select the Skype application and make necessary changes depending on your requirement.
RELATED STORIES YOU MAY LIKE:


User forum
1 messages