FIX: G Pro wireless not showing in Logitech gaming software
5 min. read
Updated on
Read our disclosure page to find out how can you help Windows Report sustain the editorial team. Read more
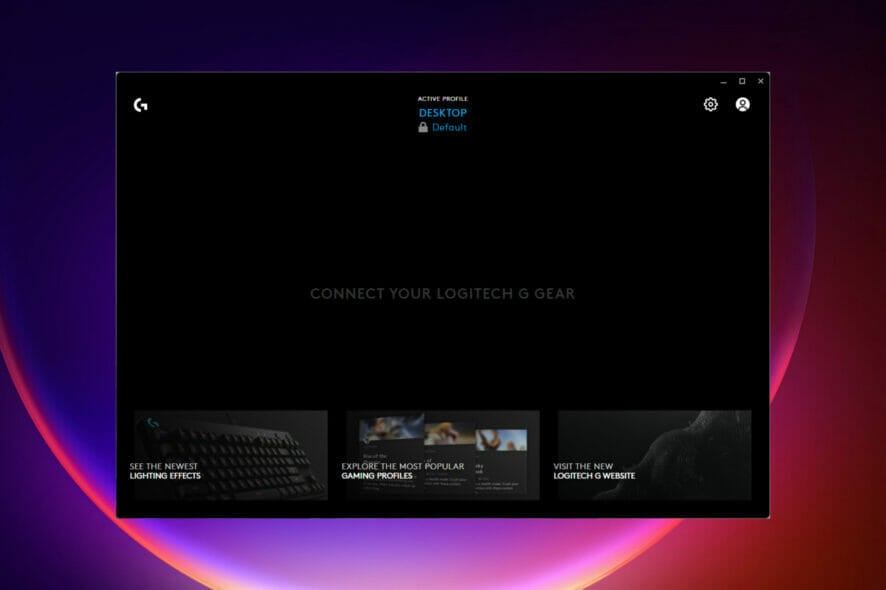
Logitech customers can manage mouse settings with one of two programs: G Hub (Logitech Advanced Gaming Software) or Logitech Gaming Software.
To perform activities like personalizing your hotkeys, altering RGB, and changing your DPI, you’ll need one of these programs loaded. It will most likely identify your mouse and allow you to access it and change its settings.
Almost all Logitech mice released in the last ten years are compatible with Logitech Gaming Software. However, a mouse may require a specific version to function correctly.
This article shows solutions to fix any problems associated with g pro wireless not showing up in Logitech gaming software.
How do I know the software that will work for my mouse?
Please read the instructions that come with the mouse to verify what software is compatible with it.
All the newer Logitech mice are not supported by the Logitech Gaming Software. They are designed for use with the Logitech Advanced Gaming Software (G Hub).
The G Hub has a unique user interface, but it is very similar to Logitech Gaming Software. Both control the same functions for linked devices in a similar way.
The G Hub from Logitech does not support the older Logitech devices, and this will be an issue if you have an older mouse.
What are the best fixes for the Logitech g pro wireless not detected on my gaming software?
1. Restart your computer
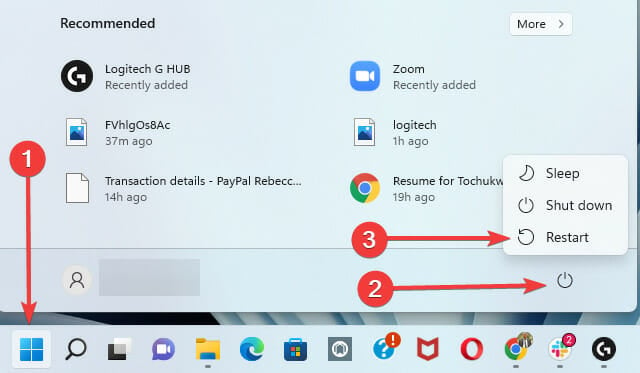
- Click the Start icon, click the input/output button, and select restart.
This initial step is the most straightforward. Restarting the computer frees up RAM and eliminates any background apps interfering with the Logitech G HUB.
It can help your computer work more smoothly in some circumstances by eradicating some flaws. This is an excellent solution to try before moving on to something more complicated.
If you’ve rebooted multiple times, skip to the next step below.
2. Update the device drivers
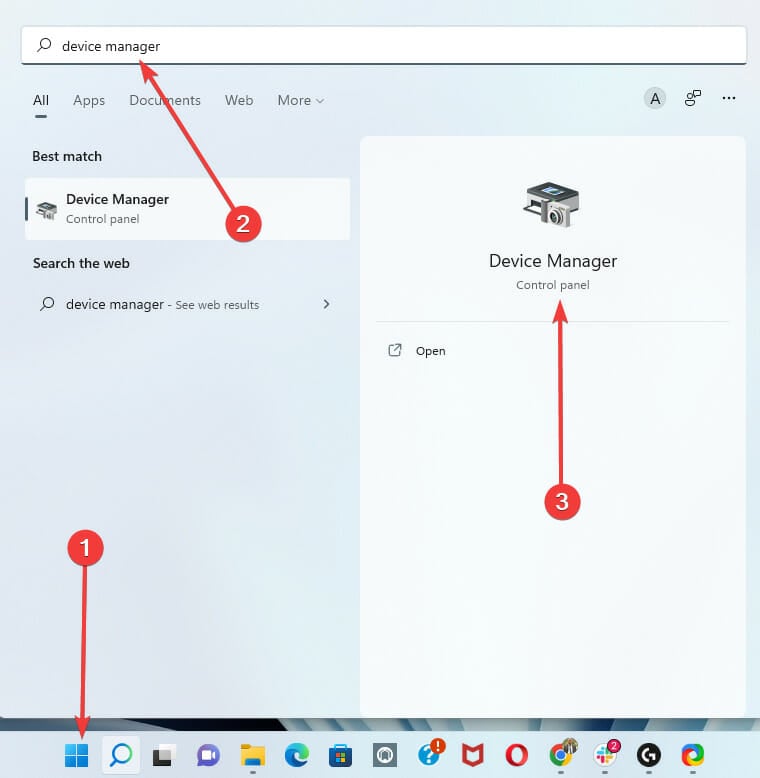
- Click on the Start menu, type in device manager, and select the option for the Device Manager app.
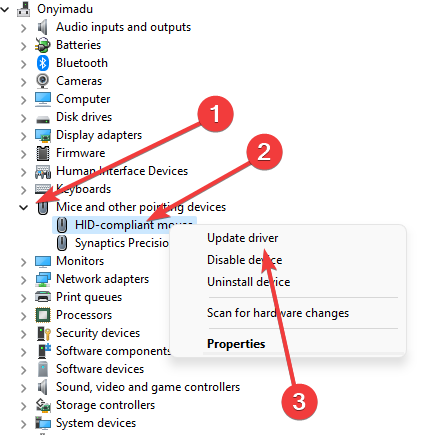
- Expand the Mice and other pointing devices section, then right-click on your mouse and select the option to update.
Alternatively, you can use third-party tools to update device drivers. Our recommendation is Outbyte Driver Updater, which ensures the update process is safe and keeps the PC away from wrong driver versions.
3. Start the app with admin privileges
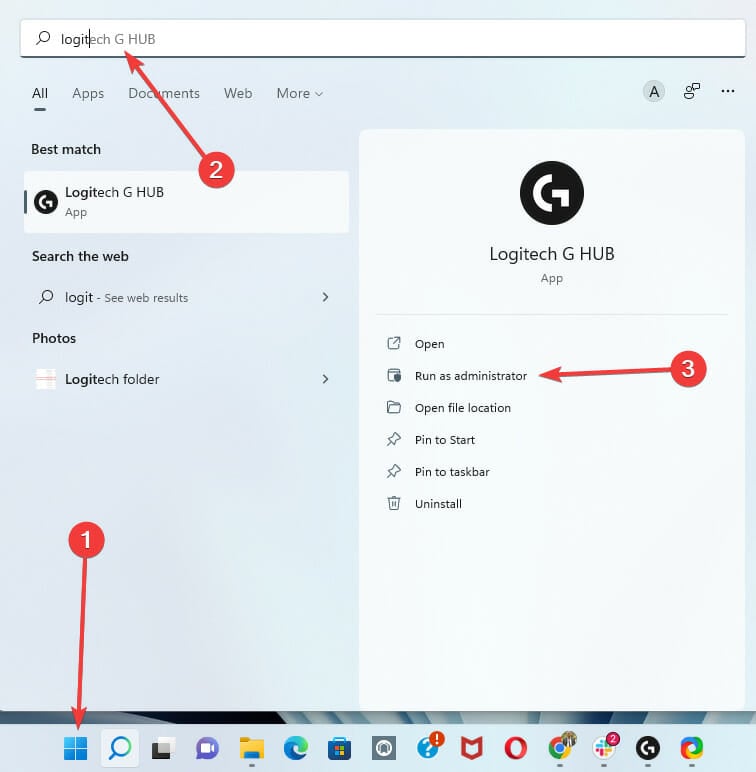
- Click on the Start menu, type in Logitech, and select the option to Run as administrator.
When changing an application’s permissions, ensure it isn’t currently executing. You’ll need to start it afresh to enable admin rights if it is.
4. Uninstall and reinstall the Logitech gaming software
4.1 Uninstalling the software
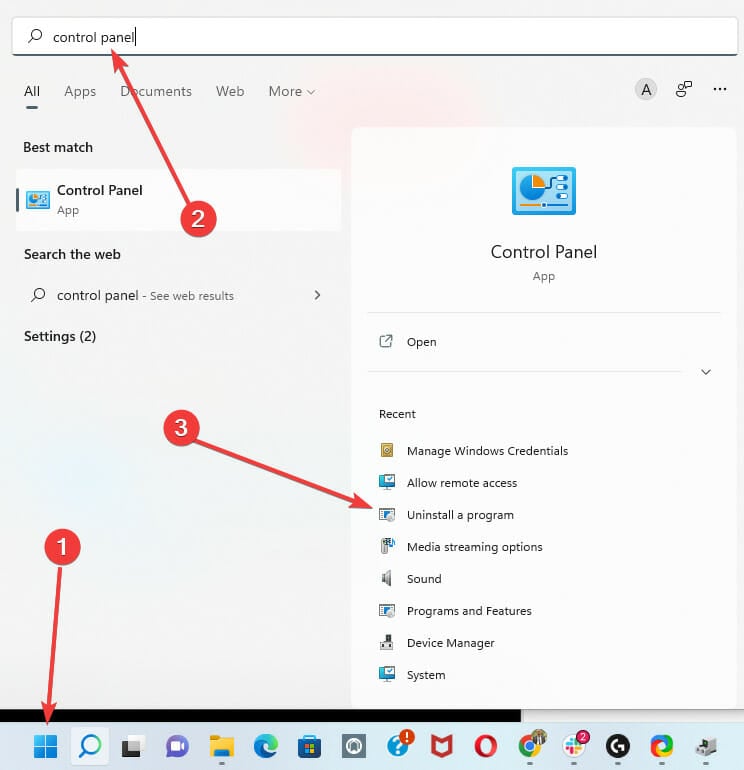
- Click on the Start menu, type the control panel, and select the option to Uninstall a Program.
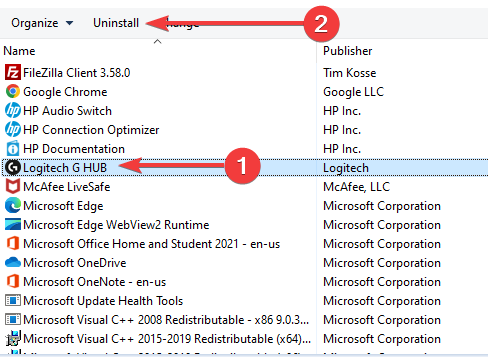
- Under the list of programs, select the Logitech software and click on the uninstall tab.
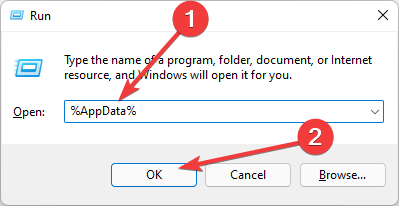
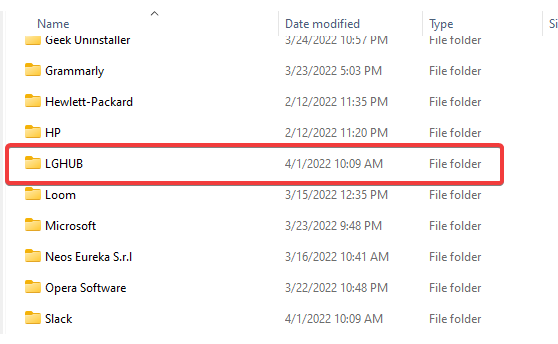
- Open the Run dialog using Windows + R, type in %AppData%, and hit ok.
- Delete any folder related to the Logitech app.
It’s also imperative that you’re not using both versions of the program on your PC. Installing both on your computer may cause issues with your mouse’s functionality.
4.2 Reinstalling the software
- Download the app from the official download page.
- Click on the .exe and follow the installation process.
It is advisable to download a fresh copy rather than reinstall the old copy. There are situations where the old copy gets corrupted, and some functionality issues will arise.
5. Update Bluetooth drivers
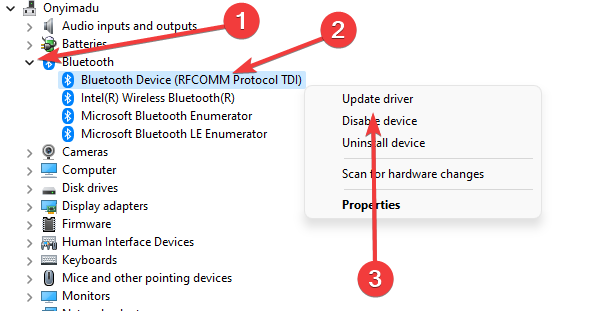
- Click on the Start menu, type device manager, and select the Device Manager app.
- Expand the Bluetooth option, right-click on your Bluetooth device and click the update option.
There are various things to consider while utilizing a Wireless Bluetooth mouse. It is necessary to verify if Bluetooth is updated. Furthermore, the gadget must be close to the PC and should not interfere with other Bluetooth devices nearby.
6. Replace the G pro battery
You should use new batteries and double-check that the wireless connection is being detected by the computer. The Logitech Gaming Software can’t identify your mouse when the PC doesn’t recognize it at all.
Note that mouse feet must be removed to change the battery on a G PRO Wireless mouse. If you want to reuse the mouse feet, heat will weaken the glue, allowing you to remove them with minimum bending. Mouse feet that are bent or damaged may need to be replaced.
7. Install pending Windows updates
- Click on the Start menu and open the Settings app.
- On the right pane scroll to the bottom and select the Windows Update option. Then on the right pane, you should download and install any pending updates.
8. Contact Logitech support
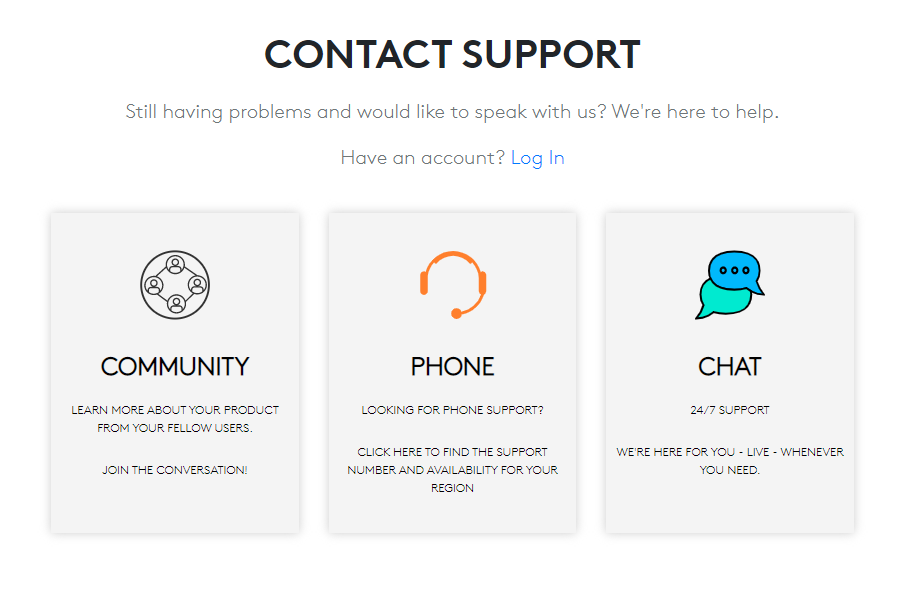
- Visit the support website.
- Scroll to the bottom of the page and select any support type you prefer. Then follow the steps to make your complaint.
This should be, in many cases, the last resort to solving issues with your g pro wireless not showing up in the Logitech gaming software.
For further solutions to wireless mouse issues, you should read our guide on Wireless mice not working on PC [Quick Fix]. If the issue is still there, you can reset Logitech G Pro Wireless and check if that helps.
Most of the solutions in this article are straightforward, and with just a few mouse clicks, you should be well on your way. While these solutions are in no particular order, we suggest contacting customer care after no other fix has worked.
Let’s know which of these fixes worked for you in the comments below.







User forum
0 messages