6 Ways to Enable a Guest Account on Windows 10
Running some commands on CMD is the fastest way to do this
8 min. read
Updated on
Read our disclosure page to find out how can you help Windows Report sustain the editorial team. Read more
Key notes
- If you want to enable a guest account on Windows 10, you can use the Group Policy Editor.
- Another effective option is to go through Computer Management.
Sometimes, you need to share your PC with other users, but that can be both privacy and safety concerns. You don’t want your guests to have full access to your PC and personal files, and this is why a Guest account can come in handy.
A guest account is an extremely useful feature, and today we’re going to show you how to use it on Windows 10.
How do I add a Guest account to my Windows 10 computer?
1. Create a new Guest account using Command Prompt
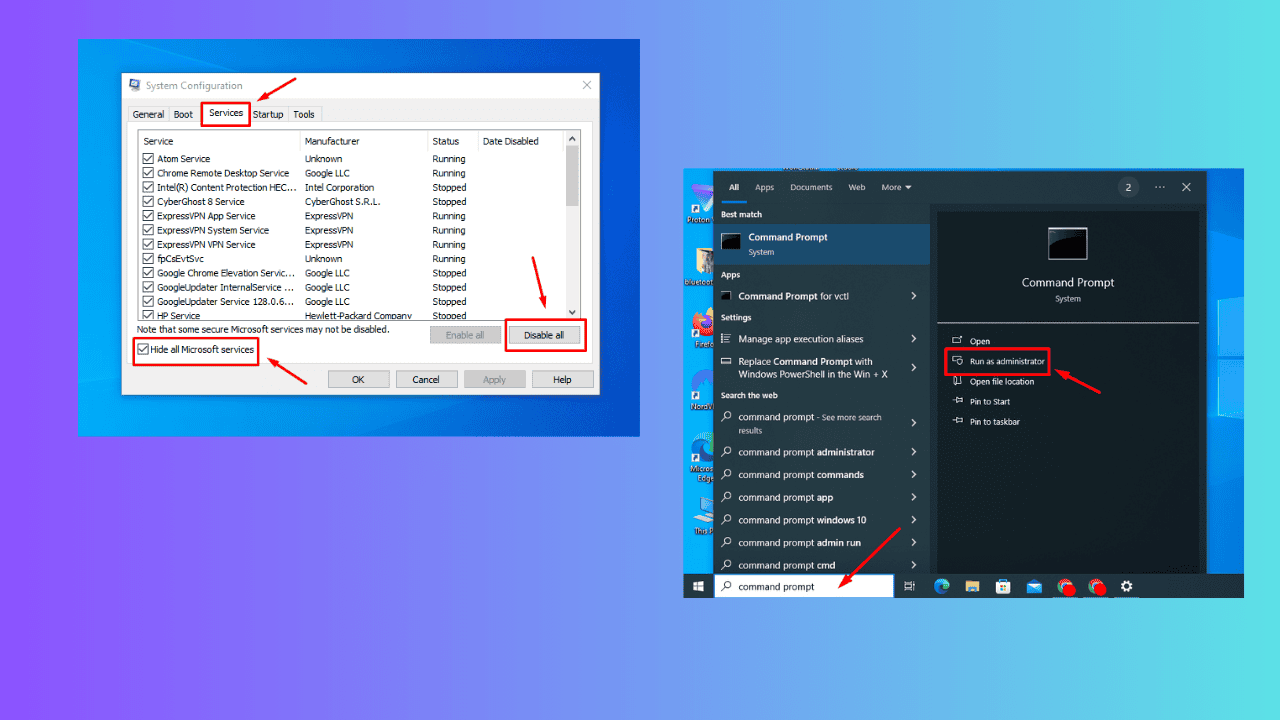
- Press Windows key + S, type cmd, and select Run as administrator under Command Prompt.
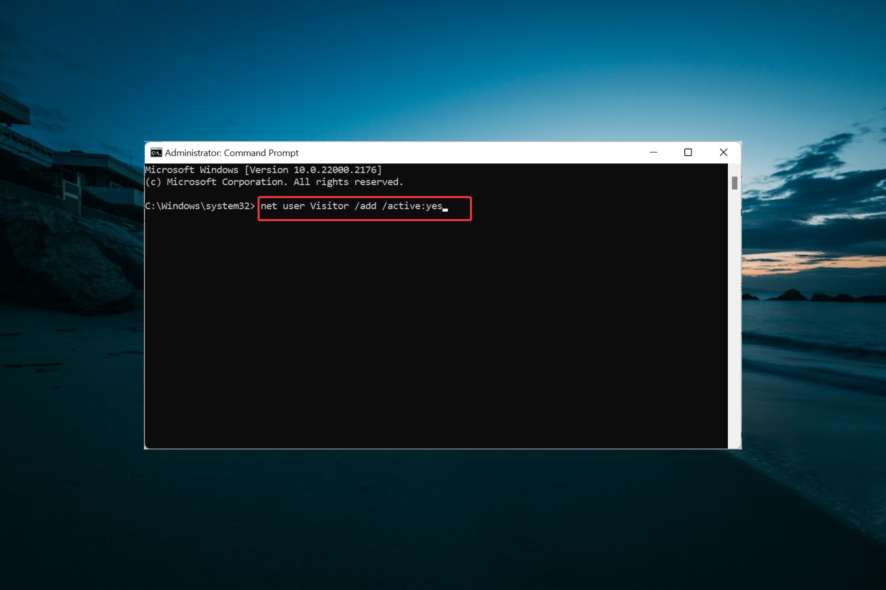
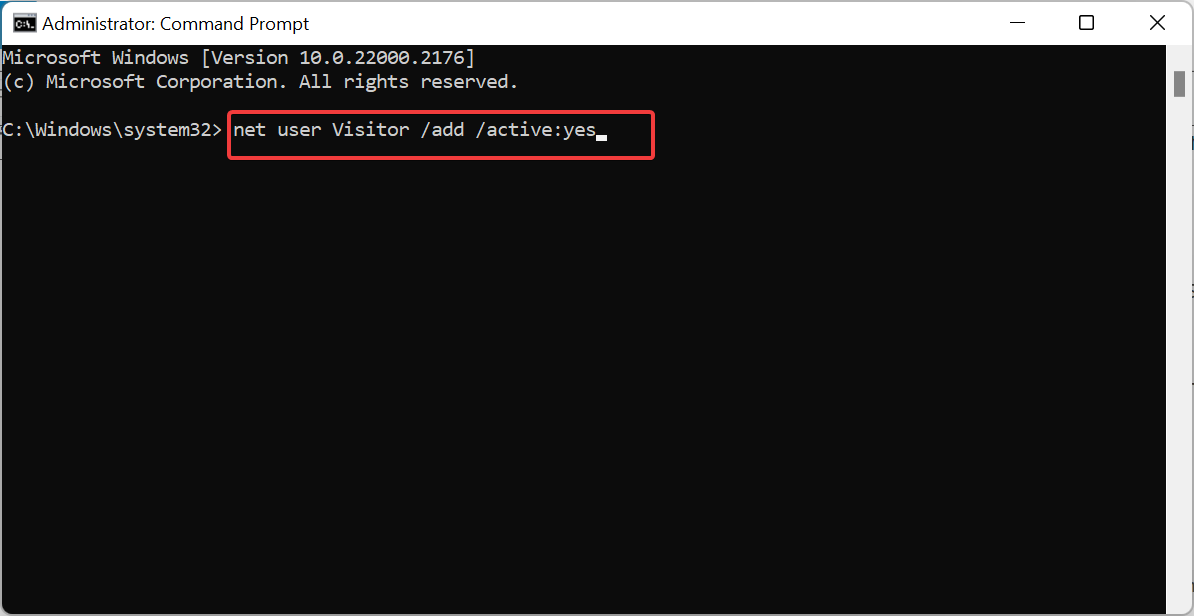
- When Command Prompt opens, you need to create a new account called Visitor. To do that, enter:
net user Visitor /add /active:yes - Now, type the command below and press Enter.
net user Visitor * - You’ll be asked to enter a password for this account. Passwords aren’t required for guest accounts, so press Enter twice to leave the password field blank.
- Now, you need to remove the Visitor account from the Users group. By default, all created accounts are added to the Users group that has full access to your PC.
- Therefore we need to remove the Visitor account from the Users group by running the command below:
net localgroup users Visitor /delete - Now, you need to add the Visitor account to the Guests group by running the command below:
net localgroup guests Visitor /add
In previous versions of Windows, you could create a Guest account easily, just as any other account, but with Windows 10, Microsoft decided to make some changes, and it almost removed this feature.
There is still a way to create a Guest account on your Windows 10 PC, but it requires that you use Command Prompt to create a new user and add that user to Guests group.
After doing that, close Command Prompt, and you should have a new Visitor account that has limited privileges of a Guest account. If you want to use the Guest account, simply log in to the Visitor account, and the Visitor account should work completely as a Guest account.
2. Use Local Group Policy Editor
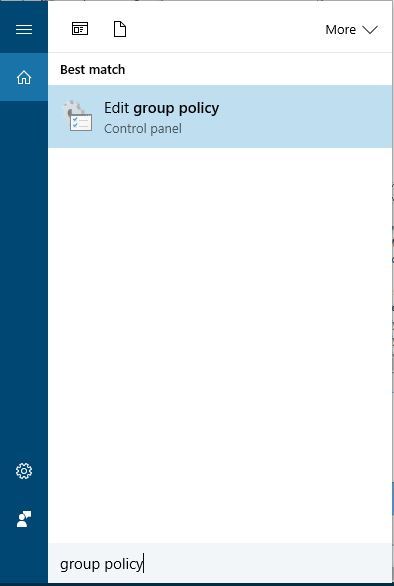
- Press Windows key + S and enter group policy. Choose Edit group policy from the menu.
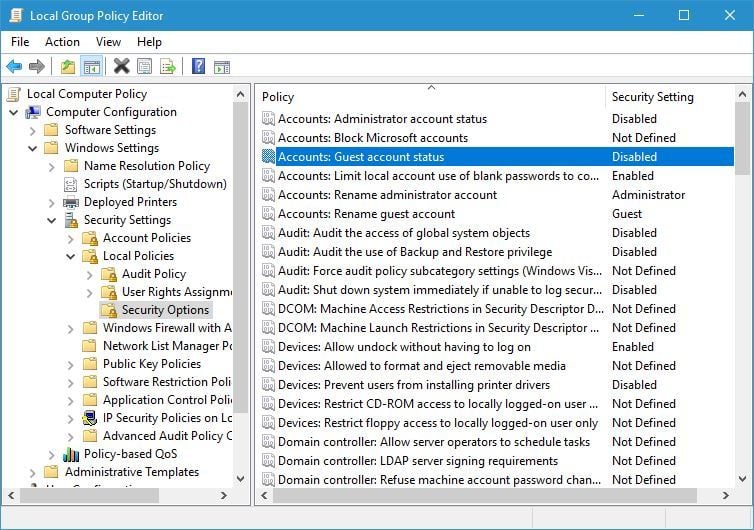
- When Local Group Policy Editor opens, in the left pane, navigate to the path below:
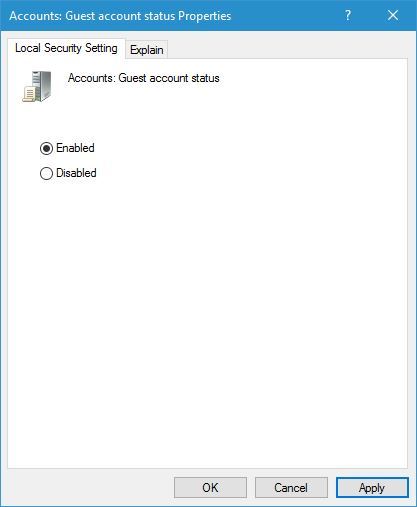
Computer Configuration > Windows Settings > Security Settings > Local Policies > Security - In the right pane, locate Accounts: Guest account status and double-click it.
- When the Properties window opens, select Enabled and click Apply and OK to save changes.
- Close Group Policy Editor.
Certain versions of Windows 10 come with the Group Policy Editor tool that allows you to change all sorts of advanced Windows settings. So you can enable the guest account with it.
After enabling this option in Group Policy Editor, you should be able to access the Guest account without any problems on Windows 10.
3. Use Computer Management
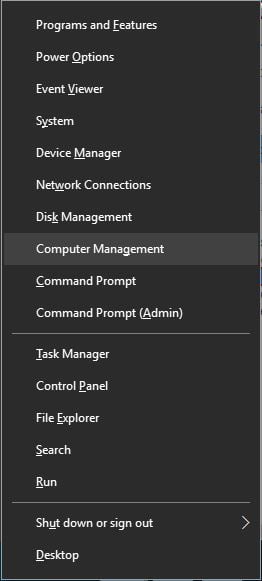
- Press Windows key + X and select Computer Management from the list.
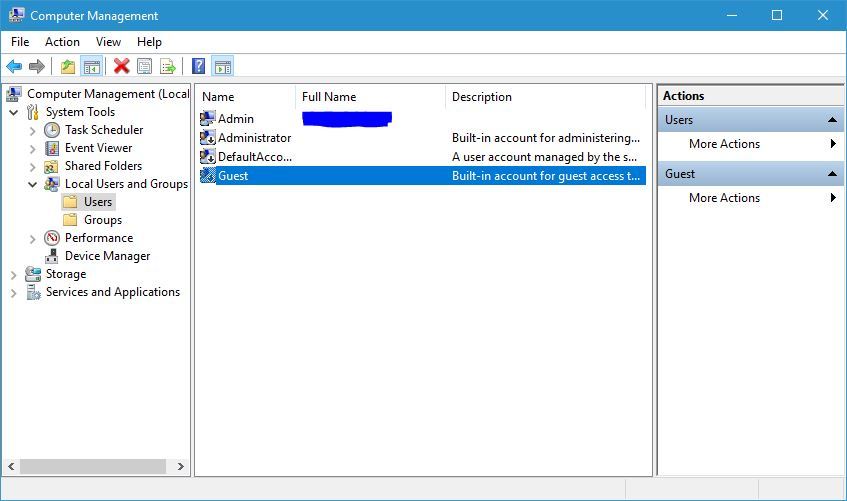
- When Computer Management opens, in the left pane, navigate to:
System tools > Local Users and Groups > Users - In the right pane, double-click Guest.
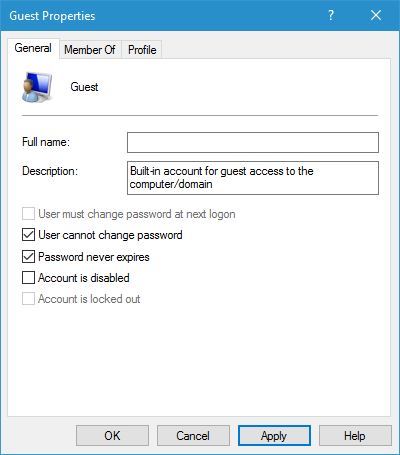
- When the Guest Properties window opens, you’ll see a list of options. By default, the Account is disabled option should be checked.
- Uncheck the Account is disabled option and click Apply and OK to save changes.
- Close the Computer Management window.
Computer Management is another Windows application that allows you to change various settings and view all sorts of important information regarding your PC.
You can use this application to change user account settings, but you can also disable or enable a Guest account by using this tool.
After disabling this option Guest account should be available on your Windows 10 PC. A few users also suggest that you need to restart your PC once you make changes to Computer Management, so be sure to try that as well.
4. Use Local Users and Groups tool
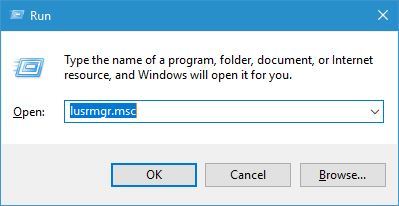
- Press the Windows key + R and enter lusrmgr.msc. Press Enter or click OK.
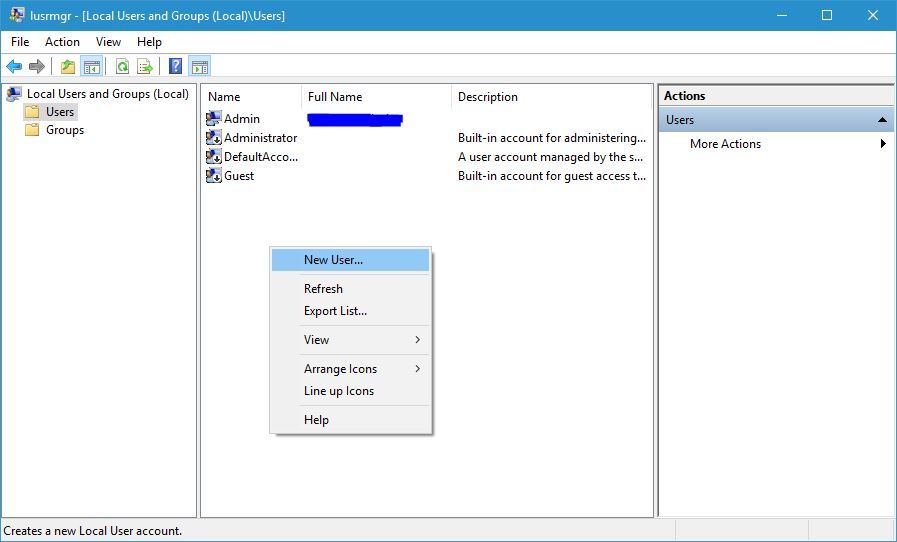
- When Local Users and Groups tool opens, select Users in the left pane. In the right pane, right-click the empty space and choose New User.
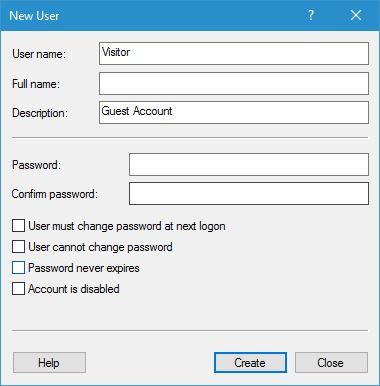
- Now Enter Visitor or any other name as User name. Feel free to enter any Description and uncheck User must change password at next login. Click Create button to create a new user account.
- A Visitor account should now be added to the list of accounts. Double-click the newly created account to see its properties.
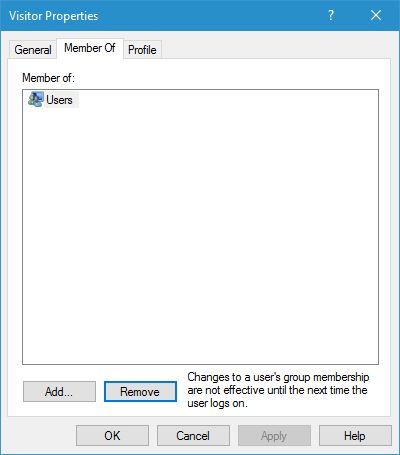
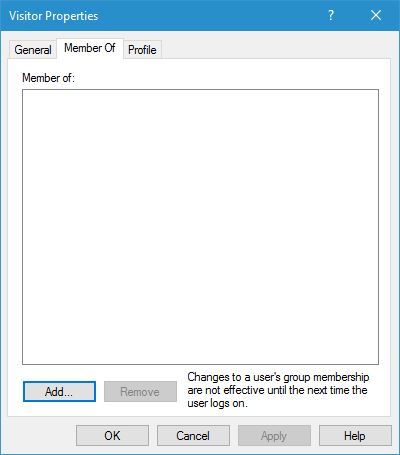
- When Properties window opens, navigate to the Member Of tab, select Users, and click the Remove button.
- This will remove the account from the Users group and remove any privileges that normal users have. It’s necessary to remove this account from the Users group because all new accounts are automatically added to the Users group when they are created.
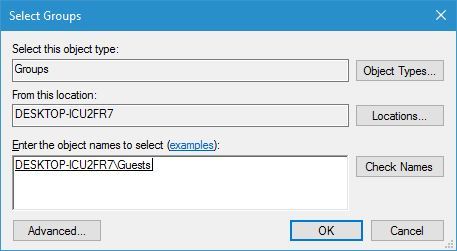
- Now click the Add button in the same window to assign the Visitor account to a new group.
- Select Groups window will now appear. In Enter the object names to select the field, enter Guests, and click Check Names. If your input is valid, click OK to save changes.
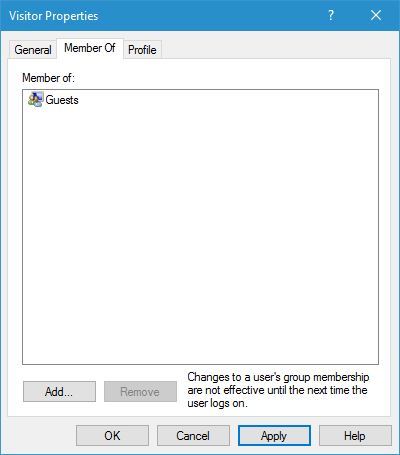
- Guests group will now appear in the Member of filed. Click Apply and OK to save changes.
- After you’re done, close Local Users and Groups tool.
You can also add a new Guest user to your PC by using Local Users and Groups tool. This solution is similar to Solution 1, but unlike Solution 1, it doesn’t require that you use Command Prompt.
5. Enable Guest account using Command Prompt
- Open Command Prompt as administrator.
- When Command Prompt opens, type the command below and hit Enter:
net user guest /active:yes - Close Command Prompt.
We already showed you how to create a new account and how to add it to the Guests group, but few users claim that you can enable a Guest account simply by running a single command using Command Prompt.
According to users, the Guest account is just disabled, and you can enable it simply by using this command. A few users reported that this method might not work until you make one more change in Local Group Policy Editor as shown below:
- Open Group Policy Editor.
- When Group Policy Editor opens, in the left pane, navigate to:
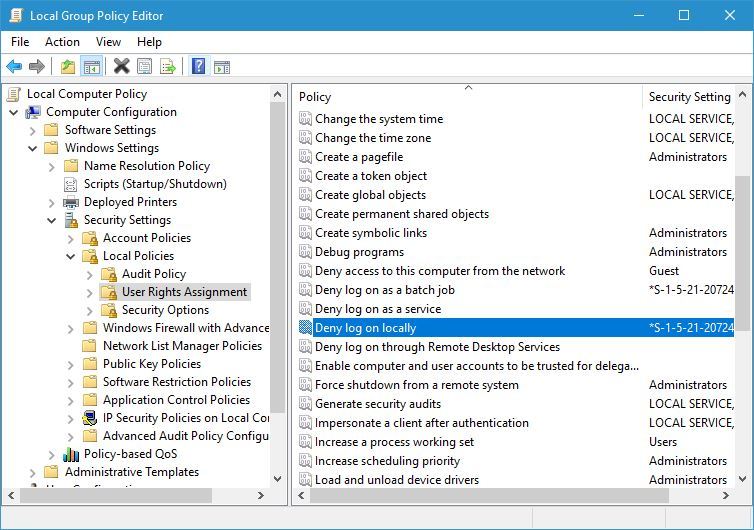
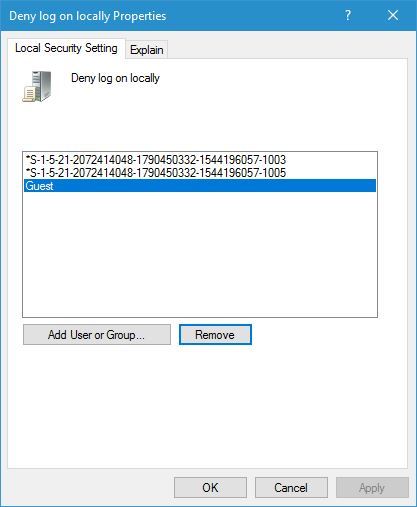
Computer Configuration > Windows Settings > Security Settings > Local Policies > User Rights Assignment - In the right pane, locate Deny log on locally policy, and double click it to open its properties.
- You should see a list of accounts that aren’t enabled for access. Among them, you should see the Guest account.
- Select Guest account and click on Remove button.
- Click Apply and OK to save changes.
- Close Group Policy Editor.
As you can see, you can’t log in to your Guest account on Windows 10 by default, but after enabling this account from Command Prompt and changing your Local Group Policy, you should be able to access it without any issues.
6. Create a new user account and change its account type
- Open the Settings app by pressing the Windows key + I.
- Go to Accounts and select Family & other people.
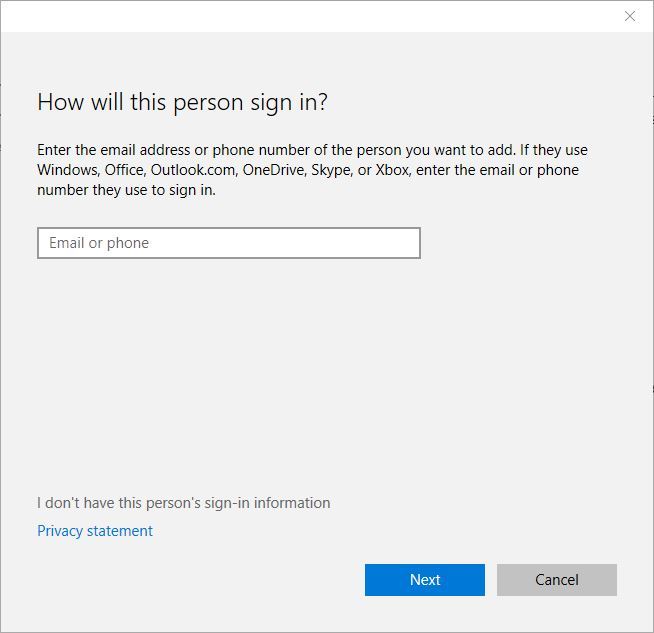
- In the Other people section, click on Add someone else to this PC.
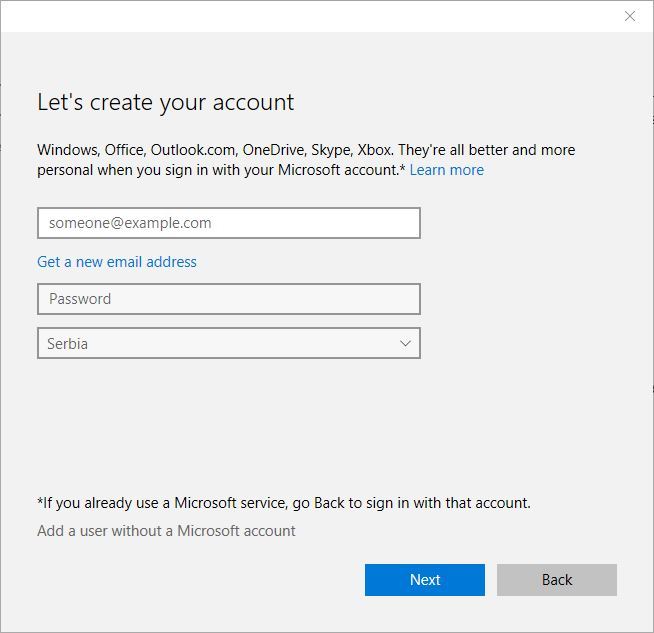
- Select I don’t have this person’s sign-in information.
- Now click on Add a user without a Microsoft account.
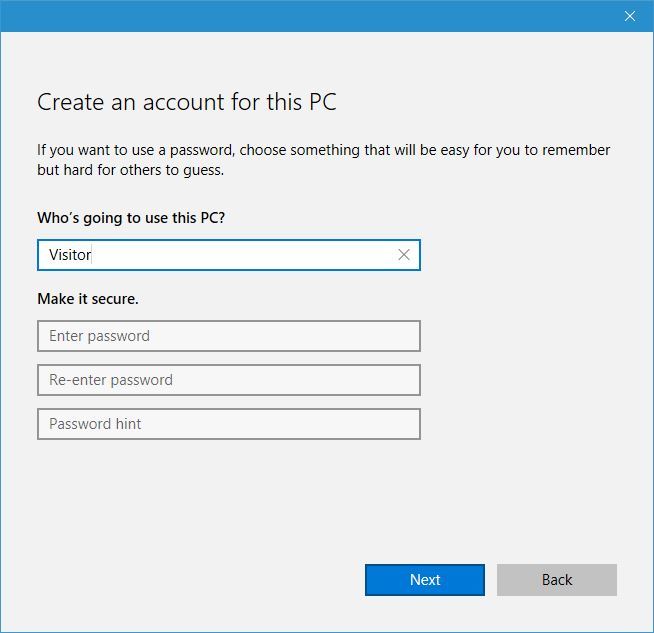
- Enter Visitor as the user name and click Next.
- In the Other people section, you should see the Visitor account that you just created.
According to users, you can fix this problem simply by creating a new user account and changing its account type.
By default, all created accounts are added to the Users group, which gives them full access to your PC. Since we don’t want that, we need to change the account type by following these steps:
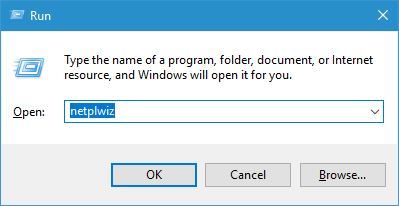
- Press Windows key + R and enter netplwiz. Press Enter or click OK.
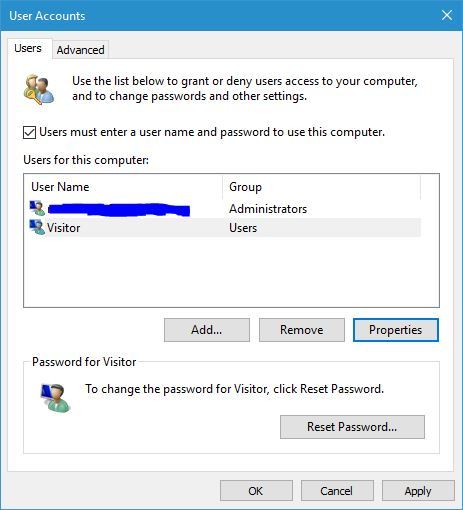
- The User Accounts window will now appear, and you’ll see all available accounts.
- Check Users must enter a user name and password to use this computer option. Double-click the Visitor user to open its properties.
- When the Visitor Properties window opens, go to the Group Membership tab. Here you’ll be able to choose between several different groups that have different privileges on your PC.
- Select Other, and from the dropdown menu, choose Guests.
- Click Apply and OK to save changes.
After doing that, you should have a Visitor account that has the same privileges as a Guest account.
As you can see, a Guest account is an extremely useful feature to have, and we’re not sure why did Microsoft remove support for this feature. If you still want to use a Guest account on your Windows 10 PC, be sure to try some of our solutions.
Similarly, if you want to change your admin account, check our detailed guide on the topic.
Feel free to let us know the option you enjoy using from our list in the comments below.




User forum
0 messages