FIX: HDMI Isn't Showing in Playback Devices on Windows 10/11
8 min. read
Updated on
Read our disclosure page to find out how can you help Windows Report sustain the editorial team Read more
Key notes
- Is your HDMI not showing up on the playback devices? Your drivers must be causing the problem.
- Reinstalling your graphics drivers will surely fix the problem. We recommend a third-party program for that.
- Make sure you double-check the playback device list if your monitor is not showing up in your sound devices.
- Some users said to update your HD Audio Device if your Windows 10 HDMI audio is not detected.
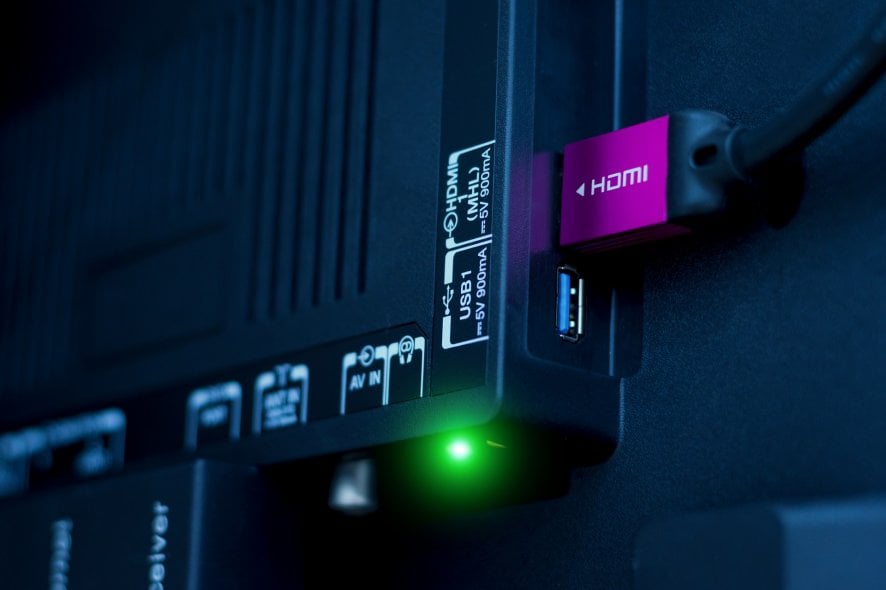
Many users tend to connect an additional display to their PC using the HDMI connection, but sometimes HDMI is not showing up in the playback devices section.
This can lead to certain problems, but today we’ll show you how to easily fix this issue.
Sometimes your HDMI device won’t show up in the playback devices section. That can be a big multimedia issue, and speaking of HDMI issues, here are some common problems that users reported:
- Digital output device (HDMI) missing Windows 10
- This is a common problem, and if this happens, be sure that your HDMIdevice isn’t hidden or disabled in playback devices section.
- Windows 10 no HDMI audio option
- Sometimes HDMI audio won’t work due to your audio drivers.
- To fix the issue, reinstall your audio driver. If the issue is still there, update the audio driver to the latest version and check if that helps.
- HDMI port not working on laptop
- Sometimes this problem can occur due to your graphics card drivers.
- To fix the issue, update the drivers to the latest version and check if that helps.
- HDMI not showing up as audio device Windows 10, up in Sound
- This is a relatively common problem, and in order to fix it, be sure that you turn on your HDMI device, connect it to the PC, and then turn on your PC.
- By doing so, you’ll force the PC to recognize the device.
- HDMI not detected, working, recognized, playing audio
- These are some relatively common HDMI issues, and we covered most of them in our how to fix HDMI output problems article, so be sure to check it out for more solutions.
How do I fix HDMI not showing up in my playback devices
- Install the default graphics driver
- Reinstall the graphics card drivers
- Double-check the playback devices list
- Update the High Definition Audio Device
- Disable the Hyper-V feature
- Change the projection mode
- Make sure that you turn on your devices in the correct order
- Remove the problematic applications
1. Install the default graphics driver
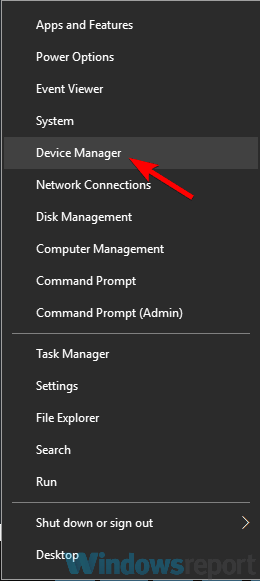
- Press Windows Key + X to open Win + X menu.
- Now select Device Manager from the list.
- When Device Manager opens, locate your graphics card driver and right-click it.
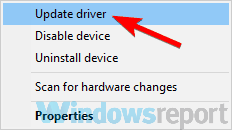
- Choose Update driver from the menu.
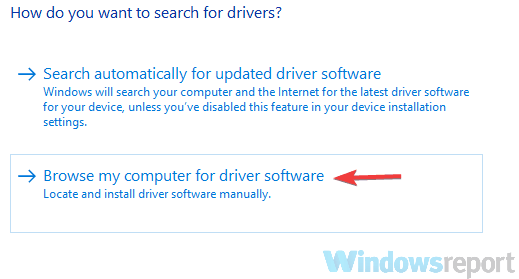
- Select Browse my computer for driver software.
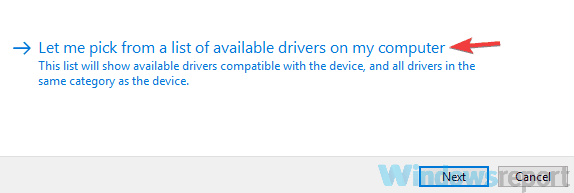
- Now select Choose Let me pick from a list of device drivers on my computer.
- Select the available driver and click Next.
- Follow the instructions on the screen to complete the process.
According to users, if HDMI is not showing up in playback devices, the problem might be related to the drivers. To fix this issue, users are suggesting installing the default graphics card driver.
Once the default driver is installed, check if the problem is still there. Bear in mind that the default driver might not offer the same performance as the latest driver.
So if you’re planning to play the latest games on maximum settings, perhaps this won’t be a good long-term solution for you.
2. Reinstall the graphics card drivers
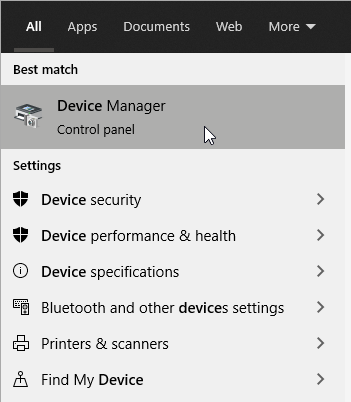
- Open the Windows search bar.
- Type in Device Manager.
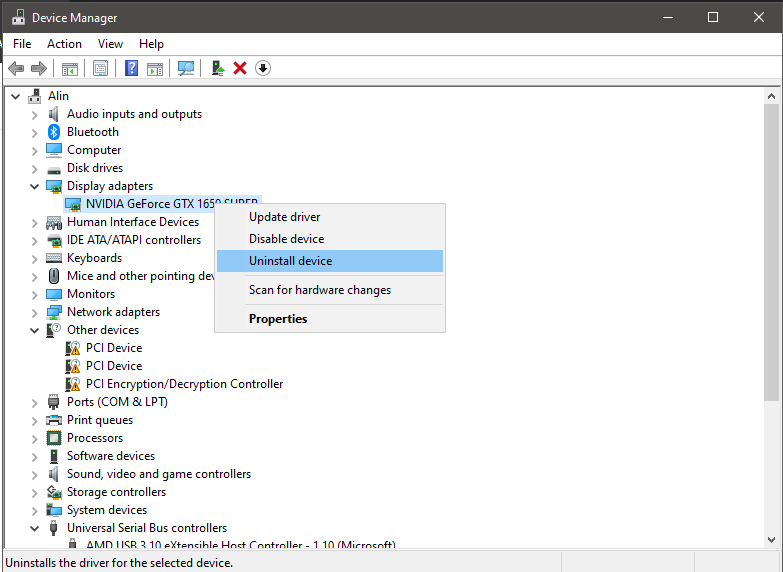
- Expand your Display Adapters section.
- Select your GPU, then right-click on it and select Uninstall.
- Now restart your computer.
- After your computer finished restarting, it will automatically search for a new driver.
Once you remove the drivers, try installing the latest drivers for your graphics card. You can do that by visiting your graphics card manufacturer’s website and downloading the latest driver for your model.
As already mentioned in the previous solution, sometimes your graphics card drivers can cause this problem to appear. To fix the issue, some users are suggesting removing your graphics card drivers.
Update drivers automatically
To completely remove your drivers, it’s advised to use a third-party software driver updater that can do it automatically for you, so you won’t need to worry about doing something wrong.
The software will make sure all of your drivers are up to date. With just a few clicks, the app will scan your device for compatible drivers and install them. The process is mostly automated as well.
3. Double-check the playback devices list
- Open the Playback devices
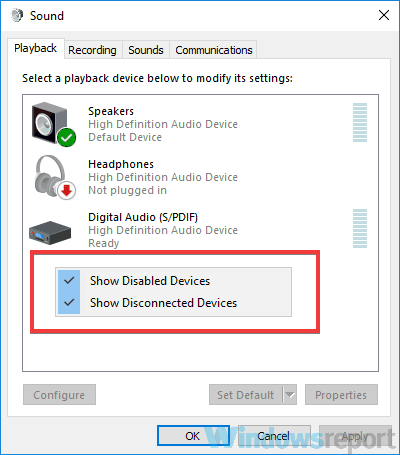
- Right-click the empty space and make sure that you check both Show Disabled Devices and Show Disconnected Devices.
Many users reported that HDMI is not showing in playback devices section, and if this happens on your PC, perhaps the HDMI device isn’t listed as HDMI on the list.
Many users reported that their device was listed as the model of their display followed by NVIDIA High Definition Audio.
As you can see, the device won’t be listed as HDMI, so you’ll need to pay a bit more attention and check all devices in the playback devices section in order to find your HDMI device.
Several users reported that their HDMI device was disabled and therefore hidden in the playback devices section. To fix that, you need to reveal all playback devices by doing the following:
After doing that, you should be able to see your HDMI device on the list and enable it.
4. Update the High Definition Audio Device
To do that, follow these steps:
- Open Device Manager and locate High Definition Audio Device.
- It should be listed as AMD High Definition Audio Device or NVIDIA High Definition Audio Device.
- Right-click the device, and choose Update driver.
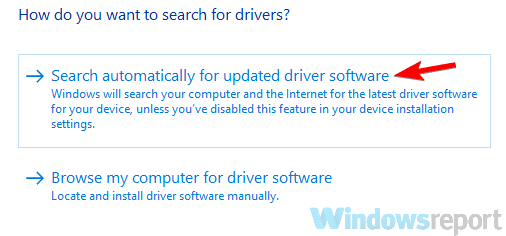
- Now select Search automatically for updated driver software and Windows will try to update the driver on its own.
According to users, if HDMI isn’t showing in playback devices, the issue can be related to your audio driver. To fix the problem, you just need to update this driver.
Once the driver is up to date, check if the problem is still there. If this method didn’t fix the problem for you, you can try updating the driver manually and check if that helps.
Some users are suggesting to uninstall your HDMI sound driver and install it again, so you might want to try that as well.
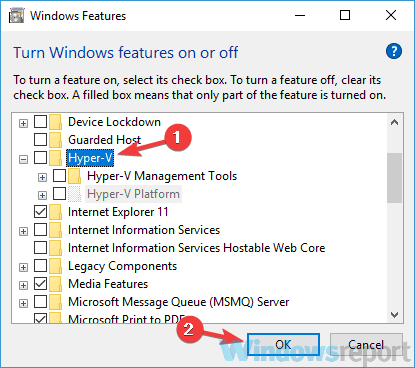
5. Disable the Hyper-V feature
- Press Windows Key + S and type windows features.
- Now choose Turn Windows features on or off.
- Windows Features window will now appear.
- Look for Hyper-V on the list and disable it.
- Once you disable this feature, click OK to save changes.
- Restart your PC to apply the changes.
Hyper-V is a virtualization feature, and thanks to it, you can create a virtual environment on your PC and use it to run any operating system inside of Windows.
Although this feature can be incredibly useful to some users, it can also cause issues with HDMI devices.
In fact, many users reported that their HDMI device wasn’t showing up in the playback devices section due to the Hyper-V feature.
According to them, they managed to fix the issue simply by disabling the Hyper-V feature. This is quite simple to do, and you can do it by following these steps:
Once your PC restarts, the Hyper-V feature will be disabled and the problem with HDMI should be resolved.
6. Change the projection mode
- Press Windows Key + P.
- You should now see a list of options.
- Select Duplicate or Extend from the list.
If HDMI isn’t showing in playback devices, the issue might be related to the projection mode.
Windows allows you to switch between several projection modes, and it seems that only duplicate and extend modes will show your HDMI device in the playback devices section.
After doing that, the HDMI device should appear in the playback devices section.
7. Make sure that you turn on your devices in the correct order
- Make sure that your PC and second display are turned off.
- Turn on your second display or TV.
- Now connect the HDMI device to your PC.
- Turn on your PC.
According to users, sometimes your HDMI device won’t show up in the playback devices section due to certain glitches.
Apparently, the HDMI device isn’t recognized if you plug it directly in your PC while it’s running. Once your PC boots, the problem should be resolved and the HDMI device should appear in the playback devices section.
Bear in mind that this is a one-time procedure, and once your HDMI device appears in the playback devices, the issue should be permanently resolved.
8. Remove the problematic applications
Several users reported that third-party applications can sometimes lead to issues with HDMI and playback devices. If your HDMI device is not showing, perhaps the problem can be related to third-party applications.
Several users reported that VLC Media Player caused this issue, but after removing the application, the issue was resolved.
Bear in mind that there are several ways to remove an application, but the most effective one is to use a dedicated utility such as CCleaner.
CCleaner is a PC cleaning and optimization software that has a powerful uninstaller feature, capable of completely removing any app along with its corresponding files and registry entries.
Once the application is removed, check if the problem is still there. Problems with HDMI devices are fairly common, and if your HDMI device isn’t showing in playback devices, be sure to try all of our solutions.
These are just a few of the solutions you can try to resolve this issue, but we also have further solutions for when there is no HDMI signal.
Let us know which one works best for you in the comments section below.

