How to Set Double Space in Microsoft Word: 4 Easy Ways
The shortcut for double line spacing is Ctrl + 2
![]() 3 min. read
3 min. read
![]() Published on
Published on
Share this article
Improve this guide
Read our disclosure page to find out how can you help Windows Report sustain the editorial team. Read more
Double spacing in Microsoft Word can make your documents more readable and professional. The quickest way to double the line spacing in Word is by pressing Ctrl + 2 on selected text.
How do I set and create double space in Word?
1. Use the keyboard shortcut
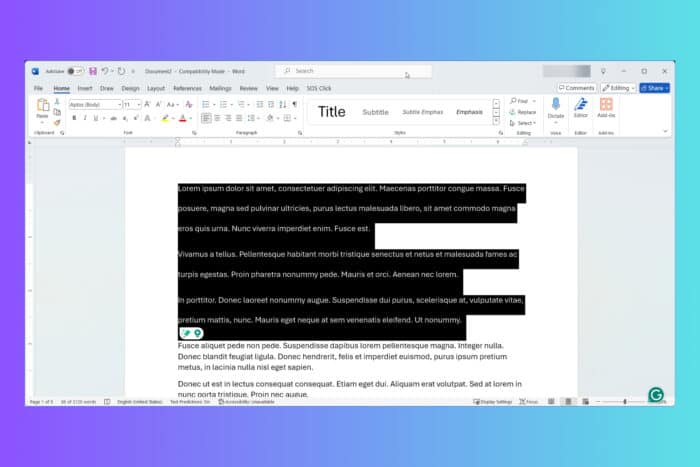
- Select the text that you want to double space. If you want to double space the entire document, press Ctrl + A to select all text.
- Press Ctrl + 2 on your keyboard to instantly change the line spacing to double.
Using the keyboard shortcut is a quick method to apply double spacing without navigating through the menus, especially useful when working on lengthy documents.
2. Format the paragraph for double spacing
- Open Microsoft Word and either create a new document or open an existing document.
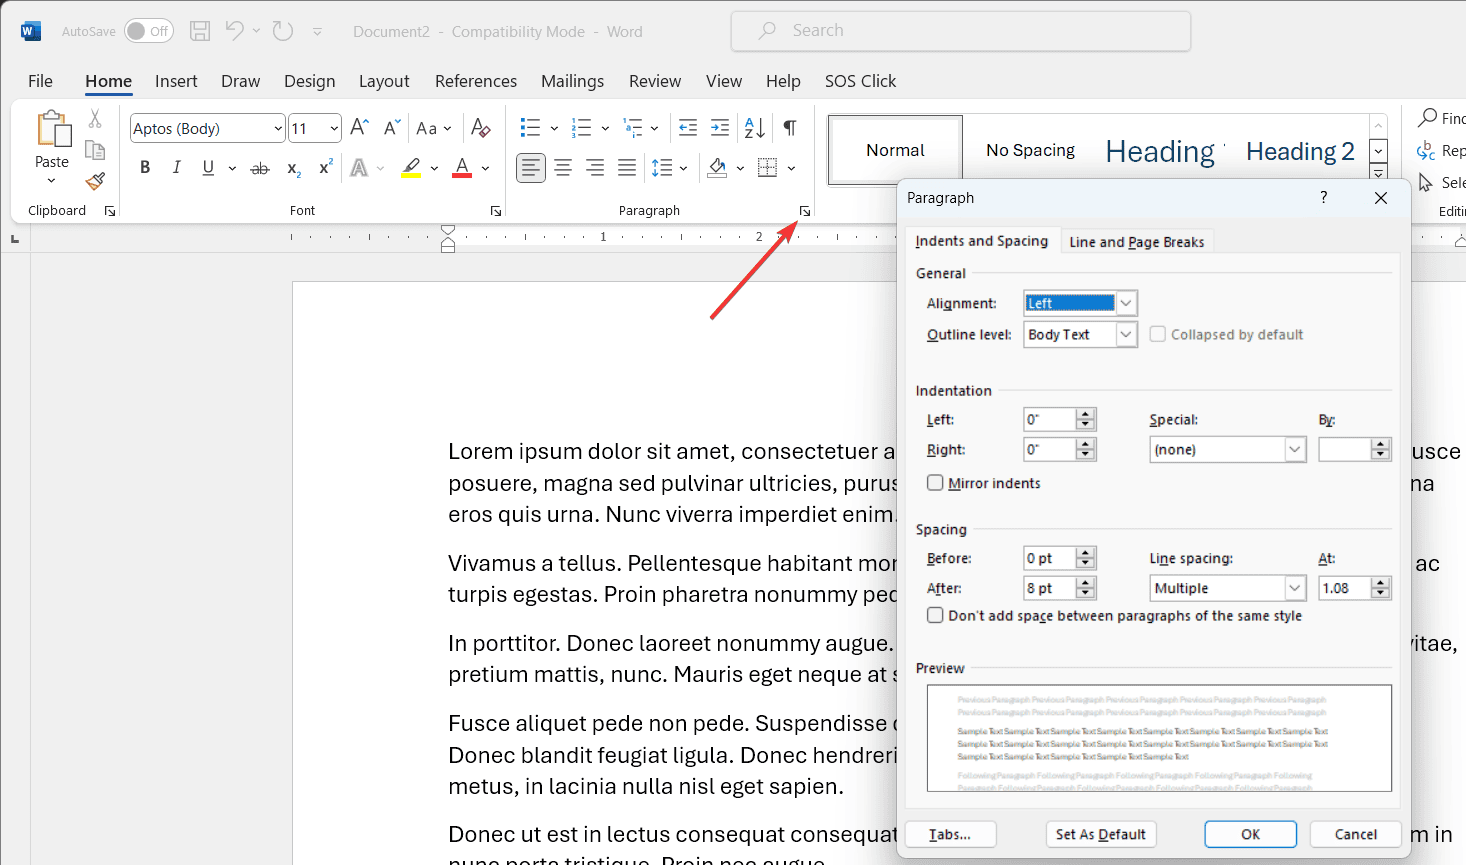
- Click on the Home tab located at the top of the Word window.
- Look for the Paragraph group, and click on the small arrow in the lower right corner. This will open the Paragraph dialog box.

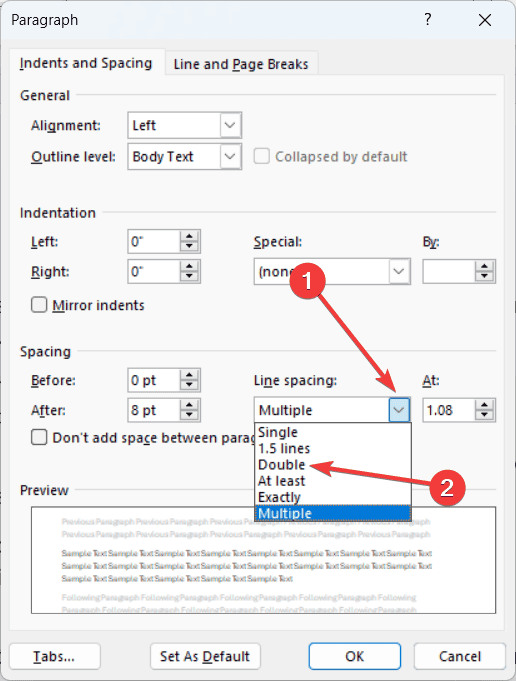
- In the Paragraph dialog box, look for the Line spacing drop-down menu. Click on it and select Double from the list.

- Click OK to apply the double spacing to your selected text or to the entire document if no text is selected.
Applying double spacing through the Paragraph dialog box ensures that every part of your document adheres to the selected line spacing, making it easy to read and edit.
3. Set louble spacing as default
- Open a new or existing Word document.
- Again, click on the Home tab and then the small arrow in the Paragraph group to open the Paragraph dialog box.
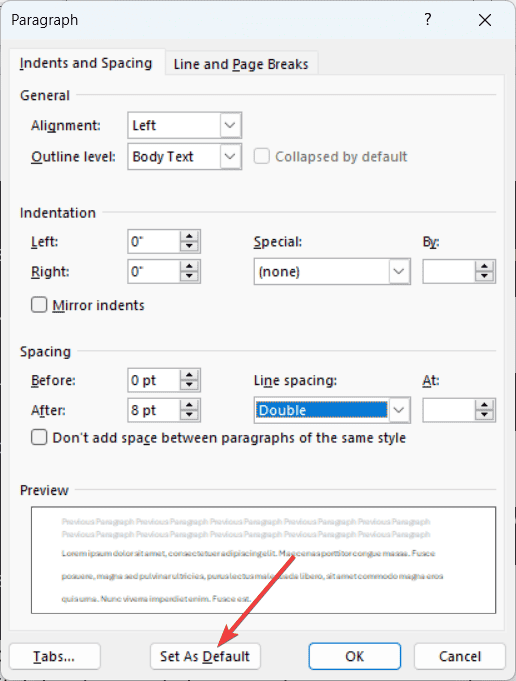
- Set the Line spacing to Double as previously explained.
- Click on the Set As Default button at the bottom of the dialog box.
- Choose whether to set this as the default setting for your current document only or for all documents based on the Normal template.
- Click OK to confirm.
Setting double spacing as the default ensures that all new documents you create will automatically have double spacing, saving you time in formatting.
4. Format styles for double spacing
- Open Microsoft Word and your document.
- Click on the Home tab.
- In the Styles group, right-click on the Normal style and select Modify.

- In the Modify Style dialog box, find the Formatting section.
- Click on the Double Space button (represented by a double-spaced icon) or set Line spacing to Double.
- Click OK to apply changes.
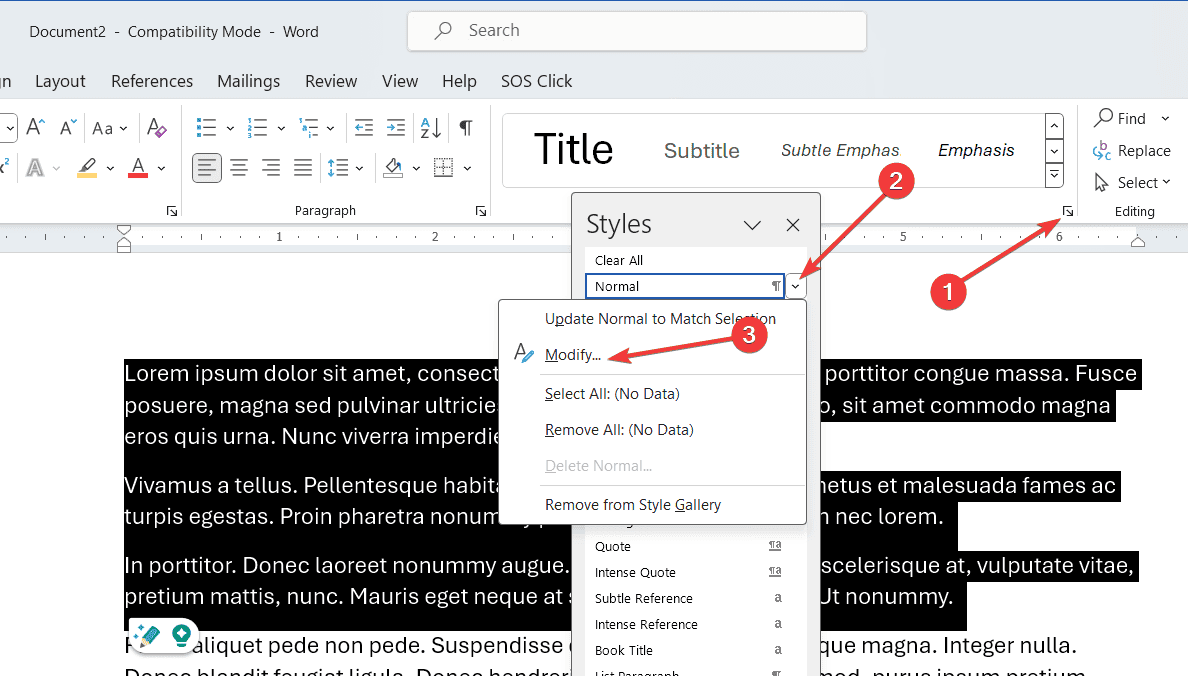
Modifying the Styles allows you to standardize the double spacing across various sections of your document, making it consistent and professional.
By following these comprehensive solutions, you’ll be able to achieve the desired double spacing format and improve the overall readability and professionalism of your Microsoft Word documents. Remember to save your settings to avoid repetitive formatting tasks in the future.
If you’re looking for more tips, here’s how to create an customize a Word table of contents. If something goes wrong, you can always reset the Microsoft Word settings to default.
Did you manage to set the line spacing to double in Word by using our guide? Let us know in the comments below.


User forum
0 messages