How to Lower Ping with Ethernet [Practical Tips & Tricks]
Get the best setup for seamless gaming, streaming & downloads
9 min. read
Updated on
Read our disclosure page to find out how can you help Windows Report sustain the editorial team. Read more
Key notes
- Ping indicates connection quality, and online activities like gaming require low ping.
- You can improve your internet connection quality and lower your ping with Ethernet.
- Using a VPN is another way of increasing connection quality and lowering latency.
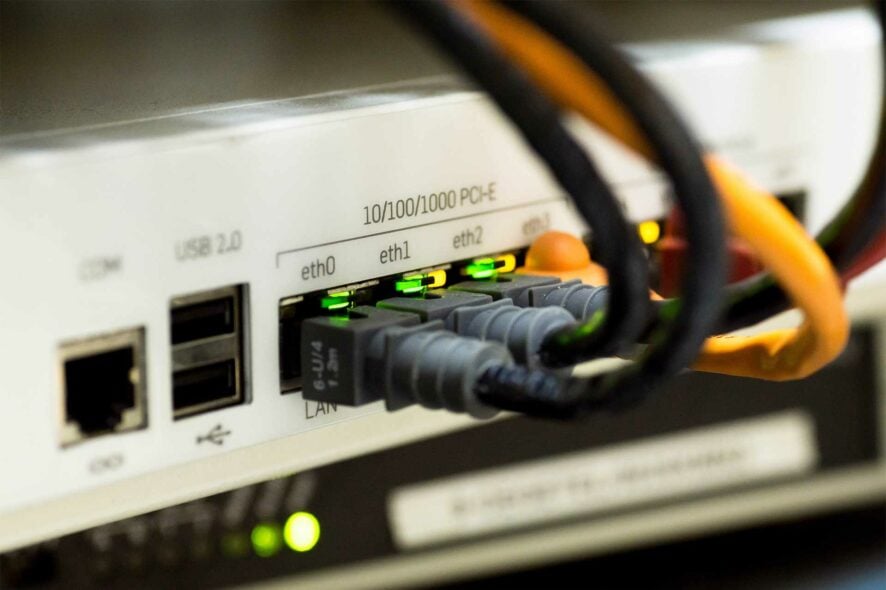
Ping is a unit of measure showing how fast a device can communicate with an online server. So, the ping rate shows the time it takes for data to travel from a device to a server and back.
The higher the ping, the slower the communication with an online server.
As you can imagine, high ping hinders many online activities, such as streaming and online gaming, which require rapid interactions with the game environment and other players.
Fortunately, there are ways to improve your connection, and one of them is to use a wired connection (Ethernet).
Unlike a wireless network, Ethernet ensures a steady connection between your PC and modem or router which results in mitigating a bad ping.
To find out how to lower ping with Ethernet in detail, keep reading.
What is Ethernet?
Ethernet is the technology of setting up a local or wide area network using a physical cable (the Ethernet cable).
Devices connected to wired networks can communicate with each other via specific protocols defined by Ethernet technology.
Contrary to wireless network protocols, such as WiFi, that communicate via transmitting wireless signals, Ethernet protocols rely on physical, wired connections for transferring data.
Connecting your device to the internet using an Ethernet cable has several benefits over WiFi connections:
- Great transfer quality
- Faster speed
- More stable connection
- Increased security
- Less noise
- Lower ping
Such benefits have made Ethernet more favorable for online gamers and streamers who require faster, more reliable connections with lower latencies.
How to set up Ethernet for lower Ping
Connecting to the internet via an Ethernet cable means the data can be transmitted from your device to the server and back to your device directly without encryption and noise.
This allows for a lower ping and a more stable connection.
Connect to Ethernet (automatically)
Here is how to set up Ethernet for lower ping:
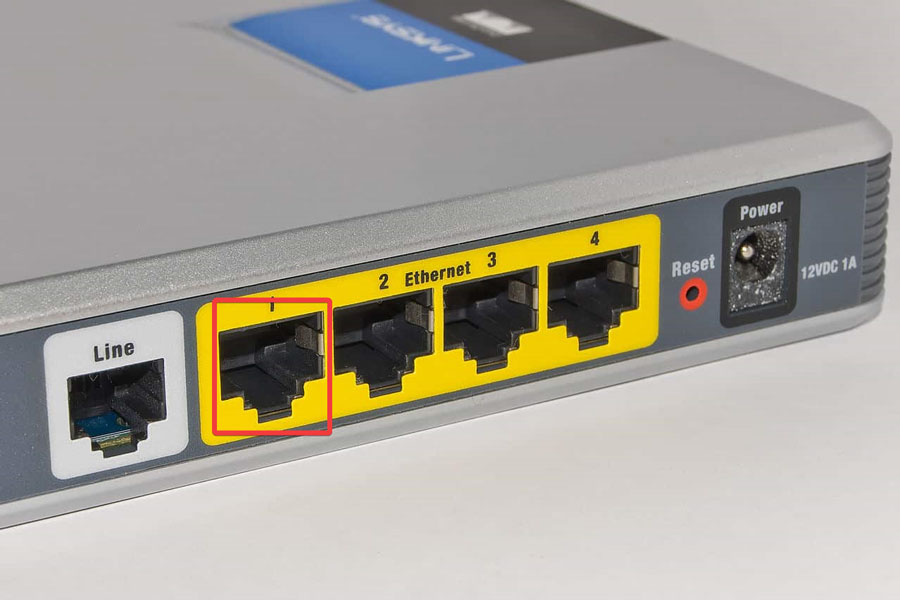
- Find the yellow Ethernet port on your router or modem and connect one end of the cable to it.
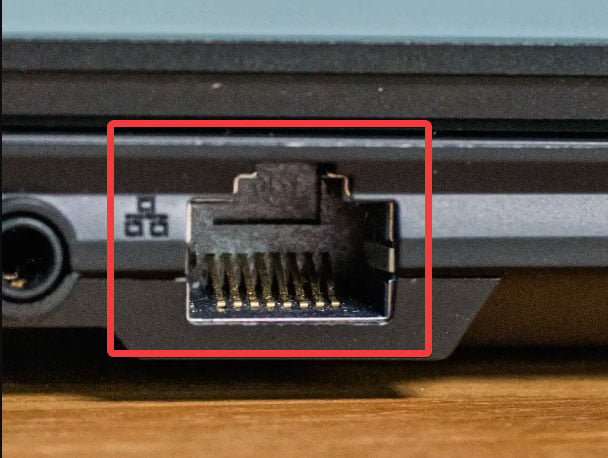
- Connect the other end of your Ethernet cable to your device via a LAN port. Most LAN ports feature a light. If your laptop’s port has an Ethernet light, make sure it is on.
Your device will automatically detect and connect to the Ethernet connection. After that, you can test your connection by opening web pages.
Sometimes, however, this process doesn’t happen successfully, and you must set up your Ethernet manually.
If that’s the case, follow these steps:
Setup Ethernet manually
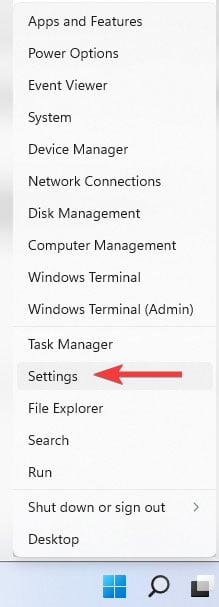
- Right-click on the Start menu and open Settings.
- Click on Network and Internet on the left menu, then select the Dial-up option.
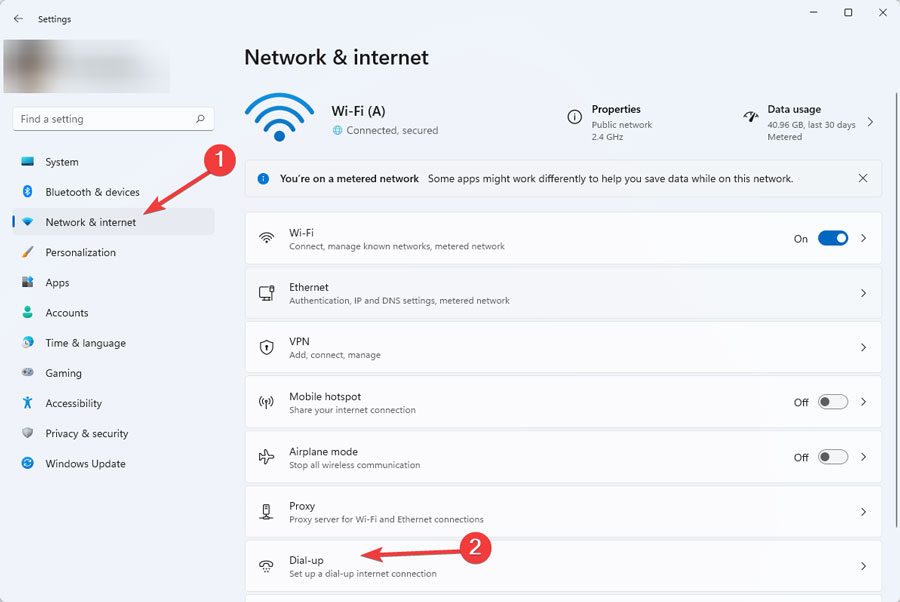
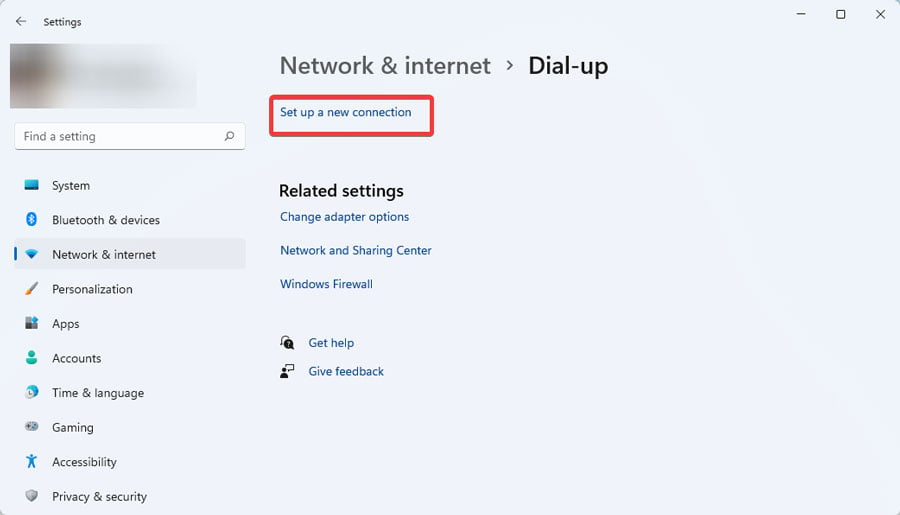
- Select Setup a New Connection.
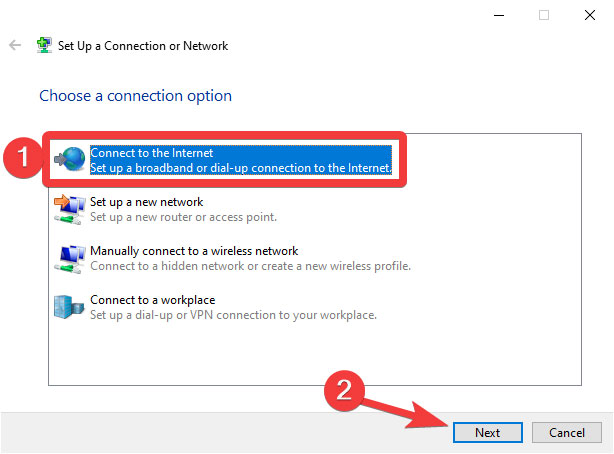
- Choose Connect to Internet option and click Next.
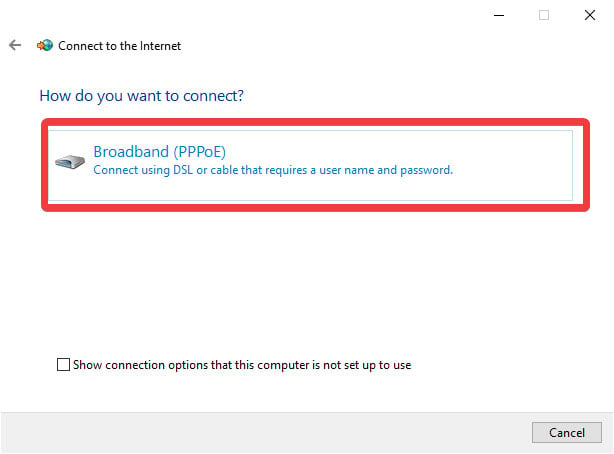
- Click on Broadband (PPPoE).
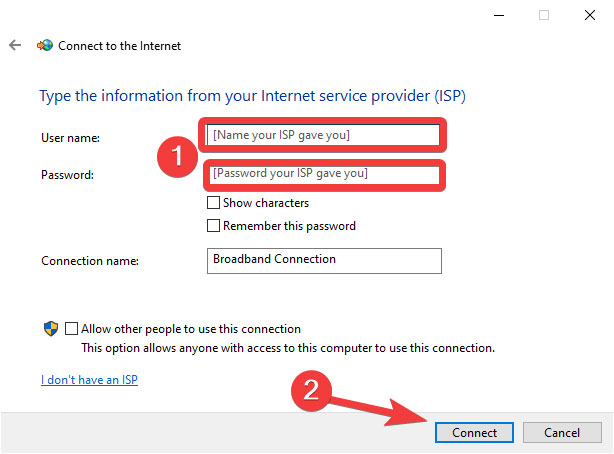
- Enter the username and password your ISP has given you and click on Connect.
If the connection is successful, you can see it listed under Network in Network and Sharing Center.
Your network icon on the taskbar will also indicate a wired connection.
If not and you still have issues with your Ethernet not connecting, thus not lowering ping, you probably have to configure your Ethernet IP address manually.
Here’s how:
Configure Ethernet IP address
Here is how:
- Click on the Start menu, type Control Panel, and press Enter.
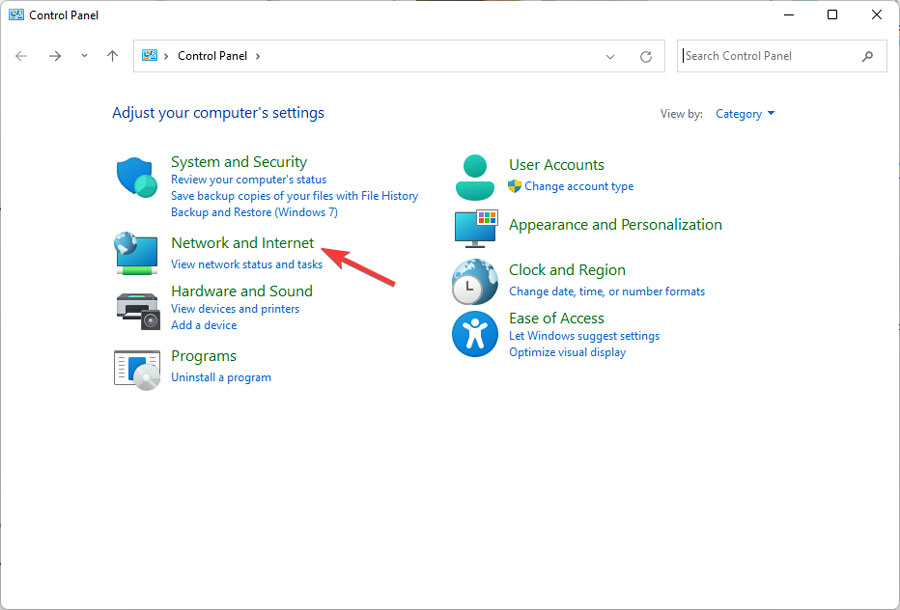
- Go to Network and Internet, and click on Network and Sharing Center.
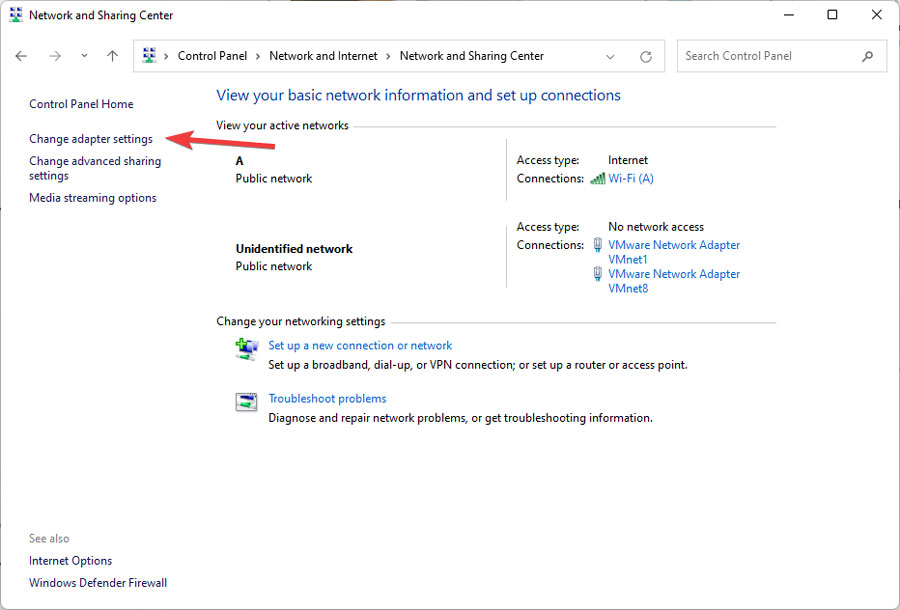
- After that, select Change Adaptor Settings from the left menu.
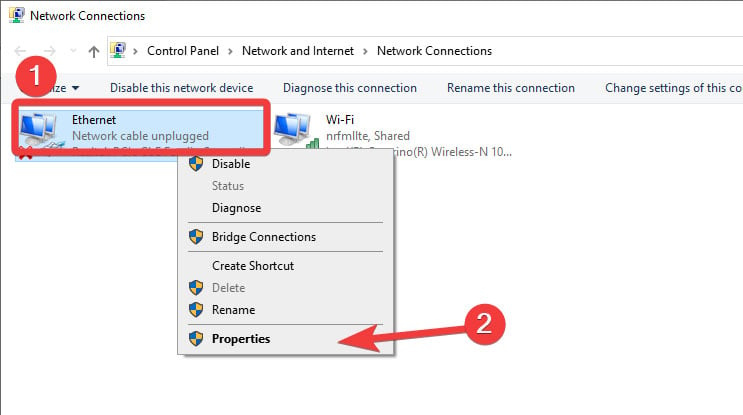
- Right-click on your network connection and select Properties.
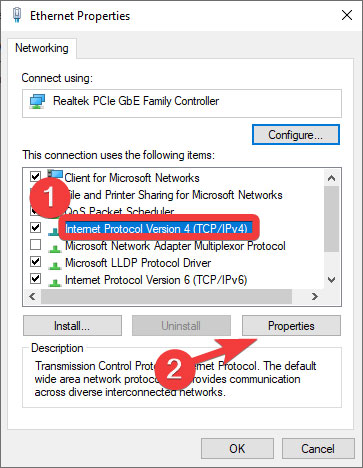
- In the Networking tab, select Internet Protocol Version 4 (TCP/IPv4) and click on Properties.
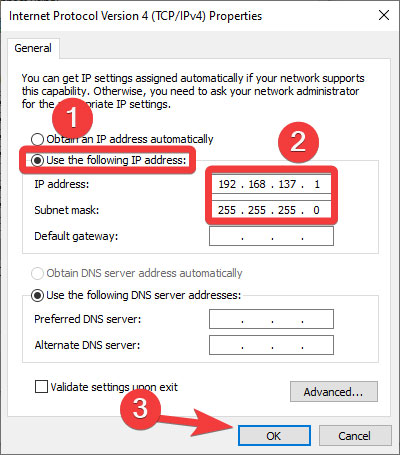
- In the General tab, enable the Use the Following IP Address option. Enter your IP address and subnet mask (provided by your ISP) and click OK.
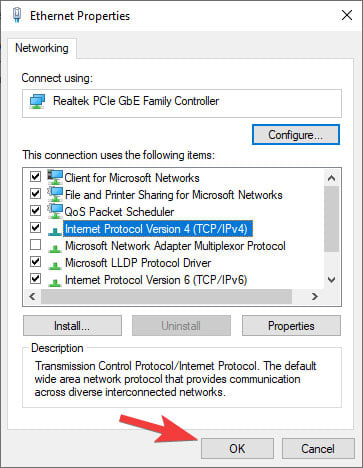
- Then, click OK in the Properties section.
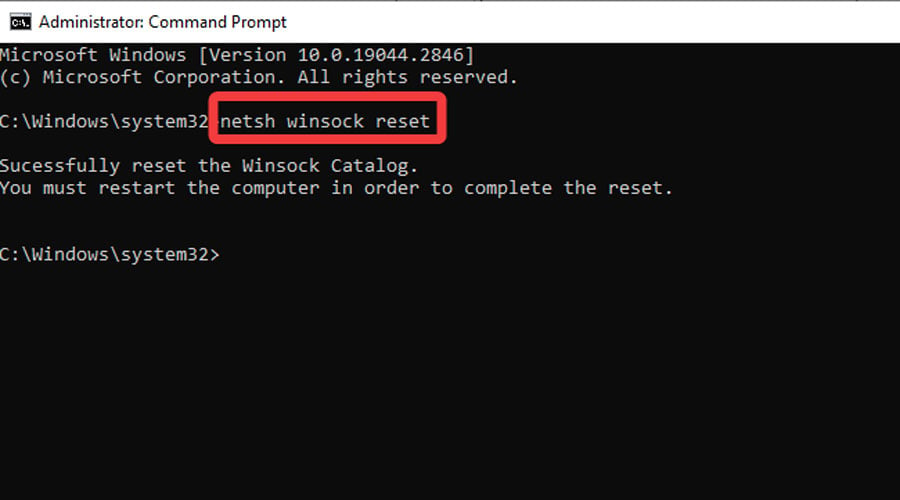
If you still have trouble setting up your Ethernet and lowering your ping, you can try specific network commands to reset the TCP/IP stack, refresh the IP address, and reset the DNS cache.
Just follow these steps:
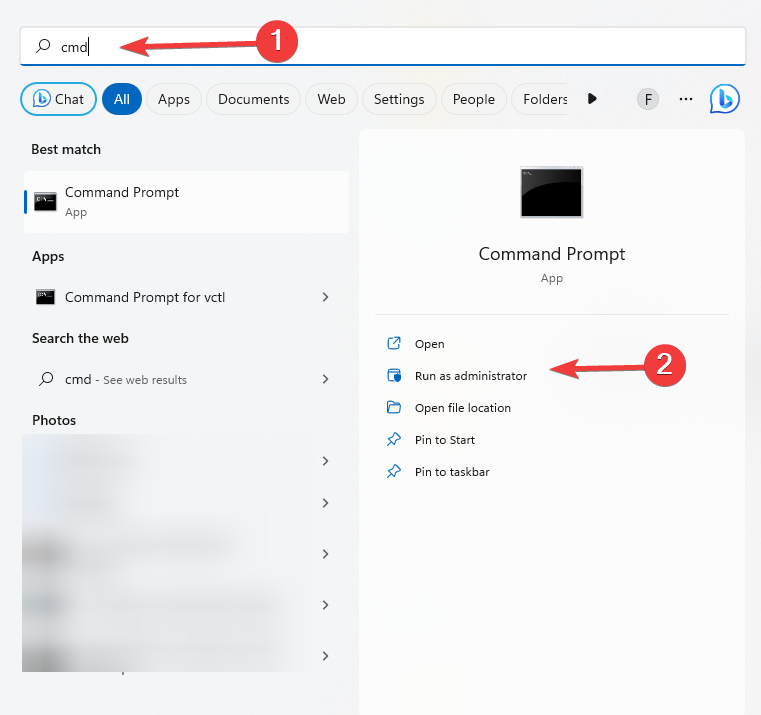
- Type CMD in the Start menu and open Command Prompt as Administrator by clicking on Run as Administrator.
- Type the following commands one by one and press Enter after each:
- netsh winsock reset
- netsh int ip reset
- ipconfig /release
- ipconfig /renew
- ipconfig /flushdns
Other ways of improving Ping
Sometimes, even an Ethernet connection can’t provide you with your desired latency.
You can say so by the lags that are turning your online gaming experience into a frustrating nightmare.
In that case, we have several tips for you that can improve your connection quality and lower your ping.
1. Check your Ethernet cable
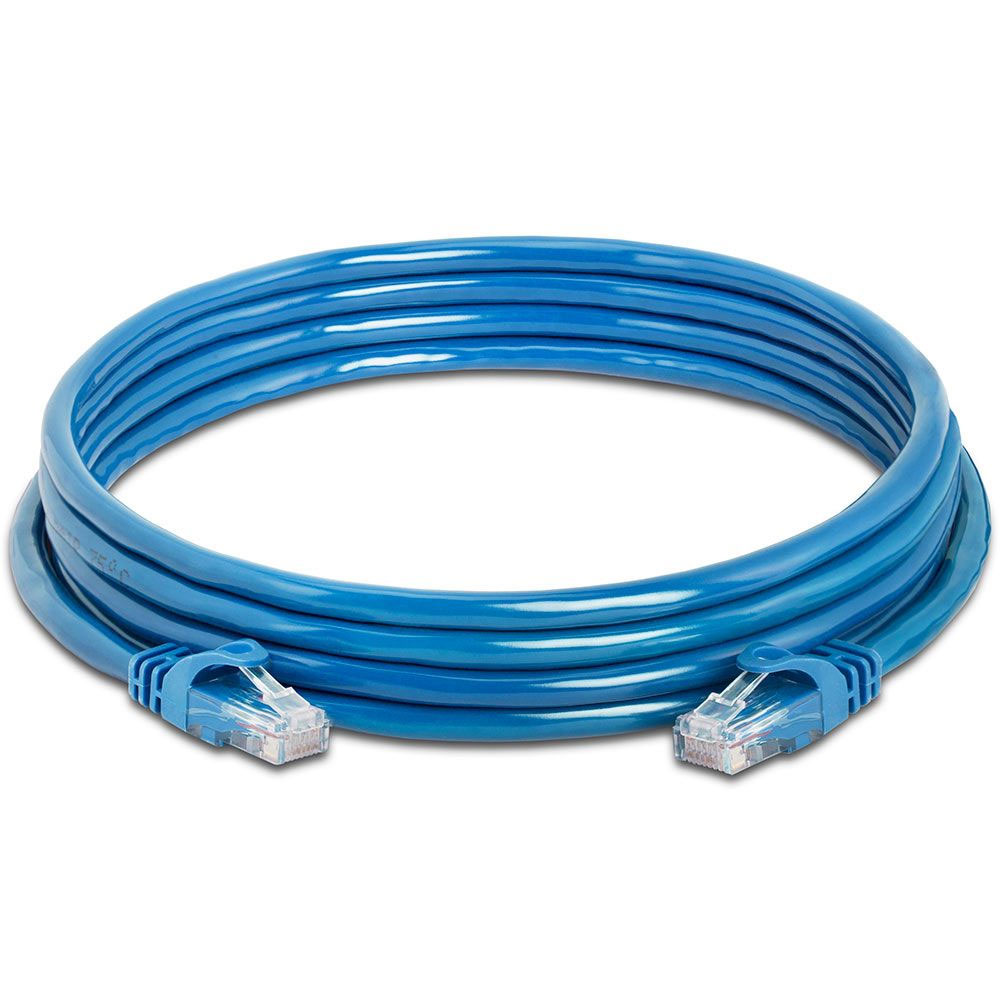
If you’d like to lower your ping with Ethernet, please make sure you use an intact cable.
A physically damaged cable can reduce your connection quality and, therefore, increase your latency.
Also, the shorter the cable, the faster the data can travel between your router or modem and your device.
In a small space such as a single room, the differences the cable length makes in connection quality are negligible.
However, in larger spaces, when very long cables are needed, you might experience a higher ping.
2. Restart your router or modem
Restarting your modem or router means disconnecting it from its power source until all of its electricity is drained.
This process allows your router or modem to refresh its connection with your ISP and fix various issues, such as slow connection.
To restart your device, simply unplug it and wait for at least 15 seconds. Now, plug your device back in and turn it on.
If your device uses batteries, don’t forget to take them out when power cycling.
4. Update your router or modem
Updating your modem or router’s system software can make it function more efficiently and give you lowered ping on your Ethernet connection.
To update your router or modem, follow these steps:
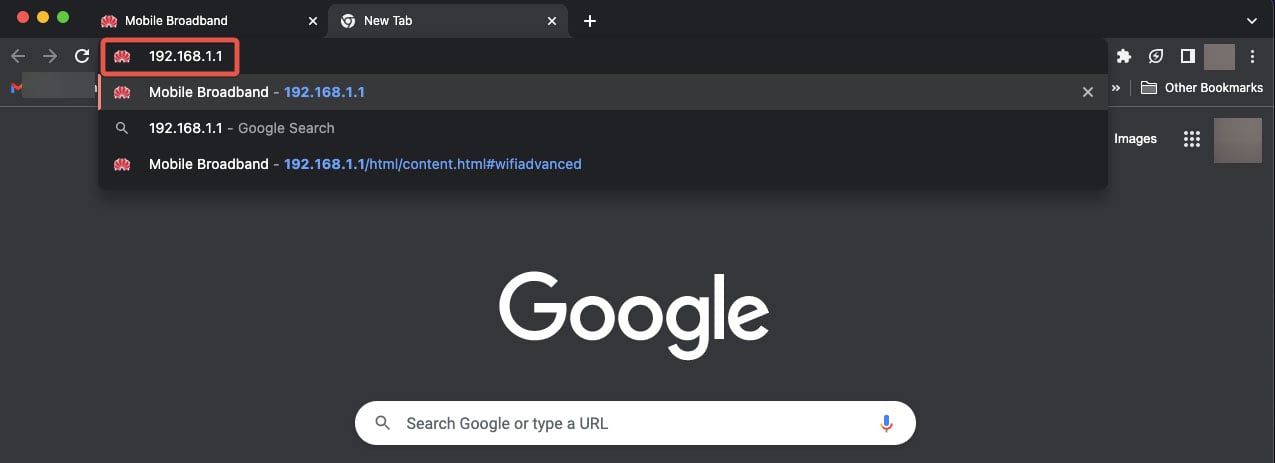
- Open your browser on a device connected to the modem and type your modem’s IP in the search bar. It’s usually 192.168.1.1.
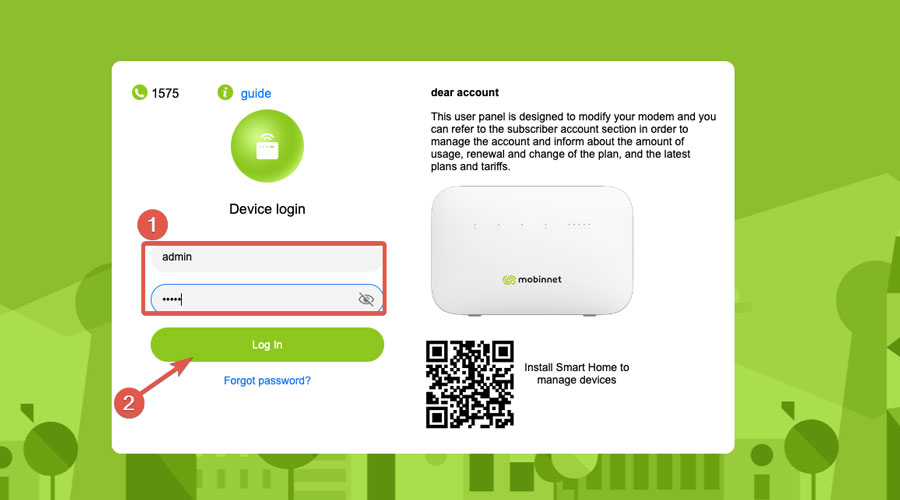
- Sign in to your modem. Your default username and password is admin.
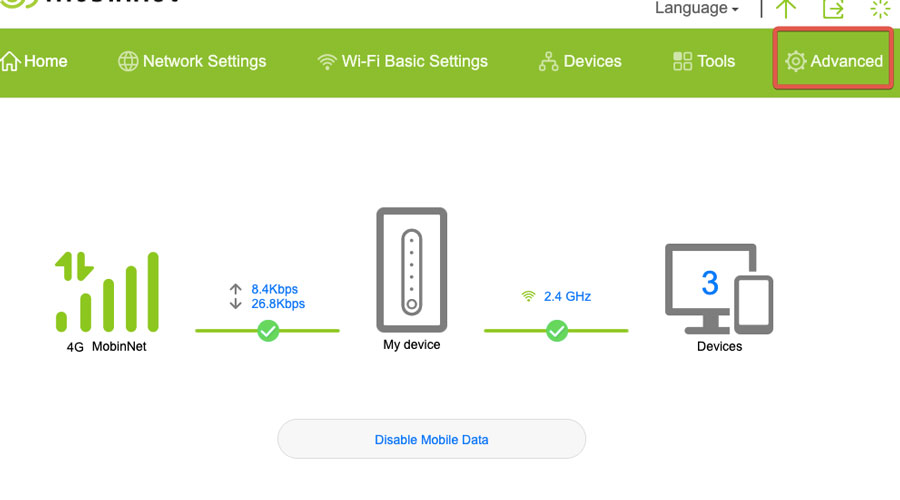
- Search for the Update section. Different routers and modems have different UIs, but you’ll be able to find the Update section with a little bit of search. In our Huawei modem, it’s under the Advanced tab.
- Select search for an update. Your device will search online for the latest system software update. You can install the update afterward.
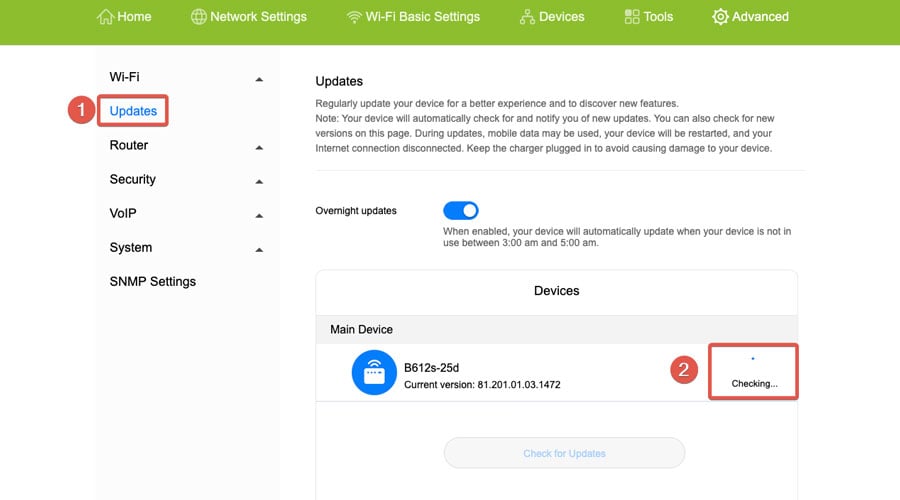
Note: Your modem or router will not be available during the update.
3. Disconnect unnecessary devices
It’s better to keep the bandwidth all to yourself when playing online games. Disconnect your cell phone and any other devices from the internet.
4. Close background apps
You might not notice it, but many background apps usually run simultaneously on your device.
Not only they lower loading speed but also feed on your internet connection, resulting in an increased ping. Closing all these apps will in turn lower the ping rates.
Also, if you have any downloads pending in the background, pause them temporarily.
5. Optimize your game’s frame rate
Although higher frame rates make your gaming experience smoother, a lower frame rate occupies less bandwidth and gives you a better ping.
Head to the in-game settings and adjust the graphics options until you obtain the desired frame rate.
6. Connect to a suitable server
Some online games give you the option to choose the server you want to connect to.
Select the server closest to where you live. A shorter physical distance between your location and the game servers results in better ping.
7. Use a high-speed VPN
Contrary to conventional belief, using a VPN can improve ping. Even though the connection isn’t as direct, you may end up connecting to a better server than what your ISP provides.
Moreover, it gives you the possibility to manually pick servers located closer to your game’s servers.
With this in mind, here’s how to use one to lower ping:
- Go to the ExpressVPN website, and subscribe to one of their plans.

- Download and install the app.

- Connect to a location that is close to you.
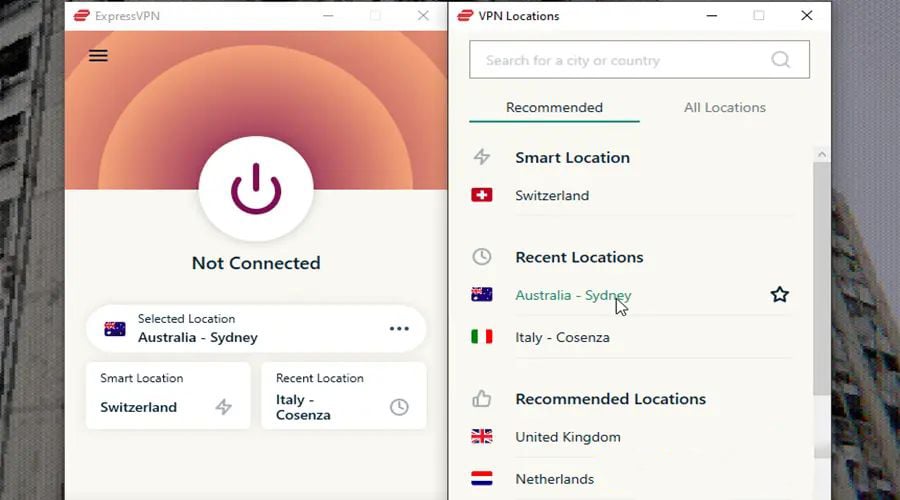
- Now check your ping. As you can see, we got much lower rates after connecting to VPN.

If you have selected the closest location, but the quality of the internet isn’t good, try another server.
Additionally, ExpressVPN is available on all platforms and operating systems, from Windows and macOS to Android and iOS.
It’s a fast and secure VPN featuring a variety of high-speed servers across 94 countries.
So you can easily find and connect to servers closest to your location (connecting to servers far away from your location can negatively affect your connection quality).
You can try ExpressVPN for 30 days and get a full refund afterward in case you are not satisfied.

ExpressVPN
Get this VPN service to improve your ping and enjoy a seamless gaming or streaming experience.If you are using a high-speed VPN and still having connection issues, don’t forget to check out our practical tips on how to fix high ping with VPN.
Bottom line
As you know, high ping is a blight on online gaming and streaming. Such activities require low latency and a stable connection.
In order to fix it you can set up an Ethernet connection.
In most cases, just connecting to the internet with an Ethernet cable will lower ping, but there are also other tricks and tweaks to optimize the connection.
For instance, disconnecting unnecessary devices, connecting to more suitable servers, and restarting your modem are among other ways of lowering latency.
Using a high-speed VPN like ExpressVPN is also a reliable way to fix high ping.


User forum
0 messages