How to Remove Space Between Words in Word: 5 Simple Ways
Check if the text is justified and align it to the left
4 min. read
Updated on
Read our disclosure page to find out how can you help Windows Report sustain the editorial team. Read more
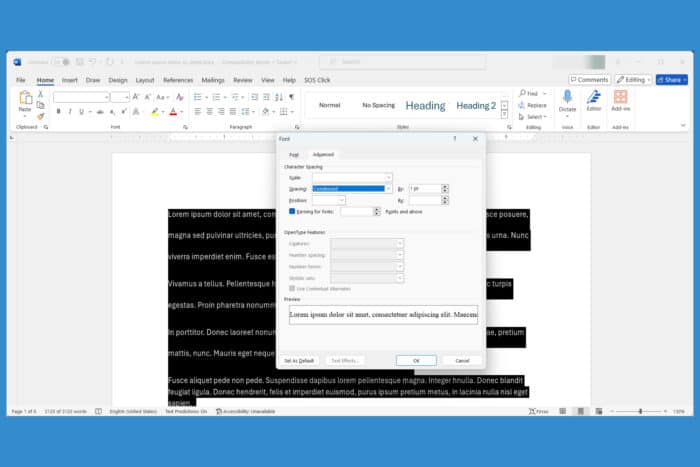
Dealing with unexpected spaces between words in Microsoft Word is a common issue when you’re formatting the text. Fortunately, there are several effective solutions to tackle this issue and ensure your document looks just right.
How do I get rid of the space between words in Word?
1. Adjust font spacing
- Highlight the text with the spacing problem.
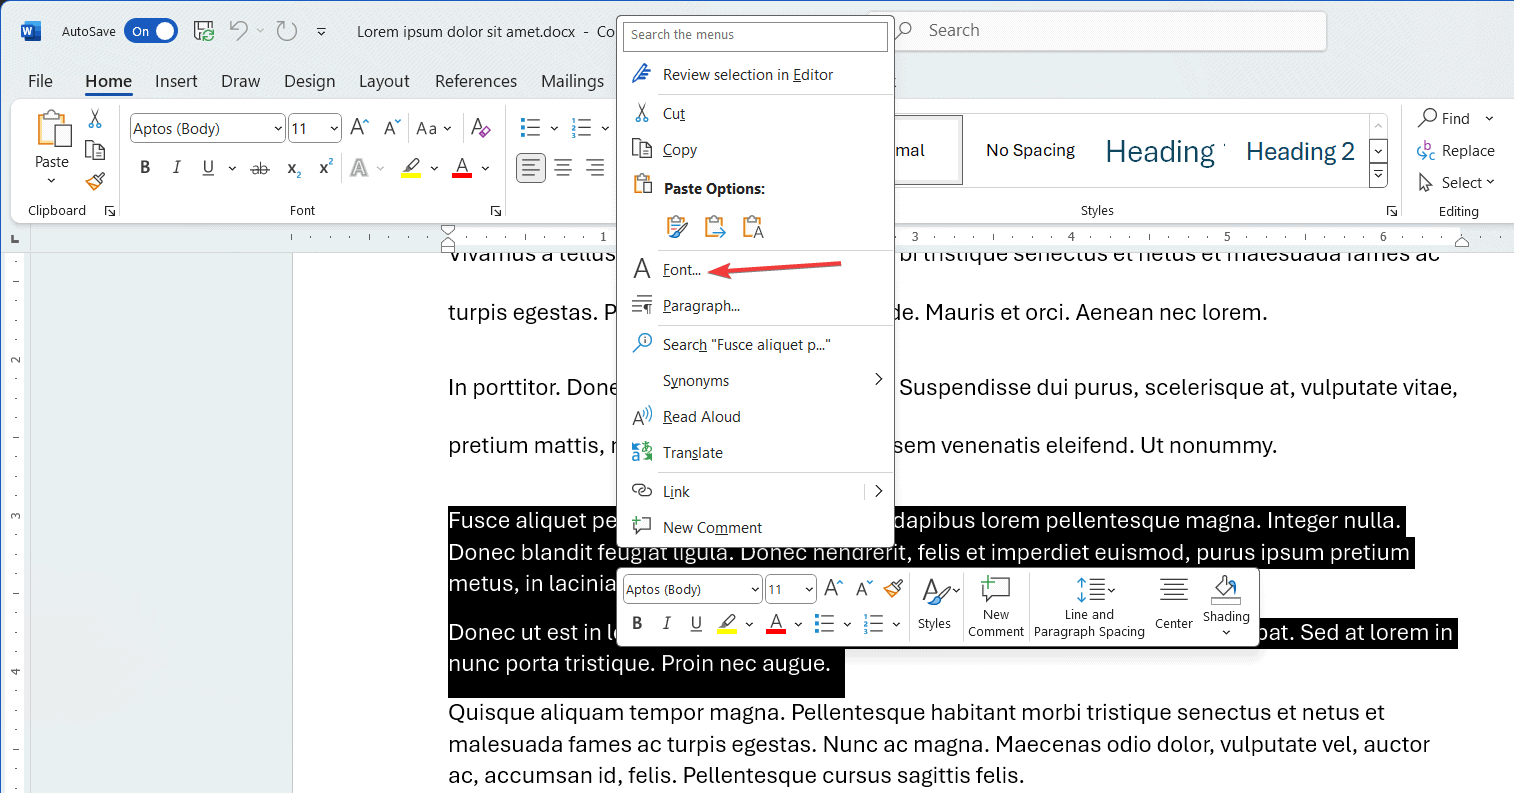
- Right-click the highlighted text and choose Font.
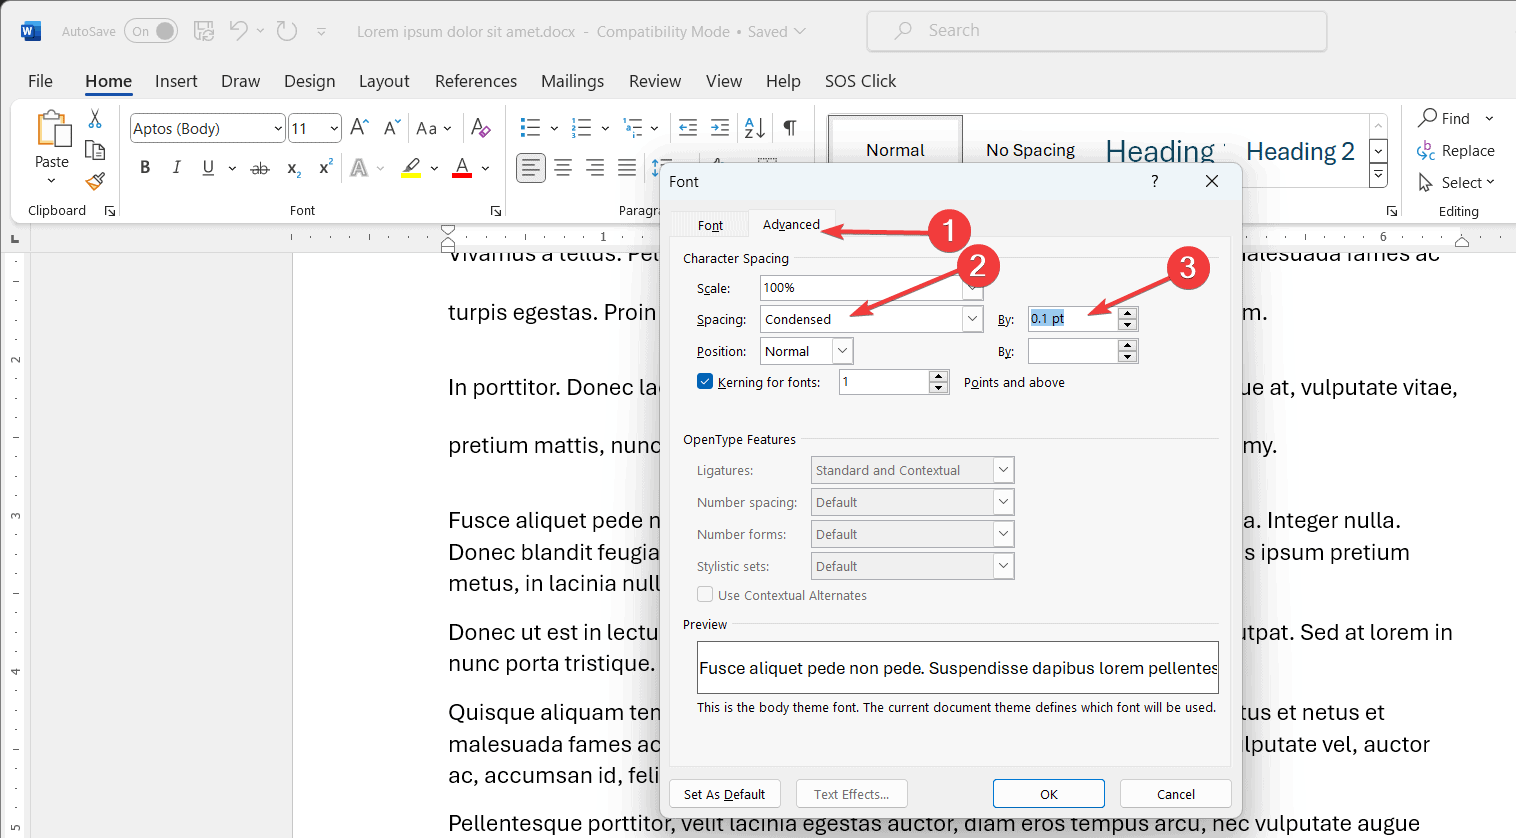
- In the Font dialog box, go to the Advanced tab.
- In the Spacing box, choose Condensed and enter a small value (like 0.1 pt) in the By field.
- Click OK to apply the changes.
This solution tweaks the spacing between characters, which can help reduce large gaps between words. However, if you condense the text too much, you might see difference between the paragraphs you condensed and the others. The technique is great if you want to fit a paragraph within a certain space.
2. Check justification settings
- Select the text with the spacing issues.
- Go to the Home tab on the Ribbon.
- Look at the paragraph alignment options in the Paragraph group.
- Ensure the text is not set to Justify. If it is, change it to Left Align by clicking the left-align button or pressing Ctrl + L.
Switching from justified text to left-aligned text can help eliminate large gaps created by Word’s justification settings.
3. Optimize character positioning
- Open the Word document where you are experiencing the issue.
- Go to the File tab in the top-left corner and click on Options at the bottom.
- In the Word Options dialog box, choose Advanced from the left-hand menu.
- Scroll down to the Display section.
- Check the box labeled Optimize character positioning for layout rather than readability.
- Click OK to apply the changes.
This method helps by optimizing the spacing between words for layout purposes, ensuring your text looks consistent and more like it did in older versions of Word.
3. Adjust the header size
- Open the Word document with the spacing issues.
- Double-click the header area of your document to activate the header section.
- Look for any text or objects (like page numbers) within the header that might be pushing your text down.
- Drag the bottom line of the header upwards to decrease its size.
- Click anywhere outside the header to save the changes.
By adjusting the header size, you allow more space on the page for your text, which can help eliminate unwanted gaps.
4. Cut and Paste with special formatting
- Select the entire text of your document by pressing Ctrl + A.
- Copy the selected text by pressing Ctrl + C.
- Go to a new Word document.
- Click on the Home tab, then click the arrow under the Paste button.
- Choose Paste Special and select Formatted Text (RTF) or Unformatted Text.
- Apply the necessary formatting to get your original look back if you chose Unformatted Text.
This process strips the original formatting that might be causing the issue and re-applies a cleaner format.
5. Use Find and Replace to adjust spaces
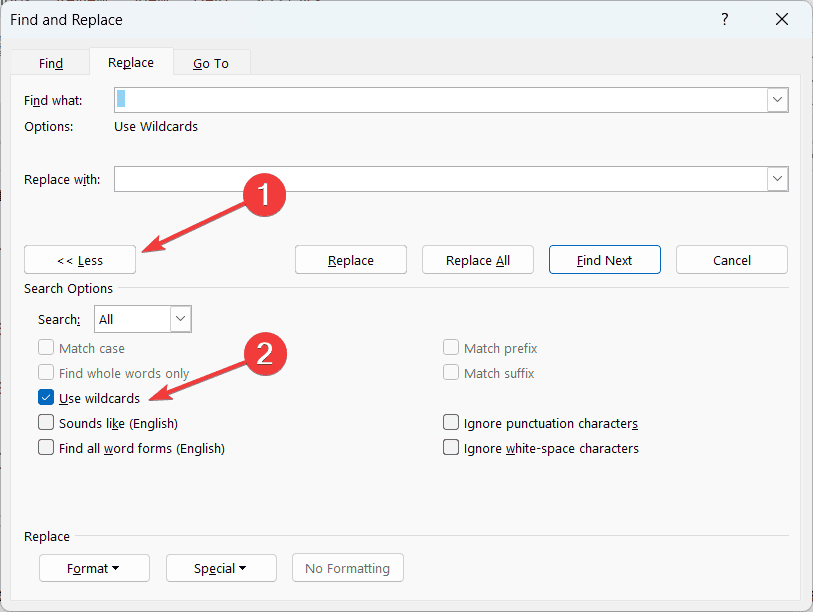
- Press Ctrl + H to open the Find and Replace dialog box.
- In the Find what field, press the Space bar twice.
- Check the Use Wildcards box from the More section.
- In the Replace with field, press the Space bar once.
- Now click on Replace all.
If you have double spaces between any words, this will remove the extra space automatically.
By following these detailed and user-friendly instructions, you can easily remove unwanted spaces between words in your Word documents and ensure a clean, professional presentation of your text. Remember to regularly check your document settings to prevent such issues from recurring.




User forum
0 messages