Intel Wireless AC 9560 is Not Working: 5 Tested Solutions
Corrupt temp files can trigger this problem
3 min. read
Updated on
Read our disclosure page to find out how can you help Windows Report sustain the editorial team. Read more
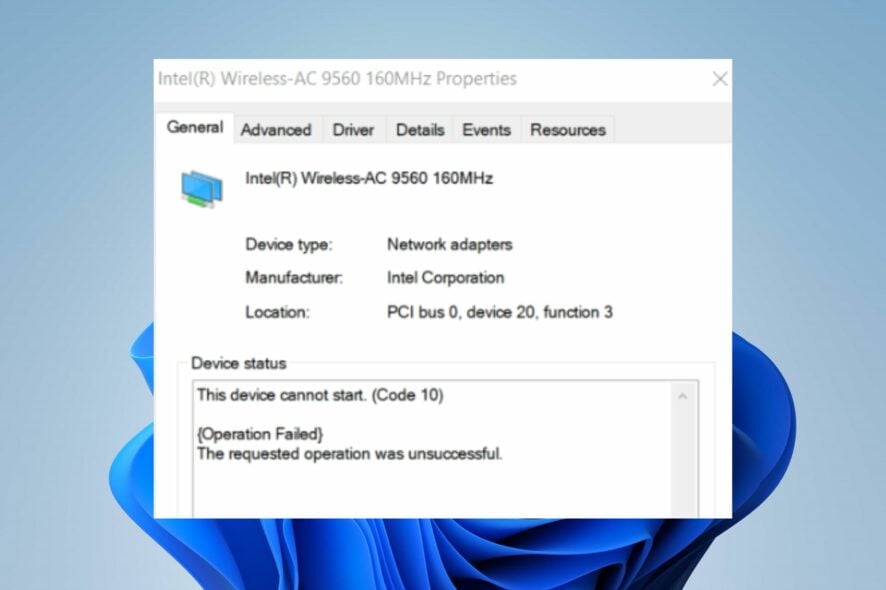
Some readers reported that the Intel Wireless AC 9560 is not working, causing it not to support the integrated wireless 802.11ac solutions from Intel.
The main reason behind this issue is a hardware problem with the Intel Wireless AC 9560 adapter. However, outdated network drivers can also be the culprit, but we don’t exclude network congestion or faulty OS updates and corrupt system files.
In rare cases, the problem may also be that the WLAN AutoConfig service is not running because it can also cause Intel(r) dual-band wireless AC 3168 not to work.
What can I do if the Intel wireless AC 9560 is not working?
1. Power cycle your PC
- Disconnect every external device plugged into the PC.
- Hold the power button for 10 seconds to drain the residual energy, then unplug the power cable from the PC.
- Wait 1 minute, connect the PC to a power source, then press the power button to turn it on.
- Connect other peripherals and check if the Intel Wireless AC 9560 adapter works.
Power cycling the computer will fix power issues and other hardware issues that may cause the problem.
2. Re-enable the AC-9560 adapter
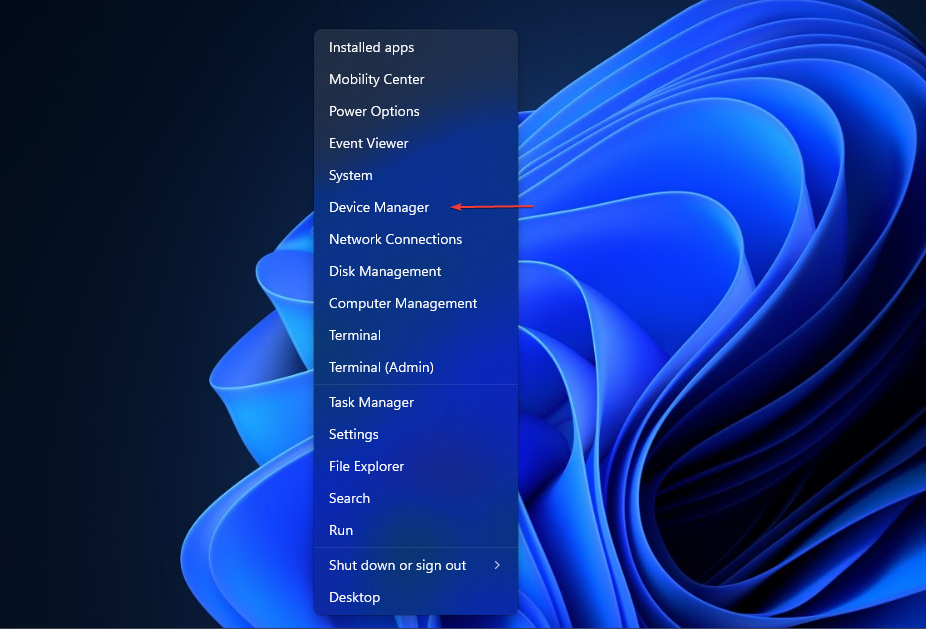
- Press Windows + X key to open the Quick Link menu, then select Device Manager.
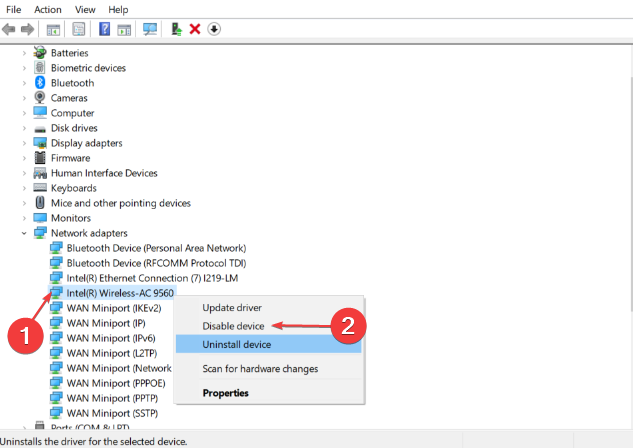
- Expand the Network adapters category, right-click Intel(R) Wireless-AC 9560, then select Disable device from the drop-down.
- Restart your PC and repeat step 1.
- Expand the Network adapters category, right-click Intel(R) Wireless-AC 9560, then select Enable device from the drop-down.
The steps above will refresh your PC’s Intel(R) Wireless-AC 9560 processor and help improve performance. Check what to do if Windows can’t find a driver for the Network adapter on your PC.
3. Enable the WLAN AutoConfig Service
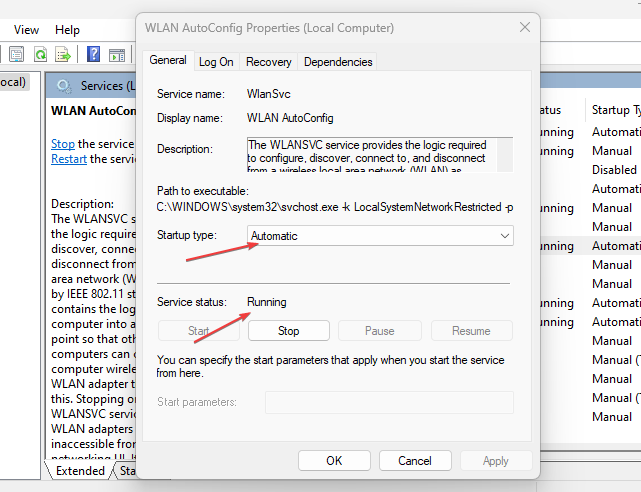
- Press Windows + R key to open the Run dialog box and type services.msc, then click OK to open the Services window.
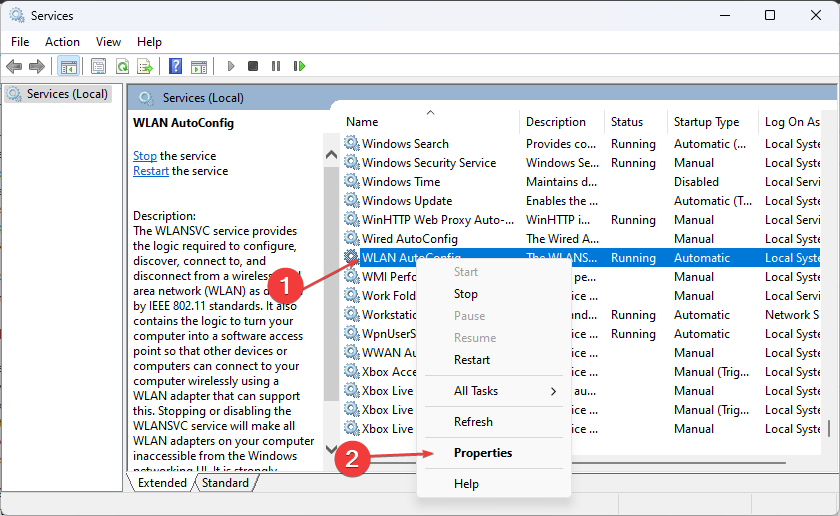
- Locate the WLAN AutoConfig, right-click on it, then select Properties.
- Set the Startup type to Automatic, and then the Service status should be Running.
- Click Apply, then OK to save the changes.
- Restart your PC and check if the Intel Wireless AC 9560 adapter works.
Enabling the service will fix WLAN AutoConfig errors and allow the adapter to run its services and support your network.
4. Check the Power Management Settings
- Right-click the Start button, then select Device Manager.
- Double-click Network adapters to expand it, right-click on Intel Wireless AC 9560, then select Properties from the drop-down.
- Click the Power Management tab, uncheck the box for Allow the computer to turn off this device to save power, then click OK.
- Restart your computer and see if the problem persists.
It will resolve power issues causing the system to disable the Intel Wireless AC 9560 service. Read our guide if the Network adapter is missing in your Device Manager.
5. Try resetting your Network Components
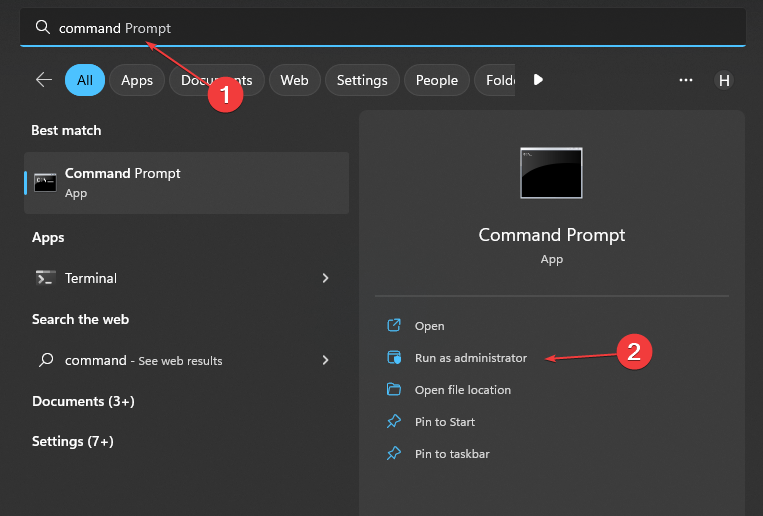
- Left-click the Start button, type Command Prompt, and click Run as administrator.
- Click Yes on the User Account Control prompt.
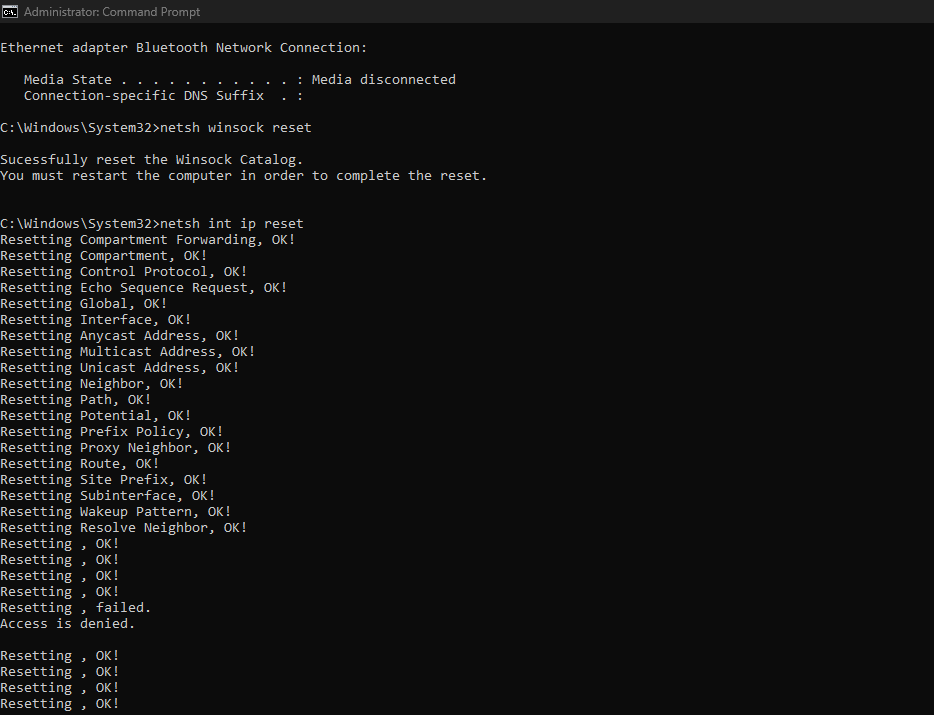
- Type the following commands into the Command Prompt and press Enter:
ipconfig/flushdnsipconfig /releaseipconfig /renewnetsh winsock resetnetsh int ip reset - Restart your PC after the process is complete.
Try connecting to the internet and check if Intel Wireless AC 9560 works.
Alternatively, our readers can check our article on Intel dual-band wireless-AC 7260 disconnecting and how to fix it.
Likewise, users complain about the Intel RST platform not supported error after upgrading their Windows.
If you have any questions or suggestions, leave us a note in the comments section below.









User forum
1 messages