How to Join Windows 11 to a Domain [Easiest Methods]
Check out the steps to add Windows 11 to the domain
Key notes
- Adding Windows 11 to the domain is a simple process; it lets you connect your computer to a centralized network.
- This guide presents you with four simple methods to get this done.

Find below the easiest methods to add Windows 11 to a domain.
Joining Windows 11 to a domain has several benefits. Some include centralized management, better security, allowing you to back up, remote access to network resources, and resource sharing.
Sounds good? Let’s get started!
What can I do to add Windows 11 to a domain?
Before engaging in troubleshooting methods, make sure you go through the preliminary checks:
- An active internet connection
- A domain name and credentials are provided by your IT administrator.
- Windows 11 must meet the system requirements to join a domain.
- Windows 11 must be connected to the same network as the domain controller.
- An account with permission to join the domain.
- The computer must be configured with a static IP address.
1. Use the Settings
- Press Windows + I to open Settings.
- Go to Accounts, and click Access work or school.

- Next to Add a work or school account, click Connect.

- On the next page, click Join this device to a Local Active Directory domain.
- On the Join a domain window, enter the domain name provided by the IT admin and the credentials of an account. Click OK.
- Next, click Add an account and click Next.
- Wait for the process to finish and click Restart now.
2. Use the Control Panel
- Press the Windows key, type Control Panel, and click Open.

- Select View by Category. Click System and Security.
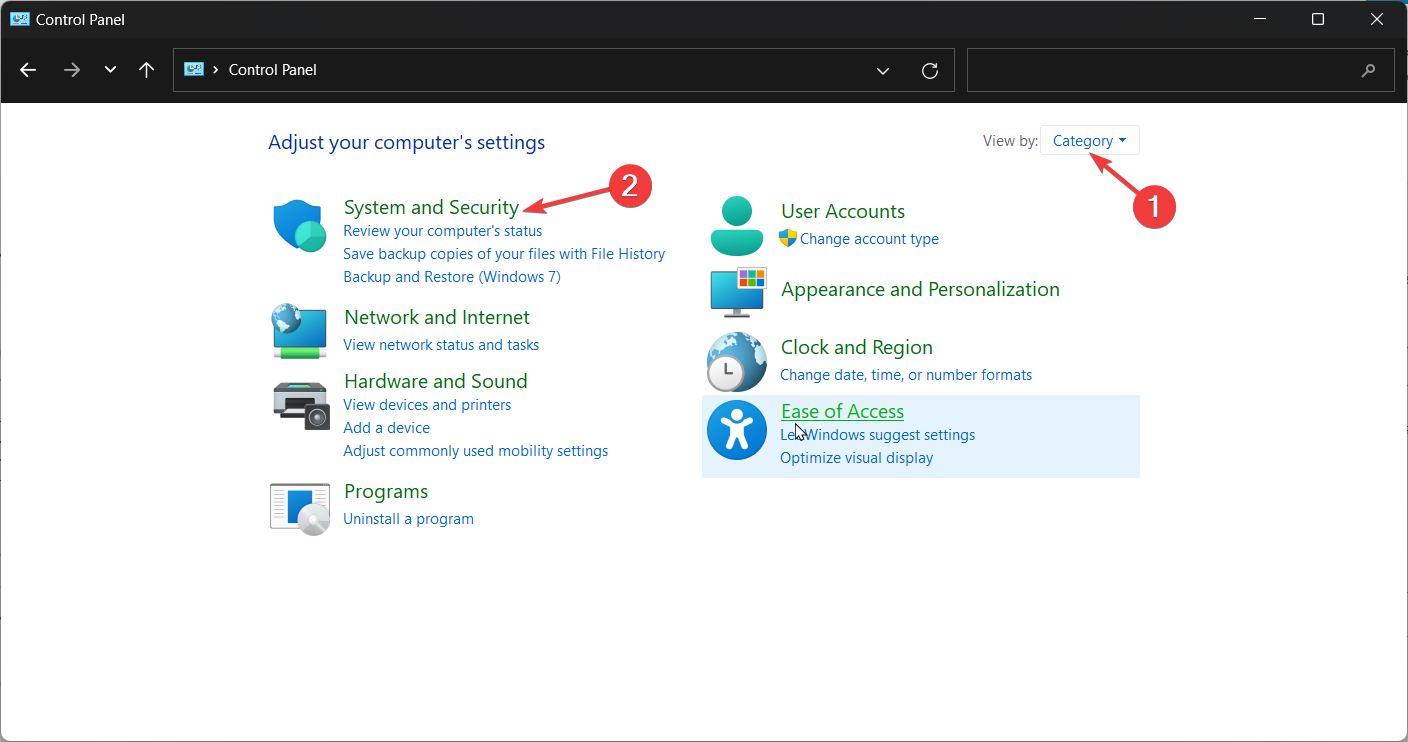
- Click System.

- Locate the Domain and workgroup option.

- Go to Computer Name, and click Change.

- Under Member of, click Domain, type the domain name, and click OK.

- Again click OK, and restart the PC.
3. Use Windows PowerShell
- Press the Windows key, type PowerShell, and click Run as administrator.

- Type the following command, replace %domainname% with the appropriate domain name for your network, and press Enter:
Add-Computer -DomainName %domainname% -Credential (Get-Credential) - You will get a prompt to enter the username and password of an account with permission to join the domain.
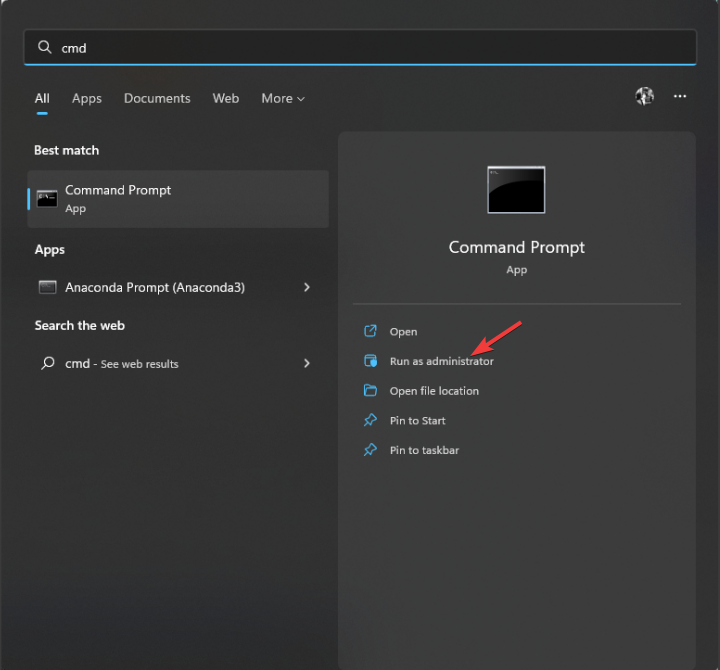
4. Use the Command Prompt
- Press the Windows key, type CMD and click Run as administrator.
- Copy and paste the following command, replace %computername%, %domainname%, %username%, and %password% with the suitable values for your network, and press Enter:
netdom join %computername% /domain:%domainname% /userd:%username% /passwordd:%password% - Restart your computer once done.
Can Windows 11 Home join a domain?
No. Windows 11 can’t join a domain. This feature is only available in Windows 11 Prop, Enterprise and Education. If you need domain capabilities, you have to upgrade from Home to one of those.
So, these are the methods that you need to follow to join Windows 11 to a domain. Try these methods to add it to the domain, and let us know which worked for you in the comments section below.
Read our disclosure page to find out how can you help Windows Report sustain the editorial team. Read more


Improve this guide


User forum
2 messages