Ksecdd.sys BSoD Error: 4 Ways to Fix It
Updating device drivers should fix this BSoD error
4 min. read
Updated on
Read our disclosure page to find out how can you help Windows Report sustain the editorial team Read more
Key notes
- The ksecdd.sys BSOD error can cause the system to crash or restart abruptly.
- It can occur due to outdated drivers and memory corruption.
- Fix the error by running SFC/DISM scans and installing driver updates.
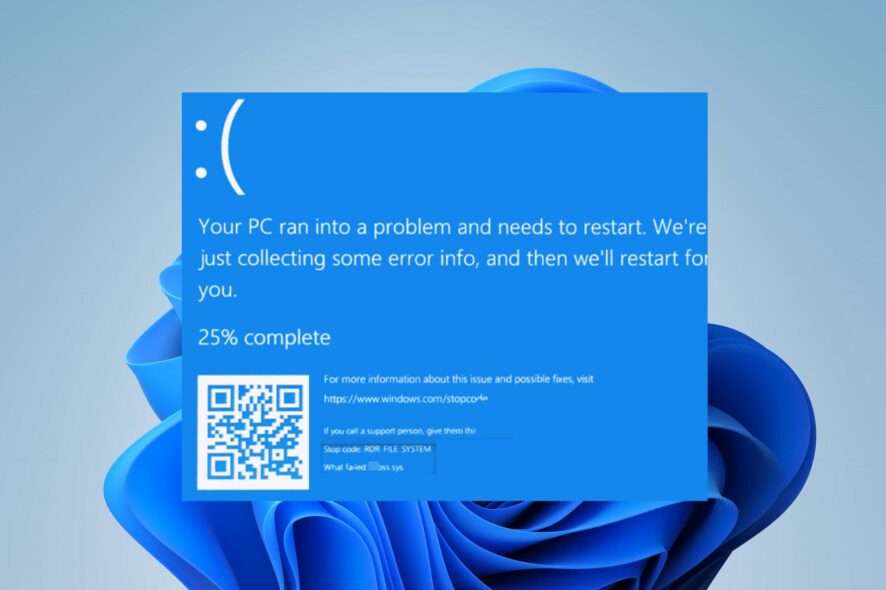
Our readers complain about experiencing the Blue Screen of Death errors referencing the ksecdd.sys. The issue mainly occurs after installing an app, updating, and opening files on the PC. Hence, this article will discuss fixes for resolving the error on Windows 11.
Alternatively, you can check our comprehensive guide about what causes the Blue Screen of Death on your PC.
What causes ksecdd.sys BSoD error?
Several factors can be responsible for the Ksecdd.sys Blue Screen of Death error on your computer. Some notable ones are listed below:
- Corrupt or outdated drivers – The error can also occur when you have outdated drivers running on your computer. The bugs can cause other drivers and hardware components to be corrupted.
- Corrupt system files – Ksecdd.sys is a system file and can’t be removed or altered because it can affect some functionalities in the system. However, corrupt system files can infect the .sys file, resulting in the BSoD error.
- Windows memory issues – Some users can run into the error due to memory corruption errors affecting the system and the ksecdd.sys file.
Different users can experience the error for varying factors depending on the circumstances. Nonetheless, we’ll take you through the basic steps to fix the issue.
How can I fix the ksecdd.sys BSoD error?
Try the following preliminary checks before anything else:
- Remove the login scripts from the user profiles and switch to the GPO network drive.
If this fails, then try the following steps:
1. Perform a System Restore
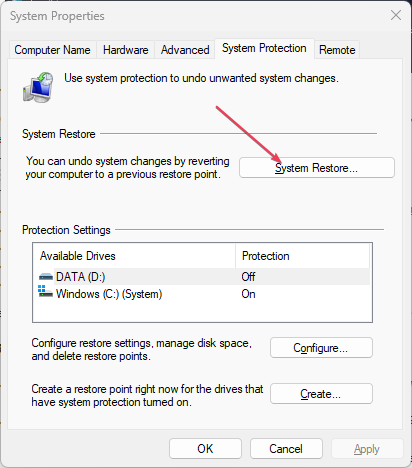
- Press Windows, type restore, and click on Create a restore point.
- Click on System Protection and select System Restore.
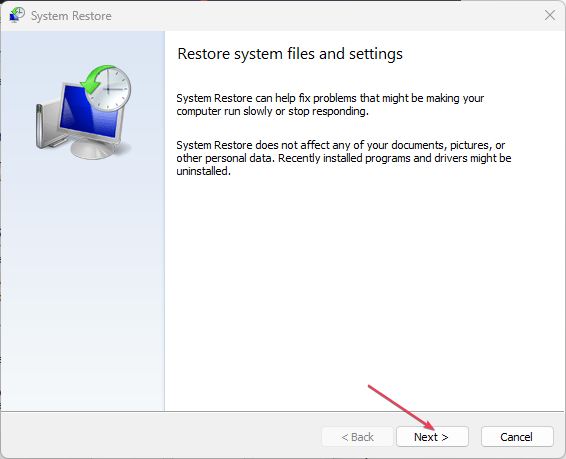
- Click Next in the Restore system files and Settings page.
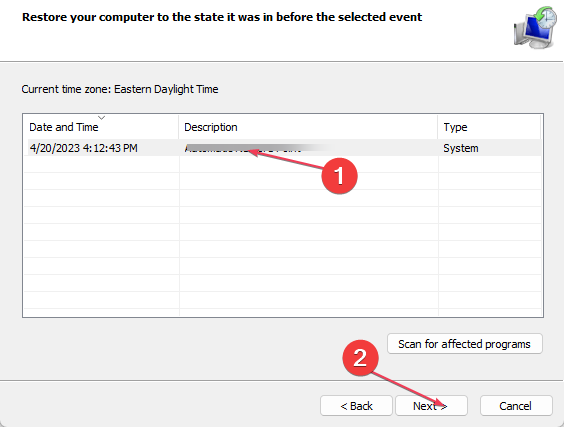
- Choose the restore point you want to restore from and click Next.
- Then, click Finish and restart your PC.
A System Restore will roll back recent system changes and configurations liable to cause the issue. Read our guide on how to fix Restore Point if it’s not working on your PC.
2. Update the system drivers
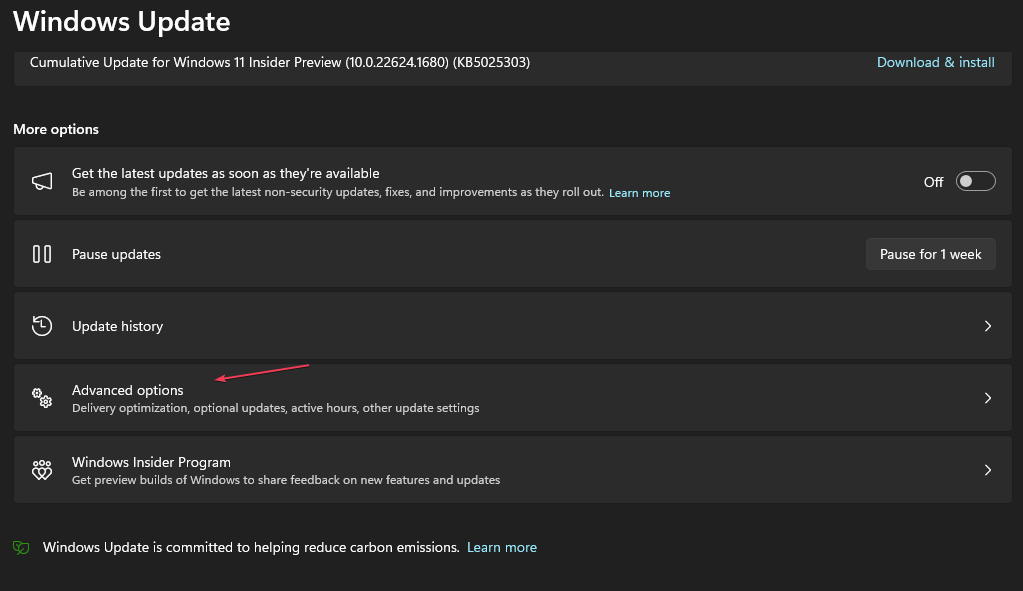
- Press Windows + I key to open the Windows Settings.
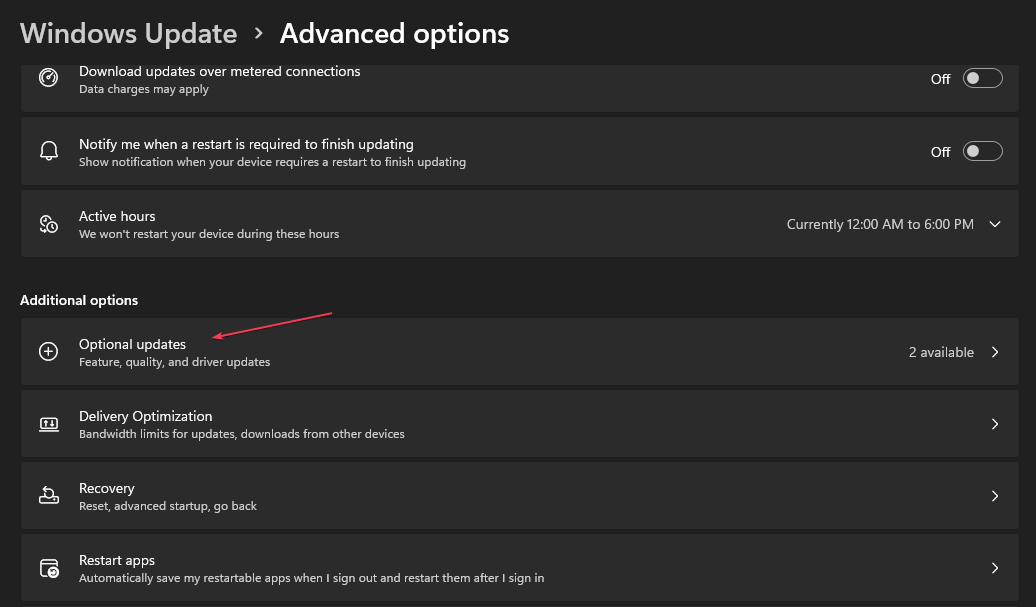
- Click on Windows Update and select Advanced options.
- Choose Optional updates from the options.
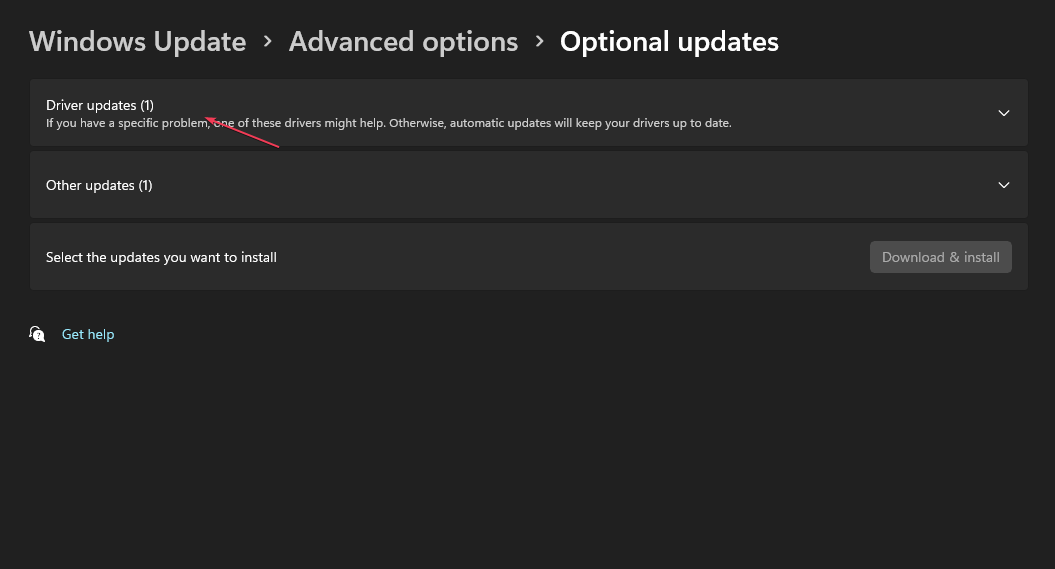
- Select Driver Updates, mark all the available updates, and click on Download & Install button.
- Repeat the steps above for other drivers.
Updating your device drivers will fix the bugs affecting the system and improve the device’s performance. Also, you can check how to reinstall devices in Devices Manager Windows 11.
In addition to this method, we advise you to consider dedicated support when it comes to updating drivers. Luckily, you have the ideal software that can detect and update any drivers automatically.
3. Run MemTest86+
- Go to the Official download site for MemTest86+ and click Download.
- Insert your USB drive, double-click on the downloaded file, and follow the installation prompts to install it on the USB.
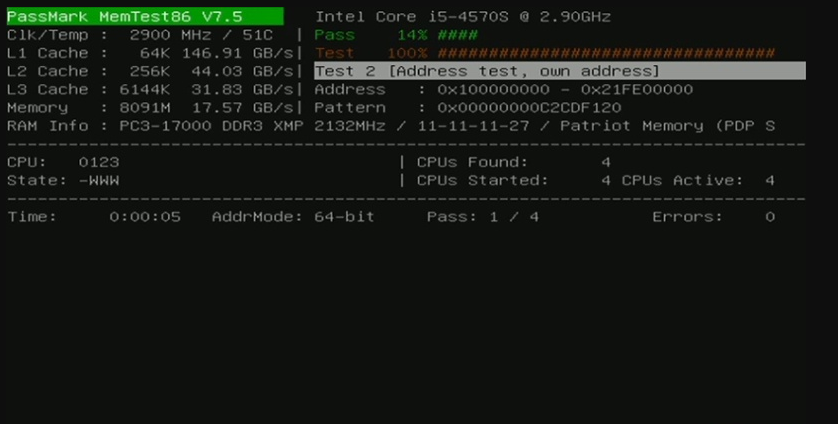
- Then, boot from your USB and allow MemTest86 to scan your PC and prompt results afterward.
It will immediately restart the PC to perform a memory check, and the results will be displayed after the restart. Alternatively, you can use the Windows Memory Diagnostic on your PC, although it’s not as reliable as MemTest.
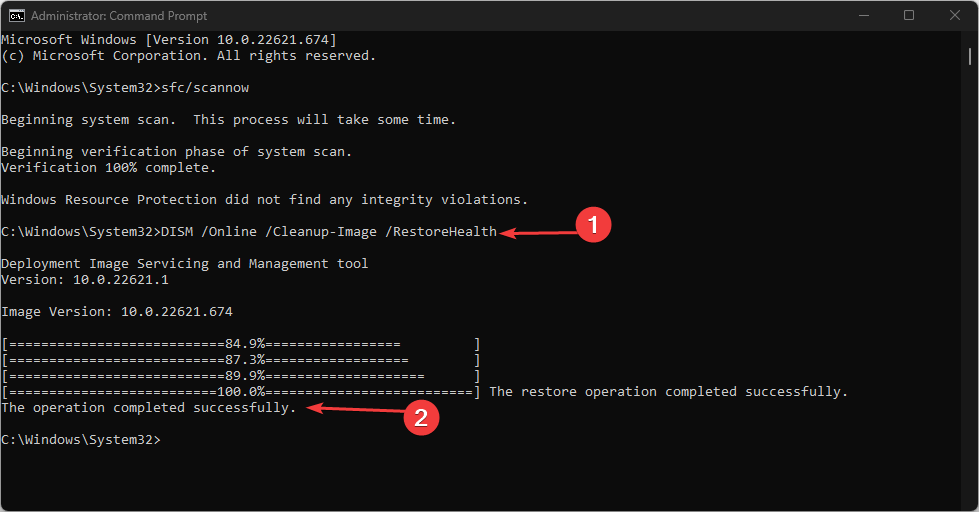
4. Run a System File Checker (SFC)/ DISM scans
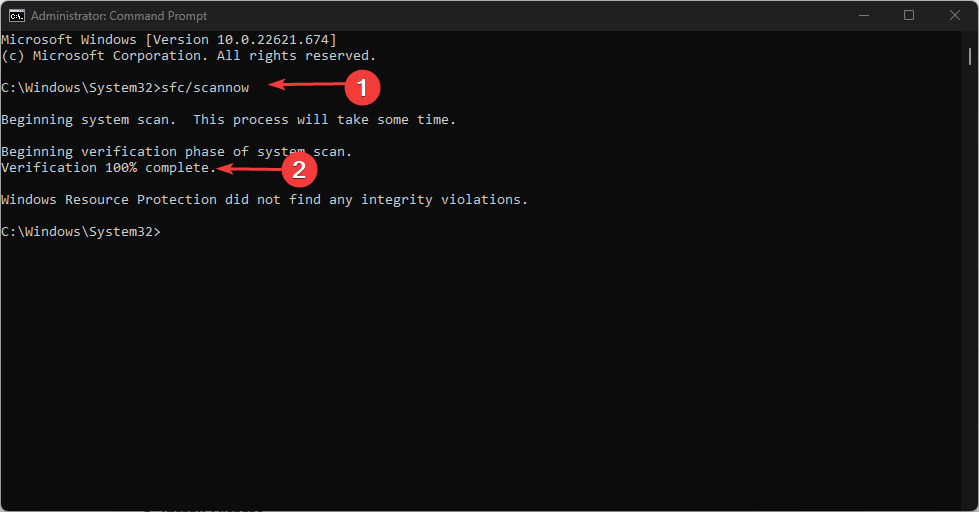
- Left-click the Start button, type the command prompt, and select Run as administrator.
- Click Yes on the User Account Control prompt.
- Type the following and press Enter:
sfc /scannow - Input the following command and press Enter:
DISM /Online /Cleanup-Image /RestoreHealth - Restart your PC.
Running a System File Checker scan will find and repair corrupt files causing the Blue Screen of Death error.
In conclusion, our readers can check our guide on fixing the Wdcsam64.sys Memory Integrity error on Windows 11. Also, you may be interested in Ndis.sys BSoD and some fixes for the error.
If you have further questions or suggestions, kindly drop them in the comments section.

