Fix: The Local Device Name is Already in Use in Windows 10
Check verified solutions that helped others
5 min. read
Updated on
Read our disclosure page to find out how can you help Windows Report sustain the editorial team Read more
Key notes
- Drive mapping is an important feature that allows access to remotely hosted drives, but many users got The local device name is already in use error in Windows 10.
- This is usually the case when the host drive is running low on storage, or a drive letter has been assigned.
- To fix things, disable the VPN, enable File and Printer sharing, and assign a drive letter, amongst other solutions.
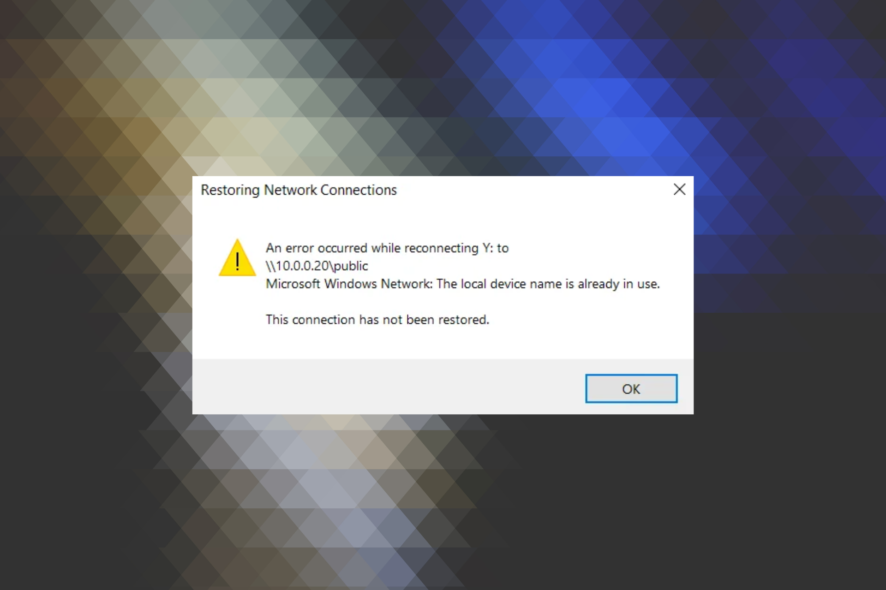
Some users utilize drive mapping to access remotely hosted disk drives. While ideally, the process should be seamless, several reported getting The local device name is already in use error in Windows 10.
The complete error message reads An error occurred while reconnecting <drive letter> to <file path> Microsoft Windows Network: The local device name is already in use. So let’s find out all about it and the solutions that worked for others.
Why do I get The local device name is already in use error?
Here are a few reasons you might be getting The local device name is already in use error in Windows 10:
- Misconfigured firewall settings: You need to have File and Printer sharing enabled on the Firewall. Otherwise, there is a good chance that the error might appear.
- Drive letter not assigned: In case a drive letter is not assigned to the network drive, you might get the error.
- Lack of storage space: Lack of storage is one of the most common reasons users encounter the error, and in this case, the usual solutions fail to work. So, you will have to verify this first.
How do I fix the device name already in use error?
Before heading to the slightly complex fixes, try these quick ones:
- Restart the computer since, in most cases, a simple reboot helped users fix this problem.
- Make sure you are not using a VPN. If that’s the case, disable it.
- Verify that there’s sufficient free storage on the shared drive. If not, you will have to clear some files.
- Check whether you are using the correct user account the drive was mapped to initially.
In case none worked, move to the solutions listed next.
1. Remap the drive
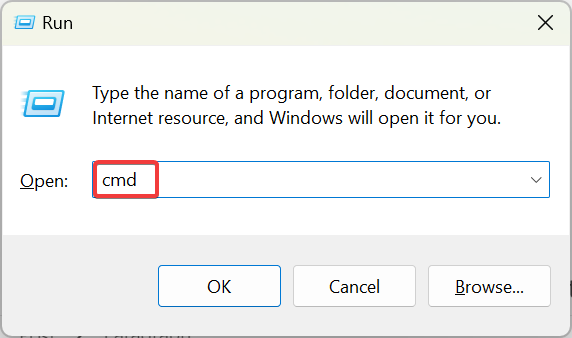
- Press Windows + R to open Run, type cmd, and hit Ctrl + Shift + Enter.
- Click Yes in the UAC prompt.
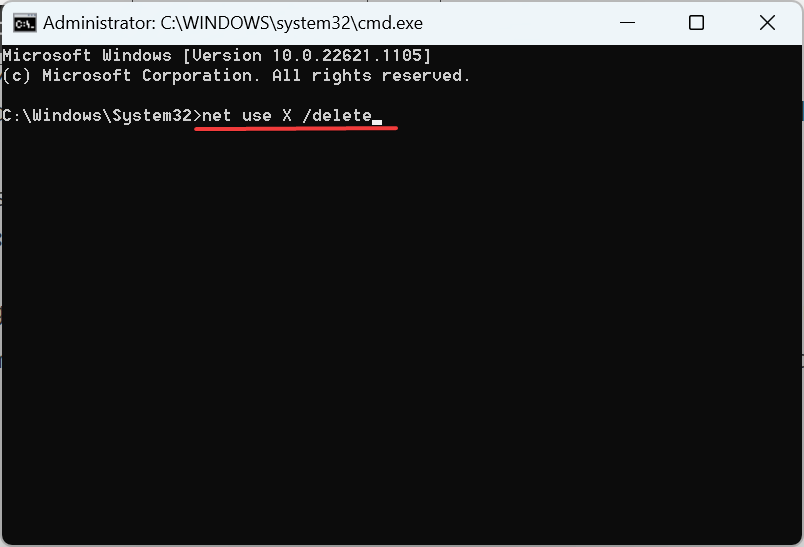
- Now, paste the following command while replacing X with the actual drive letter, and hit Enter:
net use X /delete - Next, execute this command while replacing X, the username, and the password with the actual ones:
net use X: \server\share /user:username password
A quick fix and one recommended by Microsoft, when you get The local device name is already in use error in Windows 10 is to remap the drive. Often issues come up with the previous remapping, and simply doing it again should get things running.
2. Assign a drive letter
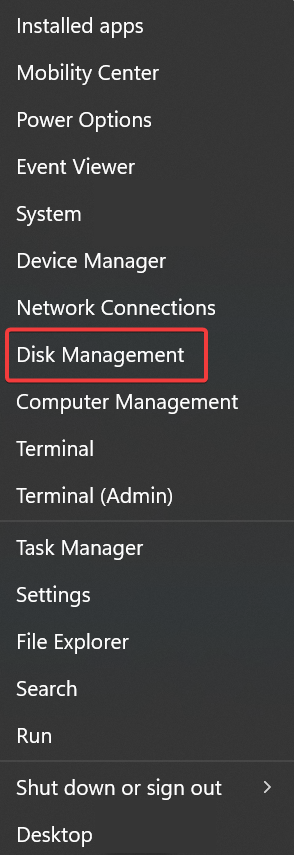
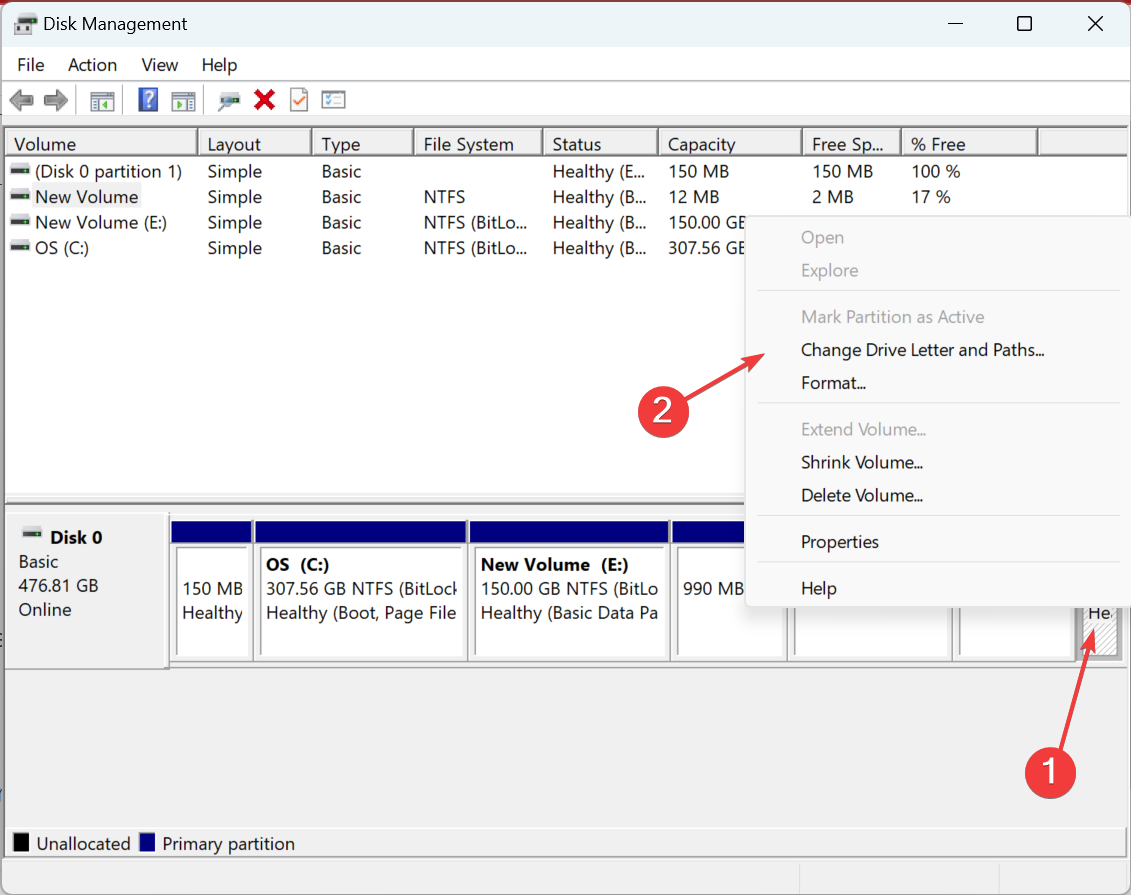
- Press Windows + X to open the Power User menu, and choose Disk Management.
- If you find that the shared drive does not have a drive letter, right-click on it, and choose Change Drive Letter and Paths.
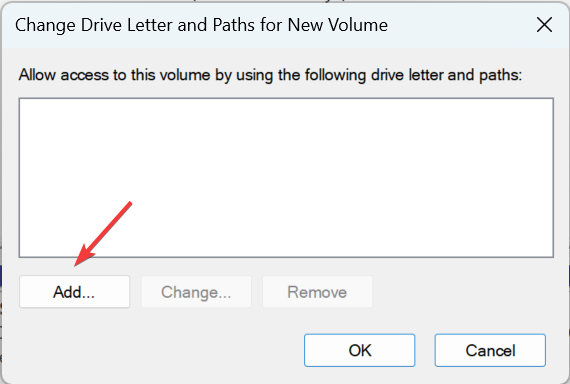
- Now, click on Add.
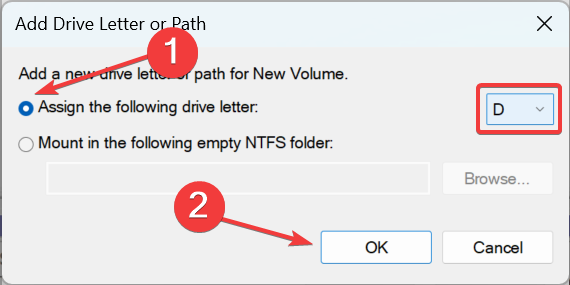
- Select Assign the following drive letter, choose one from the dropdown menu which is not already assigned, and click OK.
- Again, click OK to save the changes.
Once done, verify whether The local device name is already in use error in Windows 10 is fixed. If not, head to the next solution.
3. Enable File and Printer Sharing
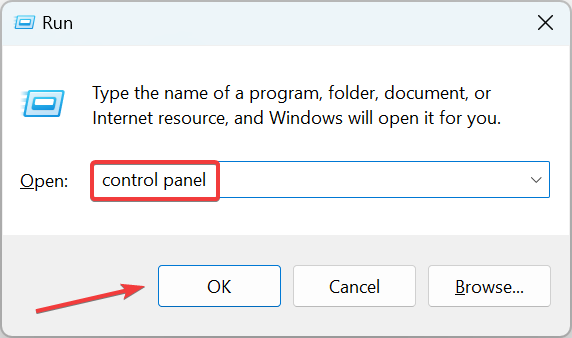
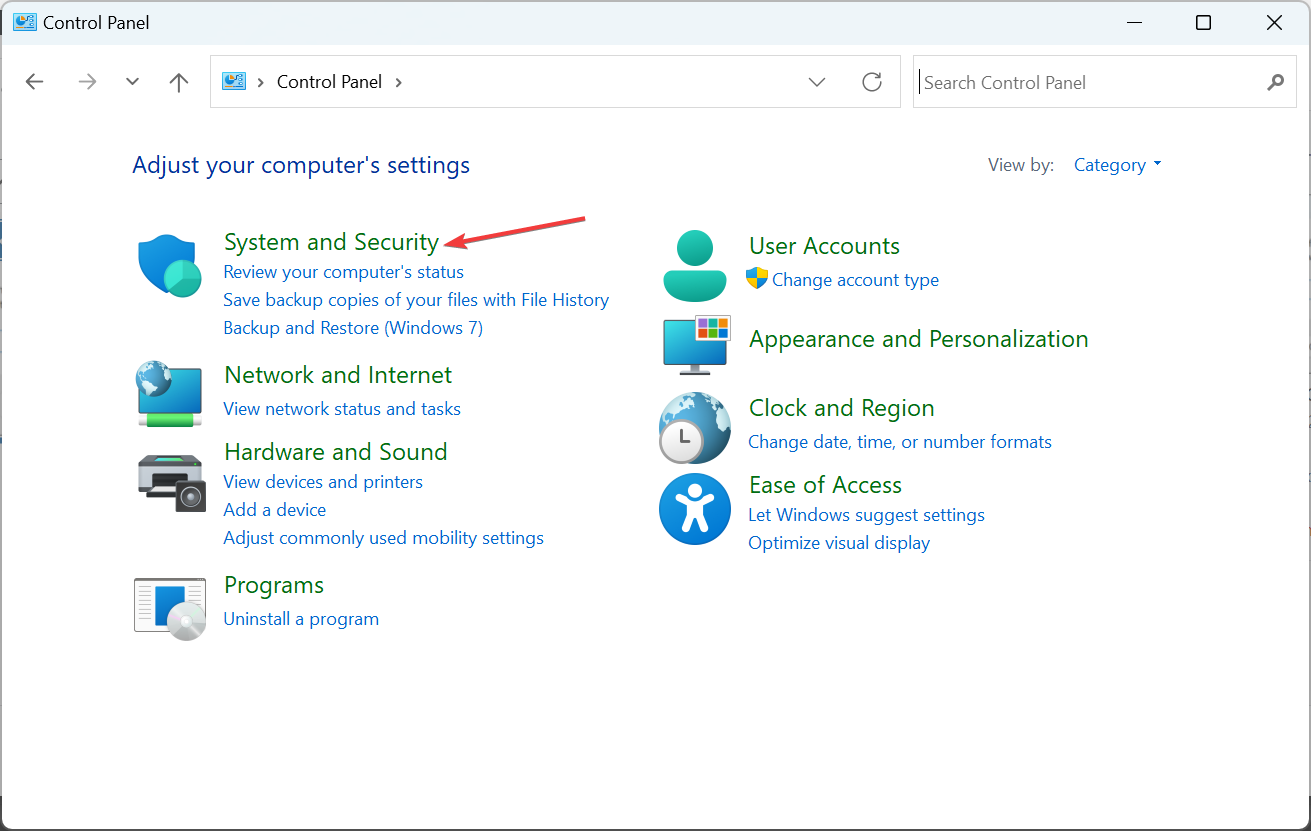
- Press Windows + R to open Run, type control panel, and click OK.
- Click on System and Security.
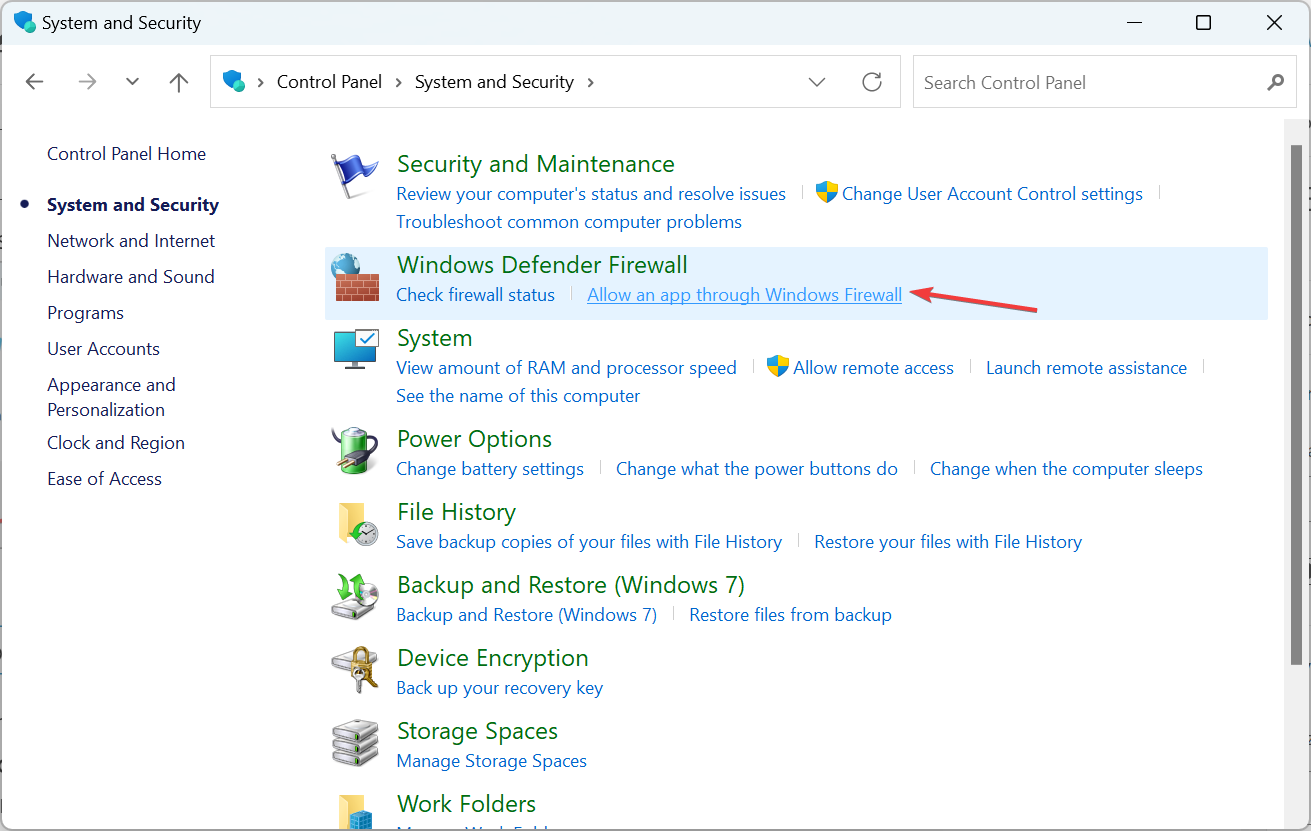
- Next, choose Allow an app through Windows Firewall under Windows Defender Firewall.
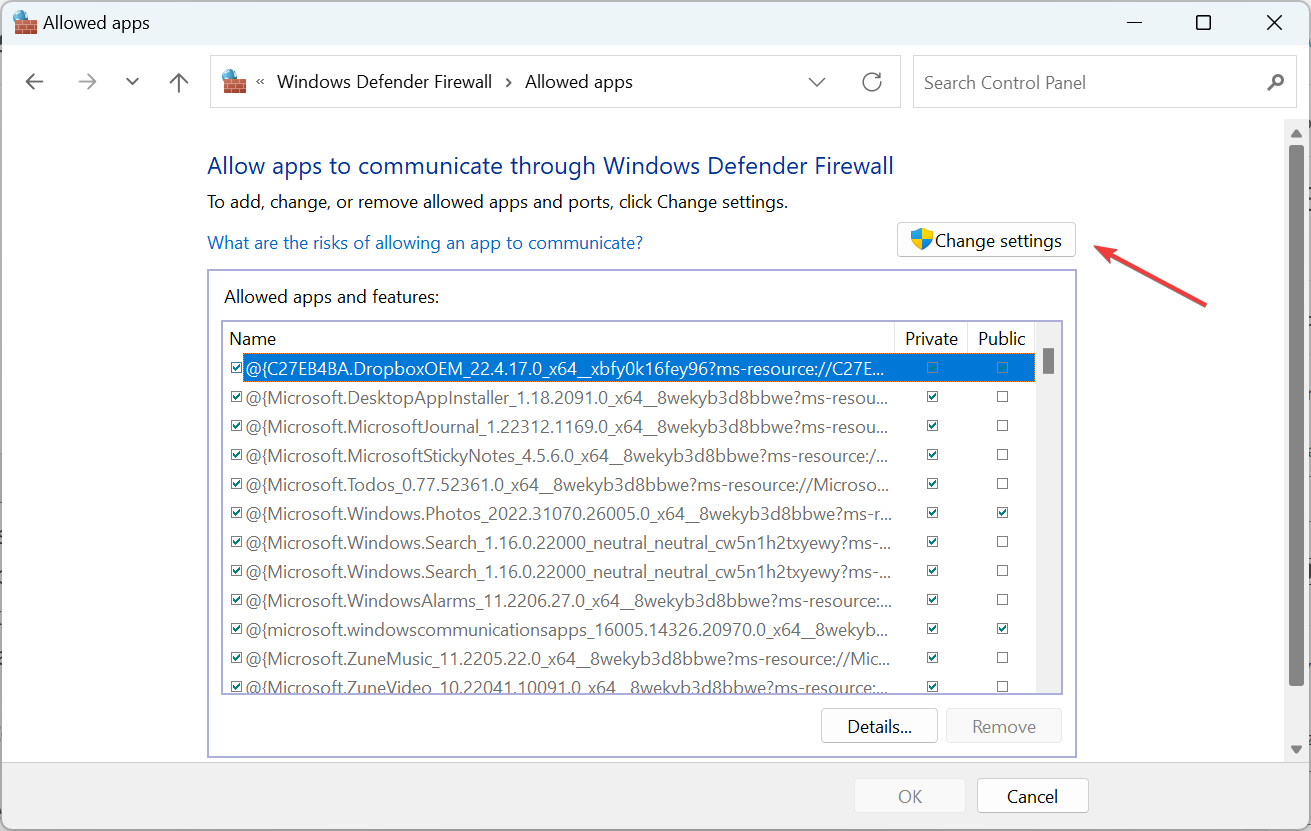
- Click on the Change settings button.
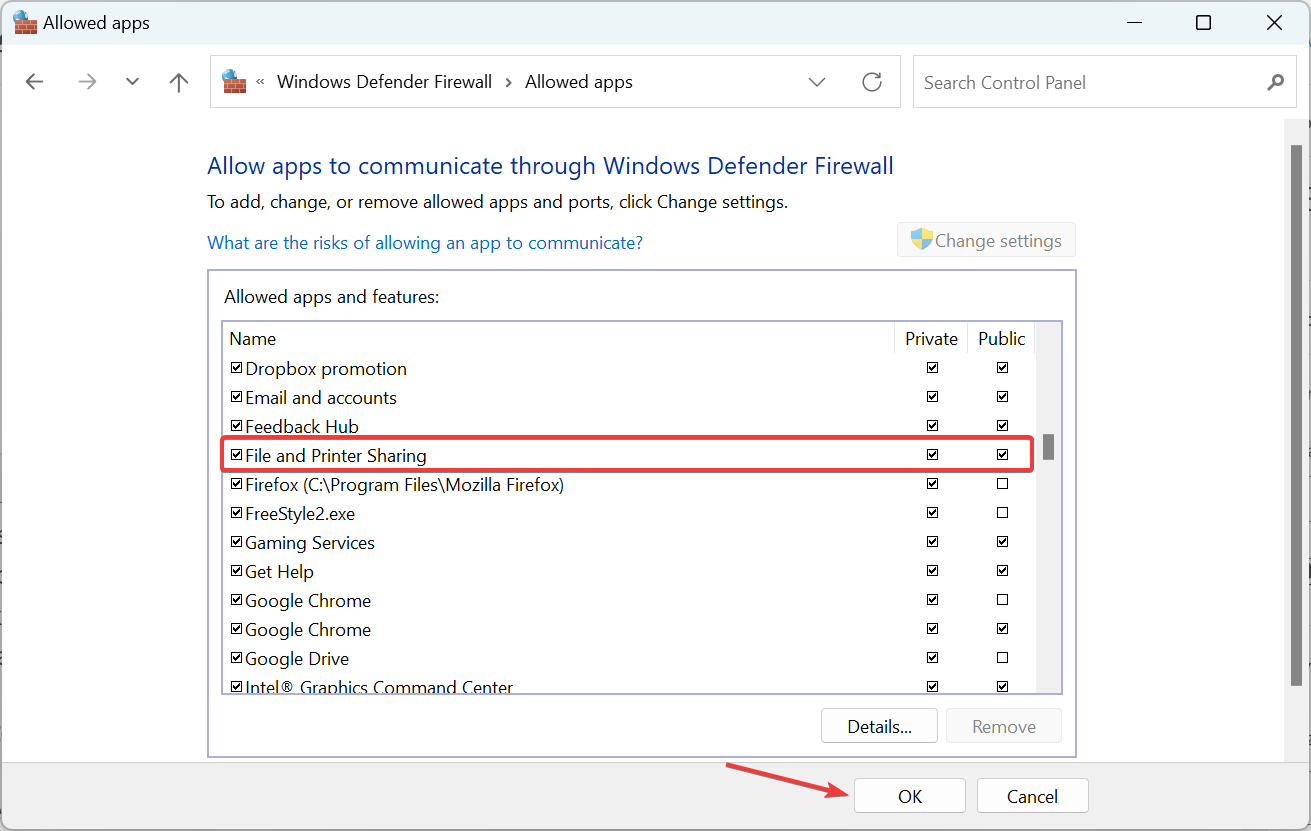
- Locate File and Printer Sharing, make sure the checkboxes under both Private and Public are ticked, and click OK to save the changes.
Several users reported issues with network drives, and even The local device name is already in use error in Windows 10 when File and Printer Sharing was disabled in Firewall.
If you happen to use a third-party antivirus with a built-in firewall, make sure to verify the same there as well.
4. Modify the Registry
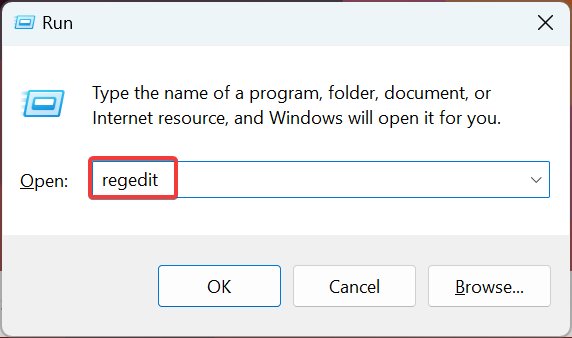
- Press Windows + R to open Run, type regedit, and press Enter.
- Click Yes in the prompt.
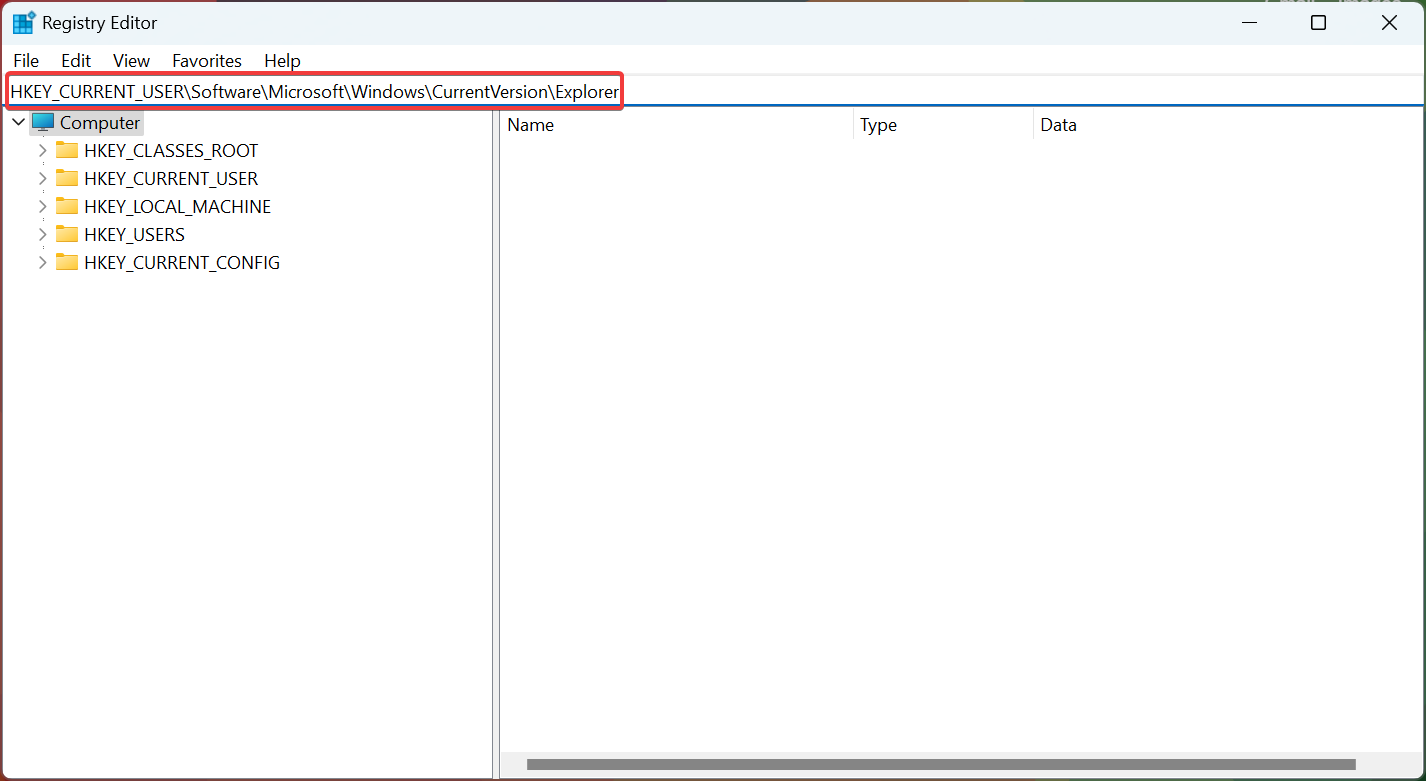
- Paste the following path in the address bar and hit Enter:
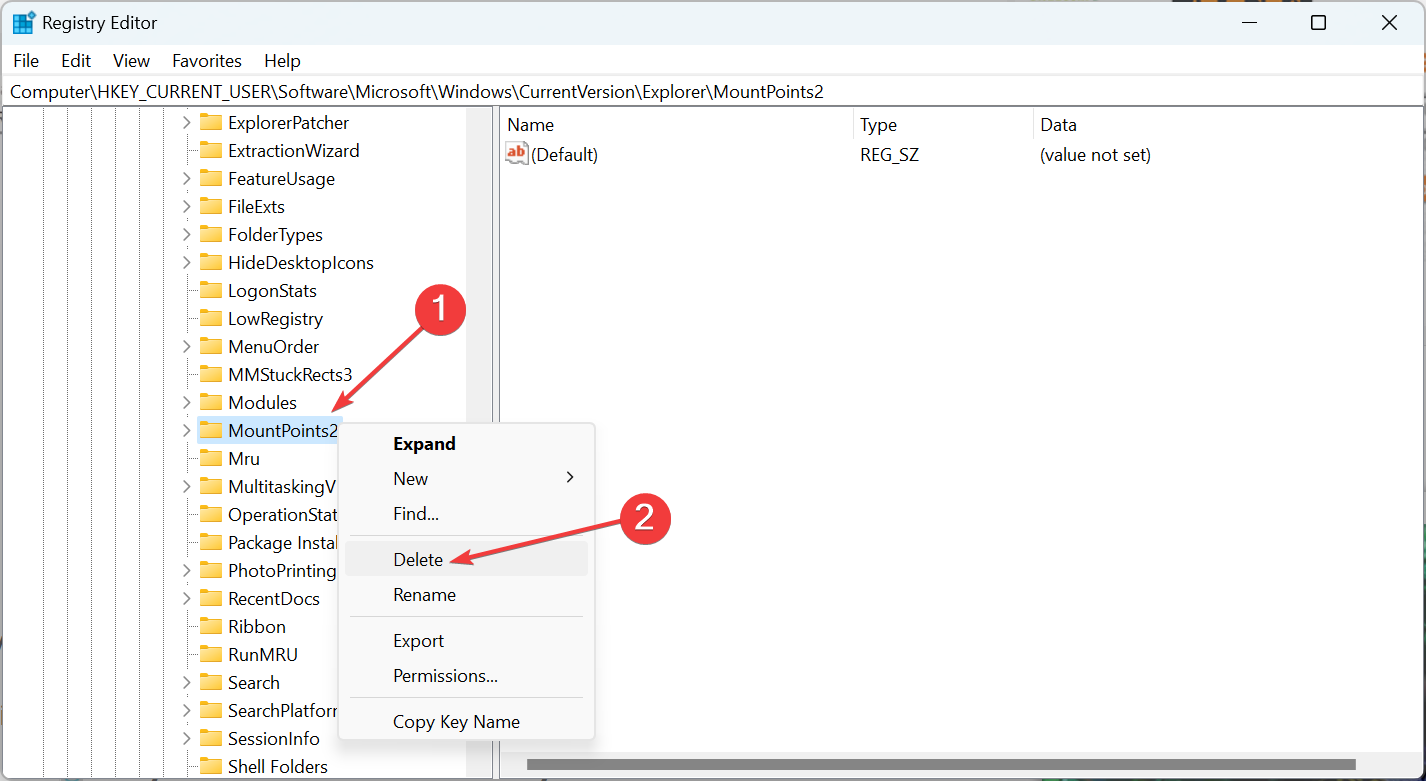
HKEY_CURRENT_USER\Software\Microsoft\Windows\CurrentVersion\Explorer - Locate the MountPoints2 key in the navigation pane, right-click on it, and choose Delete.
- Finally, click Yes in the confirmation box.
- Once done, restart the computer, and it shouldn’t throw an error when accessing the shared drive.
5. Restart the Computer Browser service
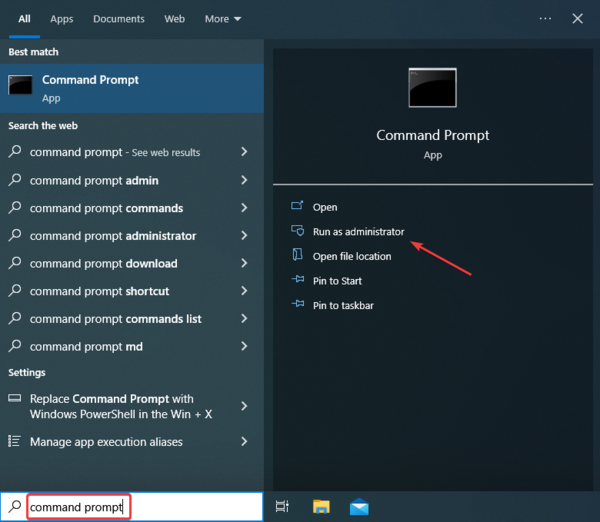
- Press Windows + S to open Search, type Command Prompt in the text field, and click on Run as administrator.
- Click Yes in the prompt that pops up.
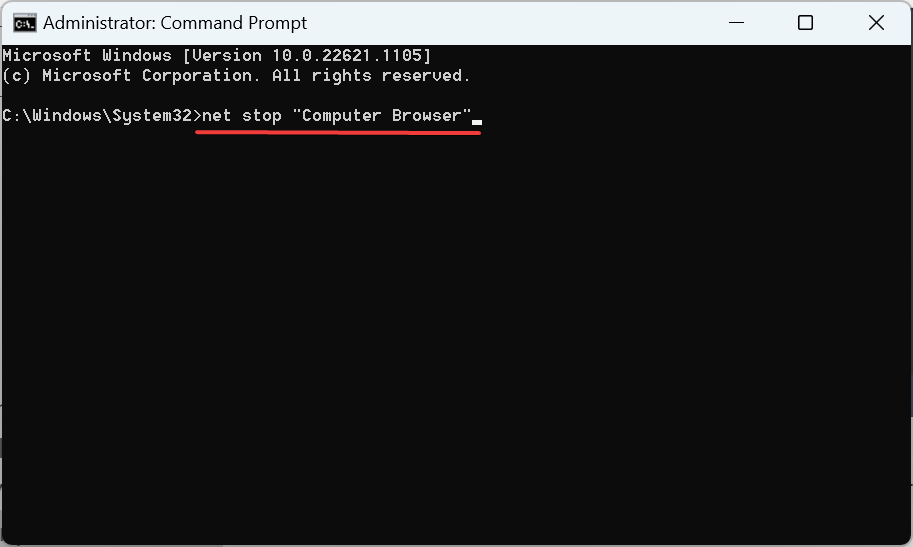
- Now, paste the following command and hit Enter to stop the Computer Browser service:
net stop "Computer Browser" - Next, execute the following command to start the service:
net start "Computer Browser"
Issues with the Computer Browser service have often been linked to The local device name is already in use error in Windows 10, and restarting it should do the trick.
One of the solutions here should have helped you fix the error. And while you are at it, also find out what to do if the mapped network drive is missing in Windows.
If you know of another method of fixing this issue, let us and everyone else know by leaving us a message in the comments section below.




User forum
0 messages