Windows 10 is Stuck at Low Resolution? Change it by Force
Keep your GPU and monitor driver up to date to prevent this issue
Key notes
- Low resolution on Windows 10 can occur if your drivers are out of date.
- If your DPI settings or registry values are incorrect, you'll encounter this problem.

Low resolution on Windows 10 can be a big problem since it will interfere with your daily activities and it will make your PC harder to use.
This will also affect the quality of your display, so it’s important to fix this issue, and today’s guide will show you how to do that.
Why is my PC stuck on low resolution?
- Your drivers might be outdated, and that can cause issues with resolution.
- Specific settings in the registry might not be configured properly, thus resulting in low resolution.
- DPI value isn’t correctly set on your PC.
How do I fix low resolution on Windows 10?
1. Update your display driver
- Visit your graphics card manufacturer’s website.
- Locate your model on the list.

- Download the latest driver.

- Once it’s downloaded, run the setup file to install it.
For more information, check our guide on how to update your graphic driver. This should help if Windows 10 has low-resolution programs or games.
All your drivers need to be updated, but doing it manually is very annoying, so we recommend you use a professional driver updater tool to do it automatically.
Update drivers automatically
If you don’t want the hassle of updating drivers manually, we strongly suggest doing it automatically. This third-party driver updating tool will check your installed driver versions against its cloud database of the latest versions and recommend proper updates.
- Download and install the Outbyte Driver Updater app.
- Launch the software and wait for the app to detect all incompatible drivers.
- Now, it will show you a list of all faulty drivers to select the ones to Update or Ignore.

- Click on Update & Apply Selected to download and install the newest versions.
- Restart your PC to ensure the applied changes.

OutByte
Keep your GPU in a flawless state without worrying about possible driver issues.2. Change the registry values
- Run Registry Editor by typing regedit in the Search box and selecting Registry Editor from the list of results.

- When Registry Editor opens you’ll need to search for a specific value, and you can do so by pressing Ctrl +F.

In the Find, window enter display1_downscaling_supported. - Double-click click Display1_DownScalingSupported key and change its Value Data to 1 and click OK to save the changes.
Next, you need to press F3 to search again. Now repeat the step 4 and 5 for all Display1_DownScalingSupported keys that you find. - After you’ve changed all Display1_DownScalingSupported you can restart your computer.
If you can’t find Display1_DownScalingSupported in Registry Editor try this:
- Open Registry Editor and search for LogPixels key. You can search it by Pressing Ctrl+F, or you can navigate to:
HKEY_CURRENT_USER\Control Panel\Desktop - Find LogPixels and double-click it.

- Set its value to 87. Depending on your screen size, you might need a lower value.
In case you’re stuck at certain Windows resolution, this guide might help you. If you can’t edit your registry, we have a special guide that can help you with that.
3. Roll back your driver
- Go to Search, type devicemngr, and open Device Manager.
- Find your graphics card under Display Adapters, right-click it and go to Properties.
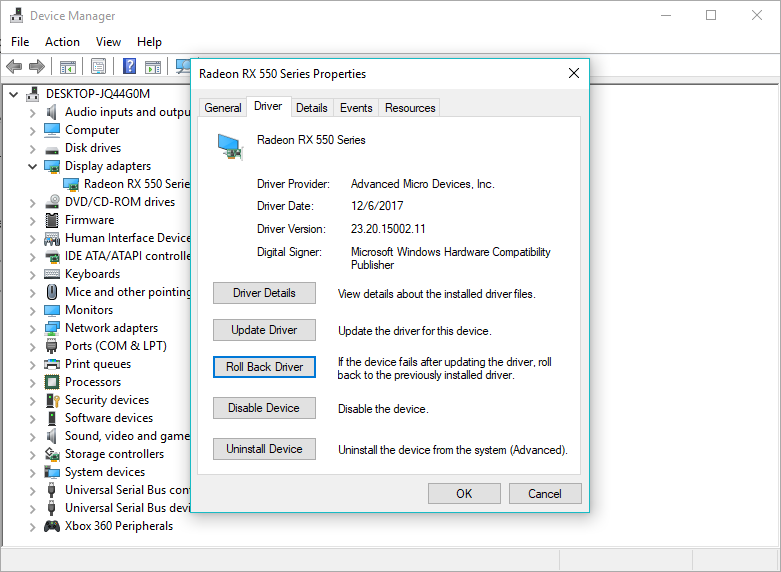
- Head over to the Driver tab.
- Click Roll back driver.
- Follow further on-screen instructions.
- Restart your computer.
If the rollback is successful and the problem disappears, you’ll have to block Windows from automatically updating drivers in the future.
4. Set DPI size
- Go to Settings and select System. Then, choose Display.
- Now, go to custom scaling, and you’ll see a screen like this:
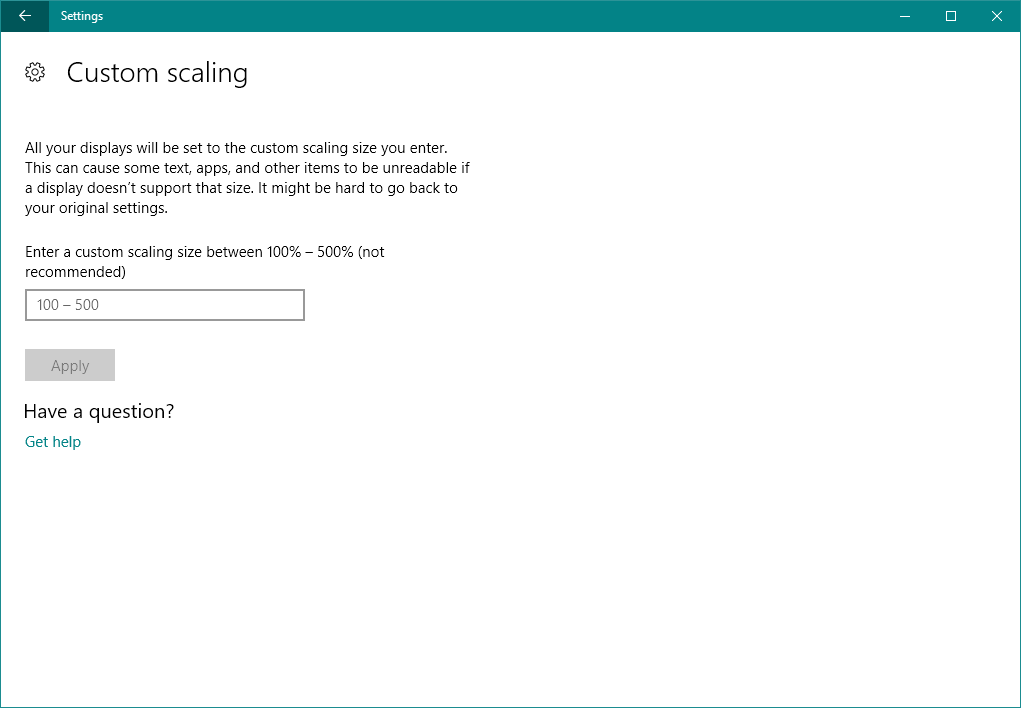
Now, choose one of these three options and save the changes:
- Smaller – 100% = 96 DPI (Pixels/Dots Per Inch)
- Medium – 125% = 120 DPI (Pixels/Dots Per Inch)
- Larger – 150% = 144 DPI (Pixels/Dots Per Inch)
Once you’ve chosen the right DPI size, just restart your computer, and you should be good.
5. Update monitor drivers
- Go to Search, type devicemngr, and open Device Manager.
- Expand Monitors.
- Right-click your monitor, and go to Update driver.

- Let your computer find new drivers for your monitor.
- If there are any new drivers available, let the wizard install them.
- Restart your computer.
Bonus: Stuck at a certain resolution
- Go to Settings > System > Display.
- Go to Display adapter properties.
- On the Adapter tab, click List all modes.
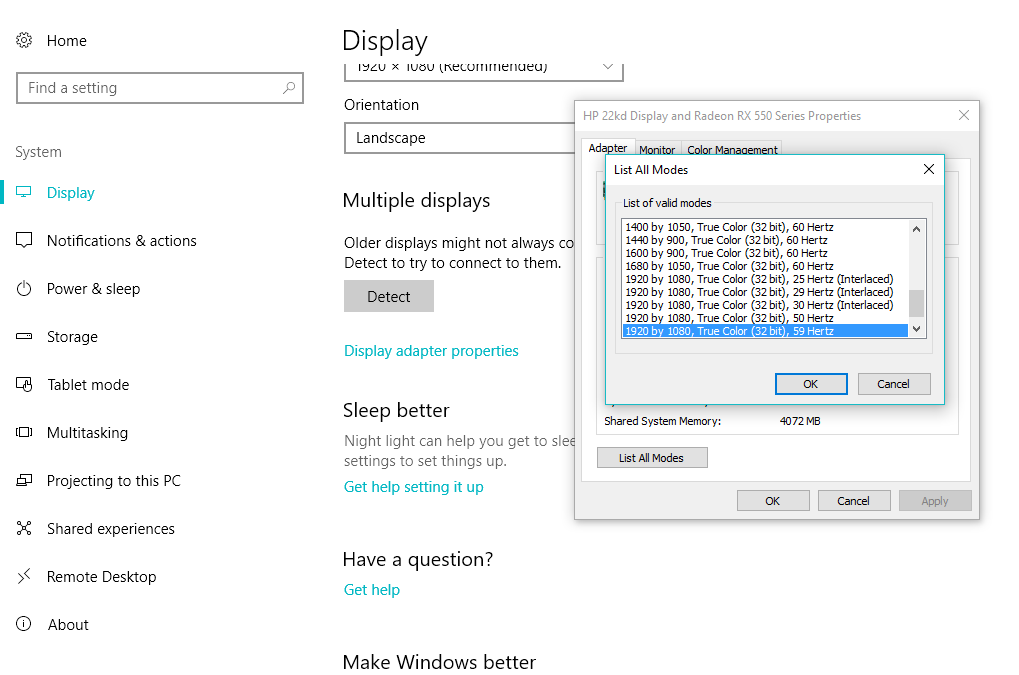
- Choose a desired resolution.
- Save the changes and restart your computer.
If you want to create custom resolutions, we have a dedicated guide that will surely help you.
This is a common and easy-to-solve issue, so one of these solutions will definitely help. If you have some other screen problems after the Windows 10 update, you can check out our article about solving problems with screen in Windows 10.
If you have any questions or comments, reach for our comments section, below.
Read our disclosure page to find out how can you help Windows Report sustain the editorial team. Read more


Improve this guide


User forum
1 messages