Merge C and D Drive in Windows 11: How to Do It in 3 Steps
Make managing your files easier by combining your drives
4 min. read
Updated on
Read our disclosure page to find out how can you help Windows Report sustain the editorial team Read more
Key notes
- Merging two drives together is a great way to increase storage space and manage your files.
- It may seem tricky at first, but it can be done easily, thanks to some third-party apps.
- But before you do that, you'll need to back up your files.
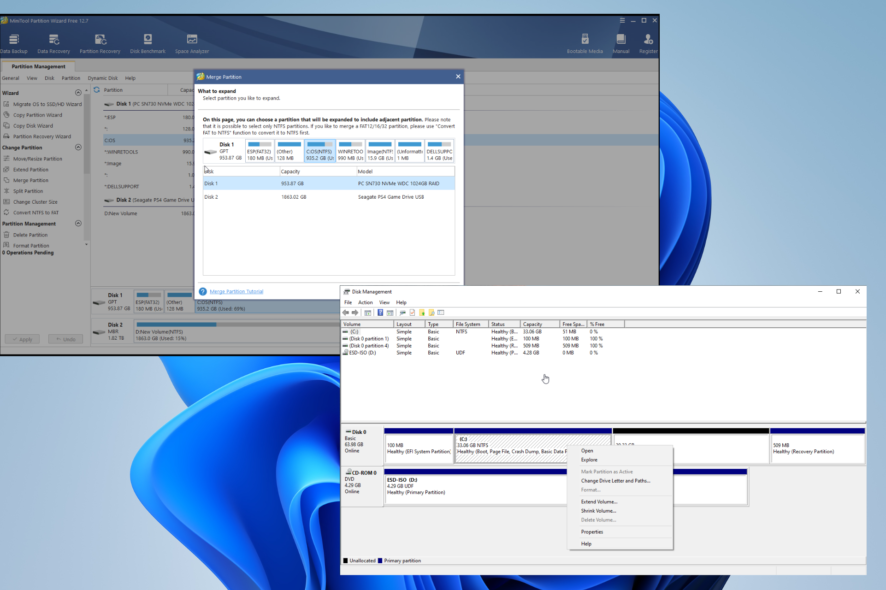
Managing files on your Windows computer can feel like a full-time job. Nowadays, people are downloading massive files, and it can be overwhelming trying to figure out where everything is.
There are many methods you can try to clear up your hard drive, like using Recycle Bin cleaners to get rid of unnecessary files. There’s another most don’t commonly try, and that’s merging drivers.
Why would I need to merge two drives?
Before going into how to merge the C: and D: drives, let’s go over why you want to do this in the first place. Believe it or not, there are various benefits to doing so:
- It frees up a lot of space on your computer – This is, by far, the biggest benefit of fusing the two drives. Sure, you can uninstall apps one by one, but merging is a faster method.
- It aids in organizing your hard drive – Wiping out a hard drive using some software can be a rather extreme method. Combining drives is a more controlled method of organizing things.
- Merging can create more space – At some point, you’re going to run out of space on your hard drive. Combining can solve this problem even if you can’t make a new partition.
How do I merge your C and D drive on Windows?
There are only a handful of ways to merge the two drives, which can be pretty tricky. There are no easy solutions. We will, however, recommend that you do a few things first before merging:
- The first thing that you should do is update your system. Install any fixes Microsoft has recently rolled out. They can save you from dealing with corrupt files later on.
- It is also strongly recommended that you back up your files. There are two ways to do it: either through the native Windows 11 feature or through some third-party software.
1. Back up files
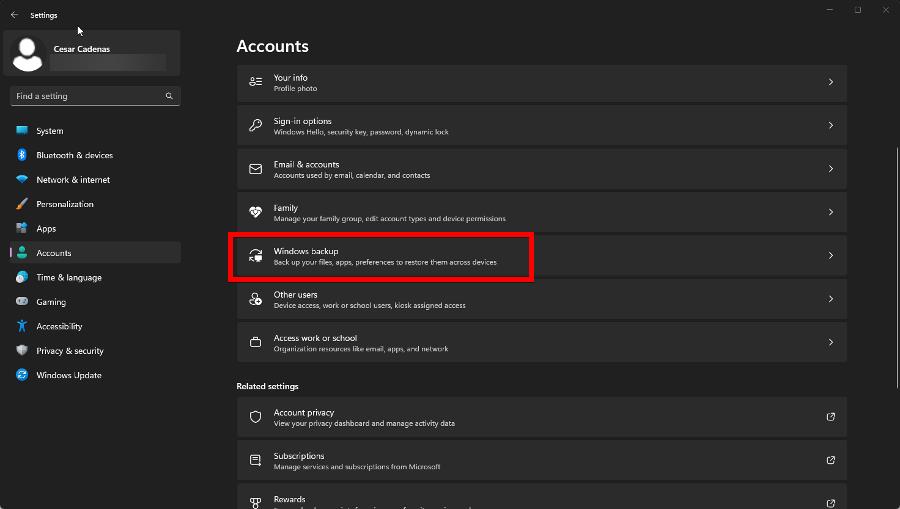
- Launch the Settings app and go to the Accounts tab.
- Next, click Windows backup.
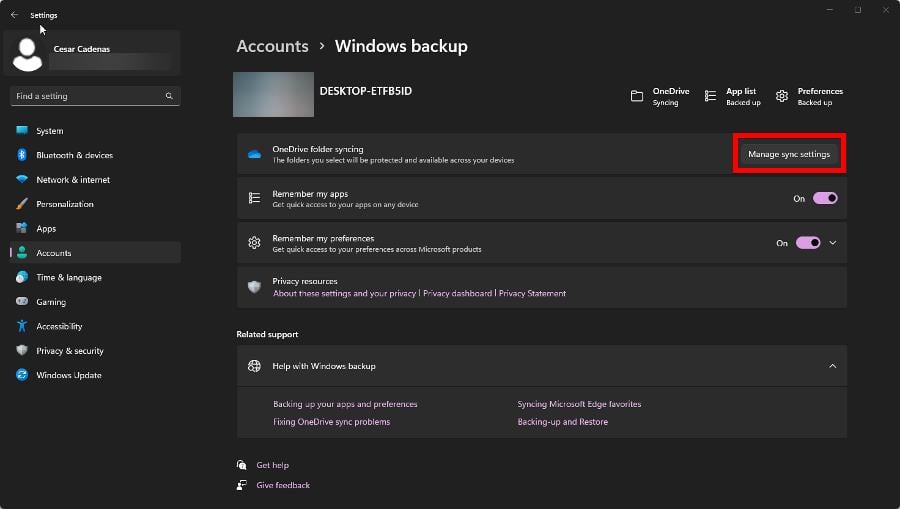
- On the following page, you can allow OneDrive to save your folders and which app logins will be remembered. To configure it all, select Manage sync settings.
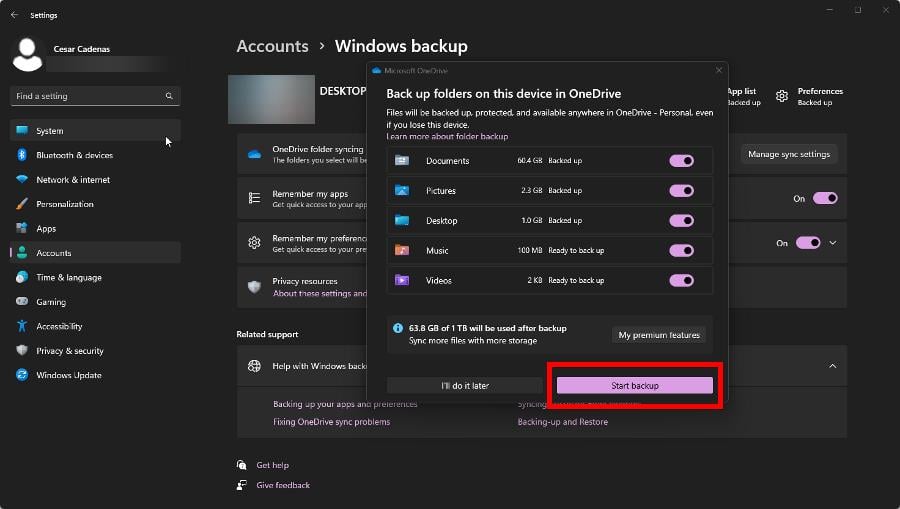
- In the new window, select which folders you want to back up to OneDrive. Click Start backup when ready.
Backing up your files needs to be the first thing that you do. If you make any mistakes, files become corrupt, or something goes wrong, you can restore the old files and start again.
2. Extend volume via Disk Management
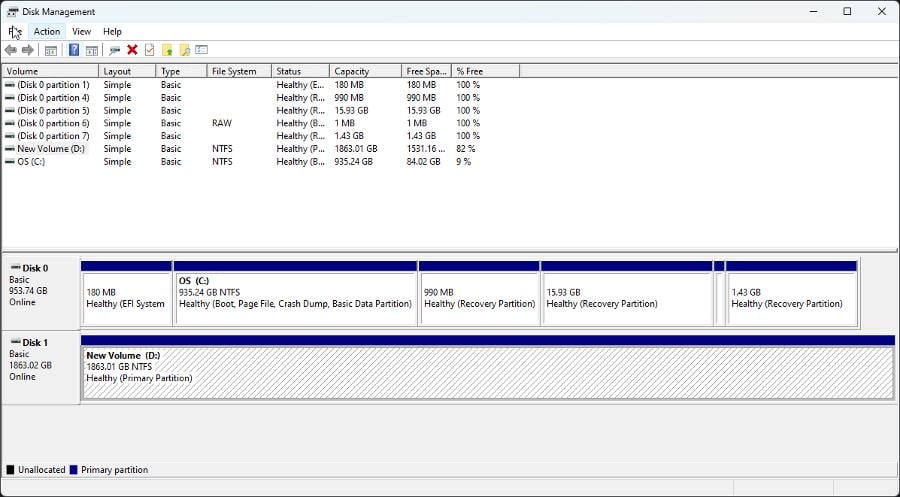
- Launch the Disk Management app from the Windows search bar.
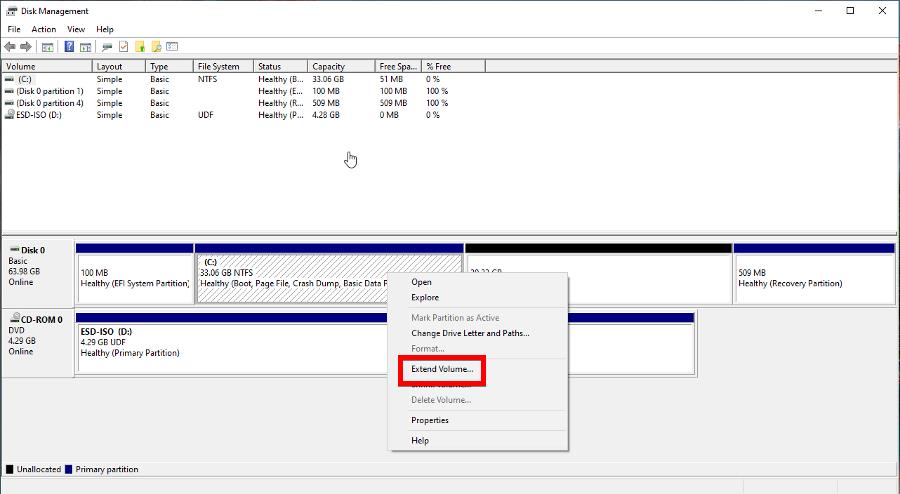
- Right-click the partition you want to extend.
- If the entries are greyed out, there isn’t any space available. You can make space by first selecting Delete Volume.
- Right-click the partition again and select Extend Volume.
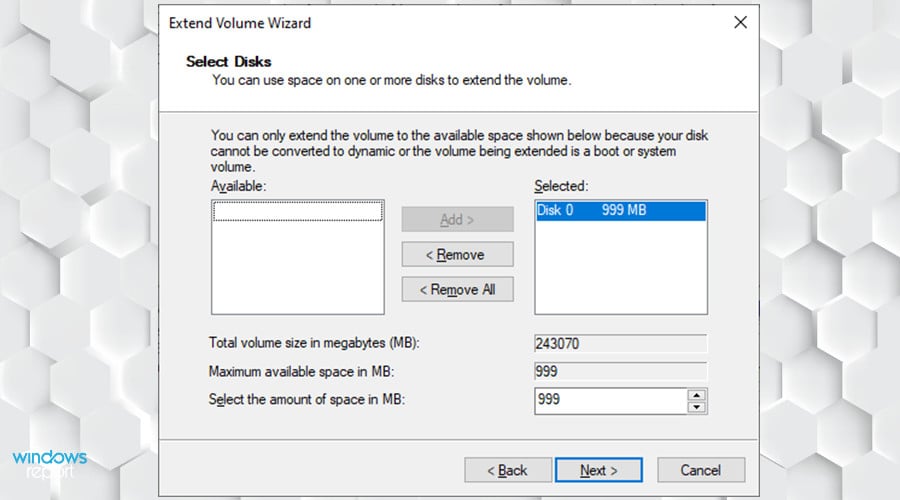
- Click Next in the Extend Volume Wizard.
- On the following window, select how much drive space you want to use for extending volume. It’s recommended that you use all available space.
- Click Next when done and then Finish on the window after that.
3. Merge drives using third-party software
- There are many different apps out there that you can use to merge drives. For this guide, MiniTool Partition Wizard will be used.
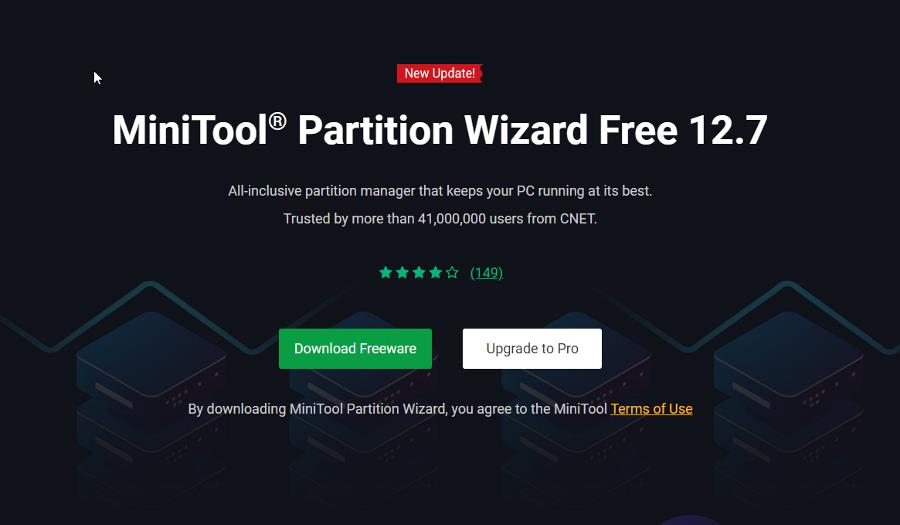
- Install the app and launch it when finished.
- Select the C: Drive in the middle menu, then click Partition on the left-hand side.
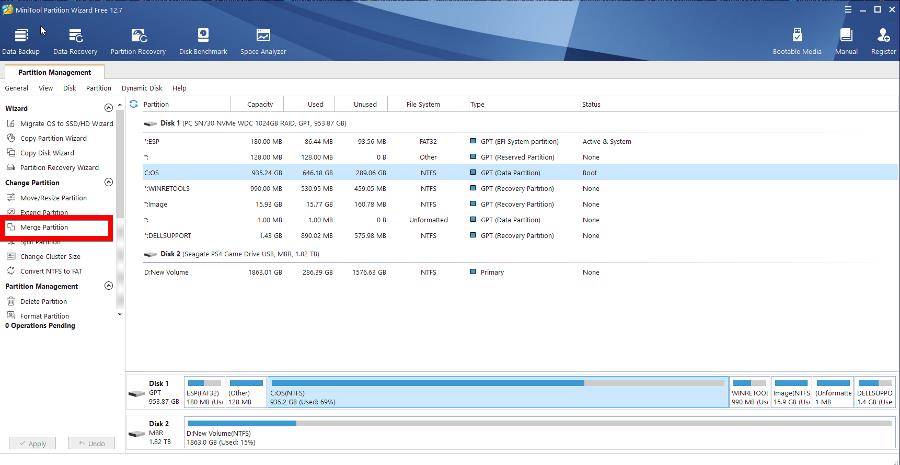
- A new window will appear. The C: Drive will already be selected. Click Next.

- On the following window, select the D: Drive or whatever other drive you want to merge. Click Finish.
- Click Apply in the top-left corner to save the change.
If you want to learn more about other similar apps, check out our list of the best seven partition manager software.
What can I do if the hard drive isn’t showing me its full capacity?
Some users have complained that their hard drive doesn’t show its total capacity in the Disk Management app. This serious problem could indicate faulty software or something damaged internally.
If it’s a software problem, it’s recommended that you update the hard drive driver and reformat it. But if it’s damaged, it’s best to take it back to the manufacturer or repair it somewhere.
Additionally, you should learn about the best defrag software. Fragmented files can cause all sorts of performance problems. Defragmenting reorganizes them to improve performance.
Some of the best ones include Iobit Smart Defrag and CCleaner. Note that the apps work for Windows 10 and 11, so don’t worry if the software only indicates the former.
Feel free to comment below if you had other hard drive questions. Also, leave comments below about reviews you’d like to see or information on other hard drive issues for Windows 11.

