You do Not Have Sufficient Privileges to Delete: How to Fix
Fix your permissions to solve this error message on your PC
![]() 3 min. read
3 min. read
![]() Updated on
Updated on
Share this article

Improve this guide
Read our disclosure page to find out how can you help Windows Report sustain the editorial team Read more
Key notes
- You do not have sufficient privileges to delete appears when using Active Directory or organizational unit.
- Adjusting your settings is the best way to deal with this error message on your computer.
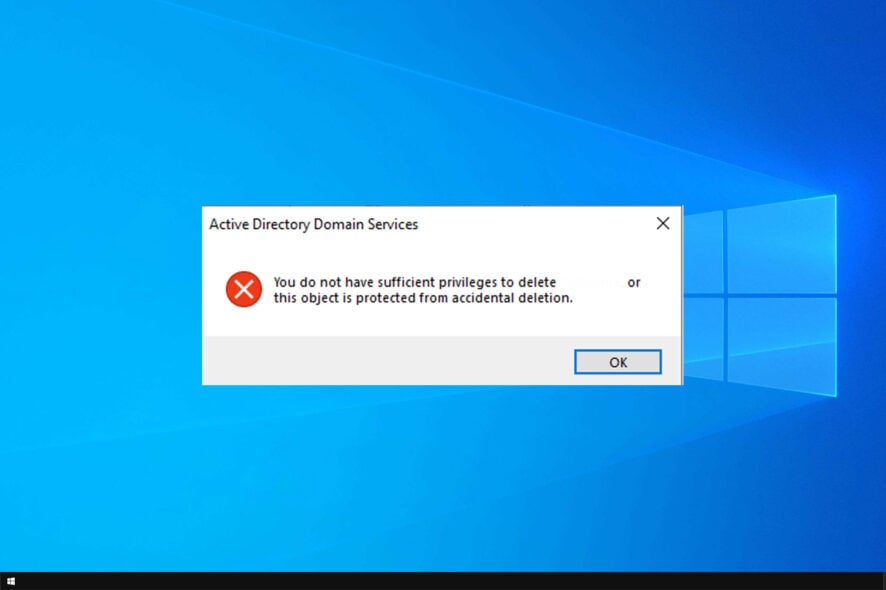
When working on your Active Directory Users and Computers or ADUC, on your Windows Server, you might be faced with the You do not have sufficient privileges to delete or this object is protected from accidental deletion type of error.
The error message is somewhat similar to the You do not have sufficient privileges to install issue that we covered earlier.
Join us while we take a closer look at this issue and show you the best ways to fix it.
Why does You do not have sufficient privileges to delete message appear?
You’ll encounter this message in several instances:
- If the object is protected from accidental deletion in ADUC.
- Your account doesn’t have inheritable permissions.
- Date parameters are wrong.
- Issues with the custom date classes.
- Problems with the network connection.
How can I fix You do not have sufficient privileges to delete error?
1. Use Advanced Features on ADUC
- Firstly, click on View and select Advanced Features.
- Now right-click on the OU you want to remove and then select Properties.

- Click on the Object.
- Simply uncheck the Protect object from accidental deletion.
- Now try to remove the OU in question.
By making these changes, you should be able to fix You don’t have sufficient privileges to delete or this object is protected from accidental deletion error.
2. Active Account solution
- Head over to the account‘s Security tab.
- Click on the Advanced button, and then we’re going to uncheck the Include inheritable permissions from this object’s parent box.

- Simply click OK afterward to close the properties dialog. Now you can go ahead with deleting the object again.
3. Convert date parameters
- Convert your date and time parameter.
- Try setting your date and time parameters to a String type in your units.
- Save changes.
After doing that, check if the error message is gone.
4. Remove custom date classes
- Head over to the unit’s properties and remove the custom data classes.
- Remove any embedded units in the report using the Microsoft Report Builder.
- Save the changes.
5. Check your connection
- Make sure that you are connected to the correct data source.
- Ensure you’re connected to the one with the tables you need.
- Ensure you have permission to access that data source in question.
There you go, these are a couple of solutions you might use to fix You do not have sufficient privileges to delete or this object is protected from accidental deletion error.
For more similar issues, visit our You don’t have privileges for configuring connection guide.
Be sure to try all of our solutions, and let us know if they worked for you.