Nvcuda.dll is Missing or Not Found: 7 Ways to Fix it
Getting a copy of the DLL from another PC is the quickest fix
5 min. read
Published on
Read our disclosure page to find out how can you help Windows Report sustain the editorial team. Read more
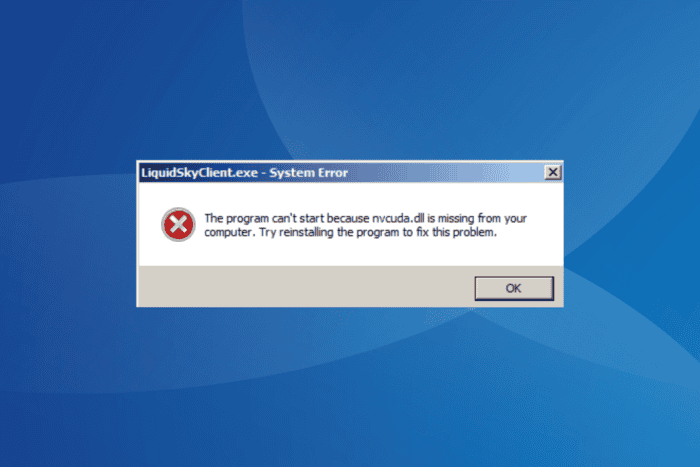
The nvcuda.dll file, developed by NVIDIA Corporation, is used by several programs, including TensorFlow, Octane, LiquidSky, NiceHash, Plex, and Batman Arkham Knight.
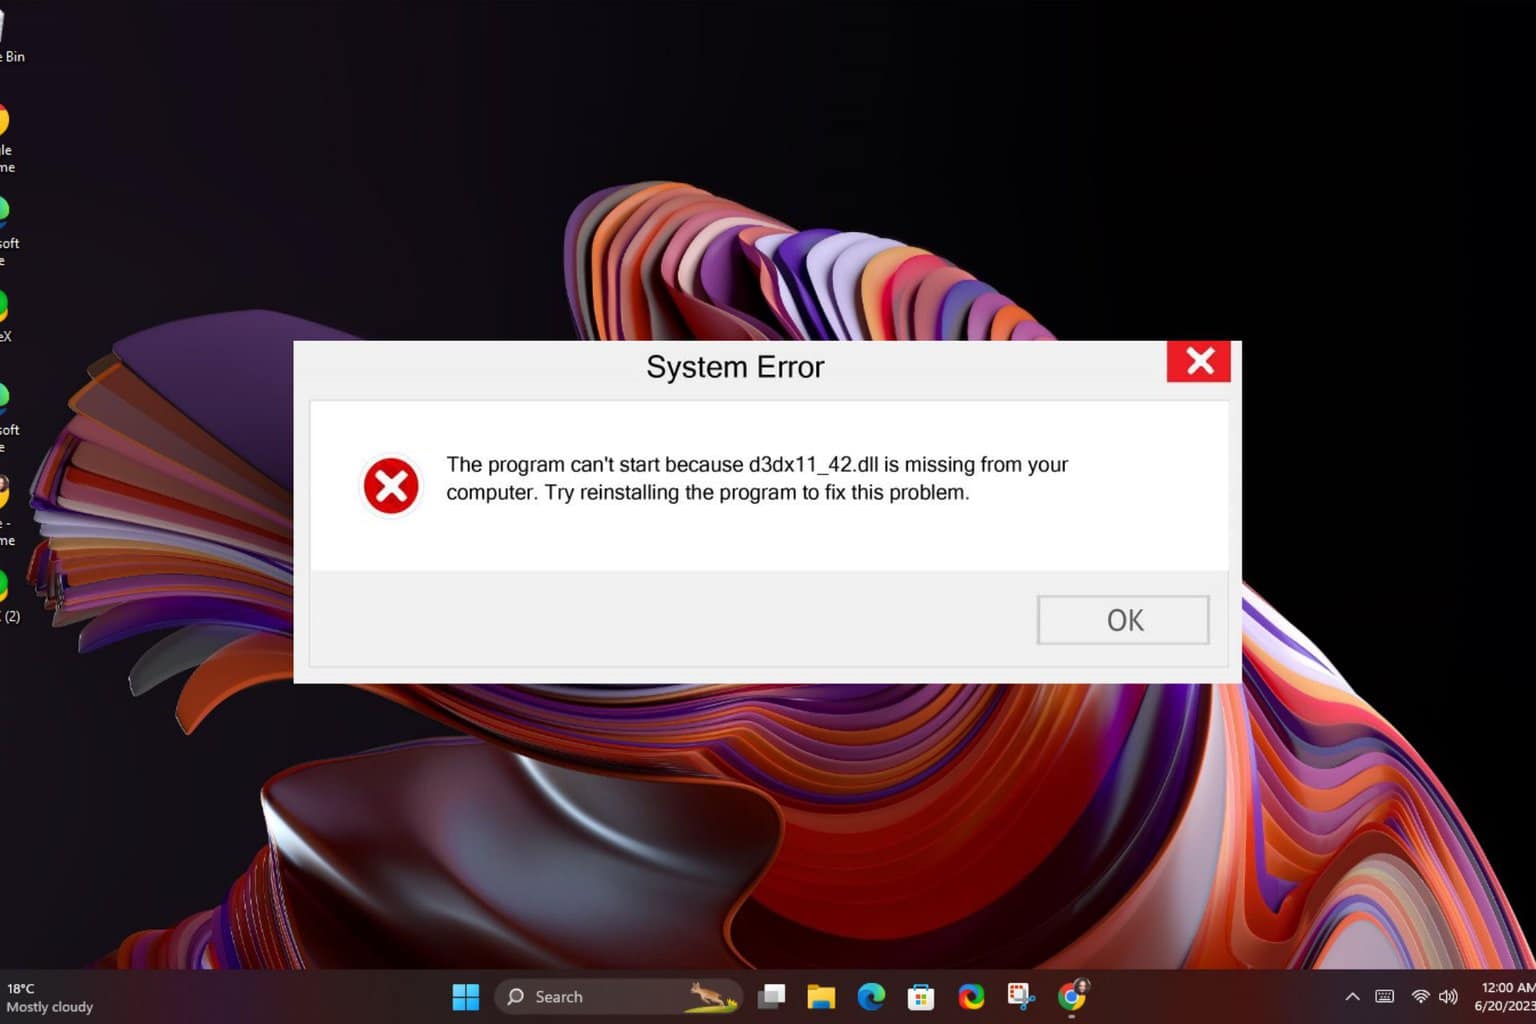
The nvcuda.dll missing error is usually encountered with AMD and Intel GPUs, given that the DLL is developed by NVIDIA, but that’s not always the case. Even with NVIDIA GPUs, inadvertent deletion of the file, either manually or after an update, can also lead to the missing DLL error.
Before you proceed, restart the PC, disable any third-party antivirus, and install all pending Windows updates. For most of you, these basic checks should do the trick!
What can I do when nvcuda.dll is not found or cannot load?
1. Manually copy nvcuda.dll to System32
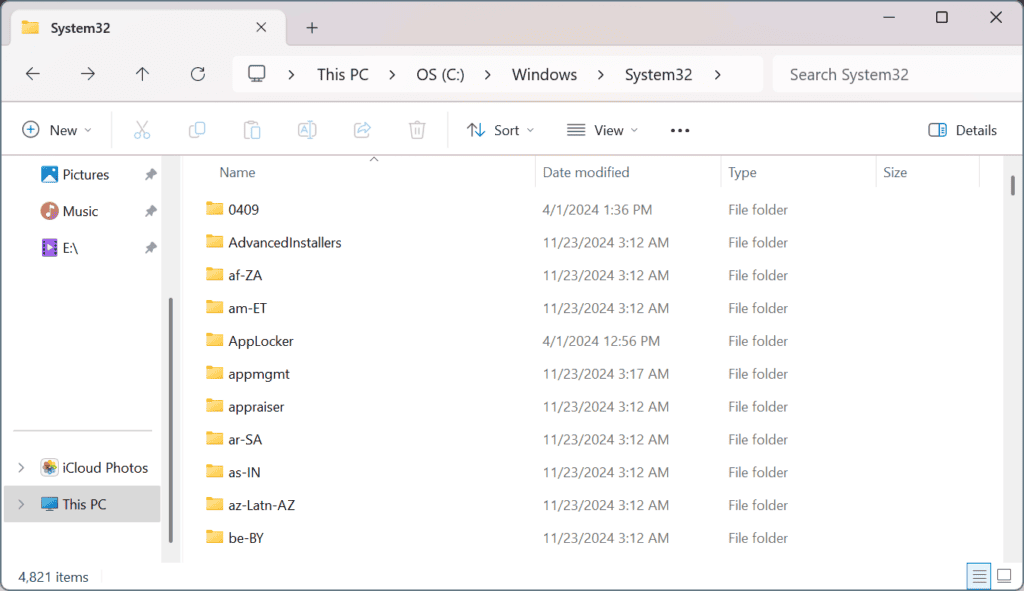
The easiest solution when nvcuda.dll is not found is to manually transfer a copy of the DLL. As to where nvcuda.dll is located, it’s found in: C:\Windows\System32
So, connect a flash drive to another PC > go to the System32 folder > copy the DLL to the flash drive > plug it into the affected PC > transfer nvcuda.dll to the System32 folder > reboot the PC to apply the changes.
2. Run the affected program as an administrator
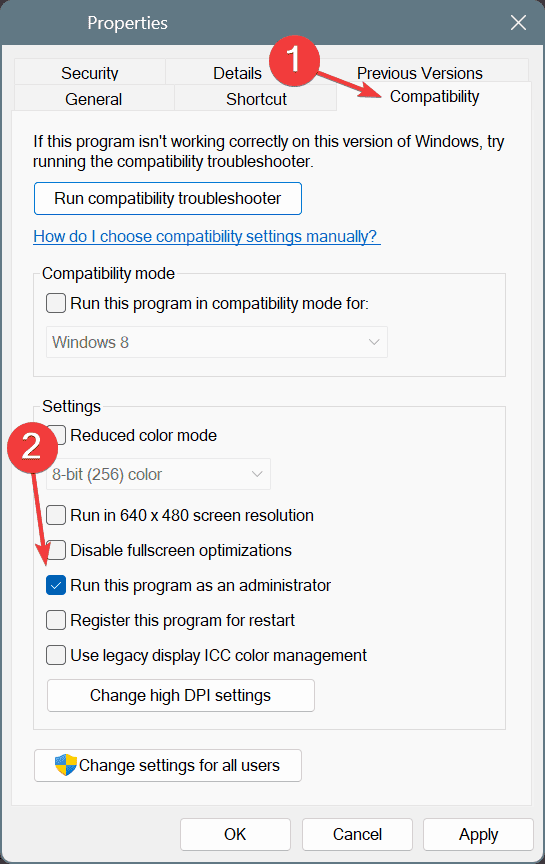
- Right-click on the affected program’s launcher (.exe file), and select Properties.
- Go to the Compatibility tab, and tick the checkbox for Run this program as an administrator.
- Click Apply and OK to save the changes.
- Restart the PC and check for improvements.
3. Download the NVIDIA CUDA Toolkit
- Go to NVIDIA’s CUDA Toolkit page, choose the operating system, architecture, and iteration, and then download the exe (local) installed for the CUDA Toolkit.
- Run the setup and follow the on-screen instructions to complete the installation.
- Finally, reboot the PC and verify whether the missing DLL error is fixed.
When nvcuda.dll is not found on an AMD GPU, downloading the CUDA Toolkit should help fix the problem!
4. Reinstall the NVIDIA graphics driver
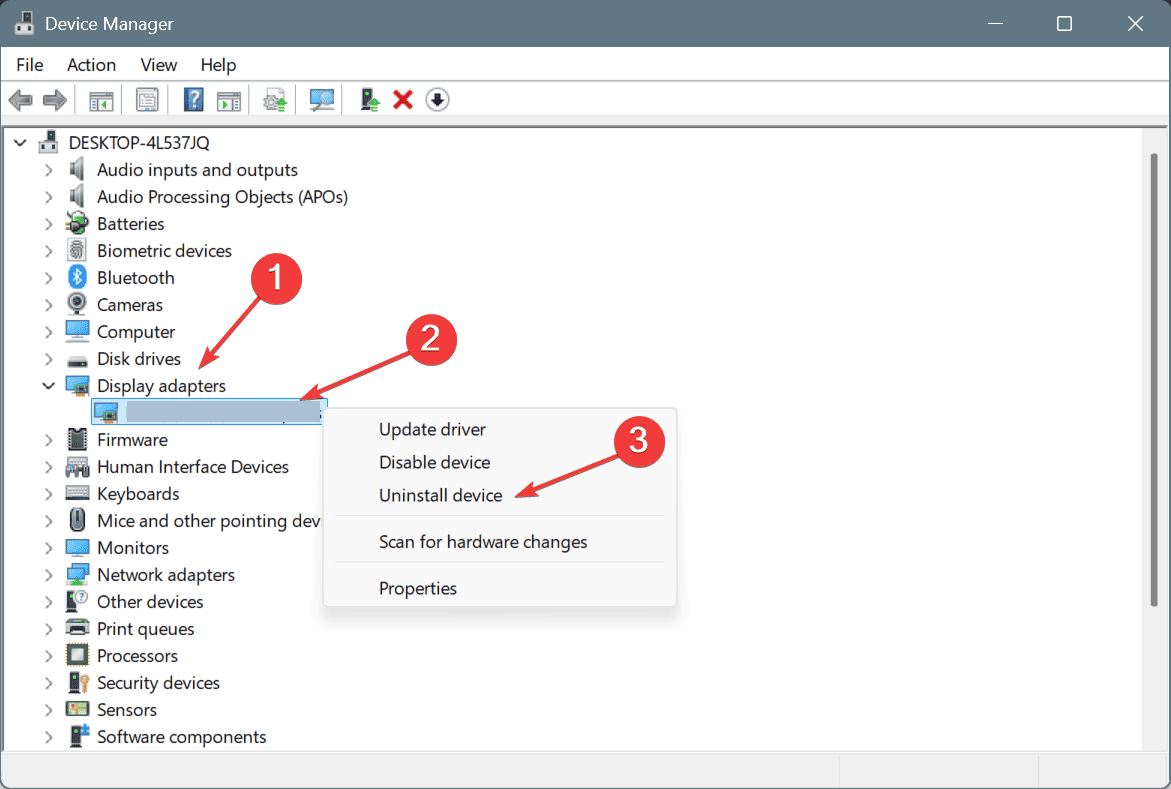
- Press Windows + X to open the Power User menu, and select Device Manager.
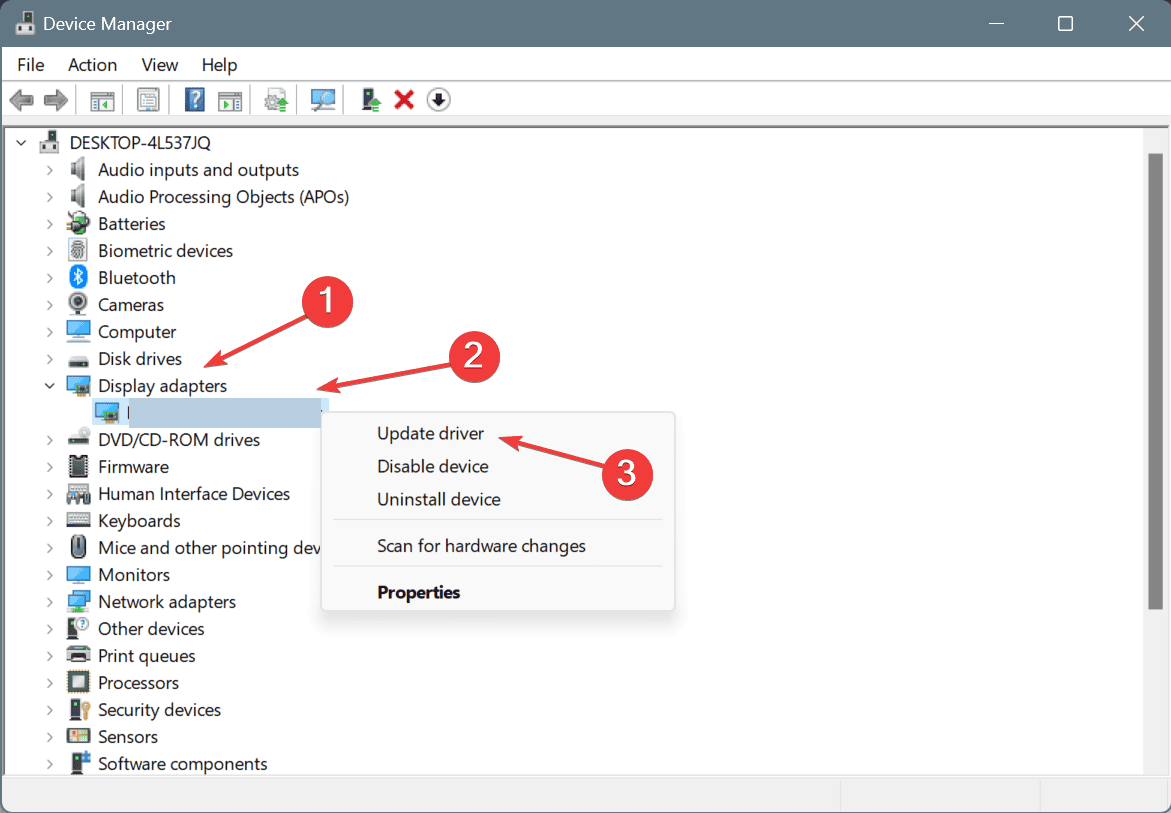
- Expand the Display adapters entry, right-click on the NVIDIA GPU, and select Uninstall device.
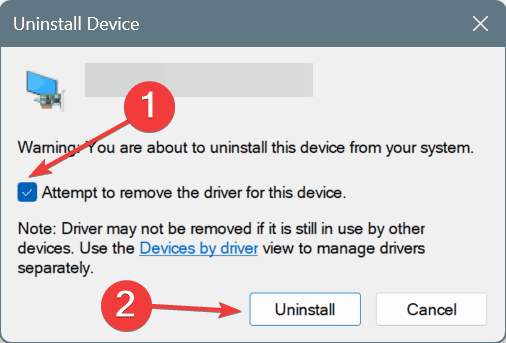
- Tick the Attempt to remove the driver for this device checkbox, and click on Uninstall.
- Once done, restart the PC, and Windows will automatically install a fresh copy of the driver.
If the nvcuda.dll not found error persists, I recommend using DDU (Display Driver Uninstaller) to completely remove the current installation, then heading to the manufacturer’s website, finding the same version, and manually installing the driver.
5. Update the NVIDIA graphics driver
- Press Windows + R to open Run, type appwiz.cpl in the text field, and hit Enter.
- Expand the Display adapters entry, right-click on the NVIDIA graphics card, and select Update driver.
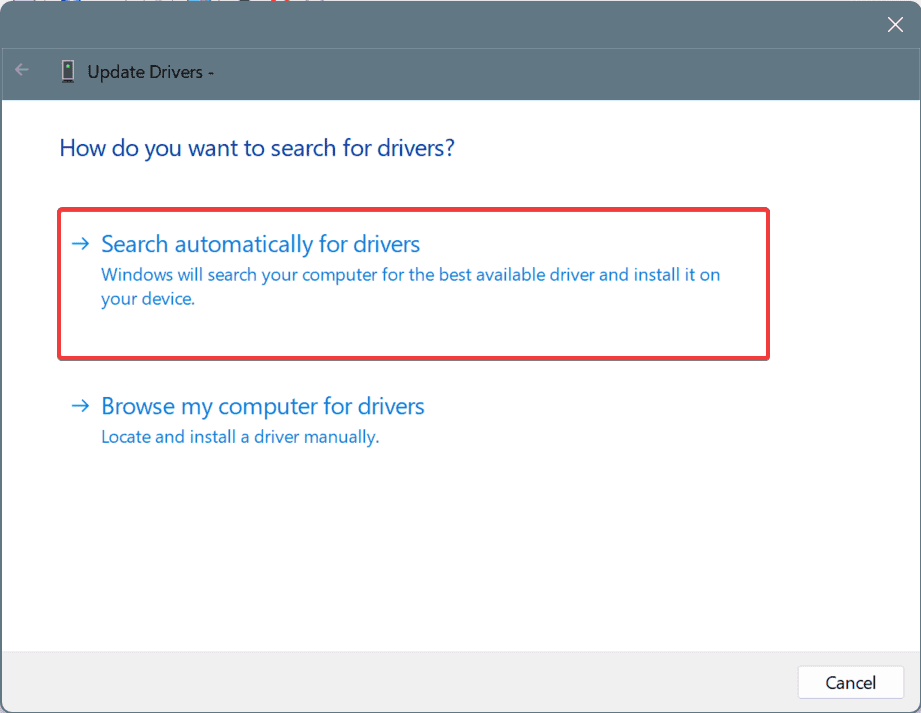
- Click on Search automatically for drivers and wait for Windows to install the best locally available version.
- Finally, restart the PC to apply the changes.
If a bug in the current NVIDIA GPU driver version leads to the nvcuda.dll can’t be loaded error message, updating the NVIDIA graphics driver will do the trick!
6. Whitelist nvcuda.dll in Windows Security
- Press Windows + S to open Search, type Windows Security in the text field, and click on the relevant result.
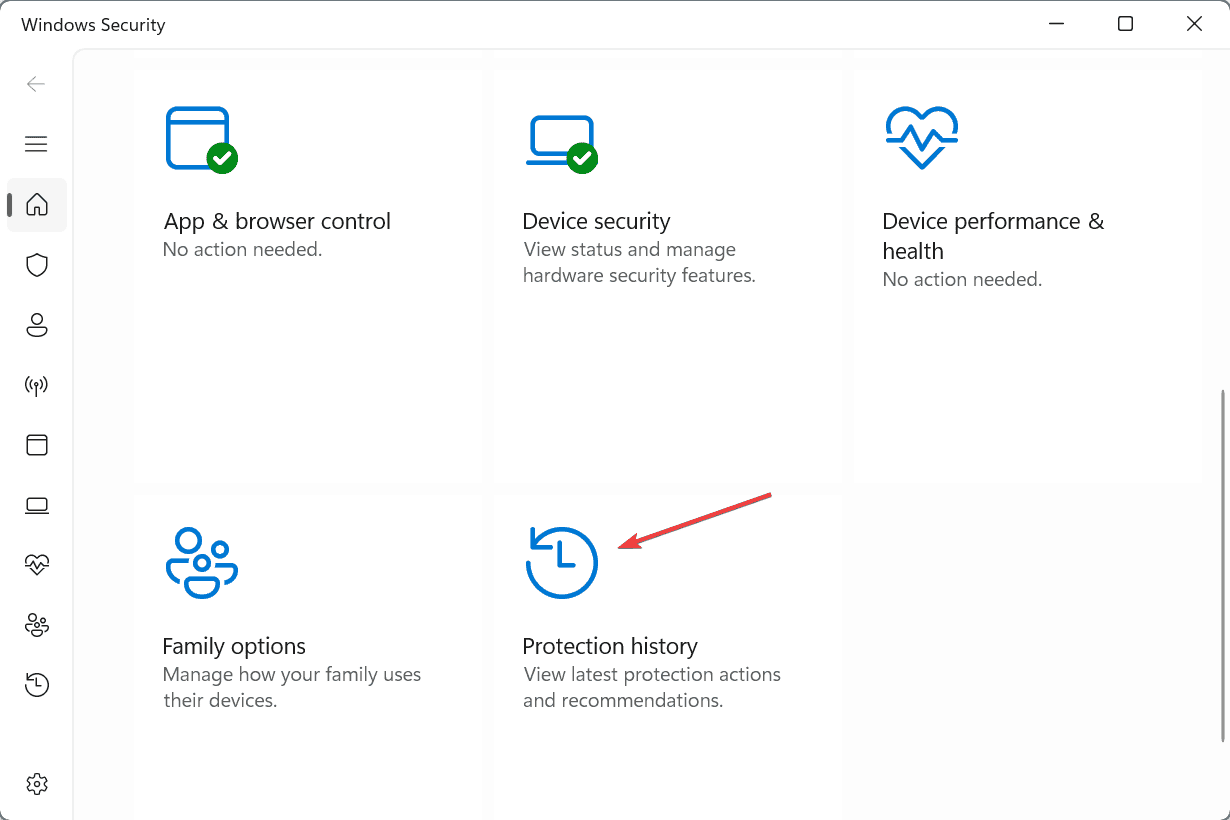
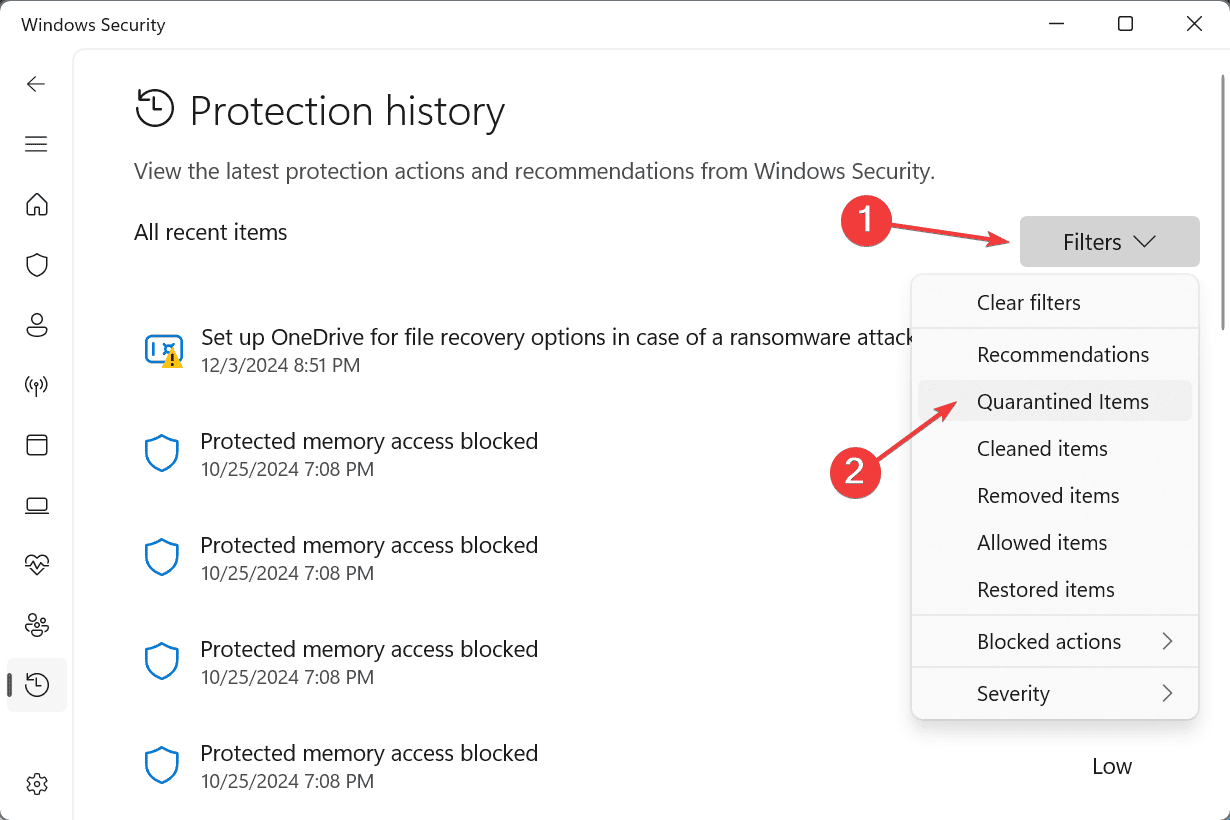
- Click on Protection history.
- Select Quarantined Items from the Filters dropdown menu, and if nvcuda.dll is listed, restore the file.
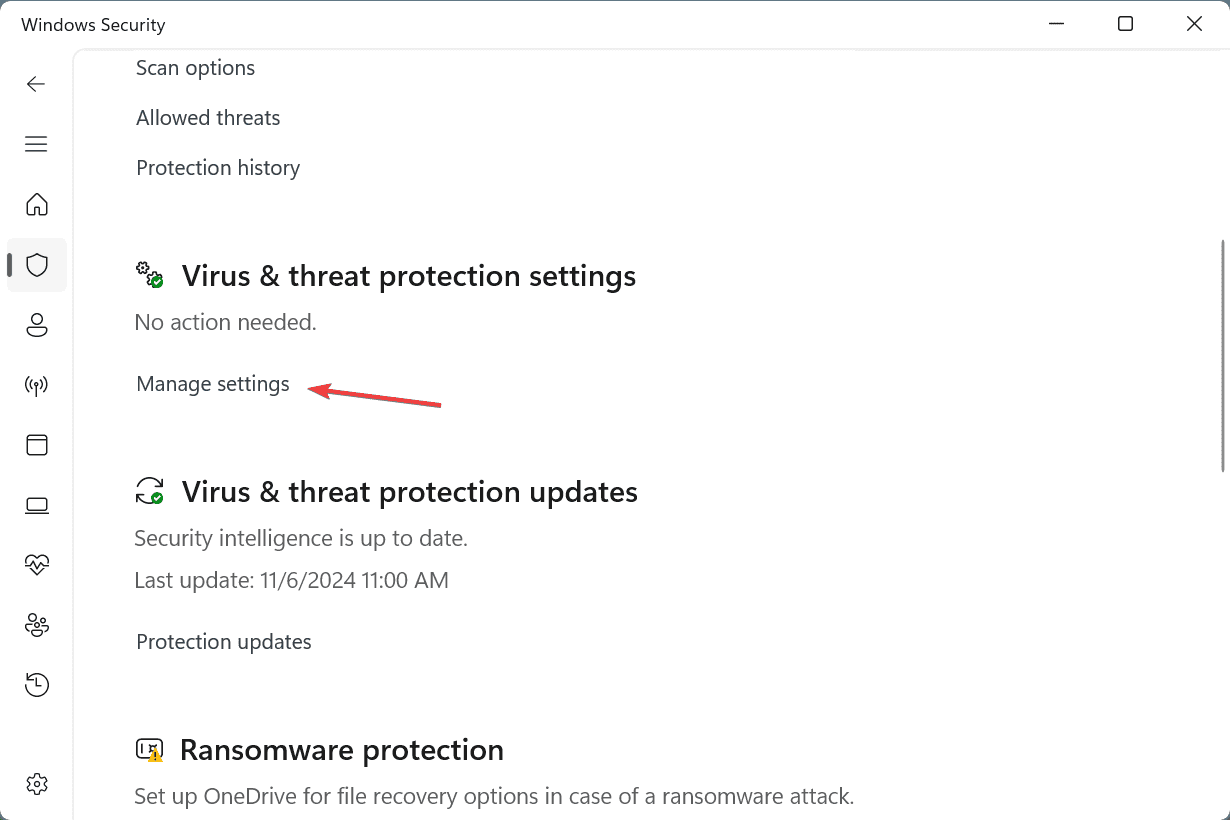
- Now, go back to the main screen and click on Virus & threat protection.
- Click on Manage settings under Virus & threat protection settings.
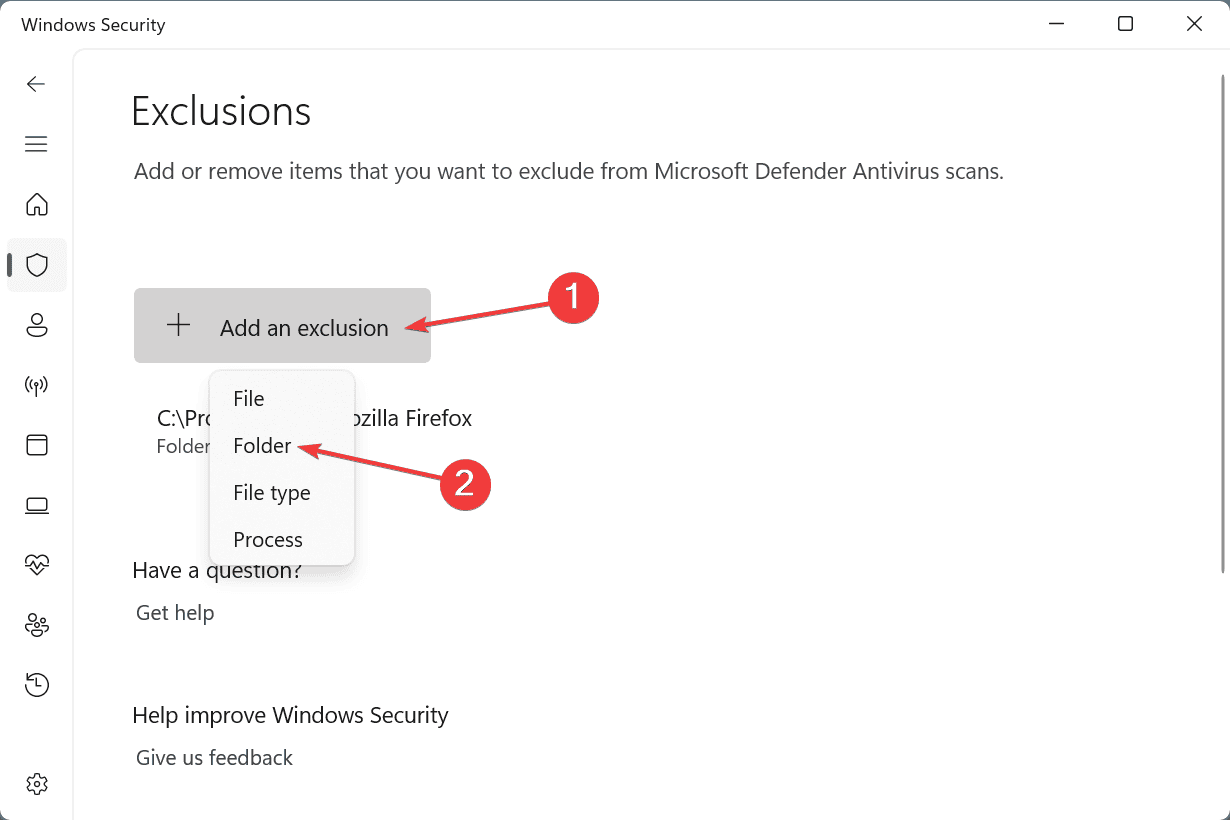
- Click on Add or remove exclusions.
- Now, click on Add an exclusion and select Folder from the menu.
- Navigate to the affected program’s directory, choose it, and click on Select Folder.
- Once done, reboot the PC, then relaunch the affected program and check whether nvcuda.dll is still missing.
Non-Microsoft DLLs are often deleted by built-in and third-party antivirus solutions. So, you will have to first restore the DLL and then whitelist it to prevent future deletion!
7. Reinstall the affected program
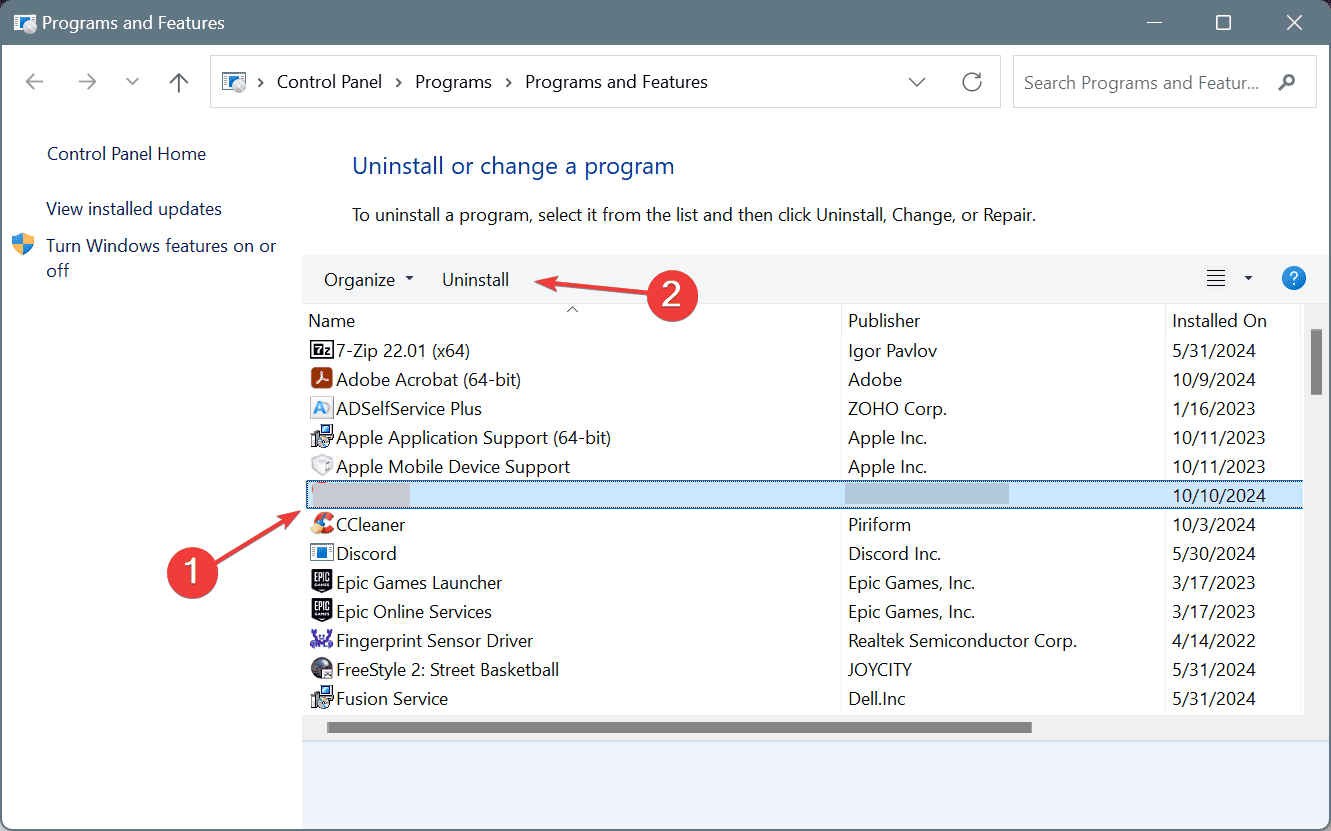
- Press Windows + R to open Run, type appwiz.cpl in the text field, and hit Enter.
- Select the affected program from the list and click on Uninstall.
- Follow the on-screen instructions to complete the process, and restart the PC.
- Finally, download and install the program from an official source.
As a last resort, you can reinstall the program that’s throwing the missing nvcuda.dll error. Remember to go with the default installation options, as any changes could prevent the DLL from being added!
For the unversed, since nvcuda.dll is a non-Microsoft DLL, running the SFC scan or reinstalling Windows won’t fix things. Instead, you should focus on NVIDIA-oriented solutions.
Before you leave, discover expert tips for missing DLL errors and fix them quickly the next time!
For any queries or to share which fix worked for you, drop a comment below.



User forum
0 messages