FIX: Oops! We couldn’t save that one error on Windows 10/11
3 min. read
Updated on
Read our disclosure page to find out how can you help Windows Report sustain the editorial team. Read more

Photos is the Windows 10’s default image-editing app, and even though a lot of people use that app for editing their images, the app isn’t immune to bugs. Some users have posted on the MS forum about a We couldn’t save that one error when they try to edit and save images in Photos. To quote one forum post:
I have many photo files that don’t seem to be editable by the windows Photos app. I own the file and have full permission on it, but when I edit the file and click Save I get a pop up that says, Oops! We couldn’t save that one.
In this guide, we will explore the best methods available to solve this issue once and for all. Read on to find out more.
How can I fix the We couldn’t save that one error?
1. Open the Windows Store Apps troubleshooter
- First, try running the Windows Store Apps troubleshooter, which can come in handy for fixing Windows 10 apps. Click the Type here to search button on the left side of the taskbar.
- Type troubleshooting in the search box that opens.
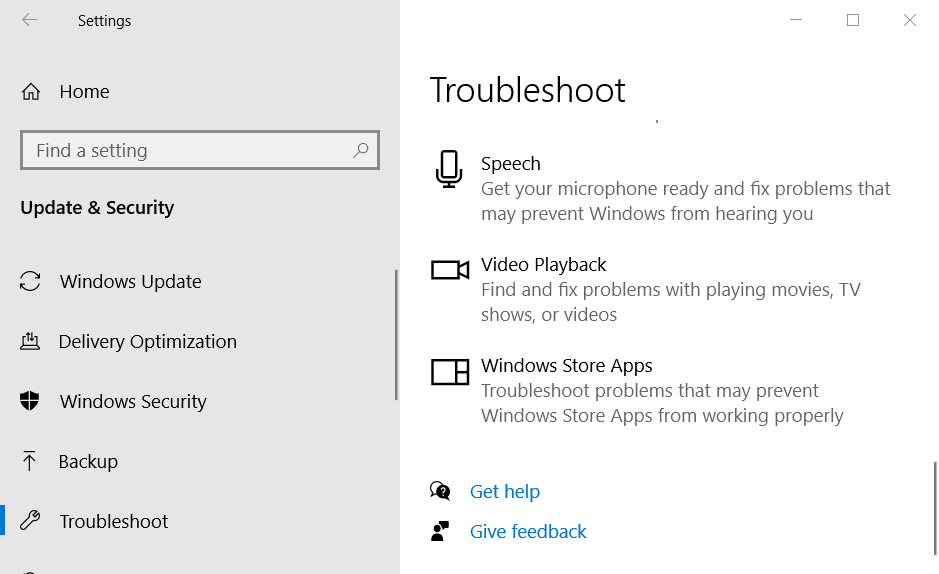
- Click Troubleshoot settings to open the window shown in the snapshot directly below.
- Select the Windows Store Apps troubleshooter to click its Run the troubleshooter button.
- Click the Apply this fix option for any potential fixes the troubleshooter might provide.
- Restart Windows 10 after applying a troubleshooter fix.
2. Modify the folder permissions for the photo’s folder
- Check that you have full permissions for the folder which includes the image you can’t save. Open File Explorer (press the Windows key + E hotkey).
- Right-click the folder that includes the image Photos doesn’t save and select Properties.
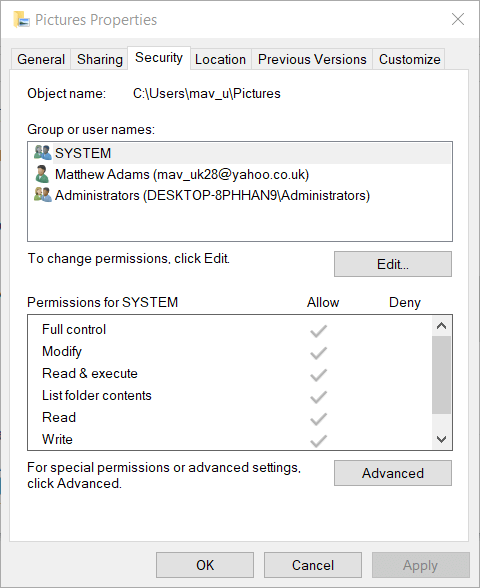
- Select the Security tab in the snapshot directly below.
- Select your user account within the Group box.
- Click the Edit button.
- Then select the Full control checkbox if it’s not already selected.
- Click the OK button.
3. Reset the Photos app
- The Reset option could fix a corrupted Photos app. Input the keyword app in the Type here to search box.
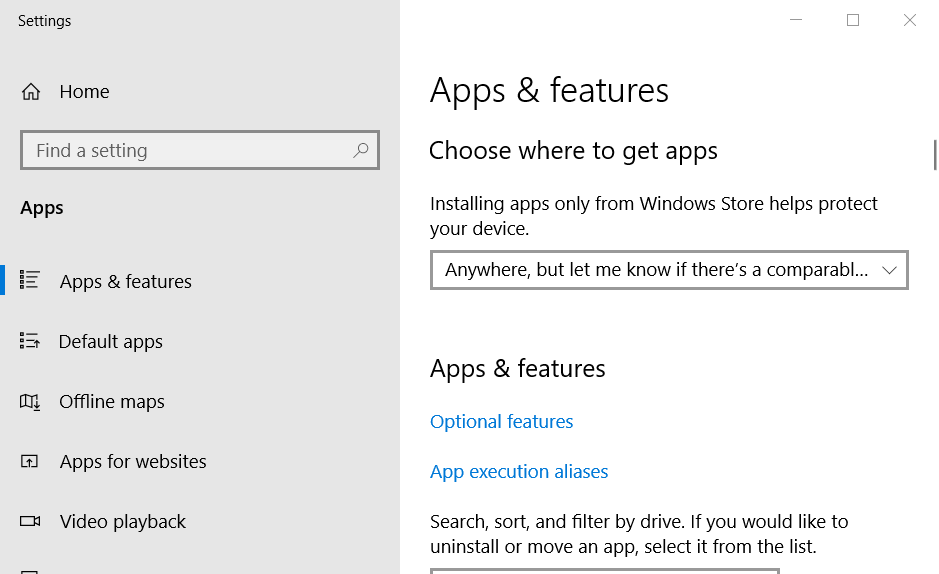
- Click Apps & features to open the window shown directly below.
- Select the Microsoft Photos app.
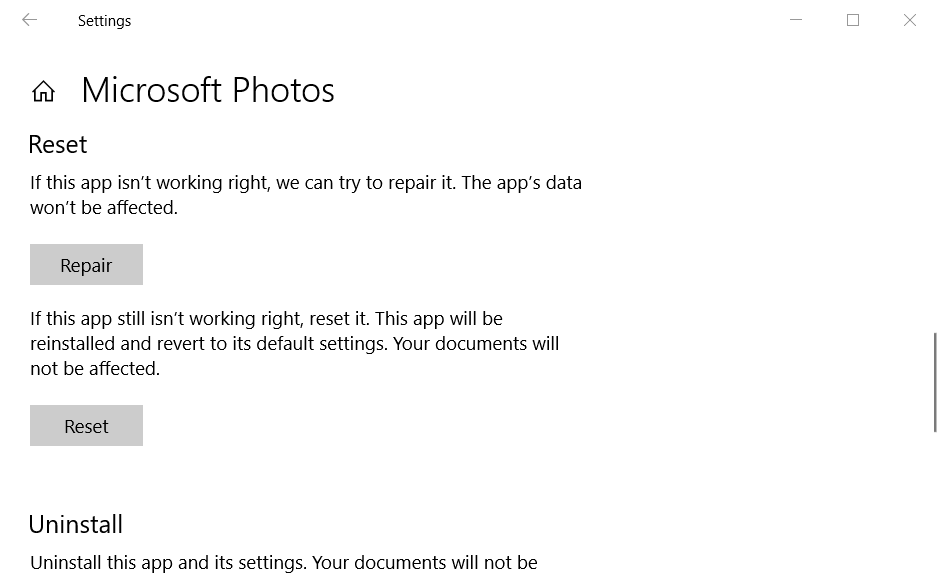
- Click Advanced options to open the Reset button shown directly below.
- Click Reset, which will open a dialog box. Then click Reset again on that dialog box.
- Note that there’s also a Repair option for Photos, which might fix the app without resetting data. You can try that option if Reset doesn’t fix the issue.
4. Save the image to an alternative format with Paint
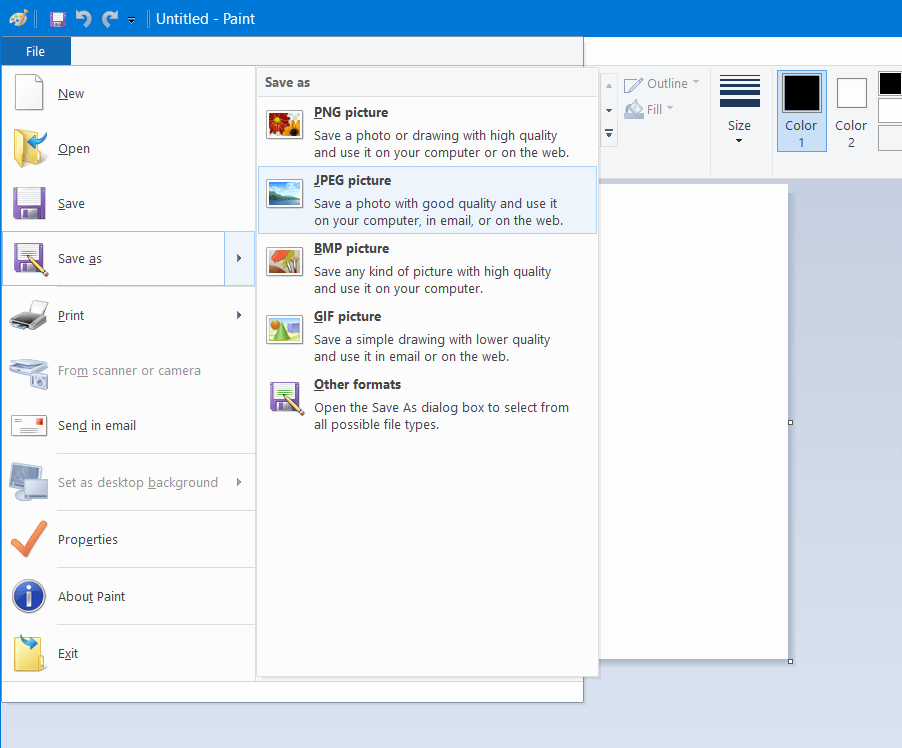
- Some users have confirmed they’ve fixed the We couldn’t save that one error by saving the file to an alternative format in Paint. To do so, enter Paint in Windows 10’s search box.
- Click Paint to open it.
- Open the image that doesn’t save in Photos.
- Click File and Save As to open a file format submenu.
- Select a different file format for the image to the one it’s currently saved as. If it’s a PNG image, select the JPEG format (or vice versa).
- Enter a title for the file in the Save As box.
- Click the Save button.
- Then try saving the same image in Photos again.
There’s a good chance the above resolutions will fix the We couldn’t save that one error. However, remember that there are plenty of alternatives to Photos.
If you still can’t fix the issue, try editing the same image with software like Irfanview or Paint.NET.
[wl_navigator]




User forum
0 messages