How to: Opt out of Microsoft Customer Experience on Windows 10
4 min. read
Updated on
Read our disclosure page to find out how can you help Windows Report sustain the editorial team Read more
Windows 10 collects information about its users and sends it back to Microsoft so that developers can improve future versions of Windows. Many users are concerned about their privacy, therefore today we’re going to show you how to opt out of Microsoft Customer Experience on Windows 10.
What is Microsoft Customer Experience and how to turn it off in Windows 10?
Microsoft Customer Experience Improvement Program was designed to collect information on how you use certain Microsoft programs so that Microsoft can improve them in the future. According to Microsoft, they don’t collect your personal information such as your name, address or phone number with Customer Experience Improvement Program, therefore your personal information is safe. Unfortunately, there’s no way to verify what data this feature collects, therefore many users feel like this feature is violating their privacy. If you’re concerned about your privacy, you should know that you can turn this feature off.
How to – Opt out of Microsoft Customer Experience on Windows 10
Solution 1 – Use Group Policy
According to users, you can turn off this feature simply by using Local Group Policy Editor. To turn Microsoft Customer Experience off, follow these steps:
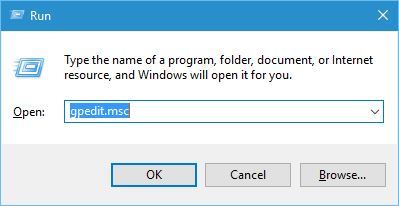
- Press Windows Key + R and enter gpmc.msc. Press Enter or click OK.
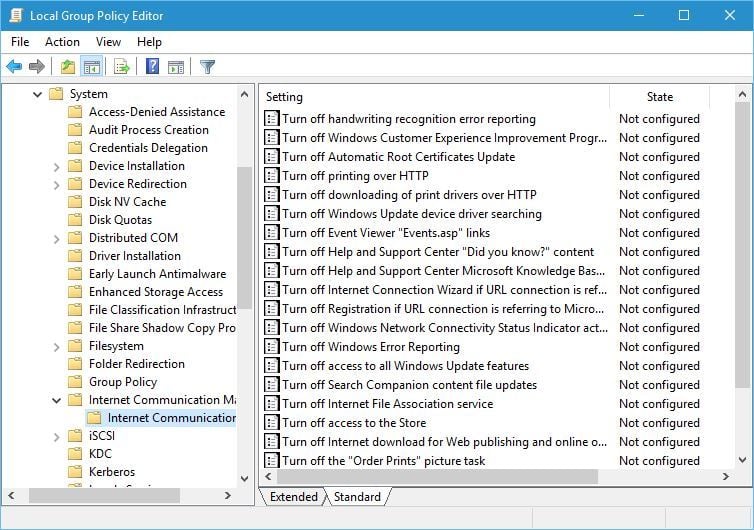
- When Local Group Policy Editor opens, go to Computer Configuration > Administrative Templates > System > Internet Communication Management > Internet Communication settings in left pane.
- In right pane locate Turn off Windows Customer Experience Improvement Program and double click it to open its properties.
- Select Enabled option and click Apply and OK to save changes.
Solution 2 – Disable Customer Experience Improvement Program in Word
As we previously mentioned, many Microsoft’s applications use Customer Experience Improvement Program, and Office tools are no exception. If you’re using any of the Office tools on your PC, you’ll have to disable this feature for every tool. To disable this feature in Word, follow these steps:
- Go to File and choose Options from the menu.
- Navigate to the Trust Center tab.
- Click the Trust Center Settings button.
- Now go to the Privacy Options tab.
- Locate Sign up for the Customer Experience Improvement Program option and uncheck it.
Disabling this feature in Office tools is easy, but you’ll have to repeat this procedure for every Office tool that you use.
Solution 3 – Disable Customer Experience in Task Scheduler
Task Scheduler is a useful application that allows to create all sorts of custom tasks and schedule them. In addition to creating your own tasks, you can also control certain Windows 10 tasks by using this application. To disable Customer Experience in Task Scheduler, follow these steps:
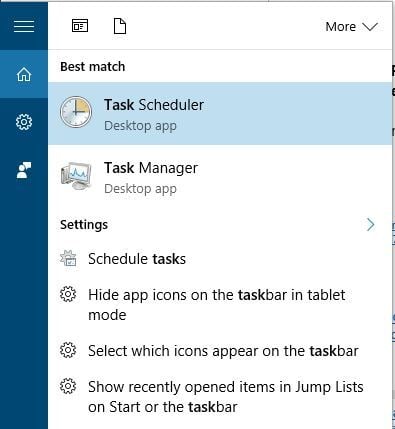
- Press Windows Key + S and enter task. Select Task Scheduler from the menu.
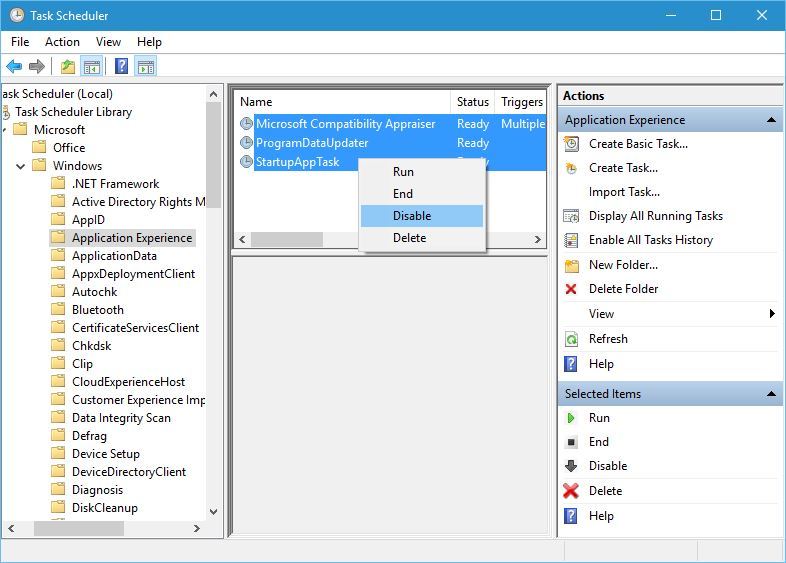
- When Task Scheduler opens, go to Task Scheduler Library > Microsoft > Windows > Application Experience in left pane.
- In the right pane you should see three options: Microsoft Compatibility Appraiser, ProgramDataUpdater and StartupAppTask. Select all these tasks, right click them and choose Disable from the menu.
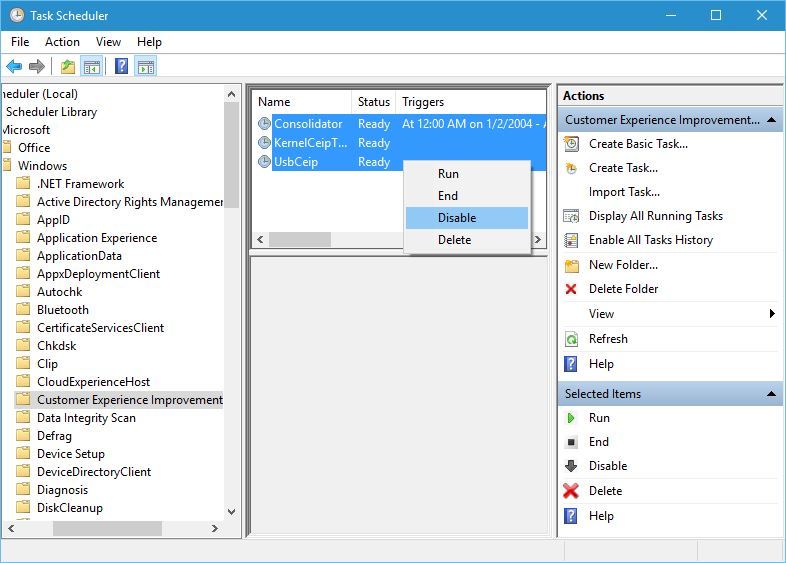
- Go to the Task Scheduler Library > Microsoft > Windows > Customer Experience Improvement Program in left pane.
- In the right pane, select all three tasks, right click them and choose Disable from the menu.
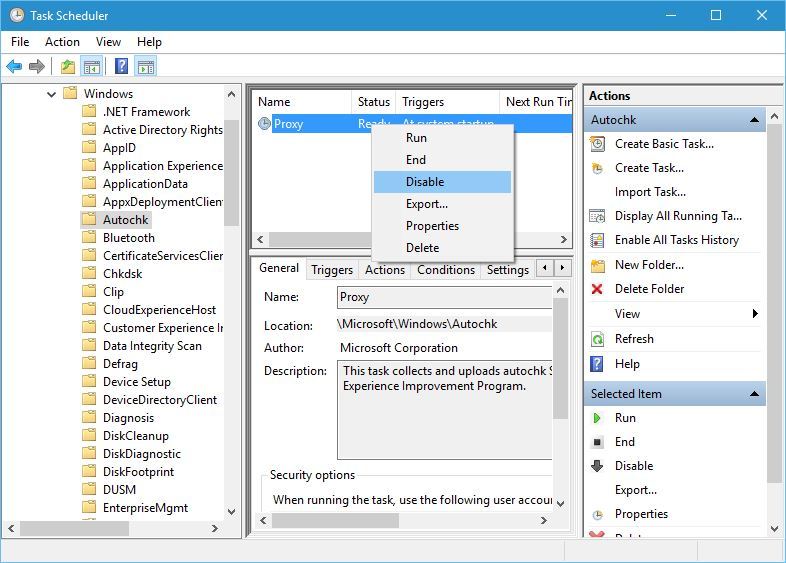
- Go to Task Scheduler Library > Microsoft > Windows > Autochk and disable Proxy task.
After disabling all these tasks the Customer Experience service should be permanently disabled.
Solution 4 – Disable Customer Experience in Windows Media Player
As we already mentioned, many applications from Microsoft have this feature enabled by default, and one of those applications is Windows Media Player. To disable this option in Windows Media Player, you need to do the following:
- Open Windows Media Player.
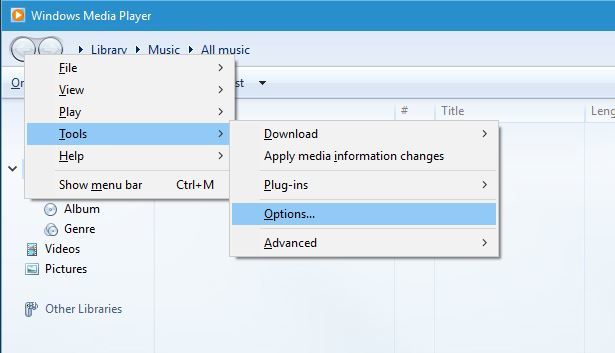
- When Windows Media Player opens, press Alt + T shortcut. Choose Tools > Options from the menu.
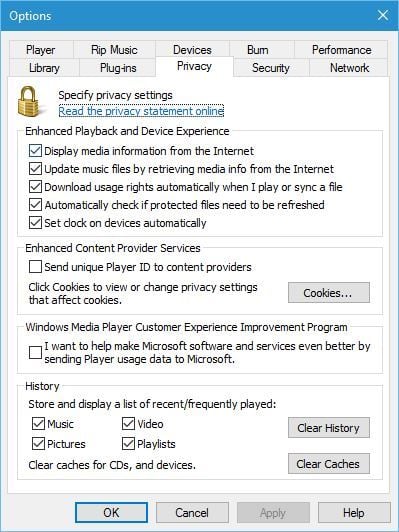
- Go to Privacy tab and uncheck I want to help make Microsoft software and services even better by sending Player usage data to Microsoft in Windows Media Player Customer Experience Improvement Program section.
- Click Apply and OK to save changes.
Microsoft Customer Experience is used to collect information regarding certain applications, and if you think that this feature is invading your privacy, you can easily turn it off by following the instructions from this article.

