Do you sometimes get confused about how to modify your computer’s calendar settings to suit your personal or regional choices? It appears that Microsoft’s PowerToys team has been busy with a solution for this type of problem.
According to the latest GitHub blog post, they are introducing a fresh Date and Time plug-in that claims to offer users greater authority over their system calendar. This might change the game for many people, especially those who constantly struggle with technology to personalize it, like me.
The Fresh plugin allows you to choose which week should be the first one in a year and which day starts each week. Imagine how simple it would be to align your digital calendar with your cultural or personal preferences.
If someone lives in another country but their system’s default settings are different, this can make life much easier for them. No more confusion over week numbers or starting days!
One of the attractive things about this update is how it might help match a user’s anticipated experience with what the system naturally does. For instance, if you are from a location where Monday begins the week but your system insists on starting its week from Sunday, this plugin could be viewed as a way to maintain your mental equilibrium.
Also, if one worries about differences in week numbers caused by varying rules for the first week, this plugin aims to tackle that problem, too.
But here’s the twist: this plugin is not yet completed. Those managing PowerToys are still creating it, and even though it’s being made, you can’t use it for official purposes right now. The improvement progress can be followed on GitHub.
It may take some time before we witness this function in an update. Nevertheless, it can be seen as good news for those using Windows 10 and 11 that there is an ongoing process to provide customization choices.
If you’re new to it, Microsoft PowerToys is a collection of utilities for power users. These tools help you fine-tune and simplify your Windows experience to boost productivity. Free and full of useful gadgets, this software can greatly improve your computer’s performance. The team has released useful capabilities, such as advanced copy/paste.
Therefore, as we anticipate the release of this new feature, it is good to understand that the PowerToys team is always trying hard to find better ways to interact with Windows.
Whether you have a passion for technology or wish to add a more personal touch to your computer, this forthcoming plugin from Microsoft PowerToys could be worth waiting for.
Important news was announced in the lively city of Amsterdam that has the potential to alter healthcare in Europe. The Trustworthy & Responsible AI Network (TRAIN), a group of healthcare frontrunners, shared its planned enlargement throughout Europe months after it began its activity in the US.
What is their mission? To use AI for health, with responsibility, safety, and results. Picture a future where AI in healthcare improves patient care and does so ethically and reliably. This is the aim that TRAIN is striving towards.
Emerging AI technologies hold significant promise for revolutionizing the healthcare sector in Europe and across the globe. By enhancing patient care outcomes, streamlining processes and reducing costs, AI has the potential to transform the industry. As the technology continues to evolve, robust development and evaluation standards are crucial to ensure responsible and effective AI applications. TRAIN aims to improve the quality, safety and trustworthiness of AI tools implemented in healthcare to help ensure clinicians and patients benefit from this innovative technology.
European healthcare organizations are joining together under the TRAIN umbrella. Notable names include Erasmus MC in the Netherlands and HUS Helsinki University Hospital in Finland.
Now that Microsoft has become a technology-enabling partner for this network, it is ready to use AI in healthcare like never before. The goal is to make healthcare smarter, safer, and more reliable for everyone involved.
The offer of AI in healthcare is huge. It can help with many things, from making processes easier to improving patient results.
However, to realize these benefits, responsible AI development and use are needed. TRAIN is dedicated to creating norms that guarantee AI tools in European healthcare are made with a focus on safety, quality, and trustworthiness.
Yet, for patients and clinicians, the big picture is access to new technologies that have been carefully evaluated and confirmed as secure. This involves establishing an arena where AI instruments can bring about change and boost care without neglecting privacy or moral standards.
Collaboration is TRAIN’s main goal. They want to share good methods and use technology-based guardrails so that every organization can enjoy responsible AI, no matter its resources. This makes a big difference, especially in settings that could be forgotten in the tech revolution.
Building a federated AI outcomes registry is among the thrilling parts of TRAIN. This will let groups exchange real-life details about how well, safely, and efficiently their AI algorithms work. Consider all the understanding and progress that can be made with this joint work.
As TRAIN prepares to discuss more of what it wants regarding AI and has accomplished at HLTH Europe, it emphasizes that this network isn’t only about technology. It’s about creating a future where AI in healthcare means trustworthiness, safety, and inclusion.
Whether you are a patient, doctor, or simply an enthusiast of health care’s future, the expansion of TRAIN is an interesting development to watch.
Think of discovering a treasure in an unexpected spot. This occurred when a unique Hulk-themed Xbox console was given to a charity shop in Oxford. It stood out among the usual items, shining brightly with a vivid green hue.
It’s not an ordinary Xbox; this was one of 50 units created to advertise the Hulk superhero movie in 2003. The British Heart Foundation (BHF) was gifted this console and earned £7,700 for it (approximately $9750). This happened after 62 bids were made in an online auction.
This rare collectible’s sale results benefitted the purchaser and considerably aided heart and circulatory disease investigation.
Paul Smith, an enthusiastic gamer and function tester at BHF’s eBay HQ, noticed the potential of this console. Its unique green color and the Hulk and Pepsi logos made it unique.
This particular console came from a UK cinema scratchcard competition, making it more special because only 36 were won, and we know about 20 have been found until now.
This Xbox console’s uniqueness is truly exceptional. In the USA, a green Xbox was made specifically for Mountain Dew.
Only 5,000 units were created. But this Hulk-inspired game machine is even more special and rare because none were available on eBay or sold in the past, making it very unlikely to find another one.
This auction’s gathering will finance crucial investigations on heart and circulatory illnesses, demonstrating how special contributions can make a significant difference.
The British Heart Foundation’s commitment to examining and authenticating unique items ensures they find new homes filled with love while backing research that saves lives.
This story is about an unusual gaming console and shows how we can give to important matters in unforeseen ways. Whether you are a player, a collector, or wish to assist, each contribution is valuable.
The British Heart Foundation’s success on eBay, which sells more than 440000 items yearly, demonstrates that different types of donations can aid its goal of defeating heart diseases.
Thus, when you think about giving away your treasures in the future, especially now that a new Xbox console is coming up, keep this story of the unique Hulk Xbox and how it went from a charity shop rack to making an important impact in medical research.
In May 2024, an unexpected trend appeared in the changing gaming world. Xbox games, which are usually thought of as being on Microsoft’s gaming console, were found to be the most downloaded and installed games for PlayStation 5 and PS4 during this month.
This change in gaming dynamics is quite surprising because it shows how the industry is shifting; boundaries between competition platforms are starting to disappear more often than before.
A few months back, Microsoft’s announcement that it would put additional first-party Xbox titles on Sony’s PlayStation consoles caused a stir. Many Xbox gamers who have been loyal for years were caught off guard, and the gaming community was filled with rumors.
However, Sony’s release of important first-party PlayStation games on PC and even the Nintendo Switch has made the concept of sharing games across platforms not so far away. Xbox Game Studios’ achievement of Sea of Thieves on PS5 shows that gaming inclusivity is a fresh time for all.
Sea of Thieves was not an ordinary game that reached high rankings; it surpassed big names such as Madden, Call of Duty, and even the legendary Grand Theft Auto 5 in download charts across the US/Canada and Europe areas.
The popularity of this game on PS5 is also shown by how much people like playing Minecraft on PS4, which proves a great desire for Xbox games among PlayStation users. Even another Xbox title, Grounded, appeared in the PS5 charts.
Microsoft’s strategy is to bring more games to PlayStation consoles on a case-by-case basis. The plan includes day-one releases on Xbox Game Pass and PC and Xbox and PlayStation consoles. For example, upcoming titles such as Call of Duty: Black Ops 6 and DOOM: The Dark Ages will be available for these platforms.
However, certain Xbox game announcements, such as Fable and Gears of War: E-Day, are expected to remain exclusive to Xbox and PC.
On the other hand, Sony has not shown any desire to make its first-party games available on Xbox consoles. Instead, it is concentrating its efforts on expanding in the PC and Nintendo Switch markets.
The shift to cross-platform availability is changing how we view gaming systems, making them more interconnected than before.
What does this mean for the future of gaming? It implies a more united gaming community, with consoles’ boundaries becoming less distinct and gamers having fun on any platform they prefer. Being a gamer now is thrilling as what can be played and where it can be played are growing increasingly.
Picture a scenario where your earbuds are not only for listening to music or answering phone calls. Microsoft has developed an earbud authentication technology that turns them into a key that allows smooth authentication on various computing devices.
This development isn’t merely about making things easier; it aims to improve user experience and increase task efficiency. Now, let’s understand the technical aspects of these smart earbuds and why they could become an important part of our digital existence.
Have you ever been in a situation where you must log in again on every device when switching between them? People use different devices simultaneously, but logging in frequently can disturb their work and concentration.
Microsoft’s newest patent application proposes keeping authenticated sessions persistent across devices using earbuds. No more repetitive logins; wear your earbuds, and you’re ready.
The main point is that once you have logged into one device, your earbuds can emit an ultrasonic signal. This isn’t just any sound wave; it’s made to bounce off the particular shape of your ear and be caught by the earbud’s built-in microphone.
The in-ear microphone is configured to capture primarily sound in the user’s ear. More particularly and as described in more detail below, in the present examples the in-ear microphone is configured to detect an ultrasonic echo signal in the user’s ear that is generated by an acoustical test signal (e.g., inaudible chirp) emitted by the earbud speaker reflecting off the unique architecture of the user’s ear canal. The earbud analyzes these echo signals to determine if the earbud is located in the ear of the user. In some examples the in-ear microphone is also used for active noise cancellation and/or other features.
The magic occurs when this echo is studied to confirm that the earbuds are in your ears. The earbuds will convey your verified status if you come near another device. You can obtain entry without any more logins.
However, if you are concerned about security, this system is simple and safe. The ultrasonic signals used are specific to the shape of your ear, creating a biometric lock that isn’t easy to break. Also, when you take out the earbuds from your ears, they cease to authenticate fresh sessions. This enhances security.
Picture yourself moving from your tablet to your laptop and getting recognized and logged in instantly, only because you have put on earbuds. This changeover is smooth, like a scene from a science fiction film. Even for people who worry about battery power, the earbuds can cleverly handle their ultrasonic signal emissions so they do not need energy.
This technology has a deeper significance than just being convenient. It reflects a direction where our gadgets comprehend and adjust to us, not the opposite way around. It’s more about making an intuitive and smooth connection with our digital world.
Microsoft has been dabbling with this multi-device experience system in many ways. The Redmond-based tech giant has been developing technologies that tackle many devices simultaneously and automatically, keeping the user engaged with them. However, this is the first time Microsoft has considered earbud authentication.
But it’s worth noting that Microsoft was not the first company to this technology. Other companies have already considered it.
Just imagine: when you wear your earbuds again, picture what they could open up. They might provide a doorway to an enhanced, more linked, and smooth digital world. It’s interesting how tech keeps growing and making our lives convenient in unexpected ways, right?
When it comes to choosing the best browser for 2024, the debate between Arc Browser and Opera is heating up. Both browsers offer unique features and cater to different user needs, making it essential to understand their strengths and weaknesses.
Which browser is better, Arc or Opera?
1. User Interface and customization
Arc Browser Features:
Vertical Tab Bar: Arc uses a unique vertical tab bar which can be hidden if preferred. This lets users efficiently manage and switch between tabs.
Spaces: This feature allows users to create separate spaces for different tasks. For instance, you can have a “Work” space with work-related tabs and a “Personal” space with personal tabs.
Split View: Users can view two websites side-by-side within the same window, enhancing multitasking.
Customization Options: Arc lets users customize the bookmark bar, tab colors, and the overall theme.
Opera Features:
Standard Tab Bar: Opera uses the traditional horizontal tab bar, familiar to most users.
Workspaces: Similar to Arc’s Spaces, Opera allows creating and switching between different workspaces.
Built-in Tools: Opera comes with built-in tools like a free VPN, ad blocker, and social media integrations.
Customization: Users can customize the background, theme, and layout, but it may not be as extensive as Arc’s options.
Arc’s unique vertical tab bar and Spaces feature create a highly customizable environment focused on task segmentation, while Opera provides familiar tools and customization options with added privacy features like a built-in VPN. In our opinion, Opera is the clear winner here although it’s a more mature browser and it should definitely surpass Arc is every way.
2. Performance and Speed
Arc:
Core on Chromium Engine: Arc is built on the Chromium engine, ensuring compatibility with Chrome extensions and stable performance.
Efficient Tab Management: Arc’s design minimizes resource use by closing tabs at the end of the day unless pinned or favorited.
Lightweight Feeling: Users report a fast and smooth browsing experience, particularly on macOS.
Opera:
Optimized for Speed: Opera is also based on the Chromium engine, ensuring fast loading times and smooth browsing.
Built-in Ad Blocker: Automatically blocks ads, which can speed up page loading times.
Battery Saver Mode: Reduces resource consumption to extend battery life on laptops.
Both browsers offer excellent performance, but Arc’s efficient tab management system and minimalist design help maintain speed and responsiveness. Opera’s built-in ad blocker and battery saver mode can enhance performance, particularly on resource-limited devices.
If you’re looking for a Mac browser, Arc will be better because it’s optimized better for macOS, but if you’re on PC, you should still go for Opera.
3. Privacy and Security
Arc:
Privacy Focus: Arc does not inherently focus on ad-blocking or VPN services but encourages users to add third-party extensions for enhanced privacy.
Data Management: Arc manages browsing data efficiently, auto-archiving tabs to keep your workflow clutter-free.
Opera:
Built-in VPN: Opera offers a free VPN service, enhancing user privacy and security online.
Ad Blocker: Integrated ad blocker helps secure browsing by blocking intrusive ads.
Additional Privacy Tools: Opera provides additional privacy tools like a cryptocurrency wallet and tracker blocker.
Opera’s built-in privacy tools such as the VPN and ad blocker make it a strong choice for privacy-conscious users. Arc relies on user-added extensions for enhanced privacy. Opera has the built-in security tools while you will need additional extension for Arc so the clear winner here is again, Opera.
4. Cross-platform availability and sync
Arc:
MacOS and iOS: Currently, Arc is available only for macOS and iOS, with plans for a Windows version in beta.
Synchronization: Arc syncs spaces and tabs across devices within its supported platforms.
Opera:
Multi-Platform Support: Opera is available across multiple platforms, including Windows, macOS, Linux, iOS, and Android.
Opera Sync: Allows users to sync bookmarks, tabs, history, and passwords across all devices.
Opera’s extensive cross-platform support and synchronization capabilities make it a more versatile option for users with diverse device ecosystems. Arc’s platform availability is currently limited.
5. User feedback and support
Arc:
Community Engagement: Arc’s development team is highly engaged with its community, frequently incorporating user feedback.
Support: Offers comprehensive tutorials and an intuitive onboarding process for new users.
Opera:
Long-Standing Reputation: Opera has a strong user base and a long history of reliable performance.
Support Resources: Provides extensive support documentation, forums, and direct support channels.
Arc’s strong community engagement and intuitive onboarding make it user-friendly, especially for those new to the browser. Opera’s long-standing reputation and extensive support resources provide a reliable user experience. We really can’t pick a winner here because both browser have a very strong support team that really listens to their users and keep fixing and improving their browsers.
By comparing all these aspects, the clear winner in our opinion is Opera, but you should still keep an eye out for Arc. While Opera has an excellent presence on all platforms and has a lot of features, Arc is just at its start and it needs a lot of work.
You might also be curious how Opera is comparing with Brave browser. Whether you’re choosing one browser or the other, let your thoughts be viewed in the comments below.
Do you want to use the Arc browser ChatGPT features for online research, learning, and work-related purposes? Read on to learn more!
Arc is making all the buzz lately for its visually appealing UI with a convenient sidebar, workspace-like user experience, and more. Besides the conventional browsing features, it also includes a powerful AI compatibility architecture. It easily integrates with many popular AI tools, such as ChatGPT. It even has a special integration bundle called Arc Max.
In this guide, I’ve tried and tested Arc’s ChatGPT integration in various ways to help you figure out if it fits your needs. So, let’s get to it!
What Is Arc Max?
Arc Max is an experimental artificial integration bundle for Arc browser. It’s free to use since the development team is still collecting user-tested feedback for further improvements.
You can use AI tools within the entire browser, so you can:
Control multiple tabs
Create tab folders automatically depending on your work
Open the most useful website without viewing the search page
Ask questions on the web page without opening any third-party AI apps.
At the time of my evaluation, I could only use it on my Mac device. So, if you’re a Windows 11 user, you’ll need to wait until the developer releases the same bundle for that OS. You can skip to the next part of the guide for Windows-specific instructions.
It offers the following features:
ChatGPT in Command Bar
This feature allows you to get ChatGPT in the Arc Command Bar. You won’t have to log into the ChatGPT website and type questions. You can use it anytime as an AI search engine.
Tidy Tabs
This feature automatically organizes your Today Tabs when you have more than six open tabs. It takes into account your user patterns, preferences, and more user behavior factors to arrange them in the most helpful way.
Instant Links
On the Arc Command Bar, you can search for a keyword, like Cat Videos, and use the Instant Links AI feature to open the topmost website without accessing the Google Search Results Page (SERP). Also, you can search multiple keywords separated by commas, and use the AI tool to open only the top websites for each keyword. Furthermore, Arc’s commands and shortcuts allow you to browse even faster.
Ask on Page
This feature enhances AI copilot assistance with the Arc browser ChatGPT integration.
You can hit the Ctrl + F hotkey on the webpage and ask it questions about the content, topic, website, products, services, and a lot more.
5-Second Previews
If you find it annoying to click on a link on the current webpage and get unexpectedly redirected, you’ll love this tool. 5-Second Preview lets you see a quick summary of the redirect or embedded link before visiting by just hovering on the link. On certain websites, you’ll need to press Shift and hover the mouse cursor for a summary preview.
Tidy Tab Titles
This generative AI feature analyzes your online search patterns to rename all the opened tabs so you can quickly browse through them.
Tidy Downloads
Arc Max uses ChatGPT AI to rename your downloads according to search topic, content, and usage patterns. You can easily retrieve the files and organize them.
How To Use Arc Browser ChatGPT on Mac
Open the Arc browser and press Command + T to bring up the Arc Command Bar on your Mac screen.
Type Arc Max.
Click on the top search result, which should be Open Max Preferences.
It opens the Arc Browser Settings (on macOS Ventura and later) or the Arc Browser Preferences (on macOS Mojave to Monterey) window.
The Max tab will be automatically selected.
You simply need to hit the Turn On Max button on the dialog box.
You can further customize your in-browser AI experience by enabling or disabling the following Arc Max features:
Automatically enable future Arc Max features
Tidy Tabs
Instant Links
Ask on Page
5-Second Previews
Tidy Tab Titles
Tidy Downloads
ChatGPT in the Command Bar.
Close the Arc Browser Settings dialog box.
Now, click on the New Tab button on the Arc Side Bar and access the ChatGPT website if you’ve just started using Arc.
Log in to your ChatGPT account.
Now press Command + T to bring up the Arc Command Bar.
The generic ChatGPT text on the Arc Command Bar will change to a green ChatGPT tablet icon with a search field.
You can now type your questions there.
The question text will be highlighted in a green background below. Click on that.
Arc will open a ChatGPT portal automatically, type in the question in the Message ChatGPT field, and load the generated answers.
How To Use Arc Browser ChatGPT on Windows
Unfortunately, you can’t get the Arc Max AI bundle on the Windows 11 edition. Therefore, you can’t activate the Arc browser ChatGPT integration as well.
However, you can still install a ChatGPT AI copilot from the extensions store. What’s good is you can add browser add-ons to Arc directly from the Chrome Web Store.
Click on the Arc Settings icon located in the top-left corner of the browser.
Hover the mouse cursor over the Extensions option on the context menu that opens.
An overflow menu will show up on the right side of the parent context menu.
There, click on the Add Extension option.
You’ll be taken to the Extensions section of the Chrome Web Store.
Search for the Sider ChatGPT extension and click on it.
Click on the Add to Chrome button.
On the pop-up box, click on Add Extension.
Click Continue with Google or Continue with Apple to sign up for the Sider app.
The Sider app icon will show up in the bottom right corner of each website you visit using Arc.
You can now choose from AI features like Summarize this page, Translate this page, and more.
Summary
In this Arc browser ChatGPT guide, you’ve learned all about Arc Max and how to enable its features on a Mac computer. You’ve also learned the alternative for Windows 11 PCs.
If this article helped you get the hang of this tool, feel free to share your thoughts in the comments. Contrarily, if you know a better way to set up ChatGPT on Arc, do tell!
Encountering an Unknown Server Error in the Arc Browser can be quite frustrating, especially when you’re in the middle of something important. Apparently, for many users, this issue is due to proxy server settings. However, some have fixed the problem just by terminating the process in Task Manager and reopening Arc.
First, try to open the problematic web page in another browser to check whether it’s a problem with Arc or with your system.
How do I fix the Unknown Server Error in Arc?
1. Clear the proxies in Windows
Open Settings in Windows by using the Win + I shortcut.
Now, go to Network & internet and select Proxy.
Here, make sure that no script or proxy is running and toggle the Automatically detect settings to On, if it’s not already.
Restart the Arc browser and see if that fixes the issue.
By turning off the proxies, you should not see the Unknown Server Error in Arc anymore.
2. Clear the browser cache and cookies
Open Arc and go to its Settings page.
Navigate to Privacy and security and click on Delete browsing data.
Select to clear cache and cookies and delete the data.
Restart the browser and try connecting to ARC again.
Clearing your browser cache and cookies can help resolve any corrupted data issues that might be preventing a successful connection.
If the issue persists, try reinstalling the browser.
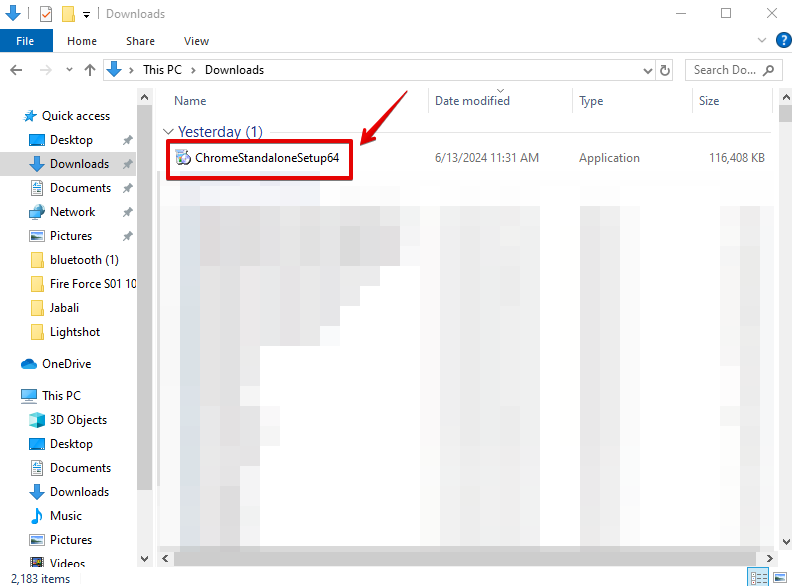
Download the latest version from the official website of the browser.
Install and restart your computer.
Keeping your browsers updated or reinstalling them can eliminate hidden bugs or compatibility issues with ARC.
By following these steps, you should be able to resolve the “Unknown Server Error” in the Arc Browser quickly. To prevent future issues, keep your software updated and regularly check your network and server settings.
In technology’s changing world, Microsoft is leading again by trying out its desktop search tool Recall on the latest Windows 11 Insider build. Think about being able to check your desktop right away without opening any app and view other people’s screens through a new tool called Screenray in Windows Recall.
The shortcut Win+Shift+D gives users an easy way to see what’s on their desktop in a small window. But this feature isn’t only about viewing; it’s also for interacting with text, links, and images from your desktop. Imagine the potential: fast translations or immediate info – all without changing screens!
According to the latest reports, the Windows Recall tool will have a fresh user interface. It will show a home page for recent snapshots and a topic system for organized searching.
This signifies no more mess, and locating what you want at the right time is easier. The features of the Topics are very interesting. For example, a user can create a topic for “software development” and keep all the search results they find in one collection. So, looking again at snapshots connected to that particular topic is easy.
Now, we move on to integration. Recall is getting close to Copilot, allowing users to jump into Copilot from content in snapshots or on their current display. It’s akin to having a personal helper prepared to examine the specifics of everything you are working on.
These characteristics are found only in an extremely unstable version of Windows 11, which Windows Insiders can access solely.
So, if you’re willing to face potential bugs and desire to be at the forefront, this could be your opportunity. An open-source alternative to Microsoft Recall is available for those who value privacy and freedom.
Even though there is disagreement and danger in testing with unstable builds, the draw towards these fresh functions cannot be denied. Screenray and Topics might change how we engage with our desktops, making it easier to get and organize information.
But, similar to all new technologies you try out for the first time, finding a balance between novelty and steadiness is important. What do you think about the new Screenray and Topics capabilities in Windows Recall? Will you dive into these waters and test them, or wait for the waves to settle down?
Have you ever thought that Microsoft Edge’s many features are too many? You are not alone. Even though Microsoft Edge is the superior browser, many Edge users find its numerous capabilities quite overwhelming.
This includes people who are very knowledgeable about technology. Even if the browser offers customization through settings, many of its elements can only be changed by policies that are not widely known to general users.
However, a positive development is a third-party script named MSEdge Tweaker, which helps you turn off specific functions you may not require or prefer.
I've just released my project named "MSEdge Tweaker", onto GitHub!
It's a simple batch script to make Microsoft Edge BETTER for you, giving you options such as disabling the first run experience or the Microsoft account sign in!
The game-changer MSEdge Tweaker, which is on GitHub, will help you make your Edge experience more focused. You can use this script to turn off many features from the start. Just think about not having to deal with the initial experience or splash screen and those constant requests for importing data from other browsers.
Moreover, it allows you to turn off browser sign-in and sync services, collections, Edge sidebar, shopping assistant, sponsored links found in the new tab page, and insider banner on the About page.
The future plans of the MSEdge Tweaker developer are promising. They intend to include more options and policies, which will give users a better chance to manage their browsing experience even more effectively.
Yet, it’s important to understand that modifying these settings will cause the Edge browser to show a banner declaring it is managed by your organization. Also, restoring back to the original setting may not be simple at present.
However, there’s a trick that can be used. Opening the script in Notepad will show you which registry keys are affected by each option. This lets you change them back manually if necessary.
MSEdge Tweaker: How to Download
If you are interested in MSEdge Tweaker, getting it is very simple. All you need to do is go to GitHub, take the files, and put them in a useful folder.
After this, click MSedgeTweaker.cmd as an administrator and choose which features you want to switch off (disable). It’s as easy as that.
Simply download the MSEdgeTweaker.cmd file from this repo
Run the downloaded script as Administrator then you will see a menu list. Follow the on-screen instructions.
Instagram’s new strategy of labeling pictures as Made with AI has created a lot of noise in photography. Imagine yourself as a photographer, feeling proud about your job, and then Instagram marks a “Made with AI” tag on each photo.
These are not random photos; they represent work you have carefully taken and possibly slightly edited using Adobe Photoshop’s AI-driven tools. As per Instagram’s head, Adam Mosseri, the tag is given based on the metadata within the image files.
It’s known that AI tools are used for various edits, even if they are harmless. But a big catch: this wide-ranging method has sparked an uproar.
Photographers are angry. They think this tag questions the genuineness of their work. They say there’s a big difference between making small changes and making something completely fake. But Instagram’s way of doing it now doesn’t seem to understand this difference.
The situation becomes even more complex. When real images created by AI also get the tag, viewers are confused about what is genuine and what isn’t. Ideas have been presented, such as separating “edited with AI” and “made with AI” tags or applying Adobe’s Content Credentials metadata to check the authenticity of real photos.
The disagreement highlights the difficulty in handling AI-created material. As AI instruments become better and more available, it gets harder to differentiate between genuine and false pictures.
Although well-naturedly intended, Instagram’s effort to address this problem has begun a conversation about how we should mark and recognize AI-generated content. Photographers are calling for a more nuanced and fair approach.
Managing AI content on the internet is not easy. Instagram analyzes image metadata to check if images are genuine or created by AI. However, users with knowledge can avoid this by putting up images without metadata, such as screenshots, making recognizing fake pictures more difficult.
At the same time, photographers utilizing Photoshop’s content-aware instruments for small changes encounter their work being wrongly labeled. This situation is not perfect, emphasizing how intricate the matter is.
Instagram’s binary tagging method is not very subtle because it only lets users choose one label. The difference between “edited with AI” and “made with AI” might answer this issue, giving a clearer picture of how much AI was used.
Historically, photographers have been manipulating images ever since photography began, but artificial intelligence introduces a fresh level of intricacy. The Generative Fill AI tools in Photoshop are taking big steps, somewhat removing the limits of possibility. This blurs the distinction between reality and artificiality.
Instagram’s “Made with AI” tag debate is about technology and relates to the concept of realness and innovation in our digitally functioning society.
In the coming time, it will be important to locate a middle ground where we appreciate photographers’ efforts and recognize AI’s contribution. Instagram’s task is to learn from feedback and adjust, steering this new landscape without devaluing genuine creativity.
The 7-Zip Windows 11 theme makes the app fit in with Microsoft’s modern style of icons and themes.
7-Zip is one of the most popular file-archiving tools for Windows 11. Best of all, it’s open-source. You don’t need to buy a license as you do in WinRAR. However, its user interface leaves something to be desired.
Its icon sets look outdated and they really stand out when you run it on a Windows 11 PC.
So, I’ve explained below how to make the program look consistent with your current theme.
Why Do You Need a 7-Zip Windows 11 Theme?
By default, the 7-Zip app will use the native icons for certain elements, such as:
The basic UI items below the Name column:
Computer
Documents
Network
Drive icons
Directory icons when you access a drive.
However, the 7-Zip menubar tabs and toolbar buttons are still the default and outdated designs.
Luckily, its Theme Manager lets you change the default design with modern theme elements that match the Windows 11 native UI designs, elements, buttons, etc.
Also, there are third-party 7-Zip themes you can download from sites like DeviantArt to further spice up your interface.
How To Set Up 7-Zip Windows 11 Theme
Here are the steps to customize its default style:
Update Your Existing 7-Zip Installation
First, you must update the existing 7-Zip installation to ensure you’re using the latest edition. Only the newer apps are compatible with UI icons and theme customizations.
Since 7-Zip doesn’t update itself automatically at regular intervals, follow these steps:
Open the app on your PC and click on the Help menu in the top toolbar.
Select About 7-Zip from the Help context menu.
Click on the 7-Zip.Org link button.
The button will redirect you to the official website’s home screen.
Click on the first Download link to get the latest version for your Windows 11 PC.
Go to the Downloads folder and install the downloaded software package.
This will update the existing 7-Zip app.
Install 7-Zip Theme Manager
Now that you’ve updated the app, it’s time to get the latest copy of the 7-Zip Theme Manager.
Visit the official website and download the highlighted version Download 2.1 or the most recent one if there’s an update.
Go to the Downloads folder to find the compressed archive. Open the archive and double-click the 7zTM EXE file to install the app.
The setup wizard might show that the theme manager isn’t compatible with the current Windows installation. Just click OK to proceed.
It’ll automatically detect and show the 7-Zip installation directory on your PC. If the directory seems okay, click Yes.
That’s it! The 7-Zip Theme Manager’s home screen will show up.
You need this app to do the following:
Customize the 7-Zip Toolbar theme.
Personalize the Filetype theme of 7-Zip.
Choose a custom self-extracting archive or SFX icon.
Create your own 7-Zip Windows 11 themes.
Load a Windows 11-Compatible Theme for 7-Zip
Launch the 7-Zip Theme Manager app.
Click on the Toolbar Themes radio button.
You can now select any of the Toolbar Themes in the left-side navigationpanel.
There are 90 options to choose from. Let’s select the Basic Icons Toolbar Theme.
You’ll see a preview in the right-side window.
The preview will show the following views:
How the app will look in its full-screen mode.
How it’ll look if you’ve reduced the app size to windowed mode.
If you like what you see, hit the Activate theme button below the left-side navigation panel.
Open the 7-Zip app to check if the theme has been applied.
Similarly, click on the Filetype Theme radio button and choose a theme set, like Sparanoid 2 from the left-side navigation panel.
Again, click on the Activate theme button.
Let’s say you also want to customize how SFX files should look on the 7-Zip app on your Windows 11 PC. To do this, click on the Change SFX Icon button.
It’ll open a file browser dialog box. Use that to choose your custom icon file (.ico) from your PC.
The theme manager will apply the icon style for SFX files. The next time you create one or view existing files, 7-Zip will show the custom icon instead of the default one.
Access the win11-7zip-theme directory and double-click on the 7zTM 2.1.1 EXE file.
Select your language and click OK.
The app will locate the 7-Zip installation automatically. Click Yes.
Click on the Filetype Themes radio button.
Choose Windows 11 from the left-side navigation panel.
Click on the Activate theme button to apply it.
Open 7-Zip to check out the new file icon style.
Here’s an example of the custom Windows 11 theme applied to 7-Zip:
Importing Custom 7-Zip Themes to the Theme Manager App
You can get free or paid themes from various online sources like DeviantArt. For example, you can get this Windows 11 Theme for 7-Zip created by ivan13x.
When you download the theme files, you’ll see the following two directories:
filetype
toolbar.
Simply copy the content of these directories, go to the 7-Zip Theme Manager directory, and place the files in the Toolbar and Filetype folders.
Don’t forget to create new folders in these directories before pasting the custom theme files.
Summary
So far, you’ve learned several methods to install a 7-Zip Windows 11 theme on your PC. You can now transform its dated look to a modern style that matches your OS. You can also try out the portable edition.
I’ve tested all the third-party apps on my Windows 11 PC. My antivirus software didn’t flag these tools and design files. So, you can follow along with the steps without worrying about malware and viruses.
Did the article help? If I missed a better method, feel free to mention that in your comment.
Facing issues while trying to create an account on the Arc browser can be incredibly frustrating. This problem is usually due to having non English characters in the name of your Users folder. Go to C:\Users\<username> and change it with only English characters for this to work. If the issue was not corrected, we have more tested solutions below.
1. Disable the Developer Mode after installation
Open Settings by pressing Windows + I on your keyboard.
Click on System, then toggle Developer Mode to Off.
Open the Arc browser and attempt to create an account again.
Disabling Developer Mode can sometimes resolve conflicts that prevent account creation.
2. Clear Site Data
Open the Arc Browser.
Type chrome://settings/siteData in the address bar and press Enter.
Go to Privacy & Security and click on Delete browsing data.
Check all and click Delete Data to clear all site data.
Restart the Arc browser and try creating an account again.
Clearing site data resolves issues related to corrupted cookies or cache that may prevent account creation.
3. Reinstall Arc Browser
Uninstall the Arc browser by going to Settings > Apps > Apps & features.
Scroll down to find Arc, click on it, and select Uninstall.
Reinstalling ensures that you have the latest version and resets any issues caused by corrupted installation files.
4. Disable conflicting extensions
Open Arc browser and type chrome://extensions in the address bar, then press Enter.
Toggle off all extensions by clicking the switch next to each one.
Restart the Arc browser.
Try creating an account.
Disabling extensions can help identify if any third-party software is causing conflicts during account creation.
5. Check browser’s security settings
Open Arc browser and type chrome://settings in the address bar, then press Enter.
Scroll down to Privacy and security.
Click on Third party cookies.
Make sure the option Allow all cookies is selected.
Return to the main settings page and click on Site settings.
Now, click on Pop-ups and redirects and click the button to allow sites to use them at the top.
Properly configuring security settings ensures no settings are blocking the account creation process.
6. Use a VPN
Install a VPN client of your choice.
Connect to a VPN server located in a different region.
Open Arc browser and attempt to create an account.
Using a VPN can bypass regional restrictions or network issues preventing account creation. For example, ExpressVPN is a great choice for this task, as it comes with servers all around the world and offers very good connection speed.
In a time when language models are becoming more complicated and sometimes confusing, Microsoft researchers working with the University of Illinois at Urbana-Champaign have created something simple but powerful: Samba 3.8B.
This is not just another model in this sea of options; it’s like gold that brings together State Space Models (SSMs) and attention mechanisms, showing superiority over other models such as Phi3-mini on main benchmarks. What sets Samba apart? Its ability to handle sequence lengths without limits and maintain a linear time complexity is truly fascinating.
In terms of its architecture, Samba combines Mamba, SwiGLU, and Sliding Window Attention (SWA) layers. The Mamba layers are like strong muscles that catch time-related meanings, while SWA ones deal with tricky non-Markovian dependencies.
When united, they form a high-performance system that can efficiently decode and handle complex dependencies. But wait, there’s more. Adding Multi-Layer Perceptron (MLP) layers, demonstrated as SwiGLU, strengthens the system’s ability to deal with nonlinear transformations and remember factual knowledge.
Introducing Samba 3.8B, a simple Mamba+Sliding Window Attention architecture that outperforms Phi3-mini on major benchmarks (e.g., MMLU, GSM8K and HumanEval) by a large margin.? And it has an infinite context length with linear complexity.?
It was not just about designing this architecture; the researchers scaled it to a 3.8B parameter model pre-trained on 3.2T tokens. The results were even more impressive, with Samba 3.8B surpassing other open-source language models with parameters up to 8B and excellent performance in various tasks, from commonsense reasoning to coding. Significantly, it has 18.1% more accuracy on GSM8K than Transformer++.
Now, how does this relate to you and me? Initially, Samba’s hybrid architecture could be seen as a potential solution for complex tasks in natural language processing.
The capacity to manage context lengths without limits and exceptional memory extrapolation abilities make it especially fitting for practical uses requiring a profound comprehension of large contexts. Picture a planet where language models grasp our intentions more clearly, enhancing technology’s intuitive and supportive nature.
The researchers’ findings and models are uploaded to GitHub if you want to explore them further. This shows their dedication to progressing language modeling and providing tools for handling upcoming difficulties in the community.
So, if you’re a researcher, developer, or simply someone intrigued by how technology aids us in comprehending language better, Samba 3.8B is an important development to watch.
Amid a gaming marathon, have you ever been disappointed by your headset’s comfort or, even more so, its battery life? It appears that Turtle Beach has been developing an answer to these problems, which could potentially eliminate them.
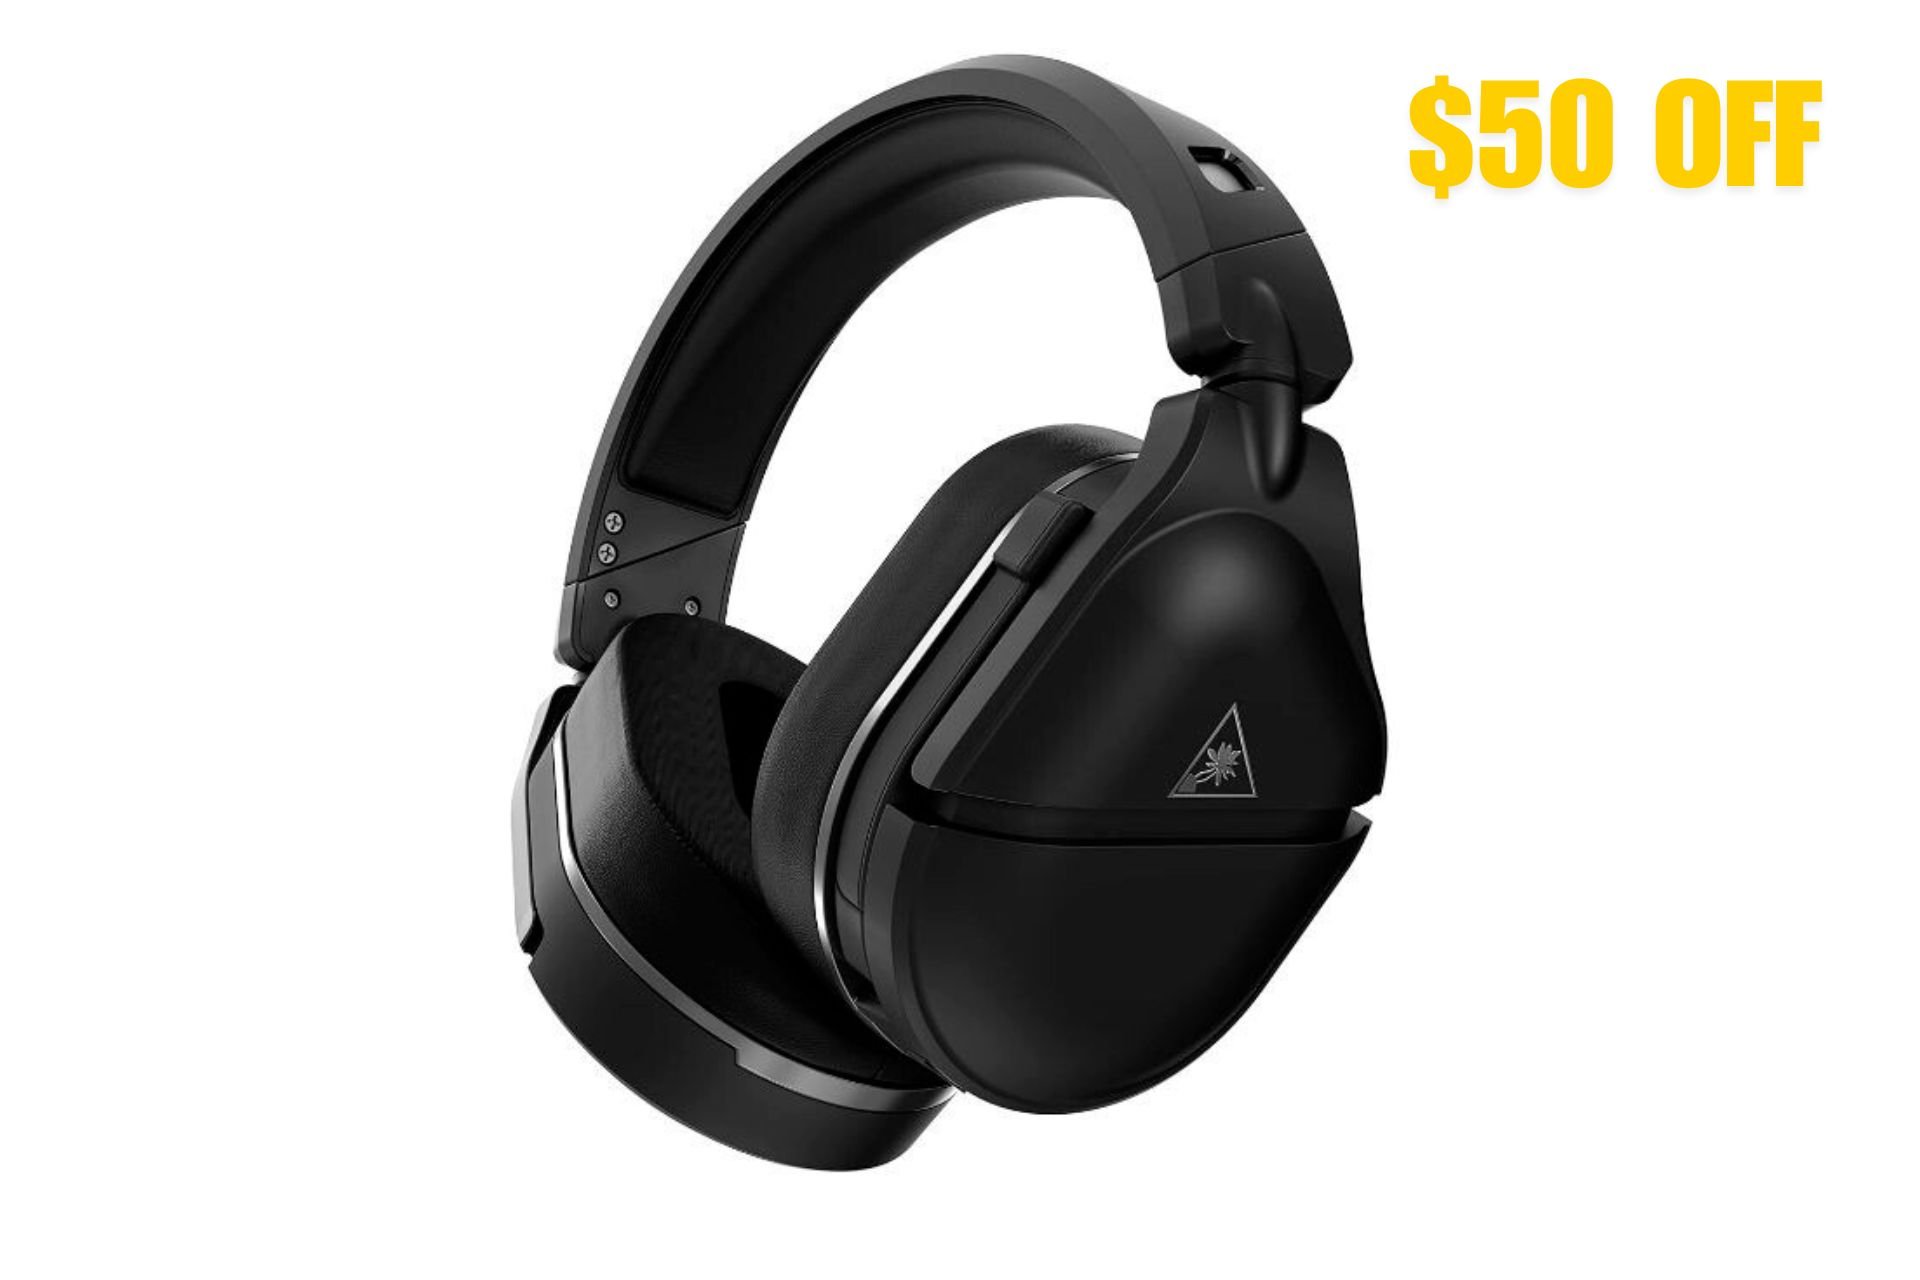
They recently introduced the Turtle Beach Stealth 700 Gen 2 Max wireless gaming headset. What do we find? It’s now available at an incredible price on Amazon. For only $129.95, you get this top-notch gaming headset, which is the lowest cost ever and saves more than $50 from its initial MSRP of $179.99.
This is not an ordinary gaming headset. It has official Xbox licensing; however, do not be mistaken; this product can work with any device that supports USB Audio or a 3.5mm headphone jack.
Thanks to its versatile 2.4GHz dongle, you can use it for gaming on your Windows 10 or 11 PC, Nintendo Switch, and the Sony PlayStation 4 and 5! This controller can also connect to iOS and Android devices using Bluetooth for people who enjoy playing games while moving around.
How is the audio quality? It’s stellar. With twin 50mm Nanoclear speakers, you get great sound support without delay (when gaming or talking to friends). About chatting, the microphone in this thing is made for clearness.
Your voice will be sharp and understandable. Comfort is a priority with the Aerofit cooling gel-covered ear pads, so you can game for hours without feeling uncomfortable. And if you wear glasses, the ProSpecs glasses relief system ensures no pressure points disturb your gaming sessions.
Battery life is usually the weak point for wireless headsets, but not with this one. You’ll get 40 hours on one charge, and when time is limited, a fast 15-minute recharge provides 8 hours of use. It’s quite impressive, isn’t it?
This offer is only for people in the US and may not be open to customers from other places. But this could be a good time for an update if you want a new gaming headset.
So, you can see that the Turtle Beach Stealth 700 Gen 2 Max is an excellent choice if you want a high-quality wireless gaming headset. And this deal for it is quite good, too, especially with those longer game sessions we all enjoy.
You can get it from here. If you’re looking for a brand-new gaming laptop, this Dell G15 is now discounted as well.
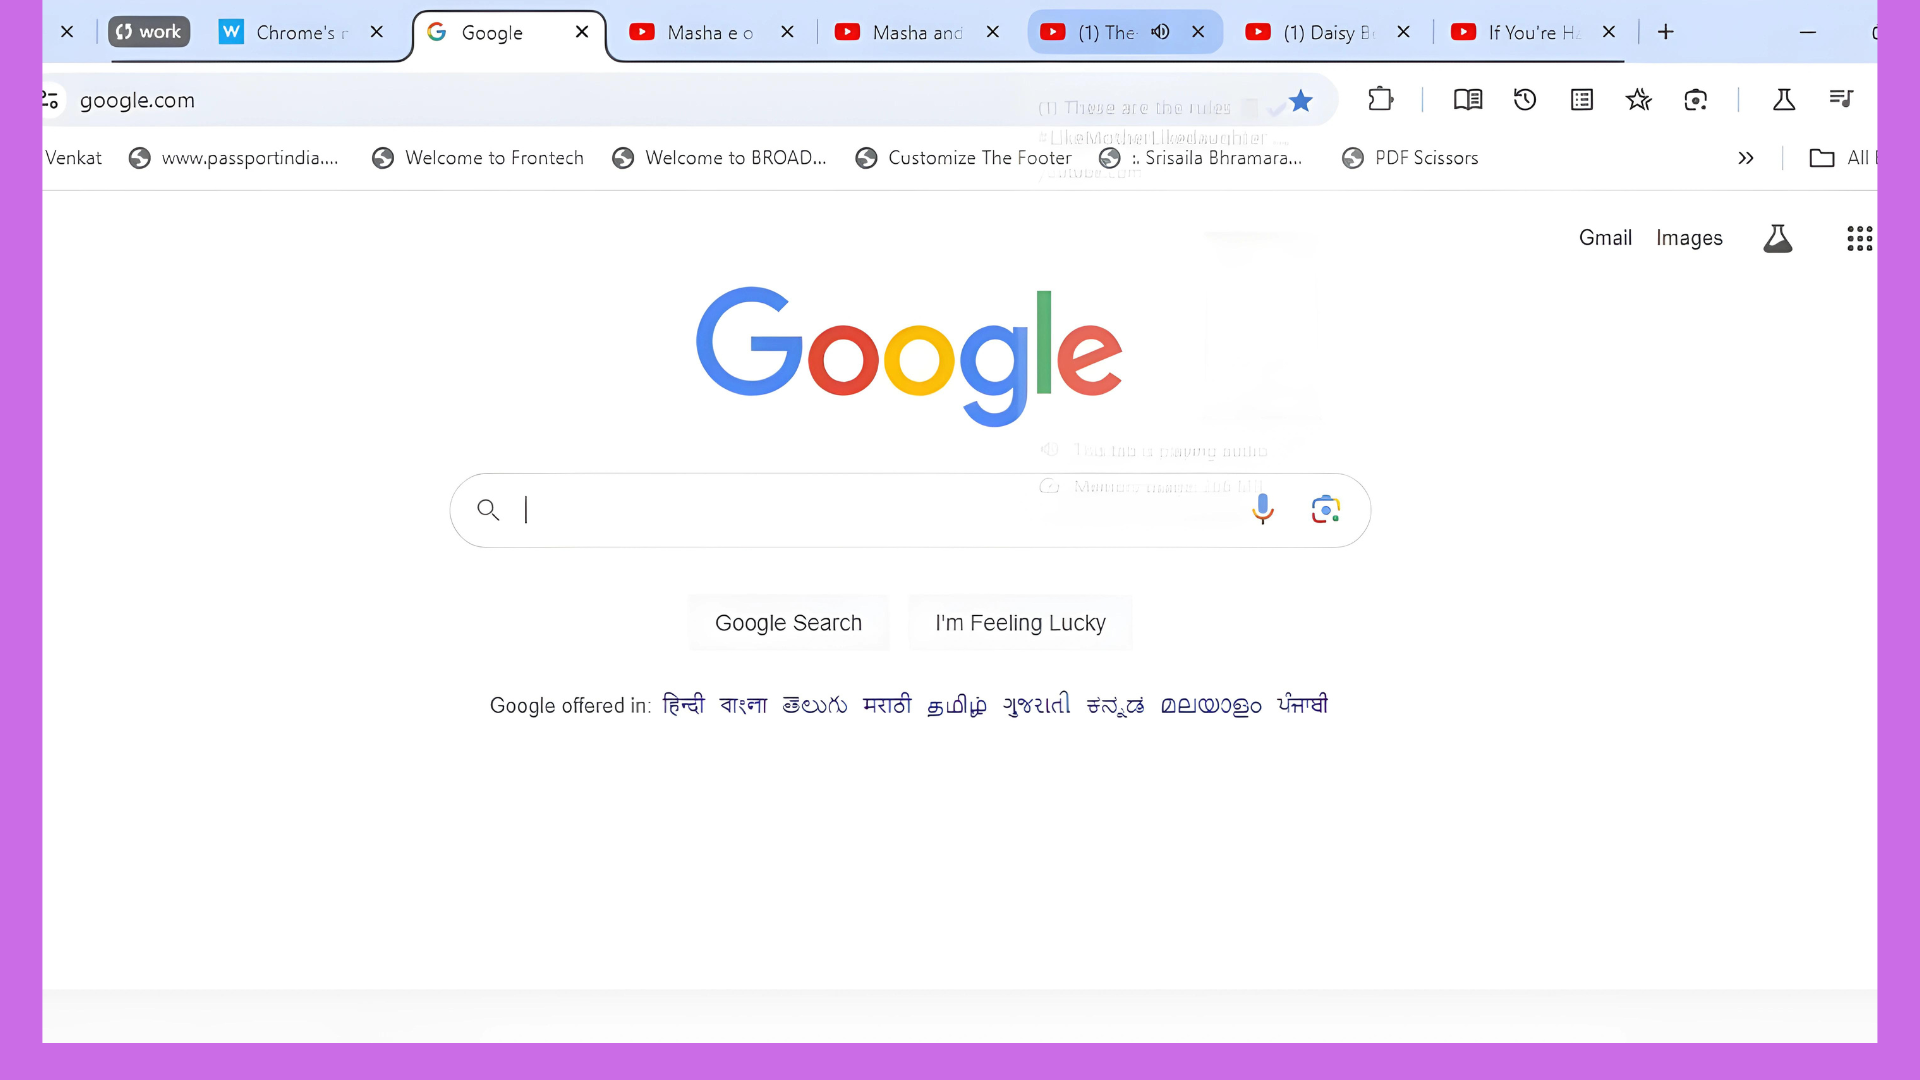
Having trouble with no sound in your ARC Browser? First, check if you have selected the right speakers or headphones in Windows, from the volume icon on your taskbar. Many users have had this problems because they accidentally muted the toolbar in Arc, or it opened muted. So, check the sidebar and see if the tab is muted. You can unmute it with a single click.
For some, the issue is only present when you switch tab during the the countdown of a video (on YouTube). To fix the problem, just reload the tab or close it and open a new YouTube tab.
1. Update your audio drivers
Open Device Manager by right-clicking the Start button and selecting the app from the list.
Expand the Sound, video, and game controllers section.
Right-click on your audio device and select Update driver.
Choose Search automatically for updated driver software and follow the prompts.
Updating your audio drivers can resolve compatibility issues that might cause audio problems in ARC Browser, ensuring you have the latest fixes and enhancements.
3. Adjust Volume in Background Music (for Mac users)
Open Background Music by clicking on its icon in the menu bar (MacOS).
Locate the ARC Browser in the list of applications.
Adjust the volume slider for the ARC Browser to ensure it’s not set to a low or muted level.
Using Background Music ensures that the ARC Browser’s volume is properly set, which is common when system-wide volume control interferes.
Disconnect the HDMI cable from both your TV and the audio system.
Reconnect the HDMI cable to the ARC/eARC labeled ports on both devices.
Go to your TV’s audio settings and select “HDMI ARC” as the audio output source.
Enable HDMI-CEC control (Anynet+ for Samsung TVs) on your TV.
Ensuring that your HDMI connections and settings are correct can fix any signal issues that prevent audio from being sent through ARC.
5. Clear Cache and Data (on Android TV)
Go to the settings menu of your TV.
Navigate to Apps and find the ExternalInputServices if you are using Android TV.
Select Clear data and Clear cache.
Restart your TV and reconnect your HDMI cable.
Clearing the cache and data can solve issues related to outdated or corrupted settings that might prevent audio from being output through ARC.
6. Use a high-speed HDMI Cable
Ensure you are using a high-speed HDMI cable rated as 2.0 (18Gbps) or better.
Replace your current HDMI cable with a known working high-speed HDMI cable.
Reconnect your devices using the new cable.
Using a high-speed HDMI cable ensures that your connection supports the ARC/eARC features, which are essential for proper audio communication.
7. Power reset your devices (for external audio problems)
Turn off both your TV and audio system.
Disconnect the power cords and HDMI cables from both devices.
Leave them disconnected for at least two minutes.
Reconnect the HDMI cable to the ARC/eARC ports and plug in the power cords.
Turn on the TV first and then the audio system.
A power reset can solve temporary glitches or software hang-ups that may prevent ARC from functioning correctly.
8. Use Device Manager to re-enable an audio device
Right-click the Start button and select Device Manager.
Expand the section Sound, video, and game controllers.
Right-click on HD Audio Driver for Display Audio and select Disable device.
Right-click it again and select Enable device.
Re-enabling the audio device can resolve conflicts and refresh the device settings, which often resolve the no-sound issue.
9. Check HDMI Control Settings
Go to the settings menu of your audio system (AVR or soundbar).
Ensure that HDMI Control (CEC) is set to On.
Check the ARC/eARC or TV Audio Input Mode setting, and set it to Auto.
Proper HDMI Control settings ensure that the connected devices communicate correctly, facilitating the ARC feature to output sound.
10. Configure TV Audio Output to PCM (for TV audio issues)
Open your TV’s settings menu.
Navigate to the Sound or Audio settings.
Select Digital Audio Out, then choose PCM.
Setting the audio output to PCM can help in cases where Dolby or DTS audio formats are not supported by your audio system, ensuring a more basic but functional audio transmission.
Most of the times, this is a simple problem with selecting the right audio output source on your PC, or an accidental mute action on your tab in Arc browser. However, above, you will find solutions on all possible issues.
To prevent future issues, regularly update your drivers and check your audio settings. Happy browsing!
Ever been in a tricky situation where you had to send a file from your PC to an Android phone and then back again? It’s like attempting the impossible, similar to threading a needle with eyes covered.
However, soon enough, Microsoft will work on something in its tech lab that may solve this issue.
They have dropped a fresh feature for those fortunate ducks in the Windows Insiders program. This one simplifies file sharing between your Windows PC and Android phone. Now, sharing content is as simple as eating a pie.
Picture this scenario: You have completed all the details of a presentation on your PC and are required to move it onto your phone. The purpose is for you to study it once again during your travel. Microsoft has assisted by adding a fresh My Phone icon in the Windows Share menu.
We are rolling out the ability to easily share content to an Android device from Windows share window. The feature requires you to pair your Android device to your Windows PC using the Link to Windows app on Android and Phone Link on your PC.
Your file is sent to an Android gadget with just one touch. You won’t have to email it to yourself or deal with pesky cables.
But hold on—there is a condition—your devices must be able to talk to each other initially. You will need to match up your phone and PC by using the Link for Windows application on Android and the Phone Link feature on your PC.
Once they become close friends, whenever you want to share something, the “My Phone” icon will appear. It’s like magic, but better because it’s technology.
This feature is only available to beta testers who updated to KB5039319, so it will be generally released shortly.
Additionally, this update does not have limited abilities. It also delivers treats such as jump lists for pinned apps and enhanced handling of images from Windows Spotlight.
In the big picture view, Microsoft is not only giving a little treat. They are solving a genuine problem for many people like us who handle content on different devices.
Even though Google’s Quick Share feature has been helpful, how Microsoft incorporates it into the Windows environment might change everything.
However, it’s worth mentioning that Phone Link, which enables the My Phone feature, currently uses many CPU resources. Dozens of Windows 11 users have noticed it, and the Redmond-based tech giant has acknowledged it, too, and it’s working on a solution.
Aside from the bug, the My Phone improvement brings much-needed relief for people like me who have wasted many minutes attempting to move files between gadgets. Now, if only all tech updates could make our day-to-day tasks this much easier.
In the past, Chrome stopped videos and music from playing automatically on tabs you weren’t looking at to save battery and make things run faster. Now, Chrome is looking to extend the media deferral feature to tabs within groups of tabs! This means less background noise and smoother browsing when you have a bunch of stuff open at once.
Chrome to defer media loading in background tab groups
Google Chrome already pauses media in background tabs to save resources. Google is now further improving this by applying to tab groups.
According to the “defer media load on background synced tab” commit, in Chrome, when you open a tab group and switch to another window or tab, media in those background tabs within the group won’t start playing automatically. This helps in improving device performance and battery life.
The code snippet mentions a feature flag kDeferMediaLoadInBackgroundTab which controls this behavior. The code also refers to methods for checking and setting the media deferral state for a web page.
This change will be beneficial to users who heavily use tab groups.
Another code snippet we spotted reveals another aspect of the development related to tab groups, and it seems to be focused on restricting downloads
Download restrictions for synced tabs within a group?
This code refers to a specific state assigned to tabs within a group. It suggests Chrome might be treating tabs in a group differently compared to regular tabs.
When a tab has this “TabGroupSyncTabState,” the code indicates downloads might be restricted. This could mean:
Downloads initiated within those tabs might be blocked entirely.
Downloads might be paused or require additional confirmation before proceeding.
Download restrictions for synced tabs within a group might be implemented for security reasons, resource management, or synchronization purposes.
These changes likely indicate the tab is part of a synced group and allows Chrome to apply behaviors like media deferral and potentially download restrictions.
Impact on Syncing: Unclear But Potentially Important
The impact of download restrictions on syncing tab groups across devices is unclear at this point. It’s possible that downloads initiated within a synced group might not be synced to other devices. However, more information is needed to confirm this.
Since the reason for download restrictions is unknown, it’s difficult to say definitively how it might affect syncing. It could potentially impact how downloads initiated within synced tab groups are handled when syncing across devices.
These changes are currently in development according to leaked code snippets and might not be available in the stable Chrome version yet. It’s important to note that Google might modify or remove these features before the official release.
Did you ever experience a time when your usual tools started acting strange, causing chaos in your routine? This is precisely what is occurring for OneDrive users utilizing Windows 11.
Annoyingly, a bug has transformed shared folders into nothing more than web links, leaving numerous people in an uncomfortable situation. Microsoft has not officially provided a solution to this issue, even though it is causing much frustration. So, what’s happening, and what can you do?
The main problem is that shared folders sync as internet shortcuts, not files. This causes a glitch that disrupts access to these shared folders and affects their ability to edit. People are confused about whether this issue is due to a recent update to Windows 11 or something else. The cause, however, remains a mystery.
Microsoft has recognized the bug and supposedly taken action, striving to provide a solution. However, they recommend remaining patient. This suggestion may not be easy to follow if you are wasting time or working together on something important.
Recently we have received a lot of reports similar to yours and have confirmed this problem is related to a bug in OneDrive sharing folder feature. For now, unfortunately, we have to say there’s no workaround yet. We completely understand your opinion and needs for this feature. Sincerely apologize for the inconvenience you have experienced, and we’ll keep to the latest progress for this issue from Microsoft. Once resolved we’ll get you informed.
Microsoft
Meanwhile, you could consider some quick solutions. Few users successfully download files from the shared folder themselves if they have the correct permissions. Some people also see other cloud storage options as a stop-gap measure. But tread lightly, as these are not official recommendations.
This situation feels difficult, particularly if you depend on these tools for everyday work. But we are watching the situation carefully and will inform you promptly when an official solution is available.
Before that happens, it might be useful to look into those short-term remedies or stop doing tasks that need access to shared OneDrive folders on Windows 11.
But don’t forget tech is full of bugs, and we must adjust our actions. Be patient, and let’s hope Microsoft solves this quickly.
In the fast-moving technology world, where updates and bug fixes sometimes seem like a spinning top that never stops, people are now talking about a recent snag in Windows 11.
Picture this scenario: you quietly sit at your computer, hoping it will run smoothly, but suddenly discover an invisible power taking up to 10% of your CPU’s resources. This is not from some tech horror movie; this problem affects certain users on Windows 11 because of a bug in the Microsoft Cross Device Service.
This bug has caused significant distress for those Windows 11 users who utilize the Phone Link feature. Phone Link is designed to simplify life by connecting your phone with your PC.
Now, you may ask, “Why is this so important?” First, high CPU usage can cause your computer to slow down significantly. It makes simple activities feel frustratingly sluggish—imagine running a marathon with a backpack full of bricks.
Windows 11 users initially raised the problem about the Phone Link bug in Microsoft’s forums, and now engineers from Microsoft have confirmed it. They accept the issue and are looking for an answer. However, they haven’t found a solution yet.
Appreciate your patience, we’ve identified the cause and are working on a fix.
Microsoft
The main source of the problem appears to be related to the recent enhancements in Cross-Device Service. The service was made better to make sharing files between a PC and phone easier, but it seems these changes unintentionally caused CPU usage to rise. It’s a common situation where a good intention results in an unexpected outcome.
As critics have highlighted, the hiccup in Windows 11 Insider builds points towards a recurring problem. The suggestion is to halt and reassess Microsoft’s direction in Windows development. Using as much as 10% of a system’s CPU for a service, particularly when not actively used, doesn’t sound very efficient.
There is a short-term solution for people who do not want to be part of this technology test without their knowledge: turning off the Microsoft Cross Device Service. This may not be the best option for everyone, particularly those using the Phone Link function regularly. However, it can be a quick fix until Microsoft provides an official remedy.
This story shows us how important it is to find the right equilibrium between introducing fresh elements and ensuring a robust, smooth-running system. Microsoft feels pressure to fix these issues because Windows 10’s support is ending soon, and AMD has started reducing compatibility with Windows 10 in some of its latest CPUs.
We hope that Microsoft will not only fix this bug but also take a wider look at ensuring their updates add value without creating new user problems. Ultimately, isn’t technology here to simplify our lives, not more complex?
Navigating through emails can be a hassle, but integrating Gmail with Arc Browser can significantly boost your productivity. Let’s dive into some practical steps to make Gmail your go-to email client in Arc Browser.
How do I make Gmail the default email client in Arc?
1. Use the Chrome settings in Arc
Log into your Gmail account from the Arc browser.
In the Arc browser’s URL bar, type chrome://settings and press Enter.
Navigate to Privacy and security > Site settings.
Under Permissions, click on Additional permissions.
Click on Protocol handlers.
Find mail.google.com in the list and click the three-dot menu (⋮) next to it.
Select Set as default.
Now, whenever you click a mailto: link, the Gmail compose view will open within a few seconds. This solution helps by ensuring your Arc browser seamlessly connects with your Gmail, making it quicker to send emails directly from web links.
2. Manually register Gmail as the mailto: Handler
Open a Gmail tab in your Arc browser.
Open the JavaScript console. On Windows, press Ctrl + Shift + J.
Enter the following code into the console: navigator.registerProtocolHandler("mailto", "https://mail.google.com/mail/?extsrc=mailto&url=%s", "Gmail");
Accept the confirmation from the browser.
If Arc initially shows Gmail as a disabled handler, removing it from arc://settings/handlers and running the code snippet again may resolve the issue. This solution manually sets Gmail as the default mailto: handler, ensuring that email links open in Gmail.
3. Check and adjust the Arc Browser settings
Open Arc browser settings by typing arc://settings in the URL bar and pressing Enter.
Navigate to Handlers settings.
Ensure that Gmail is not set to disabled. If it is, remove it from the list.
Re-run the manual registration code snippet from Solution 2 if necessary.
Adjusting these settings ensures that your Arc browser correctly recognizes Gmail as the default email client, enhancing your browsing and emailing efficiency.
4. Arc Browser Integrations
Arc browser offers several integrations that enhance productivity. Ensure you have the following Gmail integration setup:
Open the Arc Browser and go to the Integrations menu.
Find the Gmail integration and enable it.
This allows you to view unread emails and compose new emails directly from the Arc browser’s interface.
Using Arc’s Gmail integration can streamline your workflow, making it easier to manage emails without switching tabs or applications. We have a useful guide on how to manage multiple Google accounts in Arc that might come in handy.
By following these steps, you can ensure a seamless email experience in Arc Browser. Always keep your browser and integrations updated to avoid any disruptions in your productivity.
Was our guide helpful? If you have any other questions, don’t hesitate to use the comments section below.
Managing multiple Google accounts in Arc Browser can be a breeze if you know the right tricks. As you will see below, it’s all about creating more Spaces and Profiles in Arc, then switching between them using a simple shortcut.
How do I manage and switch between Google accounts in Arc browser?
1. Using Arc’s Profile and Spaces features
Create a New Space: Open Arc Browser and click on the sidebar at the top, hover with your mouse over Spaces and select New Space.
Create a New Profile: In the new space, click on New profile. You will be guided through a series of modals to set up the profile.
Assign Profile to Space: Assign the newly created profile to the space.
Switch Profiles Easily: Use keyboard shortcuts to switch between profiles. For example, Alt + [number] will switch to the corresponding profile.
Using Arc’s Spaces and Profiles features, you can manage multiple Google accounts within a single window, making it easier to switch contexts without juggling multiple browser windows.
2. Using keyboard shortcuts for efficiency
Open Favorite Tabs: Use Command + [number] to quickly jump to your favorite tabs.
Switch Tabs Efficiently: Use Control + Tab to switch between open tabs.
Navigate with Mini-Arc: Shift + Click on a link to open it in a mini-Arc, allowing you to view content quickly without opening a new tab.
Keyboard shortcuts in Arc Browser are designed to enhance productivity, allowing you to manage multiple Google accounts more efficiently by reducing the time spent navigating between tabs and spaces.
What can I do if I can’t log into my Google account in Arc Browser?
Ensure Browser Compatibility: Make sure Arc Browser is updated to the latest version.
Disable Conflicting Extensions: Disable all other browser extensions and try logging in again.
Use OAuth2: If using specific extensions for Google Calendar, ensure OAuth2 permissions are correctly set up.
By keeping your browser updated and disabling conflicting extensions, you can resolve most login issues with Google accounts in Arc Browser.
What can I do if the Google account doesn’t sync in Arc Browser?
Problem: Solution:
Contact Support: If syncing issues persist, reach out to Arc Browser support for detailed troubleshooting steps.
Check Compatibility: Some features might still be in beta; ensure the feature is stable by consulting the release notes or user forums.
Contacting support can provide you with tailored solutions and ensure that any sync-related issues are promptly resolved.
What can I do if extensions are not working in Arc for Windows?
Check for Errors: Go to extension settings and check for error logs.
Manual Login: Try using the manual login method in the extension settings.
Test Other Browsers: Verify if the extensions work in other browsers like Chrome or Firefox to isolate the issue.
If you experience issues with extensions in Arc for Windows, checking error logs and using manual login methods can help identify and resolve the problems.
These solutions will help you efficiently manage multiple Google accounts in Arc Browser, addressing specific issues and enhancing your productivity with the browser’s features. For a smoother experience, regularly update your browser and extensions to avoid common issues.
After multiple user complaints, Microsoft has finally acknowledged that the Cross Device Service bug is the main culprit behind the high CPU usage.
The news comes via Neowin which reported that Windows Insiders and users have been investigating this issue using the Task Manager after they suspected something is wrong with their system.
Microsoft Cross Device Service blamed for high CPU usage in Windows 11 PCs
On June 5, 2024, Microsoft Community Form user, leginmat90, first reported this bug. The user posted:
Noticed this began a few days ago. Initially, it was my CPU fan running unusually high, and also noted high idle temps. The task manager then shows Cross Device Service running my CPU at 7-10% continuously. As soon as I terminate this program, my CPU returns to normal idle conditions.
If you aren’t aware, the service allows your PC to sync with your smartphone for file and media sharing. Although many associated the issue with the Phone Link feature, we can’t rule out the possibility of older changes made to Cross Device Service within a year being the real culprit.
The good news is Microsoft finally came forward to address the Cross Device Service bug. Microsoft Engineer Jennifer G replied to the post and said: Appreciate your patience, we’ve identified the cause and are working on a fix.
It is worth noting that the response on the Feedback Hub was posted a week ago, but we still await the fix. Having gone through the Recall blunder lately, we expect Microsoft to act fast to resolve any issue that comes their way.
Disabling the feature could resolve this issue
As leginmat90 noted, terminating the program brings the CPU to normal. The user even asked for help through the post to disable the feature altogether. If you are also facing a similar issue you can try disabling the feature.
We have mentioned the steps to disable Microsoft Cross Device Service as suggested by Community Forum user, ViniciusMU.
Press Win + R to open the Run dialog box.
Type services.msc and press Enter.
In the Services window, locate the Cross Device Service.
Right-click on it and select Properties.
Change the Startup type to Disabled.
Click Apply and then OK
It will be interesting to see when Microsoft rolls out the fix for the reported Cross Device Service bug. Not to forget, in March, the then newly announced Cross Device Experience Host was reported to have multiple bugs.
Did disabling Microsoft Cross Device Service help you resolve the issue? Please share your thoughts with our readers by commenting below.
Microsoft recently released Edge version 127.0.2638.2 in the Dev Channel for users to test out new features and patches. As you may know, the Dev Channel gets weekly updates and is considerably more stable than the Edge Canary.
The latest update comes a day after Microsoft released Edge 126 in the Stable channel which includes a few new features like the AI Theme Generator and more. Talking of Edge Dev 127.0.2638.2, this version comes with a new icon for shared links, a few reliability improvements, crash fixes, bug fixes, and more.
Here are all the changes coming in Microsoft Edge version 127.0.2638.2 that recently dropped in the Dev Channel. Microsoft highlights all those changes in the release notes which read:
Added Features:
Introduced an icon for shared links.
Improved Reliability:
Resolved an issue causing workspaces to crash when exiting the hover menu.
Fixed a browser crash on Android.
Resolved an issue where the links were unresponsive after selecting ‘submit’ in Copilot on Android.
Changed Behavior:
Resolved an issue where the toolbar would vanish upon using the back button.
Fixed an issue where the close button was absent on the ‘Find on Page’ bar.
Fixed an issue where the ‘Profile Preferences’ page had incorrectly defined heading levels.
Fixed an issue where the history search results on the edge://history page were displaying incorrectly.
Fixed an issue where the ‘+’ icon was not displayed following the installation of a theme.
Mac: Fixed an issue where the UI dropdown was malfunctioning, displaying a black background instead of grey.
iOS: Resolved a functionality issue with the Copilot toolbar that prevented it from operating correctly on iOS.
Android:
Fixed an issue where the ‘Open downloaded page’ displayed a blank page on Android devices.
Resolved a problem that prevented switching to AAD after opening a URL from Outlook on Android.
Fixed an issue where the number of comments in the extension hub was displaying ellipses (‘…’) on Android.
Microsoft urges users to report any issues or bugs with the latest Edge version 127.0.2638.2 through in-app feedback. If you want to share feedback, go to … menu > Help and feedback > Send feedback. Not to forget, the latest version of Microsoft Edge is also available in the Microsoft Update Catalog.
Did you face any issues with Edge version 127.0.2638.2? Please share your thoughts with our readers in the comments below.
Recall AI has been in the news for all the wrong reasons ever since its announcement. And, now it has been removed with the latest build of Windows 11 24H2. For those uninitiated, this AI-powered feature records everything you do in your system and stores the recordings and snapshots locally so you can go through them whenever you’d like.
Although it sounds quite fancy, many users and security experts have voiced their concerns about it. Following the backlash, Microsoft announced that it is delaying Windows Recall on Copilot + PCs. More importantly, the Redmond giant also removed the feature from the latest Windows 11 24H2 Build 26120.961.
As Windows Latest notes, Windows Recall has been removed from the Windows 11 24H2 systems running the latest Build 26120.961 under KB5038575. Besides, all the related settings are no longer visible following the KB5038575 Dev Channel update.
Microsoft details update on the Recall preview feature for Copilot+ PCs
The company recently updated the Recall preview feature for Copilot+ PCs page to give us some additional information about news changes for the hyped feature. Microsoft has shown its intention to make several changes and wants the feature to meet the highest standard possible.
Microsoft has detailed that based on users’ feedback it is making some changes targeted towards Windows Recall. It mentions:
First, we are updating the set-up experience of Copilot+ PCs to give people a clearer choice to opt-in to saving snapshots using Recall. If you don’t proactively choose to turn it on, it will be off by default.
Second, Windows Hello enrollment is required to enable Recall. In addition, proof of presence is also required to view your timeline and search in Recall.
Third, we are adding additional layers of data protection including “just in time” decryption protected by Windows Hello Enhanced Sign-in Security (ESS) so Recall snapshots will only be decrypted and accessible when the user authenticates. In addition, we encrypted the search index database.
That’s not all, the company also conveyed that it is making security its top priority by making several changes. Microsoft mentions these notable changes in the webpage, and it reads:
All Copilot+ PCs will be Secured-core PCs, bringing advanced security to both commercial and consumer devices. In addition to the layers of protection in Windows 11, Secured-core PCs provide advanced firmware safeguards and dynamic root-of-trust measurement to help protect from chip to cloud.
Microsoft Pluton security processor will be enabled by default on all Copilot+ PCs. Pluton is a chip-to-cloud security technology – designed by Microsoft and built by silicon partners – with Zero Trust principles at the core. This helps protect credentials, identities, personal data, and encryption keys, making them significantly harder to remove from the device, even if a user is tricked into installing malware or an attacker has physical possession of the PC.
Although Microsoft has removed the Recall AI feature from the latest build of Windows 11 24H2, it says the feature will ship to the users enrolled in the Windows Insider program. Moreover, the company could expand the feature to all Copilot + PCs later this year. We will wait and see.
What are your thoughts about the Windows Recall feature? Please share your thoughts with our readers in the comments below.
Then, the company promised that it would eventually resume the rollout of Windows 11 version 24H2. So, if you have been eagerly waiting for the rollout to resume, there’s some good news.
Microsoft resumes Windows 11 version 24H2 rollout to the Release Preview Channel
Yesterday, Microsoft dropped a subtle notification update in the original announcement post for Windows 11 24H2 from May 22, 2024. To remind you, the tech giant took the same announcement post to announce the temporary pause earlier this month.
However, Microsoft updated the blog post to inform that it has resumed the rollout. Microsoft mentioned:
UPDATE 6/15: We have resumed the rollout of Windows 11, version 24H2 to the Release Preview Channel with Build 26100.863
Not to forget, Windows 11 Insiders has been quite busy of late, courtesy of several preview builds launched in different channels. The Canary and Dev Channel recently received Build 26236 and 2610.961, respectively.
Notably, the Canary Channel Build introduced the new account manager, whereas, the Dev Channel didn’t receive any major improvements whatsoever. For the Beta Channel, Microsoft dropped Build 22635.3785 bringing Jump Lists to the Start Menu.
Apart from preview builds for Windows 11, Microsoft rolled out updates for Windows 10 Insiders as well. That includes the KB5039299 update which adds major improvements to Windows Backup and more.
All that said, if you are willing to update your system to Windows 11 version 24H2, you can do so by enrolling in the Windows Insider Program by going to Settings > Windows Update. Moreover, we expect the public release of Windows 11 24H2 in the Stable Channel lantern this year.
In other news, Microsoft also announced that it is delaying the controversial Recall feature for the time being. If you can remember, Microsoft earlier said that it would ship Windows Recall on June 18. Nut, that’s not happening anymore. Time will tell when we will see the rollout of this feature, but we expect Microsoft to get things going within this year.
Opera browser is giving its popular Video pop-out feature a refresh. This feature lets you detach online videos from the main browser window and play them in a separate, resizable mini-window. Opera software is redesigning it now, and it can be enabled and seen in the dev version.
At present, Opera’s video pop-out offers basic controls that appear only when you hover over the window. These controls included:
At the top: Back to the top button, Settings, and Close icons.
Clicking the Settings icon showed options for ‘Automatic Pop-Out Video’ and ‘Transparency,’ with ‘Automatic Pop-Out’ turned on by default.
At the bottom: Play/Pause button, Mute button, and a Progress Bar
Opera browser redesigns the Video Popout
Just like before, you need to hover the window to view controls for the redesigned Video Popout.
The video pop-out window now has the following at the top:
Back to Top button
Automatic Pop-Out Video (used to be in settings)
Transparency button (used to be in settings)
Unmute button (moved from the bottom bar)
The bottom bar now only shows the Play button along with the Progress bar. The Mute button has been moved to the top bar for easier access.
How to enable redesigned Video pop-out in Opera browser
Launch Opera.
Visit opera://flags.
Find and enable the “Video popout Redesign” flag.
Restart the browser.
Play any video, click on the video pop-out button, or right-click and select Picture in Picture. Hover over the video in the mini window to see the newly added controls with the redesign.
This redesign is especially helpful for people who use the video pop-out feature a lot to watch videos while doing other things. The easier access and cleaner layout make it smoother to work with multiple videos at once.
Right now, the redesigned video pop-out is only available in Opera’s developer version, so it’s still being worked on. We can expect more improvements and a possible release to the regular version of Opera later on.
Microsoft recently announced that it would delay Windows Recall on Copilot + PCs since it received heavy criticism from users and security experts. The feature was supposed to debut on Surface Pro 11 too, however, it won’t happen any time soon. And, guess what? Apple isn’t sparing Microsoft for the Windows Recall blunder.
Apple mocks Microsoft over the failure of Windows Recall
As Windows Central reported, Apple’s global marketing SVP Greg “Joz” Joswiak mocked Microsoft for the Recall PR failure at the recently held WWDC talk. You may think, what exactly did he say? Well, when the host of the talk show asked if Apple was frustrated because Microsoft didn’t succeed in building trust in such features (referring to Windows Recall).
In response, Joswiak laughed and joked are we frustrated by the failing of our competitors? The answer’s no. Following the response, the talk show was full of laughter from the panelists and the audience. Watch the interaction here:
For the uninitiated, Apple is now a direct competitor of Microsoft in the AI landscape as the Cupertino Giant recently announced Apple Intelligence, Apple’s version of Copilot. Notably, Apple also partnered with OpenAI to bring ChatGPT superpowers to most of its products.
Earlier there were reports that Microsoft was worried about OpenAI’s potential partnership with Apple. Now that the Apple-OpenAI partnership is public, Microsoft is working on developing its own AI model. That too, is independent of OpenAI.
Windows Recall has been facing criticism ever since its announcement
Ever since Microsoft announced the Windows Recall feature at Build 2024, the internet went after it. Security researchers further discovered a range of issues related to the new feature. As you may know, Windows Recall records and screenshots everything you do allowing users to “recall” everything later on.
While the feature sounds good in theory with Microsoft’s constant effort to convey to users that Windows Recall is safe, the backlash continued. The controversy escalated in a manner that even the UK data watchdog stepped in to investigate the feature.
What do you think about the Windows Recall feature? Please let us know your thoughts in the comments below.
If you are eyeing one of the best business laptop deals, get the ThinkPad X1 Carbon Gen 11 now. Lenovo is offering a jaw-dropping 50% discount on this Intel 13th Gen Core i7 laptop in a limited-time flash deal.
Lenovo Thinkpad X1 Carbon debuted back in 2023 with some amazing specs. This business laptop is lauded for its compact and lightweight design. Besides, speedy SSD and excellent battery life come as the cherry on the cake. In addition, the Thinkpad X1 Carbon performed incredibly well in real-world testing.
Lenovo Thinkpad X1 Carbon is a beast of a laptop and is a no-brainer for professionals
Lenovo Thinkpad X1 Carbon boasts a balance between reliability and durability. Having rated with MIL-STD 810H standards, the performance beast withstands everyday wear and tear due to heavy usage. Plus, it is a suitable companion for travelers out there.
Thinkpad X1 Carbon flaunts a 2.8K 14-inch OLED display that comes with Eyesafe certification and a 16:10 aspect ratio. The 1080p IR hybrid webcam which comes with a privacy shutter ensures fast and secure facial recognition via Windows Hello. There’s also an integrated fingerprint reader on this laptop that offers you instant access.
Not to forget, the dual fan and rear venting combined offer improved thermals ensuring that this productivity horse stays cool even if you work all day long. Overall, if you’re eyeing a reliable and highly secure laptop that caters to professionals, the Lenovo ThinkPad X1 Carbon is a no-brainer. And, that too when it is down to $1614.5 from its original price of $3229.
You can grab this tempting offer by applying the “THINKFLASH” coupon code at checkout to bring the ThinkPad X1 Carbon home. Notably, it is one of the hot deals seen on the ThinkPad X1 Carbon lately. So, don’t think too much. Hurry up, and grab the ThinkPad X1 Carbon Gen 11 now.
Microsoft which recently announced the opening of the first cloud regions of data centers in Spain is reportedly planning to invest billions of dollars to build new data centers in Aragon, Spain’s northeastern region.
The news comes via Reuters which first reported that Microsoft is planning to invest 6.69 billion euros ($7.16 billion). The news agency quotes a local newspaper, El Heraldo, which reported that the tech giant has already applied for a construction permit to build the data center with the approval of Aragon’s regional government.
The regional government has further informed that Microsoft has promised to spread out the investment over 10 years. As you may know, Aragon has been a major cloud computing hub within Europe, and Microsoft wants to tap that region to accelerate the development of the AI economy.
Microsoft’s move to build data centers in Aragon comes after Amazon’s recent announcement
You might be wondering why Microsoft is taking its interest in Aragon. To understand this, let’s go back a month. Microsoft’s biggest cloud computing competitor, Amazon Web Services, has already announced to invest 15.7 billion euros over 10 years to build a data center in Aragon, Spain. That’s the main reason why Microsoft is planning to build a data center in Aragon.
Amazon also announced that the data centers in the Aragon region of Spain would be fully powered by renewable energy. For the uninitiated, the Aragon region is popular for its large wind power capacity. And, Amazon wants to make the most of it, so does Microsoft.
Microsoft has been investing in various regions to capitalize on the increasing demand for cloud computing services. The company recently announced a $1 billion investment to build a data center in Thailand. Moreover, the Redmond giant announced the Datacenter Community Pledge to make data centers more sustainable earlier this month.
Google and AI, these days, go hand-in-hand, and that is fair enough. The company has been aggressively integrating AI features in most of its products and services. Last week only, there were reports about the company adding a new AI feature to Google Chrome which would reimagine what search history works down the line.
Not to forget, the details about the new Chrome’s AI history search feature were missing from previous reports. However, we do have some details now.
Google Chrome’s new AI search feature will help you dig deeper into your browsing history
Google Chrome is evolving continuously, and some minute changes are made here and there. Thankfully, an avid Chrome researcher @Leopeva64 on X (formerly Twitter) has spotted new details about the history search feature.
Google has added the description of the new Chrome feature "History search", and this description CONFIRMS that it will be possible to search based on the general content of the page and not just based on the title and URL:https://t.co/gP9L35bHlOpic.twitter.com/sJG8n18MVO
For the uninitiated, Google calls the new feature History search, powered by AI. The new feature would let you search for anything in your browser history window. With AI playing its part in Google Chrome, you can not only search the browsing history based on the title and URL of the webpage but also its content.
When you turn on this AI feature in Google Chrome, you’re most likely to see an improvement in search efficiency on the dedicated search history page. That’s further applicable when you use @history followed by a search query in Chrome’s address bar.
Google and human reviewers may access your search query data to improve the new AI-powered feature
While it may sound like a great feature that Chrome users will cherish, there’s always a privacy risk associated with it since Google could feed your data to train its AI model. Unlike other times, Google has been pretty straightforward about the AI training data this time around.
The Things to Consider section provides a disclaimer stating that Google and human reviewers may have access to your data. The exact wording is quoted below, please check.
Things to Consider
When you search browsing history, your history search terms, page content of best matches, and generated model outputs are sent to Google and may be seen by human reviewers to improve this feature. As you browse sites, their page contents are saved in an encrypted form on your device.
In other words, Google or human reviewers won’t have access to details about the sites you visited, rather they can access the search queries and all. Although we’ve seen Google giving AI touch to Chrome for some time now, the new feature is likely to take things to the next level.
On June 14, 2024, Microsoft announced Windows 11 Insider Preview Build 22635.3785 for Insiders in the Beta Channel. Notably the new build under KB5039319 brings a slew of improvements including bug fixes and addresses known issues.
The biggest of all is related to Window Share, the Start menu, and the Snipping tool. Let’s jump on to all the new improvements introduced by the Windows 11 Insider Preview Build 22635.3785.
The Beta Channel Preview Build 22635.3785 introduces several features and fixes several known issues
One of the biggest changes coming with Beta Preview Build 22635.378 is the ability to share content to an Android device using Windows Share. You can use this feature by pairing your Android device to your Windows PC using the Link to Windows app on Android. The Phone Link feature on your PC also allows you to use this feature seamlessly.
Talking of other changes in Beta Preview Build 22635.378, right-clicking on the app pinned to the Start Menu will display jump lists for apps that have them such as PowerPoint. Not to forget, Microsoft is also making some adjustments to the Windows Spotlight experience for desktop users. You can check the same in the image below.
Another big improvement is related to the Snipping Tool. Microsoft is rolling out an update for the Snipping Tool, version 11.2405.31.0 and newer. It introduces automatic save for screen recordings and is available for Insiders in the Beta and Release Preview Channel.
The new feature will ensure that your recordings are automatically saved to Screen Recording folders (Videos folder of your PC). If you want to turn this off from the settings of the Snipping Tool. Lastly, the Windows Insider Beta Preview Build 22635.378 brings the ability to make fast and safe checkout in the Store using Microsoft Wallet.
As mentioned earlier, this preview build further comes with several bug fixes related to Taskbar & System Tray, File Explorer, and Start Menu. It also addresses general issues and all those related to Widgets, Settings, and Start Menu. You can learn more about it by clicking here.
Many websites use geolocation to provide location-based services, like weather forecasts or nearby restaurants. But what happens when you’ve disabled geolocation on your Windows system and a website requests your location?
Previously, Chrome might not have provided a clear explanation for why it couldn’t access your location. This new update to Chrome integrates with Windows’ system-level location permission, offering a more informative message in these situations.
Chrome makes finding your location easier on Windows
Many websites use geolocation to provide location-based services This change is part of Google’s work to better “integrate Windows Location and Wi-Fi Permissions” with Chrome. When you’re on Windows and a website requests geolocation, Chrome’s geolocation bubble will now check your system-level settings.
If geolocation is disabled there, the bubble will display a clear message: “Turned off in Windows System Preferences” (sort of) and provide a helpful “Open Settings” button. Clicking this button takes you directly to the Windows privacy settings where you can enable geolocation if you choose to.
How to Check Your Location Settings
Chrome:
Open Chrome and click the three-dot menu in the top right corner.
Select “Settings” and then navigate to “Privacy and security.”
Click on “Site Settings” and then choose “Location.”
Here you can see which websites have permission to access your location and make changes as needed.
Windows 11
Open the Settings
Visit Privacy & security > Location
Ensure Location Services is enabled
Under “Let Apps access your location,” you can toggle the switch for individual apps, including Chrome.
This update will bring the following benefits to users:
The geolocation bubble now explains why Chrome can’t access your location, avoiding confusion.
With a single click, you can navigate to the relevant Windows settings to enable geolocation if needed.
The update lets you manage your privacy preferences more effectively when it comes to geolocation.
This change by Chrome can make a big difference for Windows users. By providing a more informative geolocation bubble and easier access to settings, Chrome provides users with a clearer understanding of their privacy options.
Wondering how to get a Chrome download offline installer? Setting up Chrome can be challenging in areas with unstable internet connections.
Luckily, with the offline installer, you can save time and bandwidth, especially when installing the browser on multiple devices. I’ll demonstrate the process below, so let’s jump right in!
Connect your PC to the internet to access the Chrome standalone setup page. The standalone setup tool is different from the regular online one, and it’s exactly what you need in this situation.
Scroll down and tap “Other Platforms.”
Select the appropriate version for your operating system (Windows, macOS, Android, iOS or Linux).
After selecting your Operating System, tap “Accept and Install.” The download will start automatically.
5. The file will be saved on your PC in the Downloads section.
Once the download is complete, you can transfer the file to another PC to install Chrome without worrying about an internet connection. Double-tap the installer file and follow the on-screen instructions.
After installing the browser, you can create a handy shortcut using our guide on how to add Chrome to the desktop for faster access.
Download from Third-Party Websites
You can get the offline installer for Chrome from reputable third-party websites like Softlay. However, it’s always best to first attempt downloading from the official website. You’ll want to avoid security risks associated with unreliable third-party sources that may infect you with malware.
How to Download Chrome Online Installer
You can also go for the traditional route and get the regular, online installer via official or third-party sources. However, it requires an internet connection.
Tap “Accept and install.” Wait for the download to complete.
Go to your downloads on your PC to access the ChromeSetup file.
Double-click on the file and follow the onscreen instructions to complete the installation.
Use a Third-Party Website
You can also download the Chrome online installer through a reputable third-party website like uptodown. However, I advise you to use the official website before you try any other sources.
It always provides the most up-to-date version of Chrome, including the latest features, security patches, performance improvements, and crash fixes.
FAQs
What is the Chrome offline installer?
The Chrome offline installer is a full standalone setup file that lets you install Google Chrome without an internet connection. It includes all required components in a single package.
When should I use the Chrome offline installer?
Use it when installing Chrome on multiple PCs, setting up a system without internet access, or avoiding issues caused by network restrictions, proxies, or unstable connections.
Where can I download the official Chrome offline installer?
You can download it from Google’s official Chrome download page by selecting the Download Chrome for another platform or Offline installer option. Always avoid third party sources to prevent malware risks.
Does the offline installer auto update Chrome?
Yes. After Chrome is installed, updates work normally through Google Update. The offline installer only affects the initial installation process.
By following these steps, you can easily get the Chrome download offline installer. Overall, you should prioritize downloading the app from the official website to get the latest version. Moreover, if you have any problems with uninstalling or opening the app, we’ve got you covered.
In the ever-evolving digital landscape, YouTube is once again at the forefront of innovation, testing two intriguing features that might change how we interact with the platform. Imagine jumping into a live chat with a quick summary of what’s been discussed or effortlessly sharing your favorite channels using a simple QR code.
That sounds handy, right? That’s exactly what YouTube is experimenting with, along with some other nifty additions to enhance user experience.
For starters, YouTube is experimenting with AI-generated live chat summaries. This feature is a godsend for those who’ve ever felt lost in a sea of messages during a livestream.
Using AI to summarize the chat’s highlights, newcomers can quickly catch up and dive into the conversation without missing a beat. However, it’s worth noting that this feature is currently limited to English and channels with super active chats.
To help you more quickly understand and participate in the exciting conversations that happen via YouTube live chat, we’re experimenting with AI-generated live chat summaries. If you’re in the experiment group, you’ll see a banner display at the top of the live chat when you join a live stream that’s accrued sufficient chat activity prior to you joining.
Then there’s the introduction of channel QR codes on YouTube, a straightforward yet effective way for creators to share their content widely.
Whether online or offline, QR codes can be easily scanned on YouTube, directing potential new followers straight to a creator’s channel. This simple tool could significantly lower the barrier to discovering new and exciting content.
To make it easier for creators to share their channels with others, we’re experimenting with channel QR codes. If you’re a creator in the experiment, you can share your channel QR code by navigating to the You tab on the bottom menu of the app > tapping the chip under your handle that says “Share your channel” > tapping “QR code” in the menu that pops up. Viewers can find and share your QR code by tapping the three-dot menu on your channel page > tapping Share > selecting the QR code ? The codes are scannable both online and offline. We’re testing this feature out with a small group of creators at first but we’ll let you know of our expansion plans in the future!
But YouTube isn’t stopping there. The platform also tests user-generated effects for YouTube Shorts, allowing creators to add a personal touch to their short-form videos.
And for those who’ve ever wished for a more intuitive way to search for content, YouTube is exploring the integration of Google Lens into its search bar. This would enable users to search for videos by simply snapping a picture of an item.
We’re experimenting with the ability to search on YouTube via Google Lens ? ? If you’re in the experiment, you’ll see a Lens button on in the search bar. From there, tap the Lens button to search what you see and receive relevant YouTube content as your search results.
While these features are currently in the testing phase and available to only a small group of users, the potential for a wider rollout is exciting.
YouTube’s commitment to innovation is clear, and these tests underscore the platform’s ongoing efforts to enhance the user experience, making the platform more interactive, accessible, and engaging for its billions of users worldwide.
It’s also worth mentioning that the company has been experimenting with horizontal video suggestions; frankly, it doesn’t look that bad.
So, what do you think? Would you be excited to use these features? YouTube’s experiments could shape how we interact with video content online, and I, for one, can’t wait to see what’s next.
I thoroughly tested this software and I’m here to discuss its standout features, interface, customer support, and pricing.
Sounds good? Let’s roll in!
Features
To write an authentic Revo Uninstaller Pro review, I tested this software and examined how well it performed.
Now let me share my experience with its features:
1. Forced Uninstall
This option is designed to tackle situations where the built-in uninstaller doesn’t work or is missing. To be more specific, it allows you to remove applications that are damaged, partially installed or removed, or lack an uninstaller.
In addition, Forced Uninstall can perform leftover scans on applications installed without using Revo Installer Pro. It uses an advanced scanning algorithm that ensures a thorough scan while maintaining high accuracy.
To test it, I clicked on the Forced Uninstall button from the main window.
Then, I typed “Driver Easy” as the program name.
As a result, Revo Uninstaller Pro automatically fetched some information like the complete Program Name, Type, and Uninstall Command.
To move ahead, I clicked Next.
Then, the software created a full Registry backup and System Restore Point, before initiating the built-in uninstaller.
I clicked Yes to confirm.
Within a few seconds, Revo uninstalled Driver Easy from my system.
However, I recommend using this feature as a last option after trying the standard uninstall process.
2. Quick Uninstall
Quick Uninstall is mainly useful if you want to uninstall multiple programs in one go. This feature helps to make the application removal process as simple as possible.
For instance, I navigated to the All Programs sub-window, selected the application, and clicked the Quick Uninstall button.
I clicked Yes to permit Revo to uninstall the selected programs quickly.
Before proceeding, Quick Uninstall first created a System Restore point and Registry backup for the complete programs queue.
It then executed the built-in uninstaller of each program and started automatic leftover scans.
Lastly, when I clicked Continue, Revo silently executed the uninstallers to speed up the process and minimize user involvement.
However, unlike removing programs individually, this feature doesn’t offer the same level of customization, such as choosing the uninstall order.
3. Uninstall Browser Extensions
Browser Extensions list all of the installed extensions, grouped by browser to provide a better overview. Specifically, it supports the following services:
Mozilla Firefox
Google Chrome
Microsoft Edge
Microsoft Internet Explorer
Opera.
To test it, I clicked on the Browser Extensions option from the left side panel, selected NordVPN, and clicked Remove.
Consequently, Revo asked me for permission and deleted the selected extension within minutes.
However, the software might not be able to remove all traces of a browser extension, such as its settings or the modified data.
4. Uninstall Windows Apps
Revo Uninstaller Pro lists all pre-installed Windows apps separately from the regular programs for better organization. This feature helps you to remove any desired software with a single click.
Additionally, you can get rid of multiple apps for all users with the Quick Uninstall feature.
For instance, I navigated to the Windows Apps section, selected the Dolby Audio Premium Windows app, and clicked Uninstall.
Then, I marked the checkboxes to create a System Restore Point and a full Registry Backup and clicked Continue.
Then, Revo executed a scan and displayed the leftover Registry items.
Likewise, it showed the found leftover files and folders.
As the last step, I clicked Finish to delete the selected leftover Registry items, files, and folders of Dolby Audio Premium.
Keep in mind that uninstalling certain Windows apps might require administrative privileges which Revo doesn’t have by default.
5. Logs Database
Revo Uninstaller Pro has an extensive collection of trace logs for different programs. Its developer team generates these logs using real-time monitoring features and stores the data on the related servers.
They behave like the trace logs you can create manually and allow you to perform additional cleanup.
To view them, I clicked on the Logs Database option from the left side panel.
As a result, the software displayed a list of programs including details like:
Program Name
Program Version
Windows Bits
Windows Version.
However, some users might be concerned about the logs being stored on Revo’s servers, even though they’re anonymized.
6. Hunter Mode
Hunter Mode is another stand-out feature that allows you to manage or uninstall automatic startup programs with ease.
Unlike Forced Uninstall or Quick Uninstall features, Hunter Mode is handy in situations where:
You don’t remember the exact name of the program.
The program isn’t listed in All Programs or Autorun Manager.
For instance, I clicked on the Hunter Mode from the left-side panel.
Consequently, Revo Uninstaller Pro’s windows disappeared and a new target icon appeared at the upper right corner of my desktop.
Next, I dragged and dropped the target over the OBS Studio app shortcut.
From the on-screen menu, I clicked on the option to Uninstall OBS Studio. Within a few seconds, Revo deleted the app using its official installer.
However, Hunter Mode might not be able to detect programs that run silently in the system background.
7. Additional Cleaning Tools
Some of the additional cleaning tools include:
Autorun Manager: Enables or disables the Windows startup application and displays their information
Windows Tools: Gives you one-click fast access to 10+ common Windows tools
Junk Files Cleaner: Finds and removes several types of unnecessary and junk files
Evidence Remover: Permanently erases the leftover files and folders from the hard disk
History Cleaner: Deletes temporary internet files
Unrecoverable Delete: Physically erases all of the selected files and folders
Backup Manager: Manages backup information that Revo stores.
Interface
Revo Uninstaller Pro has a well-organized and user-friendly interface. You’ll find most of its features on the left side panel. Even if you aren’t tech-savvy, you’ll find it easy to use.
Additionally, you can easily switch from one category to another without facing any navigational issues.
I’ve used several uninstallers to date. However, in my opinion, Revo stands out from its competitors because of its easy-to-navigate interface.
Customer Support
Revo Uninstaller Pro provides customer support through Email and Live Chat channels. Moreover, it maintains a knowledge base of user manuals, video tutorials, and a FAQ page.
Pricing
Revo offers both a Pro and Pro Portable version. Here’s a quick comparison table:
Feature
Pro
Pro Portable
Pricing Per License
$24.95
$29.95
Forced Uninstall
Yes
Yes
Quick Uninstall
Yes
Yes
Scanning for leftovers after the standard uninstall
Yes
Yes
Uninstall Windows Apps
Yes
Yes
Remove Browser Extensions
Yes
Yes
Free Professional Technical Support
Yes
Yes
Logs Database
Yes
Yes
Real-Time Monitoring of System Changes
Yes
Yes
Additional Cleaning Tools
Yes
Yes
Multi-level Backup System
Yes
Yes
Full Registry Backup
Yes
Yes
Suitable for use with a USB Stick
No
Yes
Support for Unlimited Devices
No
Yes
Revo Uninstaller Pro also offers a 30-day free trial to explore its features. Furthermore, you can purchase its subscription through PayPal, Visa, and Wire Transfer, with a 60-day money-back guarantee.
There isn’t a free trial for the Pro Portable version.
Notably, the service announced a 60% discount on its birthday. So grab it before it ends!
Revo’s primary use is the complete removal of programs from the system so you can free up space on your hard disk. Some of its significant features include Forced Uninstall, Quick Uninstall, Hunter Mode, Removing Windows Apps, Uninstalling Browser Extensions, Viewing Logs Database, etc.
However, some tools carry the risk of accidentally deleting important user data, if not used with caution.
Overall, I’d give it a solid 7.5/10.
Have you already used it? Feel free to share your feedback in the comments below!