Fix: Power Automate Network Error
Don't let a poor connection make you go manual
5 min. read
Published on
Read our disclosure page to find out how can you help Windows Report sustain the editorial team. Read more
Key notes
- A Power Automate network error can be fixed with a quick system requirement check and rebooting your router.
- If that doesn't work, ensure your firewall/antivirus isn't in the way.
- For these and more tips, find out what WindowsReport experts have in store for you.

We can all agree on the convenience automation software brings into our lives, so when the Windows 11 Power Automate app throws the network error, tasks can become a huge burden to bear.
If network issues are anything to go by, they’re quite easy to fix, so keep reading to find out how we dealt with this issue.
What is the Power Automate network error?
It means that Power Automate cannot communicate with the server, which prevents you from saving your changes or accessing it on your web browser. Your antivirus program may be blocking the software from connecting to the Web or some problematic extensions are interfering with the connection.
How do I fix Power Automate’s network error?
Jumpstart your troubleshooting journey with these basic steps:
- Check for app updates as well as browser updates and ensure your device meets the system requirements to run Power Automate.
- Verify that you have a working and stable internet connection.
- Try another browser and restart your device.
1. Check the Service Health
- Navigate to your browser and log in to the Microsoft Admin Center.
- Go to the About admin roles Service health>Health > Service health.
- Look for Power Automate and check any advisories linked to it.
If there are any alerts or issues related to your Power Automate service, you can resolve them by following the instructions given in the alert messages.
Also, ensure to check the integrated service for server status updates. For instance, if you’re using Power Automate with Microsoft Teams, check whether Teams is down.
2. Run the connection troubleshooters
2.1 Run the Network adapter troubleshooter
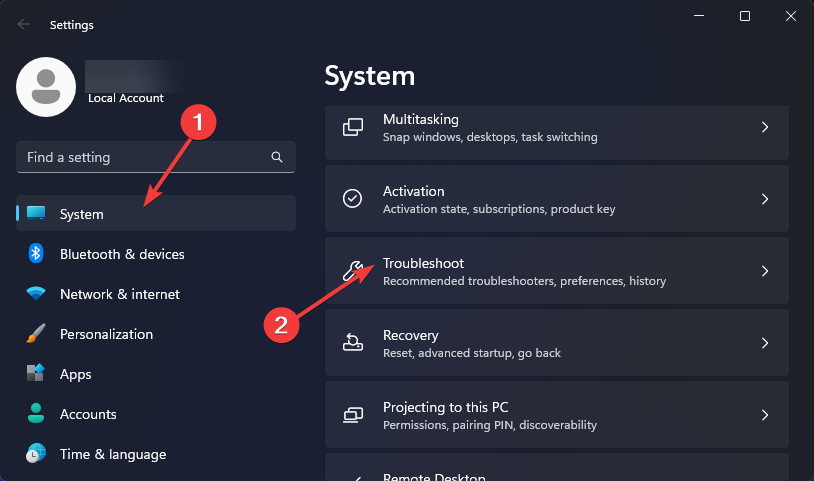
- Hit the Windows key and click on Settings.
- Click on System, then select Troubleshoot.
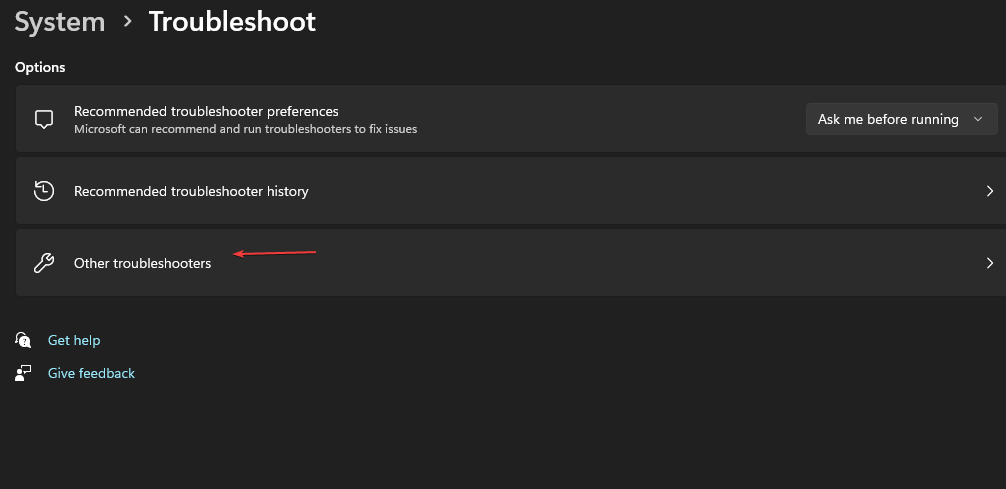
- Select Other troubleshooters.
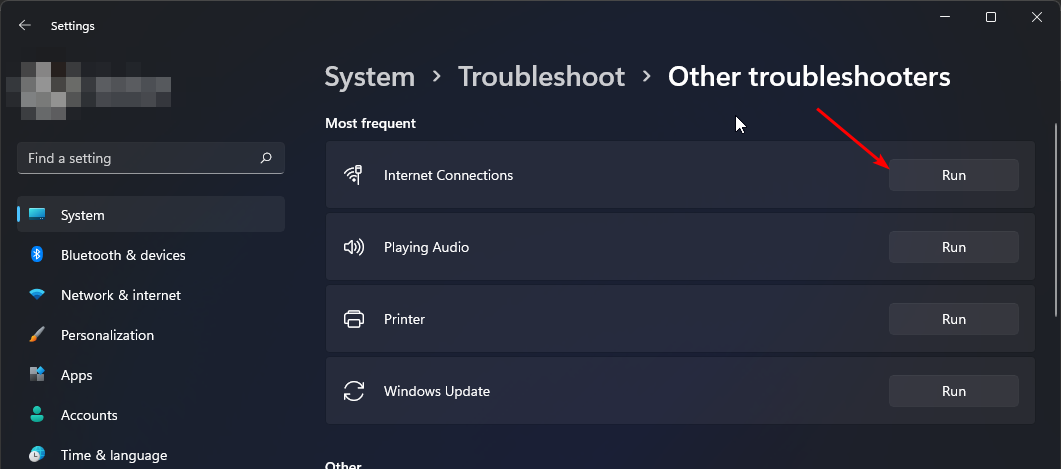
- Locate the Network Adapter troubleshooter and click on the Run button next to it.
2.2 Run the Internet Connections troubleshooter
- Hit the Windows key and click on Settings.
- Go to System, and click Troubleshoot.
- Now click Other troubleshooters.
- Locate Internet connections, and click Run.
- Follow the onscreen prompts to complete the process.
3. Disable the firewall temporarily
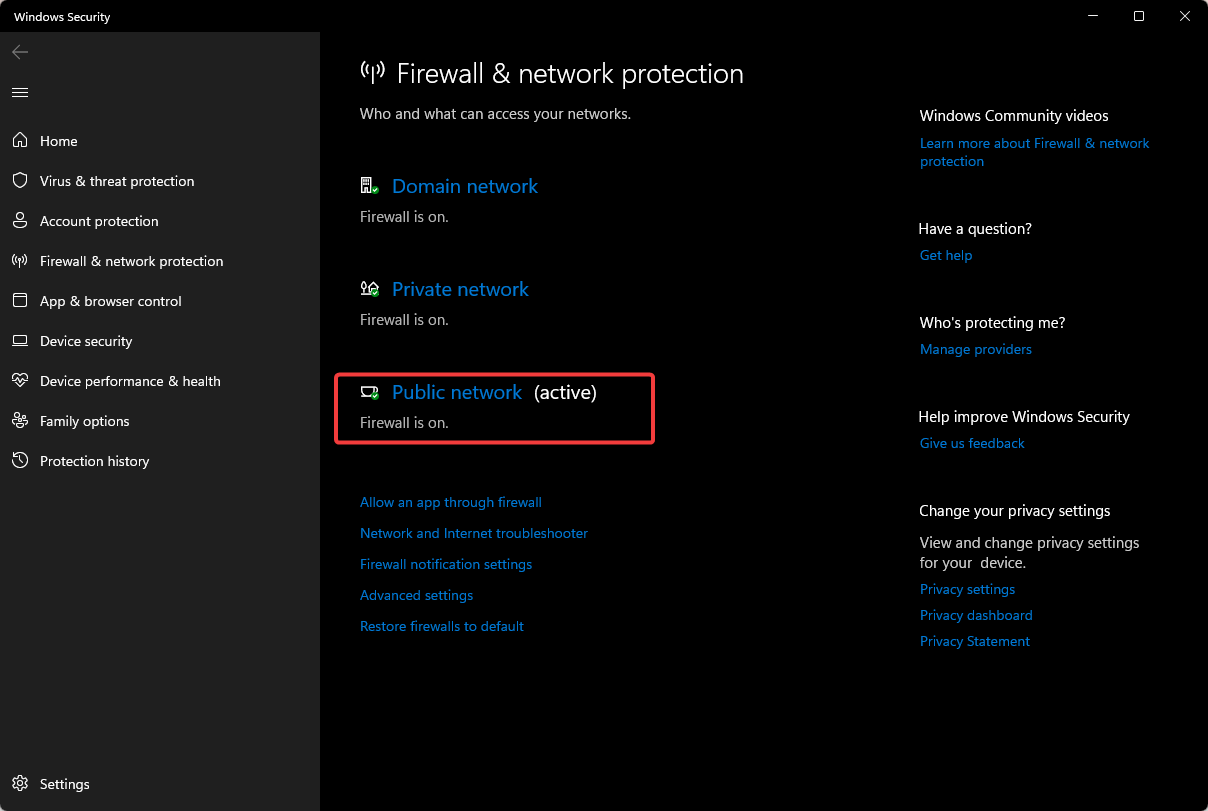
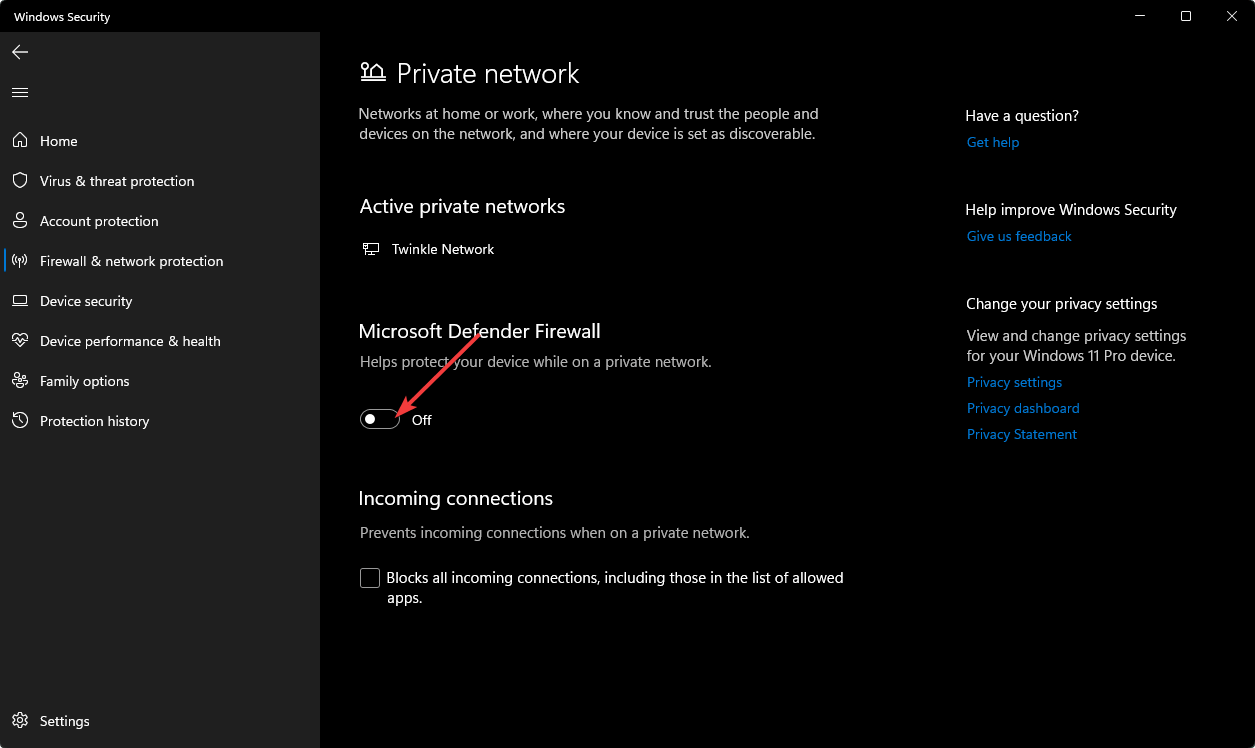
- Hit the Start menu icon, type Windows Security in the search bar, and click Open.
- Click on Firewall & network protection, then select Public network.
- Locate Microsoft Defender Firewall and toggle the off button.
If the network error disappears with your firewall disabled, you may have to whitelist Power Automate to prevent a repeat of this issue.
4. Delete cache
4.1 System cache
- Hit the Windows key, then click on the Settings menu.
- From the left window pane, select System, then, from the right window side, navigate to Storage.
- Wait for your OS to scan and assess the temporary cache files stored on your system then click on the Temporary files option.
- Scroll down, then select the files that you want to delete, and click on the Remove files button.
- In the pop-up window, click on Continue to complete the process.
- Now, your selected files are deleted.
4.2 Browser cache
- For this step, we shall be using the Chrome browser.
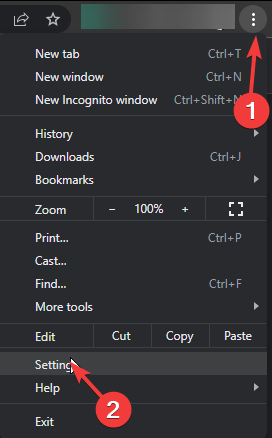
- Launch your Chrome browser and click the three vertical ellipses in the top right corner.
- Select Settings.
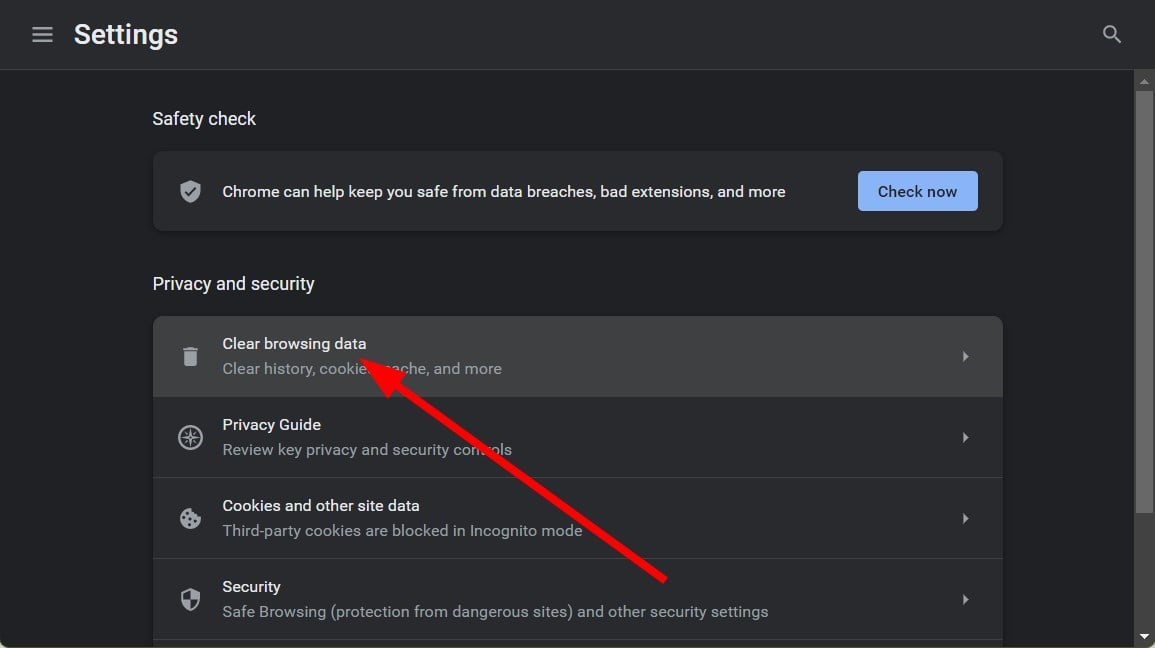
- Click on Privacy and security, then select Clear browsing data.
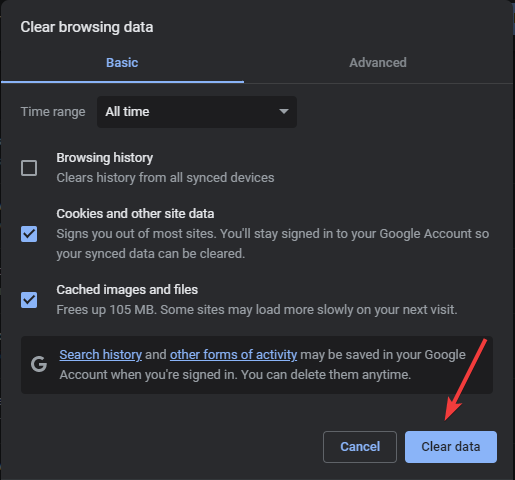
- Check Cookies and other site data and Cached images and files, then hit Clear data.
Cache files may accumulate over time and become corrupted. This can affect how certain apps work, so clearing them will allow you to free up disk space as well as recreate new files.
5. Disable browser extensions
- Open your Chrome browser, click the ellipsis near the top right, hover the cursor over Extensions, and then select Manage Extensions from the flyout menu.
- Disable the toggle for all the extensions listed here.
- If the Power Automate Network error message disappears, re-enable the extensions one at a time, wait for the error to reappear, and as soon as it does, the extensions enabled last is the problematic one.
- Finally, click the Remove button under that extension and confirm the change.
Adblockers and tracking extensions topped the list for this network error. Privacy Badger was particularly notorious, so you may want to restrict these add-ons or switch to Incognito mode whenever you’re using Power Automate.
6. Reinstall the Power Automate app
- Hit the Windows key and click on Settings.
- Select Apps, then click on Apps & features.
- Search for the Power Automate app, click on the three ellipses, and select Uninstall.
- Confirm uninstallation in the next prompt.
- Go to the Microsoft Store, search for the Power Automate app, and click Install.
As essential as Power Automate is in automating tasks in Windows 11, a network error halts any activity. If it were any other, you could probably get away by recreating the workflow in case you made a mistake in your initial setup.
We admit that it is a fairly complex app, so you might need a little in-depth explanation on how to navigate and use Power Automate.
And if you’re having trouble getting past the network error, you can try your luck with other automation software. There are a handful of options out there, and you’re bound to find one that works for you without a lot of technical know-how.
Were you able to get past the network error? Let us know in the comment section below.









User forum
0 messages