Fix: Adobe Premiere Pro Not Using GPU [5 Ways]
Reinstall Premiere Pro for a fresh start
Key notes
- Adobe Premiere Pro is a professional video editing software that can be used for editing videos and audio files.
- The software uses GPU processing power to speed up the work, however, some users reported that they are not able to see any speed improvements in their system.
- If you are using an older version of Premiere Pro, then it may not be able to utilize the GPU in order to render your videos at high frame rates.

Adobe Premiere Pro is a cult favorite among creatives so it’s not uncommon to find it in a handful of people’s PCs. That being said, it has its own fair share of glitches and one of them is not using the GPU.
The video editing software renders a lot of graphics so it is expected that the GPU is an essential ingredient if you want to get the best performance out of it. In this article, we look at ways to ensure that Premiere Pro is using your GPU so that you can enjoy using the program.
Why is Adobe Premiere Pro not using the GPU?
When you render, like when you export an image, Premiere Pro uses the GPU. Sometimes, this does not happen because of the following reasons:
- No dedicated GPU – Whereas each PC comes with an integrated GPU, it can only do so much. You will need a dedicated GPU especially if your tasks require a lot of rendering.
- Corrupted/missing driver – If for some reason your system ended up with corrupted drivers or during an update you have missing drivers, Premiere Pro may not use the GPU.
- Unrecognized GPU – If you have a dedicated GPU but for some reason, your PC cannot detect the second GPU, Premiere Pro may not be able to use the GPU to render graphics.
- Older GPU – If you have an older computer with a motherboard that doesn’t support the latest graphics technology, then Adobe Premiere Pro won’t be able to use the GPU.
- Outdated drivers – Over time, drivers become outdated and the video driver becomes unsupported or incompatible. It is best practice to update your drivers regularly.
How can I fix Adobe Premiere Pro Crack not using the GPU?
A few checks that may be able to help before any advanced troubleshooting include:
- Check if you have installed the correct version of Adobe Premiere Pro.
- Ensure there are no conflicting applications using the same graphics card as Adobe Premiere Pro.
- Make sure you have enough memory available for your machine (RAM).
- Uninstall any third-party add-ons that may be interfering with Premiere Pro.
1. Adjust your graphic settings
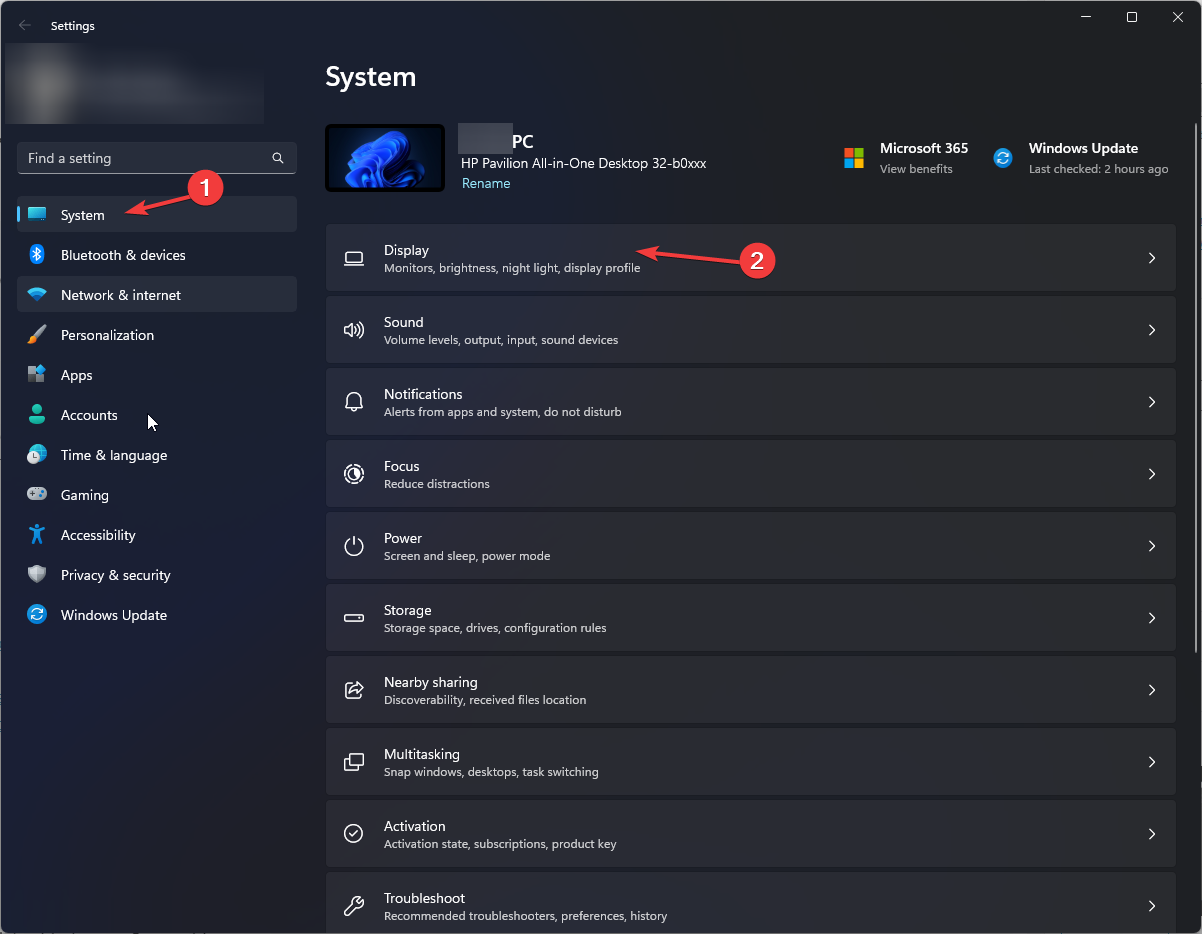
- Click on the Windows key and click on Settings.

- Click on System on the left pane then select Display.
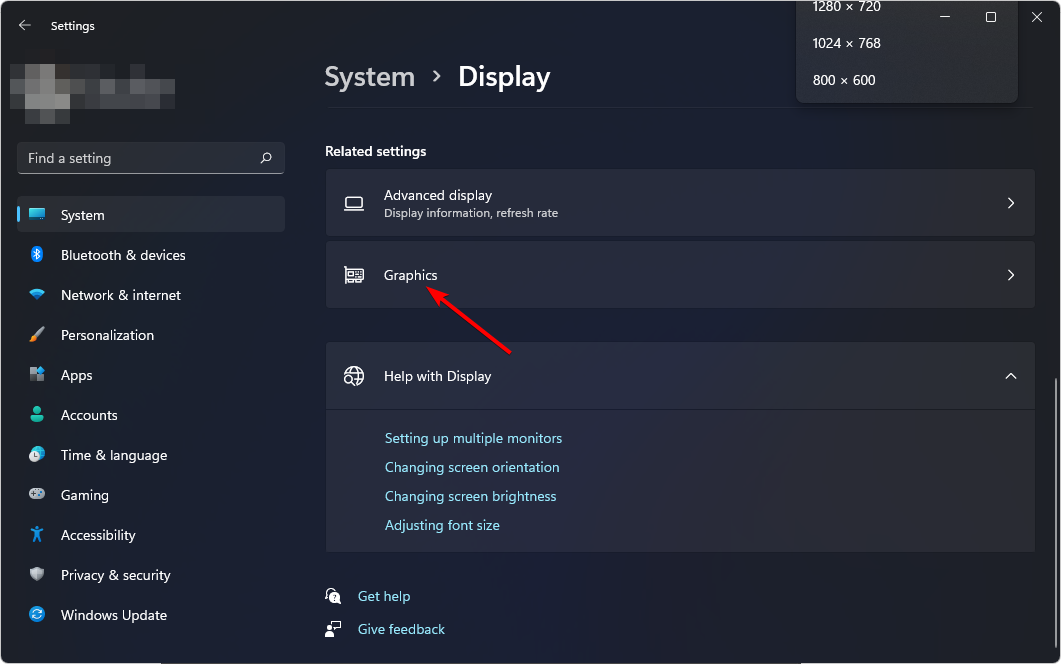
- Under Related settings, click on Graphics.
- Select Adobe Premiere Pro from the list, and click on Options.
- Now, choose High Performance and click Save.

2. Enable hardware acceleration
- Run Adobe Premier Pro and then click on Files on the top left side and select Project Settings.

- Click on General from the extended drop-down menu.

- Hit on the arrow to open the drop-down menu, Renderer, under the Video Renderer and Playback section then select Mercury Playback Engine GPU Acceleration.

- Click OK to save the changes.

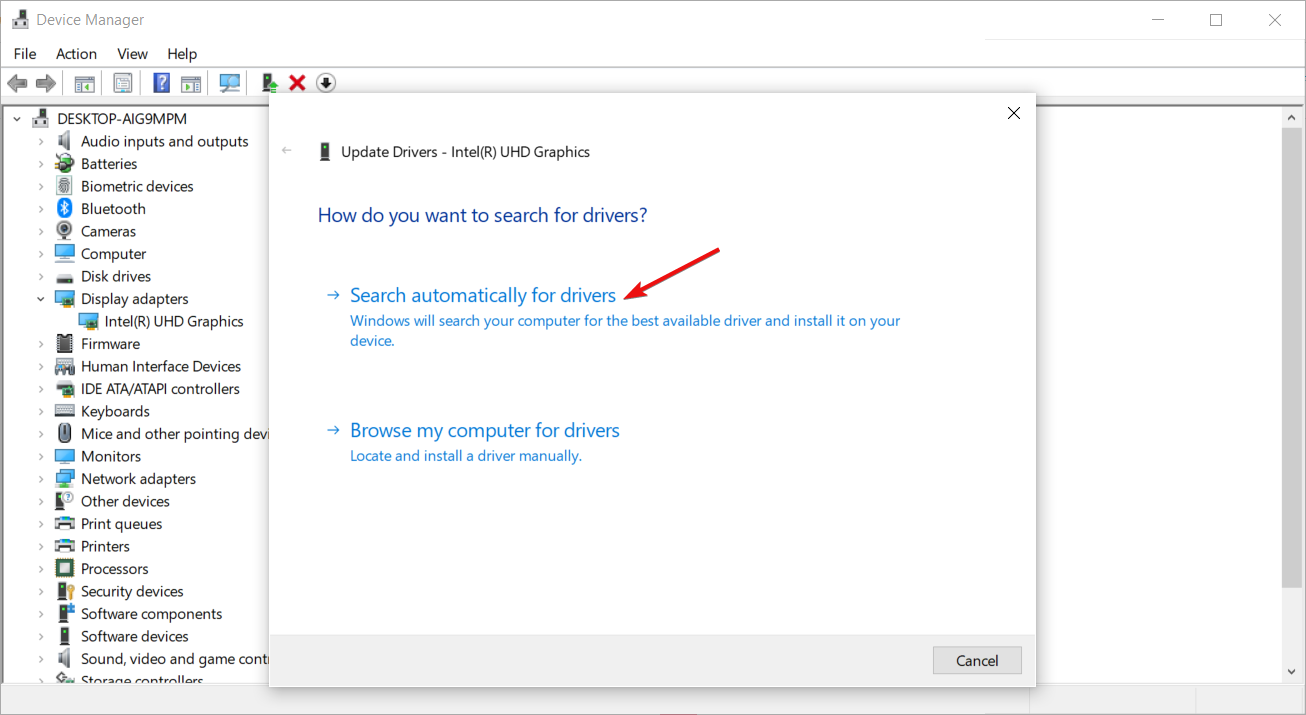
3. Update your graphics drivers
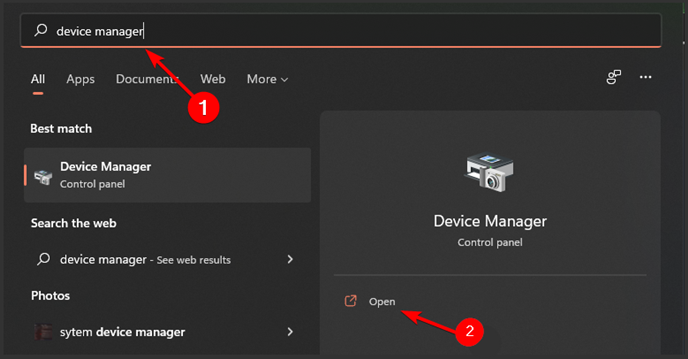
- Click on the Start Menu icon, type Device Manager in the search bar, and click Open.
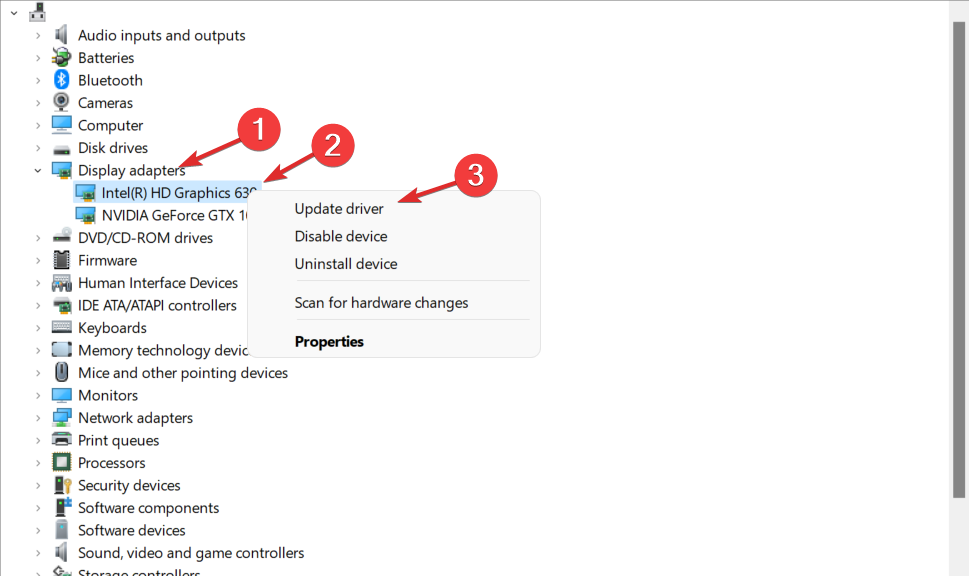
- Navigate to Display adapters to expand, right-click on your graphics card, and select Update driver.
- Select Search automatically for drivers.
An easier method would be to install a driver updater utility especially if you’re not conversant with manually updating drivers. Powerful tools such as PC HelpSoft Driver updater can be of great welp when dealing with outdated drivers.
⇒ Get PC HelpSoft Driver Updater
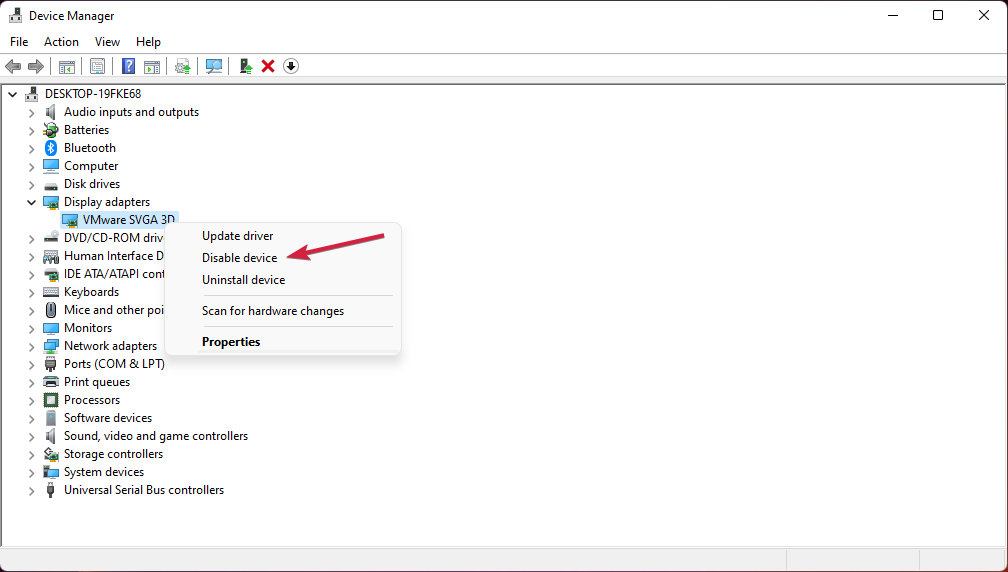
4. Run Premiere Pro on your dedicated GPU
- Click on the Start Menu icon, type Device Manager in the search bar, and click Open.
- Navigate to Display adapters to expand, right-click on your graphics card, and select Disable device.
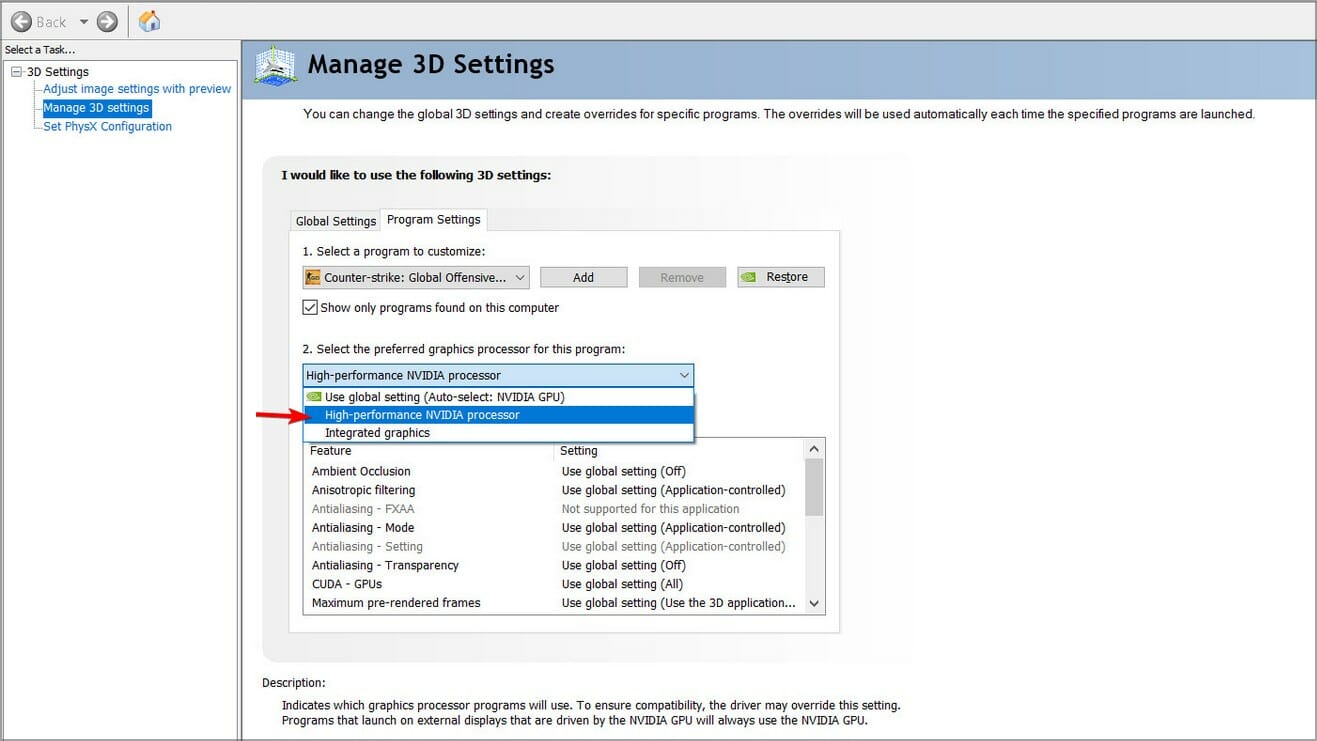
- Next, launch your dedicated graphics card control panel (In this case, Nvidia Control Panel).
- Select Manage 3D settings from the navigation pane on the left.
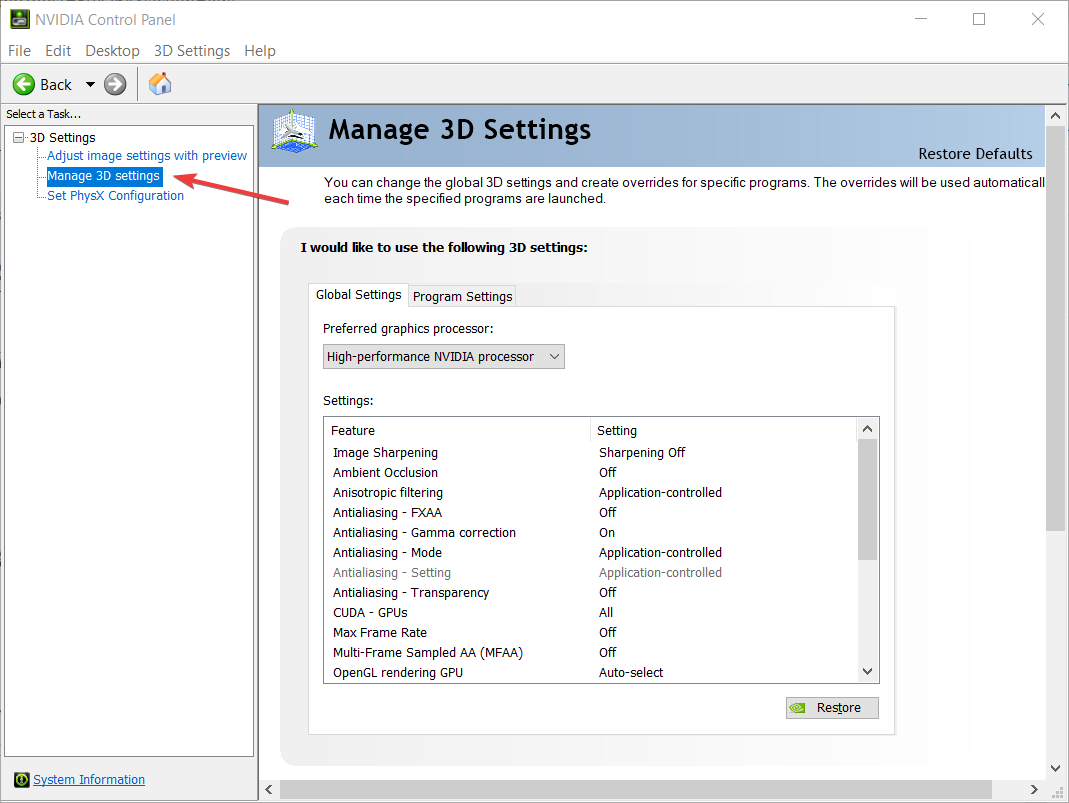
- Choose a High-performance NVIDIA processor from the Preferred graphics processor dropdown menu.
- Restart your PC.
5. Reinstall Adobe Premiere Pro
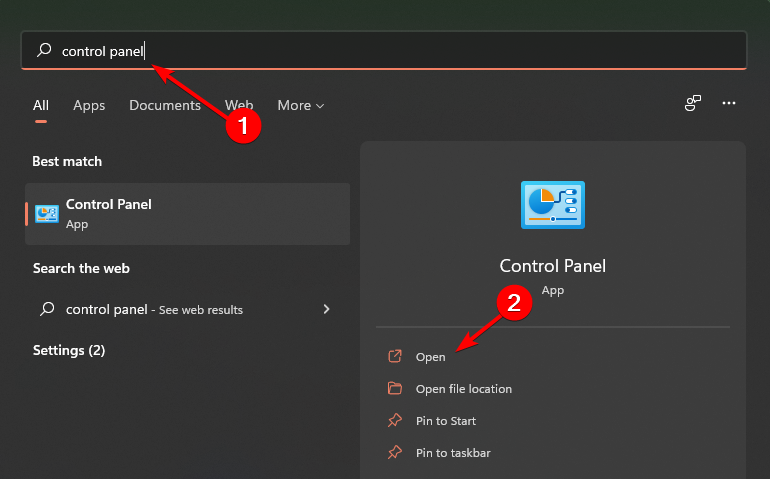
- Hit the Windows key, type Control Panel in the search bar and click Open.
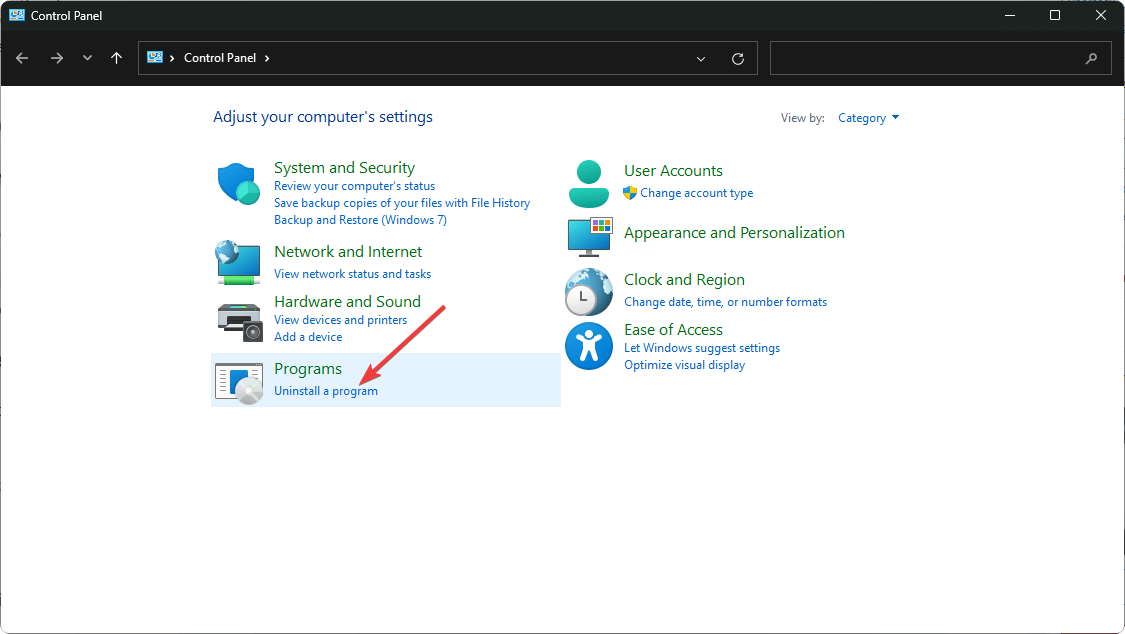
- Select Programs and click on Uninstall a program.
- Locate Adobe Creative Cloud application and click on Uninstall.

- Select Remove to get rid of all damaged settings and third-party plugins.
- Wait for the uninstallation process to complete and then restart your computer.
- Redownload the Adobe Creative Cloud application and look for Premiere Pro.
- Click on the Install button alongside the app.

And that’s how to ensure Premiere Pro uses the GPU for rendering. If the issue was Premiere Pro export not using the GPU, or full video not exporting, you can try renaming the file and see if it helps.
That’s all we had for this article but should you experience any other related issues such as the Adobe error 16, feel free to refer to our comprehensive guide for a quick fix.
Let us know of any other tips and tricks up your sleeve in the comment section below if you were facing the same issue.
Read our disclosure page to find out how can you help Windows Report sustain the editorial team. Read more


Improve this guide


User forum
0 messages