7 Quick Ways to Fix px.dll Not Found Error
Get a new copy of the DLL file
4 min. read
Updated on
Read our disclosure page to find out how can you help Windows Report sustain the editorial team. Read more
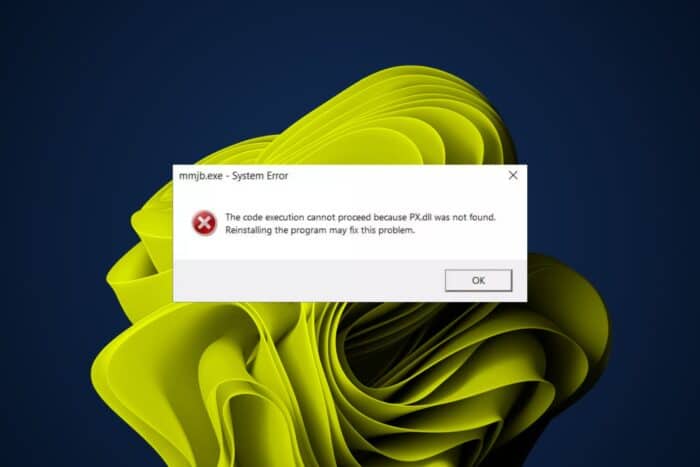
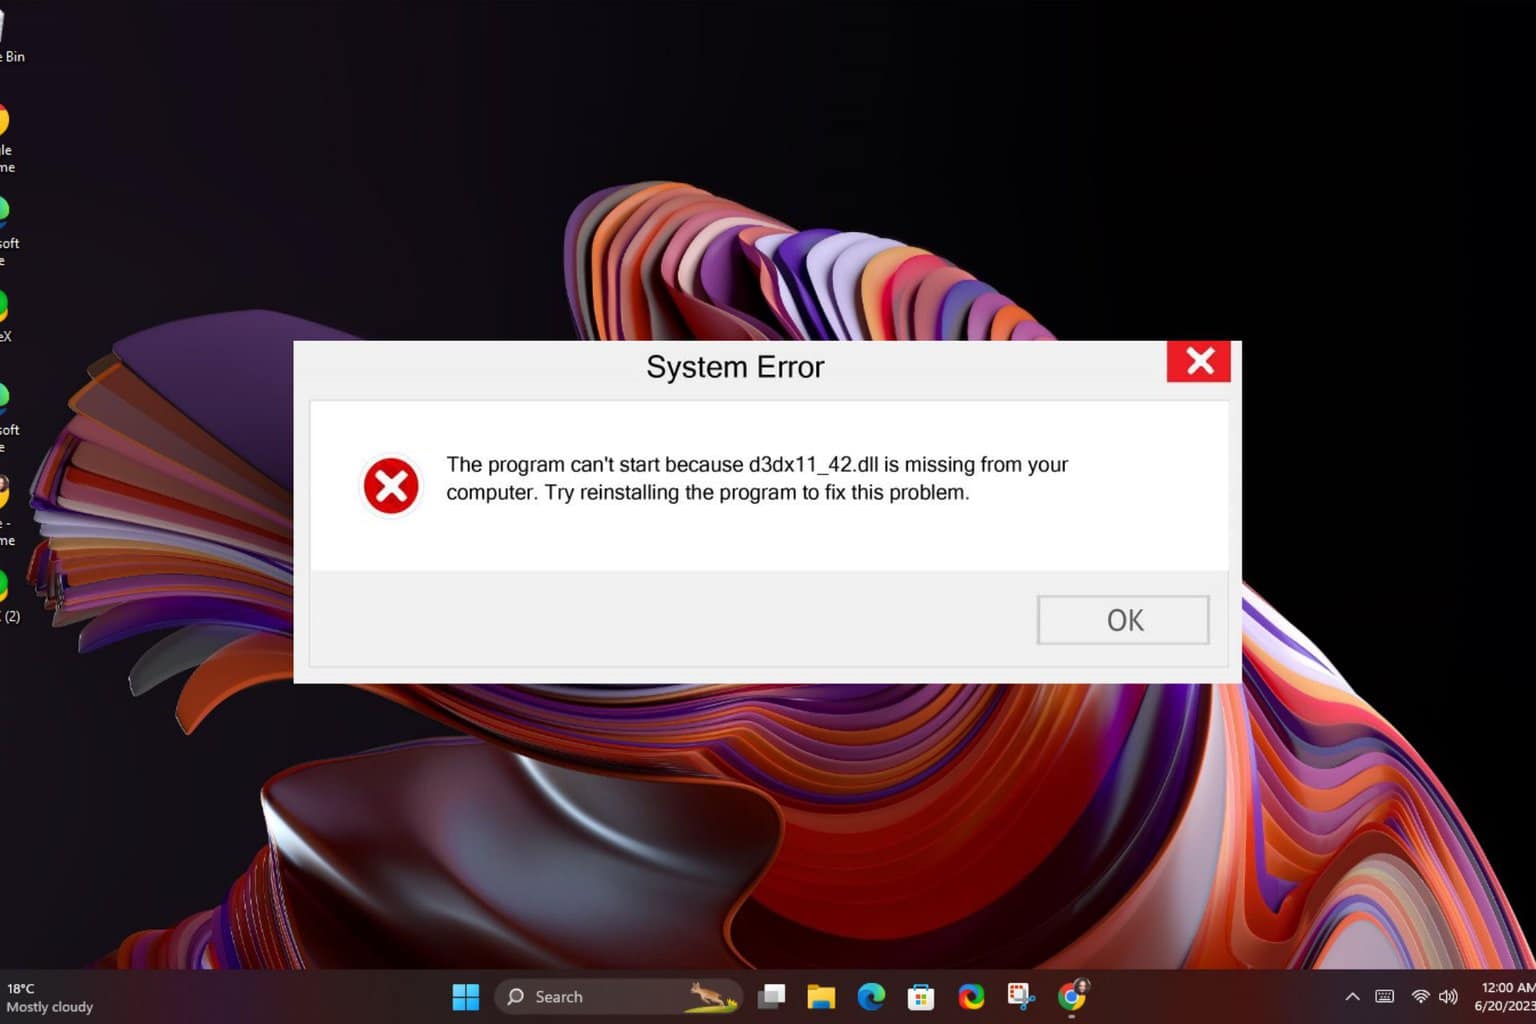
The px.dll is a critical DLL file commonly found in audio software and is used in burning CD/DVDs. When it is missing or cannot be found, you cannot run the software or burn the CD/DVDs.
The main reasons why it may be missing are software corruption, outdated software or a malware infection. For some, a recent upgrade of the program led to the DLL file missing so it could also be triggered by an incomplete installation.
How can I fix px.dll related errors?
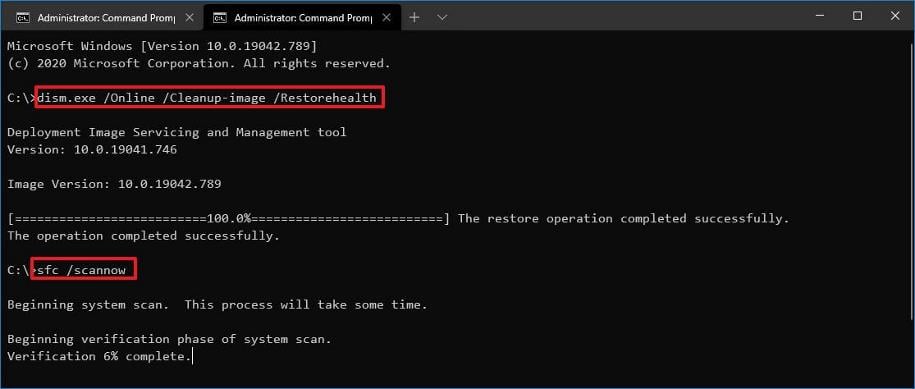
1. Perform DISM and SFC scans
- Hit the Start Menu icon, type cmd in the search bar, and click Run as administrator.
- Type the following commands and press Enter after each one:
DISM.exe /Online /Cleanup-Image /Restorehealthsfc /scannow
2. Reinstall the audio drivers
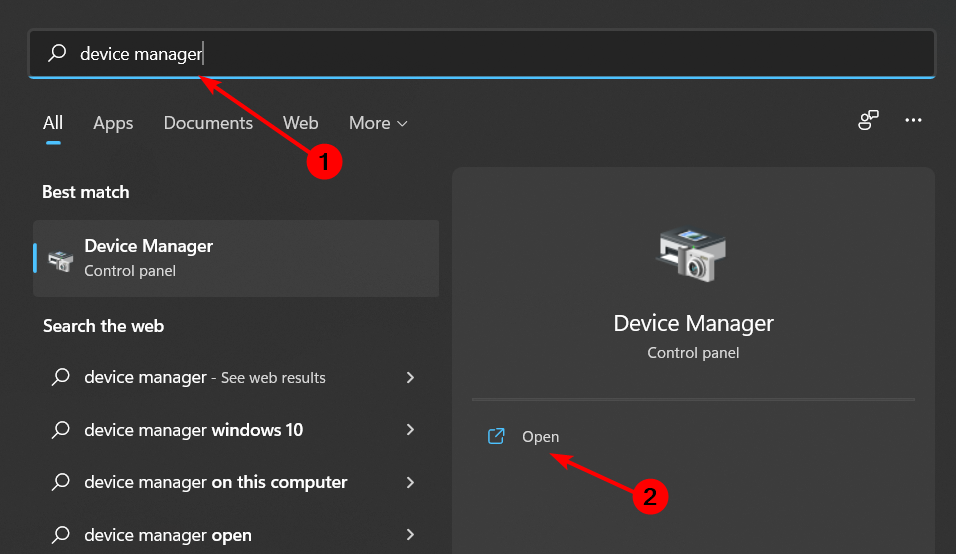
- Hit the Windows key, type Device Manager in the search bar, and click Open.
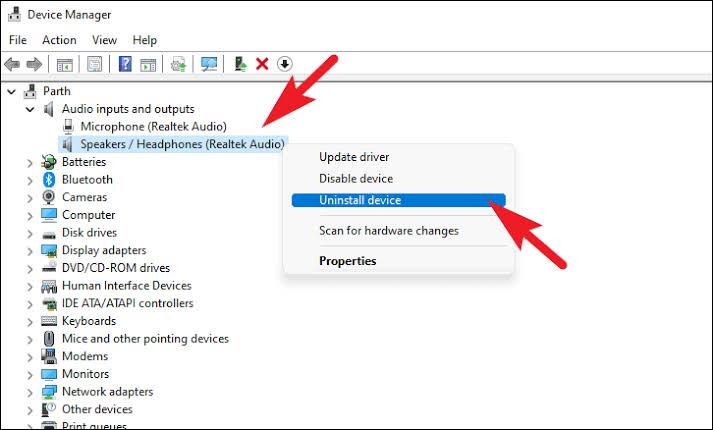
- Navigate to Sound, video, and game controllers to expand, right-click on your audio device and select Uninstall device.
- Repeat the same for any device under Audio inputs and outputs, Software components.
- Restart your device and the drivers will automatically reinstall themselves.
3. Update your audio drivers
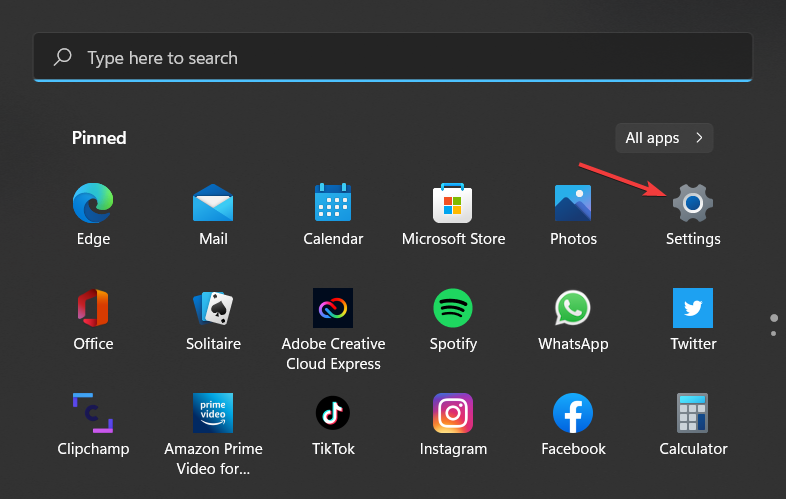
- Hit the Windows key and select Settings.
- Click on Windows Update.
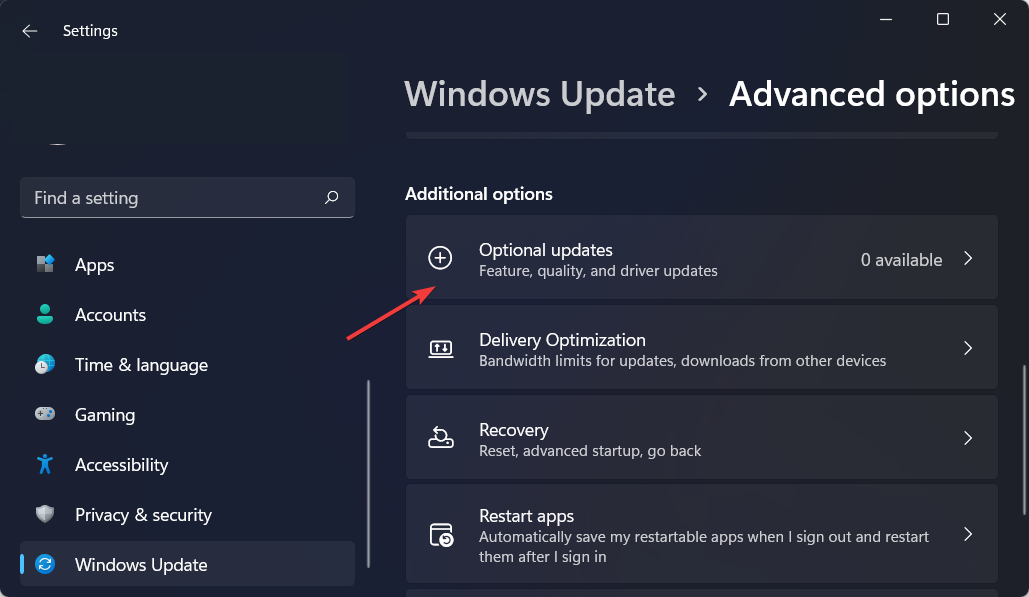
- Select Optional updates.
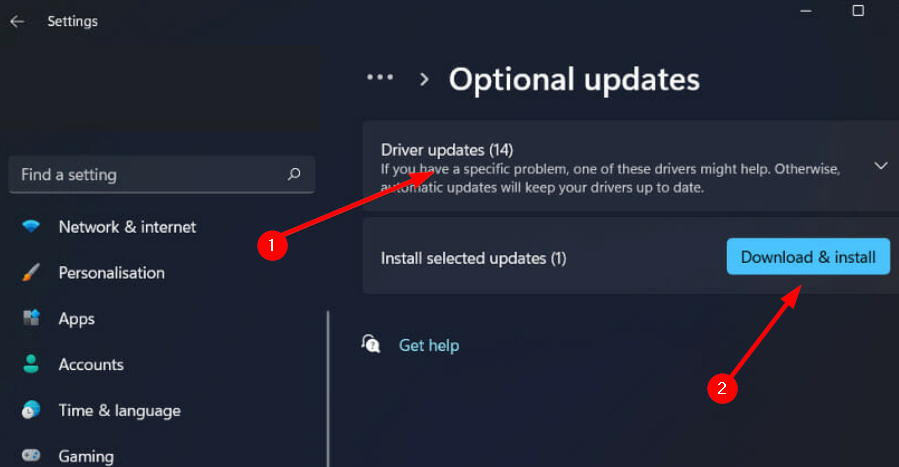
- Click on Driver updates and if there are any new updates, click Download & install.
4. Scan for viruses
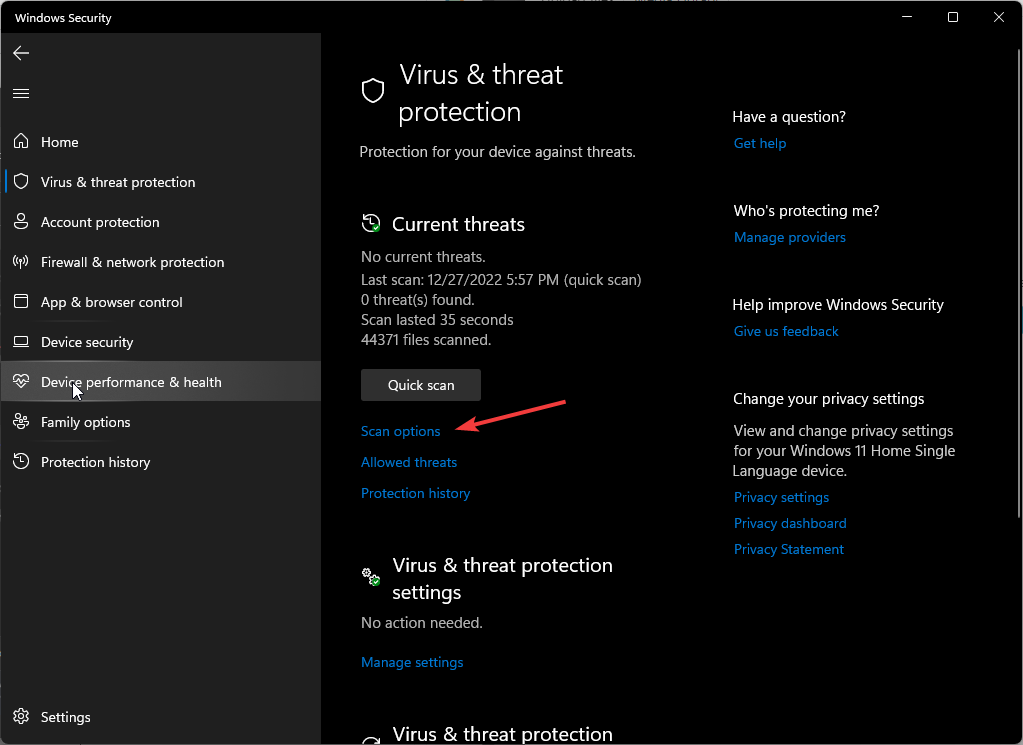
- Press the Windows key, search Windows Security, and click Open.
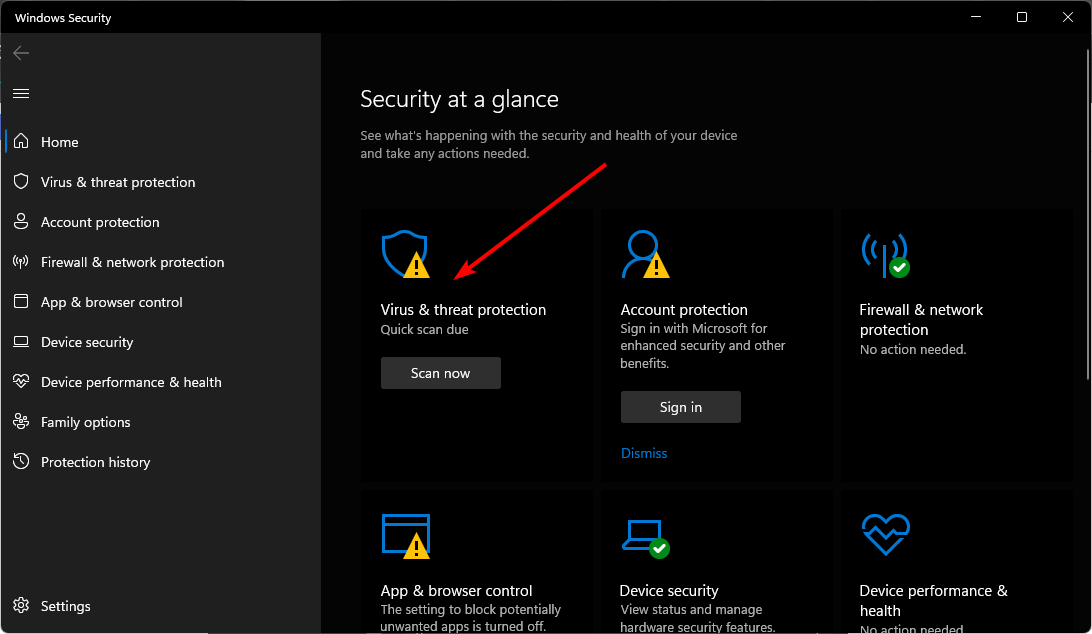
- Select Virus & threat protection.
- Next, press Quick scan under Current threats.
- If you don’t find any threats, proceed to perform a full scan by clicking on Scan options just below Quick scan.
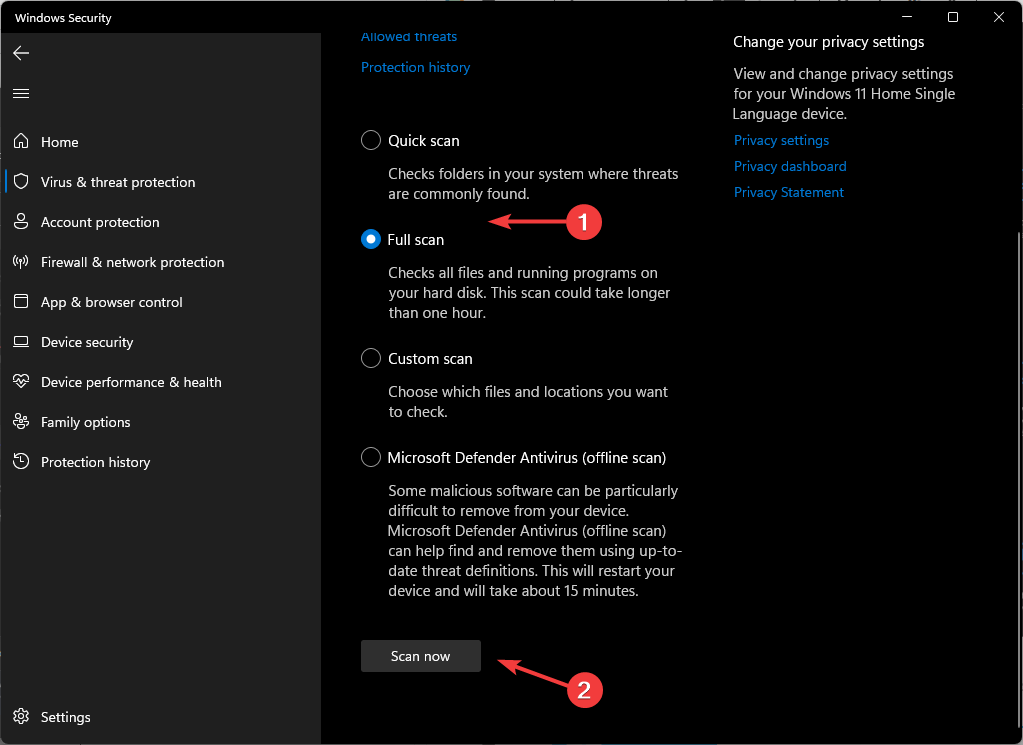
- Click on Full scan then Scan now to perform a deep scan of your PC.
- Wait for the process to finish and restart your system.
5. Download the DLL file manually
- Visit the DLL-Files website, search px.DLL, choose an appropriate option, and click Download.
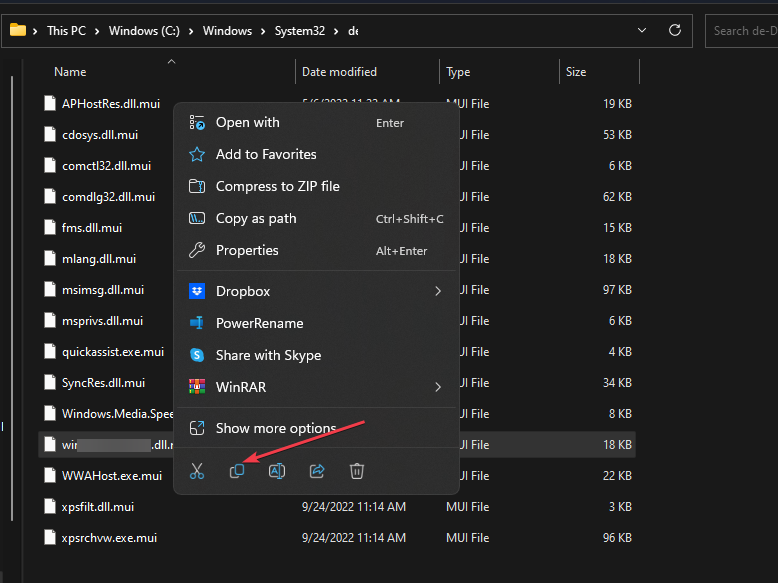
- Double-click the downloaded folder to open, locate, and copy the .dll file.
- Press the Windows + E keys to open the File Explorer.
- Navigate through the following path and paste the file:
c:\WINDOWS\SYSTEM32\ - Close your File Explorer and try to launch the program and see if the error persists.
6. Reinstall the program in compatibility mode
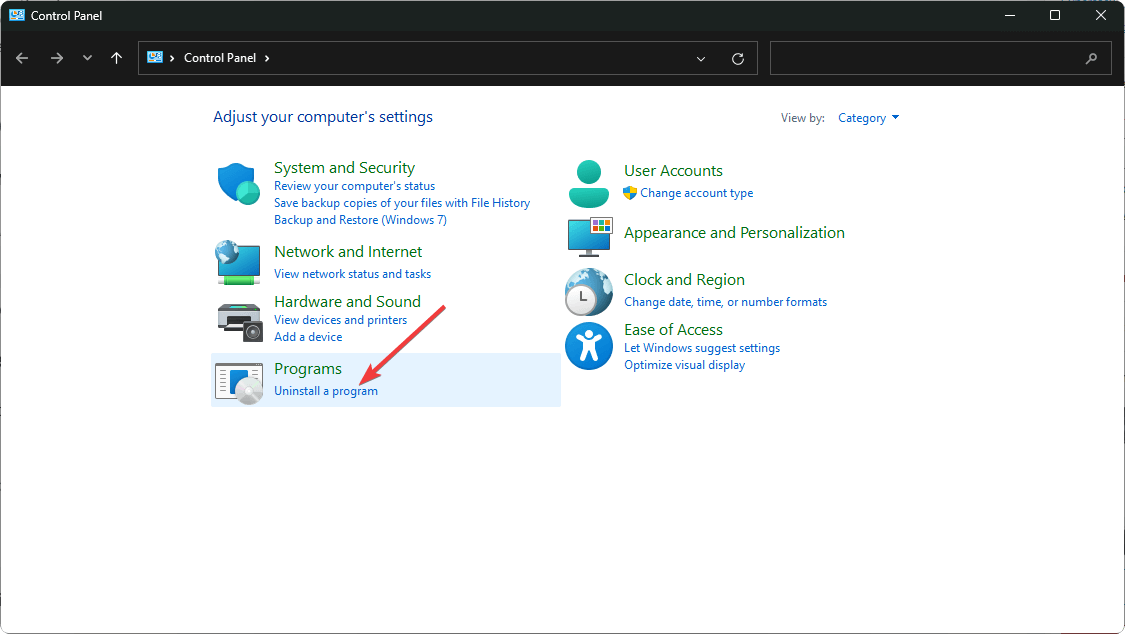
- Click on the Start Menu icon, type Control Panel on the search bar, and click Open.
- Select Uninstall a Program under Programs.
- Find the problematic app, click on it, and select Uninstall.
- Confirm uninstallation in the next pop-up.
- Install the app again from the official website.
- Locate the .exe file of the problematic app usually in one of the following paths depending on your version of Windows:
C:\Program Files (x86)orC:\Program Files - Scroll down until you find the program you’re looking for.
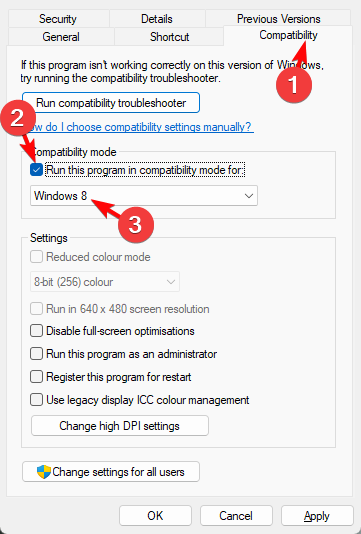
- Right-click on the .exe file of the program (Musicmatch in this case) and select Properties.
- Navigate to the Compatibility tab, check the Run this program in Compatibility mode option, and select Windows 8 from the drop-down menu.
- Also, check the Run this program as an administrator box and allow the program to finish installing, then check whether the error persists.
7. Perform a System Restore
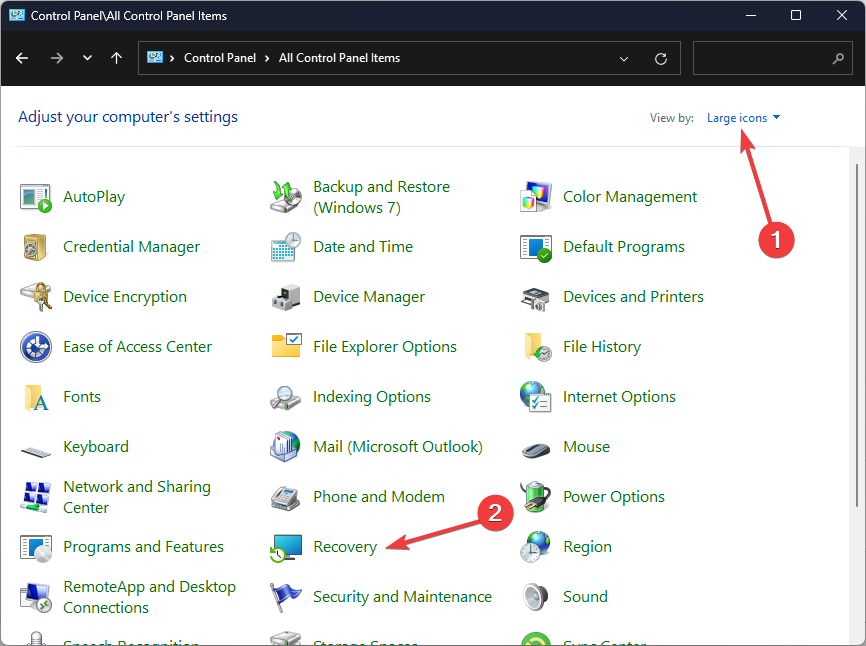
- Press the Windows key, type Control Panel, and click Open.
- Select Large icons as View by and click Recovery.
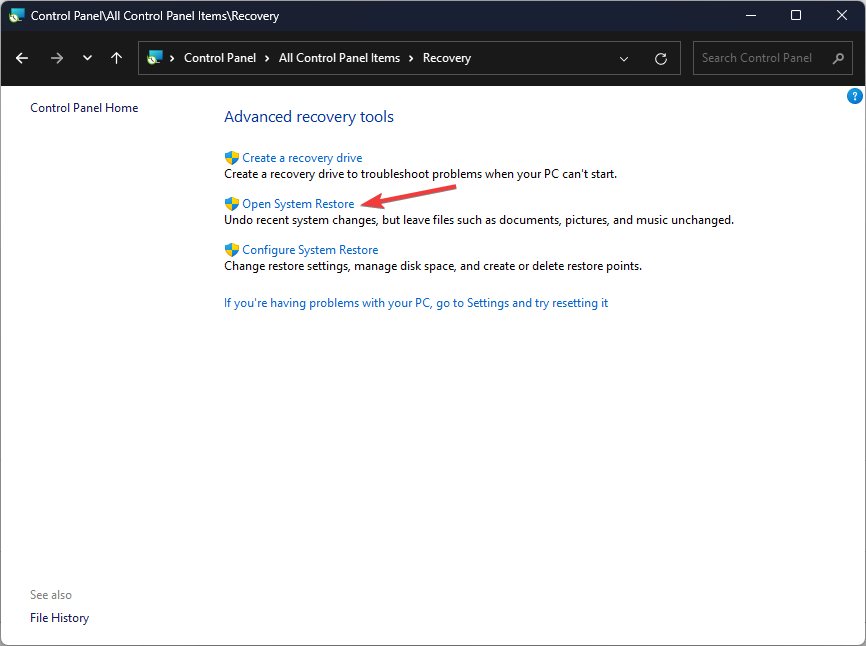
- Click Open System Restore.
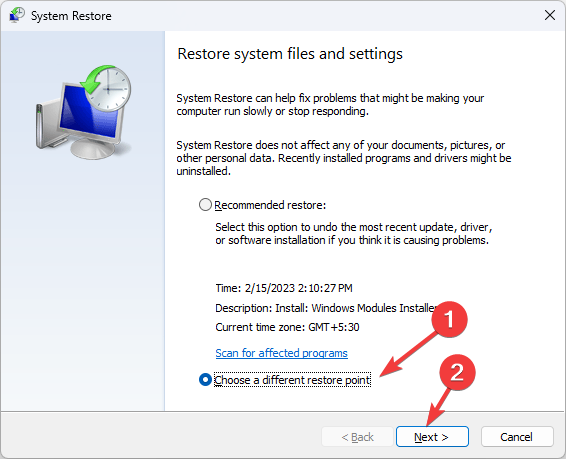
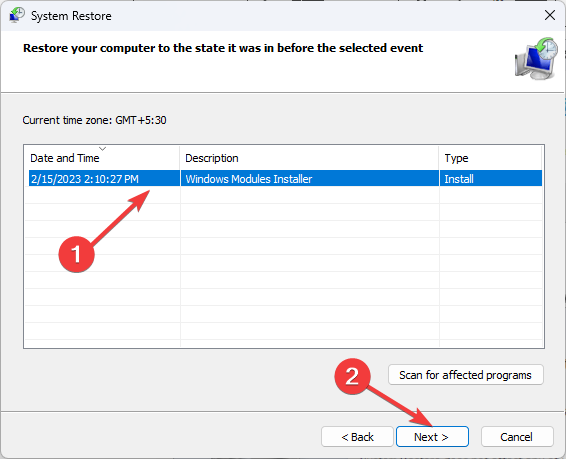
- Select Choose a different restore point and click Next.
- Now select the restore point and click Next.
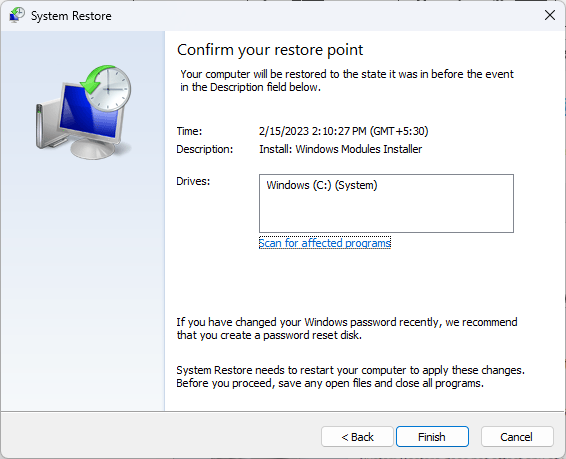
- Click Finish to restore the previous settings, and Windows will restart.
While the above solutions may come to your rescue, they can be quite overwhelming since you have to perform them one by one hoping it fixes the px.dll not found issue. For a more straightforward method, try one of our recommended DLL repair tools.
Our latest guide covers sres.dll, so don’t miss it if you want to learn more about this file.
That’s a wrap from us but do let us know if you have any other solutions you think we should try in the comment box below.







User forum
0 messages