Fix Packet Loss in Rainbow Six Siege: 7 Solutions for R6 Issues
Optimize your connection for hitch-free gaming sessions
3 min. read
Updated on
Read our disclosure page to find out how can you help Windows Report sustain the editorial team. Read more

Packet loss in Rainbow Six Siege causes issues like rubberbanding, high ping, and disconnects, often due to network congestion.
High ping and jitter result from unstable connections, sometimes caused by ISP throttling. Follow the steps below to fix these connection issues and make R6 Siege run smooth:
How to fix packet loss in Rainbow Six Siege?
First, check the server status on Ubisoft’s official Rainbow Six Siege Status Page. Also, consider switching from WiFi to Ethernet.
Still having issues? Keep reading.
1. Update Network Drivers
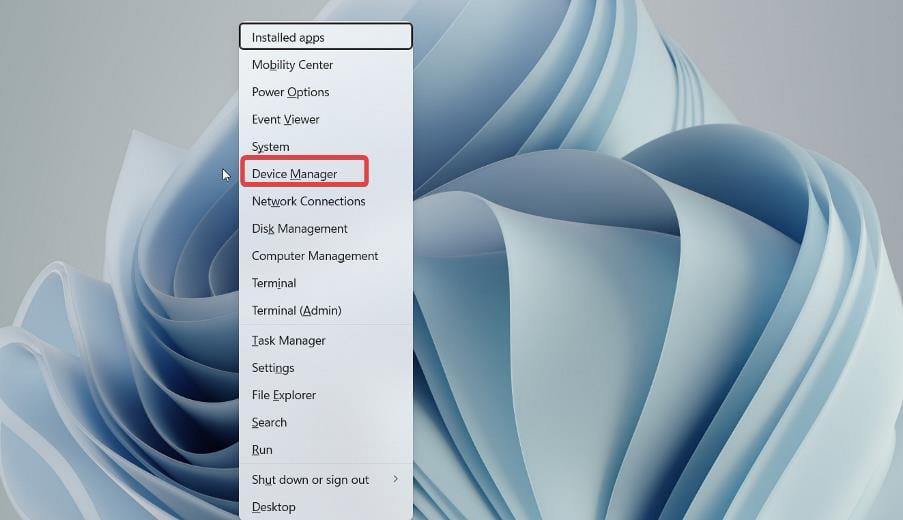
- Press Windows + X and select Device Manager.
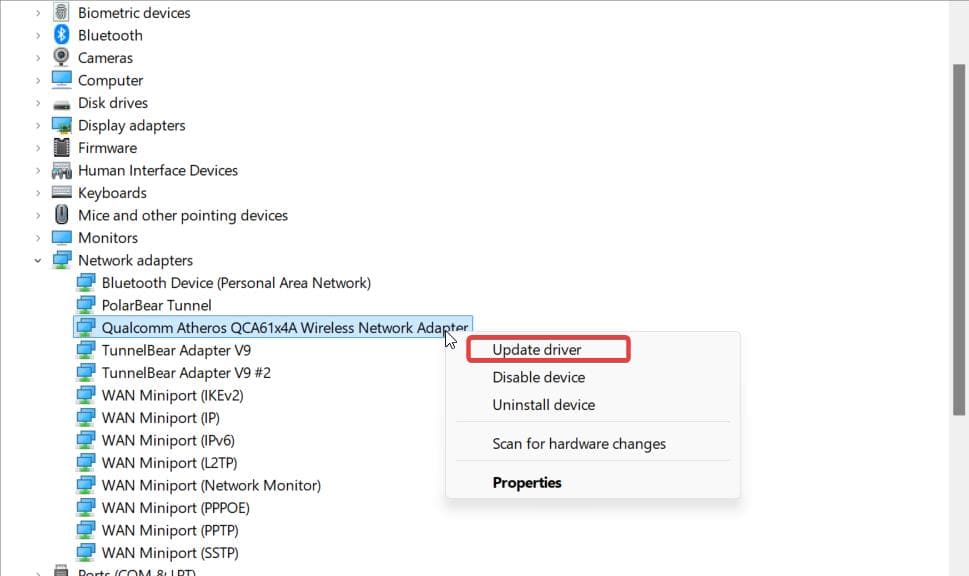
- Expand the Network adapters section.
- Right-click your active network adapter and select Update driver.
- Choose Search automatically for drivers.
- Restart your computer.
2. End Network-Intensive Processes
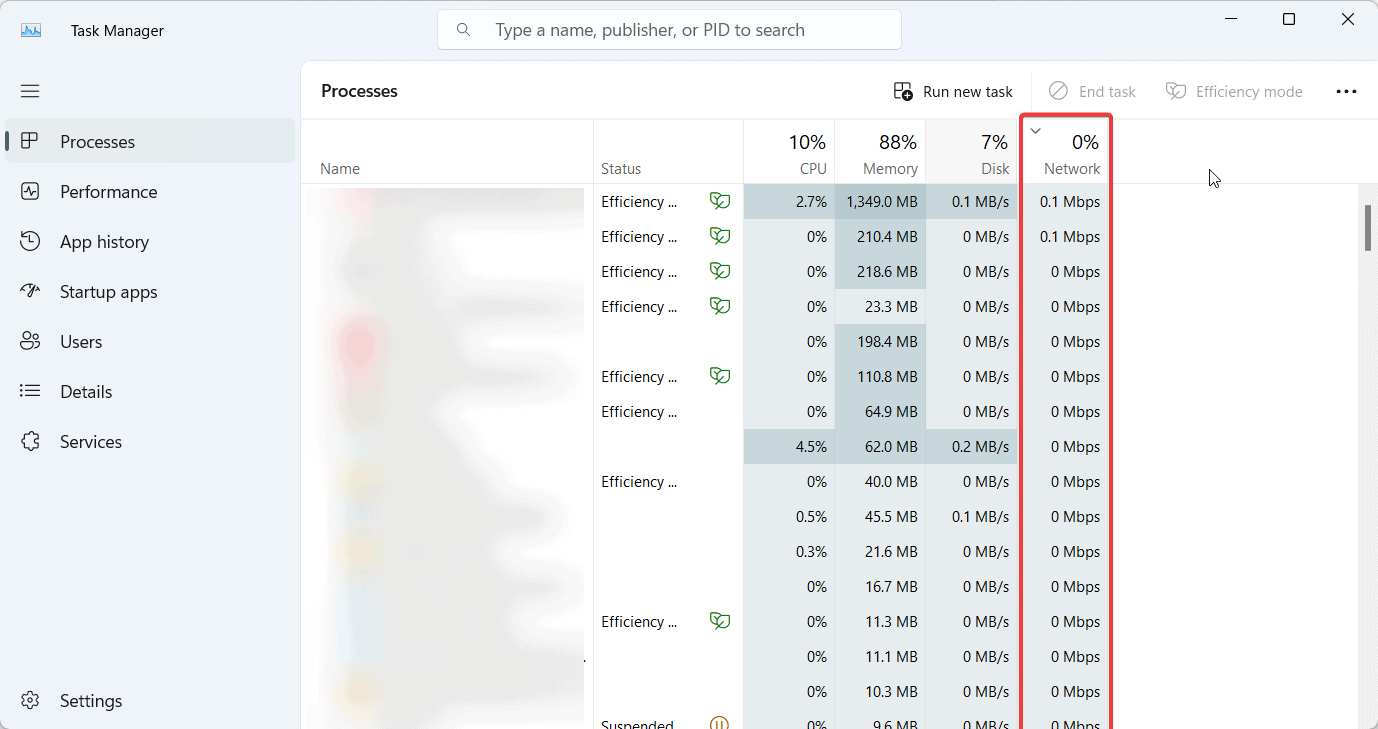
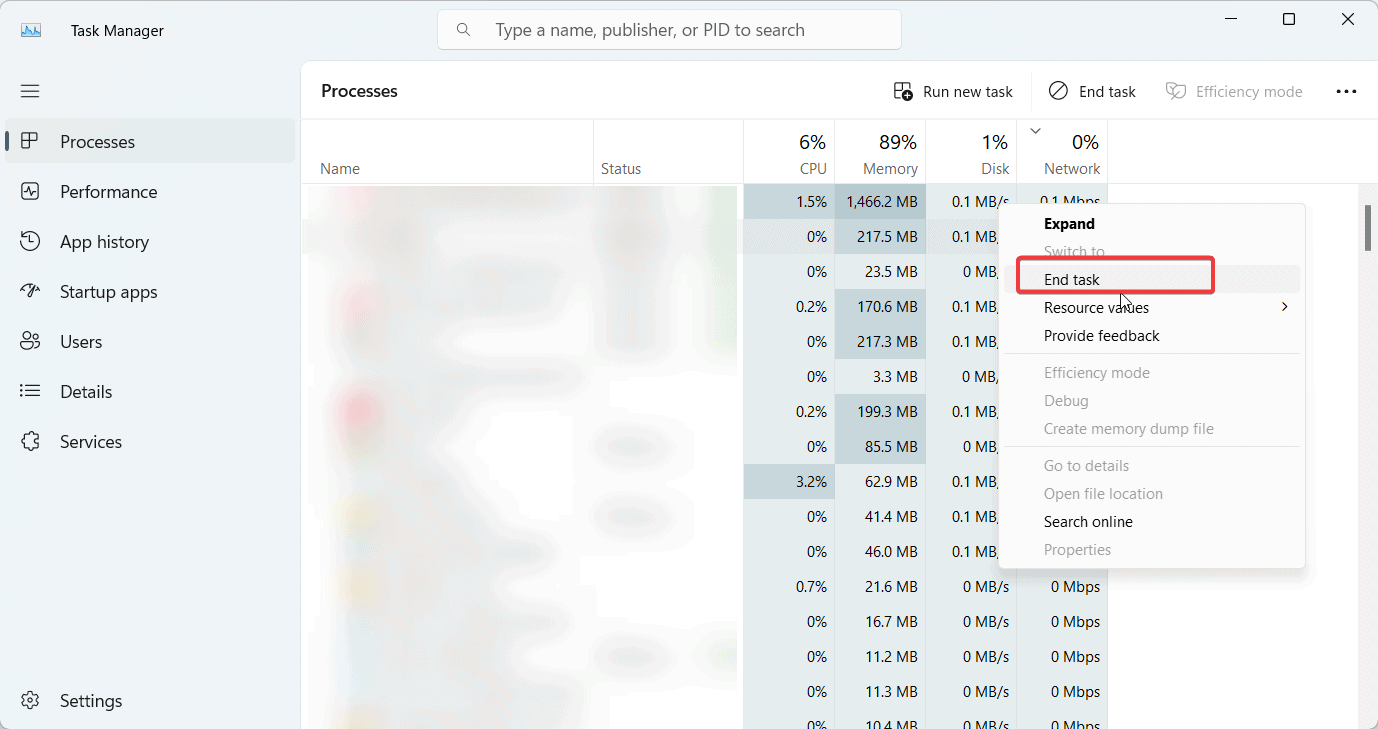
- Press Ctrl + Shift + Esc to open Task Manager.
- Click on the Network column to sort processes by network usage.
- Right-click on any high-usage processes and select End task.
- Close unnecessary background applications.
3. Verify the Integrity of Game Files
- Open your game client (e.g., Steam, Uplay).
- Navigate to your game library.
- Right-click on Rainbow Six Siege and select Properties.
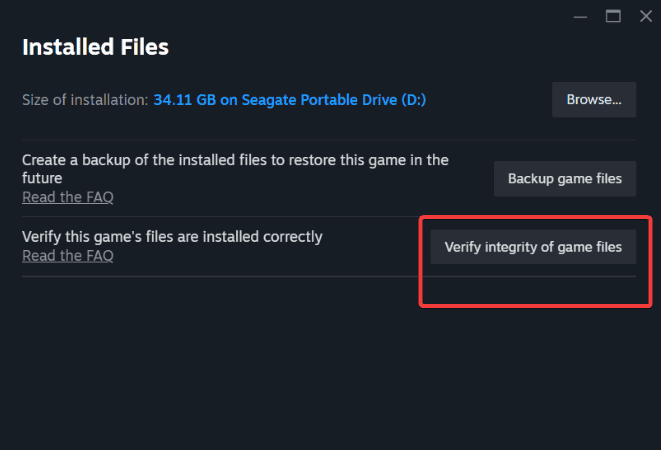
- In Steam: Go to Local Files and click Verify integrity of game files.
- In Uplay: Go to Games, select Rainbow Six Siege, click Properties, then Verify Files.
4. Flush DNS
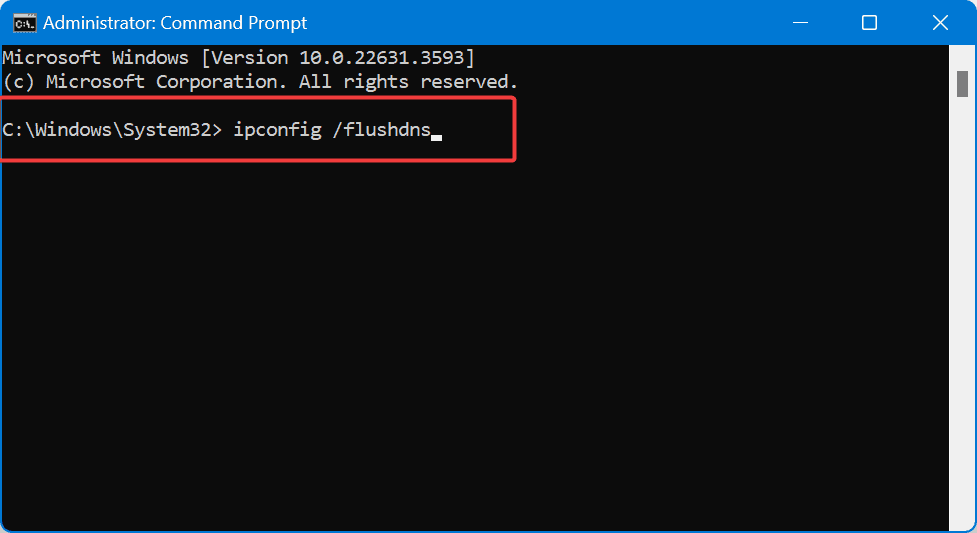
- Press Windows + R, type cmd, and press
Enter. - Type
ipconfig /flushdnsand pressEnter. - Wait for the confirmation message.
- Restart your computer.
5. Change the DNS Server Address
- Press Windows + I to open Settings.
- Go to Network & Internet.
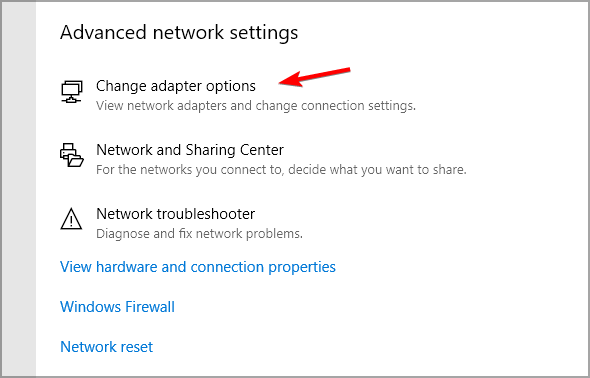
- Click on Change adapter options under Status.
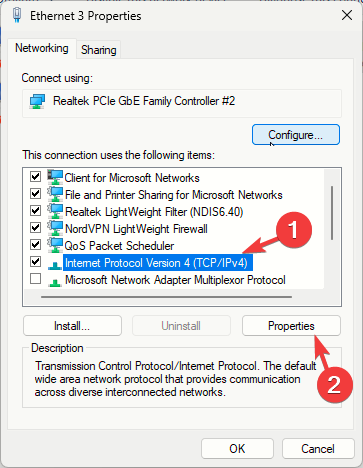
- Right-click your active network connection and select Properties.
- Select Internet Protocol Version 4 (TCP/IPv4) and click Properties.
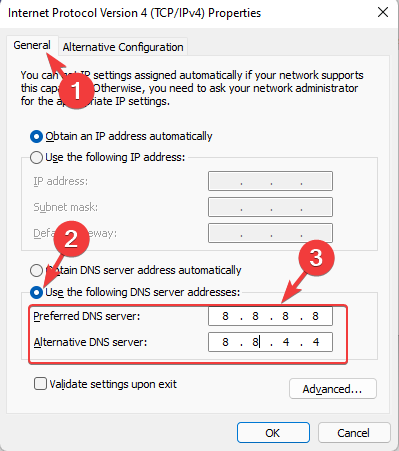
- Select Use the following DNS server addresses.
- Enter 8.8.8.8 as the Preferred DNS server and 8.8.4.4 as the Alternate DNS server.
- Click OK to save changes.
6. Use a zero-lag proven VPN
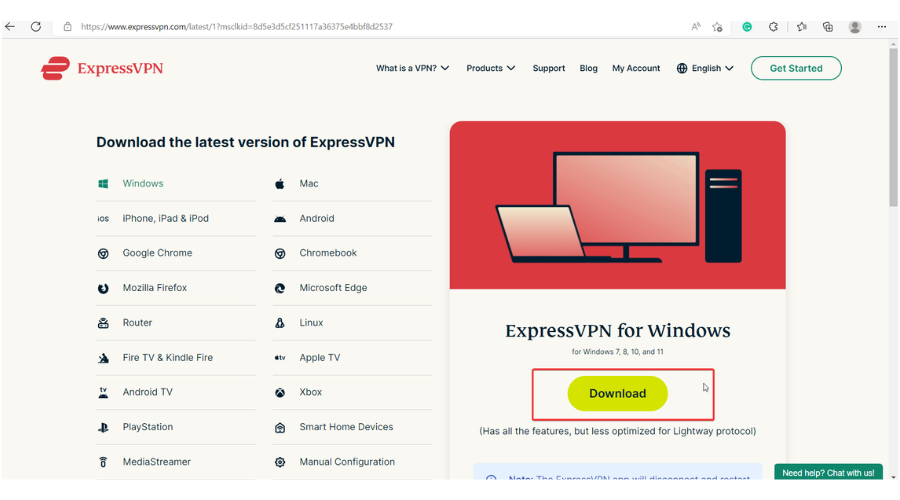
- Download and install ExpressVPN. (We tested the packet loss with it)
- Launch it and login with your credentials.
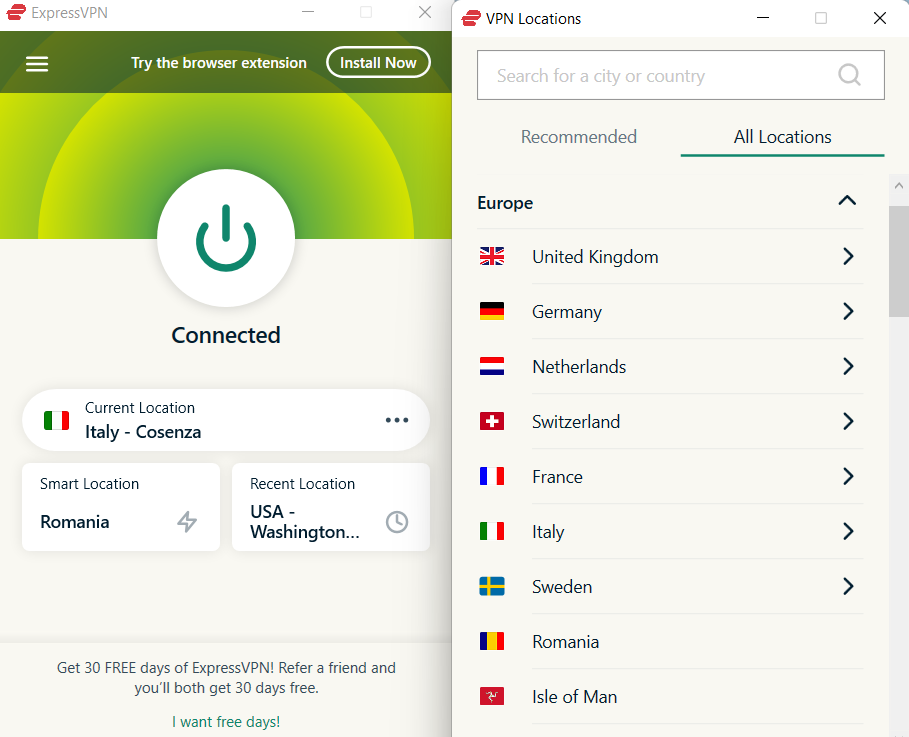
- Connect to a Recommended Location offered by ExpressVPN.
- Run Rainbow Six Siege.
- Check if the problem still persists.
A VPN can reduce packet loss in Rainbow Six Siege by bypassing ISP throttling, reducing network congestion, optimizing routing paths, and enabling port forwarding for more efficient data flow.

ExpressVPN
Choose your server to play on and bypass network congestion in multiplayer mode for Rainbow Six Siege.7. Run a packetloss test in Command Prompt
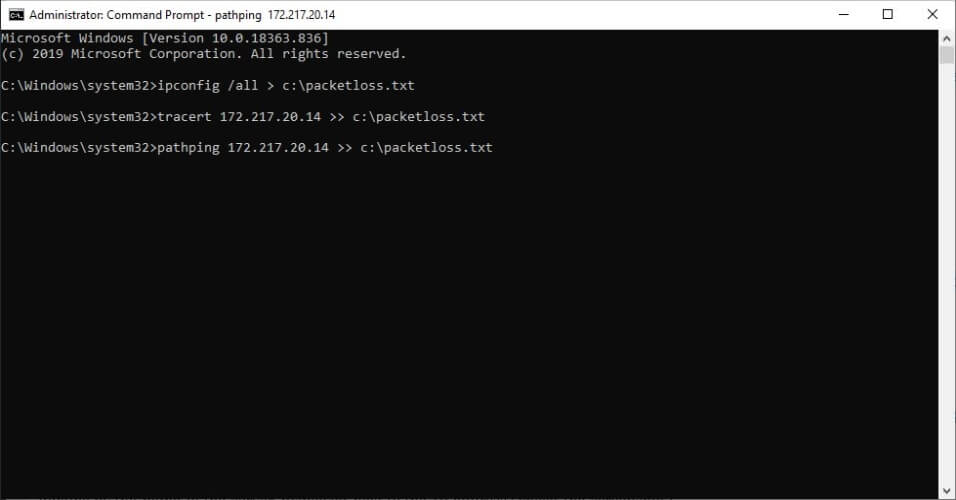
- Open Command Prompt.
- Type
ping [target] -t > packetloss.txt(replace[target]with the IP address or domain) and press Enter. - Let the test run for several minutes.
- Press Ctrl + C to stop the test.
- Open packetloss.txt with a text editor.
- Look for “Request timed out” or high latency in the file.
If you see packet loss, check and fix your network equipment; if the issue persists, contact your ISP with the results or report the problem to game support.
Wrapping up
Bottom line is, if you’re experiencing packet loss in Rainbow Six Siege, don’t sweat it. If you can afford the luxury of waiting it out, then do so. More often than not, the issue is caused by network congestion, which comes and goes. Also, a VPN works for the Rainbow Six Siege error code 10-0x00000.
Last but not least, try using a wired connection. Wi-Fi leaks packets more often than wired connections since it’s subject to a few additional factors that can cause it.




User forum
0 messages