Fix: Realtek Audio Console Connector Retasking Failed
It's all about drivers so update, uninstall or revert
![]() 5 min. read
5 min. read
![]() Published on
Published on
Share this article
Improve this guide
Read our disclosure page to find out how can you help Windows Report sustain the editorial team. Read more

If you’re an audiophile, you can understand the significance of the Realtek Audio Console connector retasking feature so when it’s not working or fails to switch to your preferred audio input, you need to troubleshoot it immediately.
The retasking menu is built to ensure you get the most out of your audio input and output devices. Whether you’re looking to listen to music or attend a meeting, this switching allows you to tailor the input/output according to your preferences and needs.
This option may be unavailable or greyed out if your audio drivers have malfunctioned or are outdated. Further, your audio ports may be damaged making them undetectable or third-party software may be causing conflicts.
What can I do if the Realtek Audio Console connector retasking menu has disappeared?
1. Make sure that your audio device is enabled
- Right-click the Volume icon in the bottom right corner of the Taskbar and choose Playback devices from the menu.

- When the Sound window opens, right-click the space and choose Show Disabled Devices.

- Finally, check if your Playback device appears on the list. If your audio device is grayed out, it’s disabled. To enable the device, right-click it and choose Enable from the menu.

- Next, check if the audio device is enabled in the Device Manager. Press Windows Key + X and choose Device Manager from the list.

- When Device Manager opens, locate your audio device and ensure it’s enabled. If not, right-click the device and choose Enable device from the menu.


2. Configure the Realtek HD Audio Manager Settings
- Open the Realtek HD Audio Manager.
- Click the I button at the bottom right.

- Select the Display icon notification area option, and press the OK button.

- Next, click the yellow folder icon almost at the top right corner, select Disable front panel jack detection, and if it’s selected, deselect the Enable auto popup dialog option; and press the OK button.

- Click the Device Advanced Settings window link at the top right of the audio manager.

- Select the Make front and rear output devices playback two different audio streams simultaneously playback option.
- Also, select the Tie up same type of input jacks, i.e., line-in or microphone, as an input device recording device option and press the OK button on the Device advanced settings window.

- Click the green active back panel speaker icon on the right of the Speakers tab.

- Select Set Default Device from the drop-down menu on the right of the tab.
- Next, click the Microphone tab, and select the red back panel to activate the microphone icon.
- Click Set Default Device on the Microphone tab’s drop-down menu.
- Finally, press OK to apply the new settings.


3. Run the audio troubleshooter
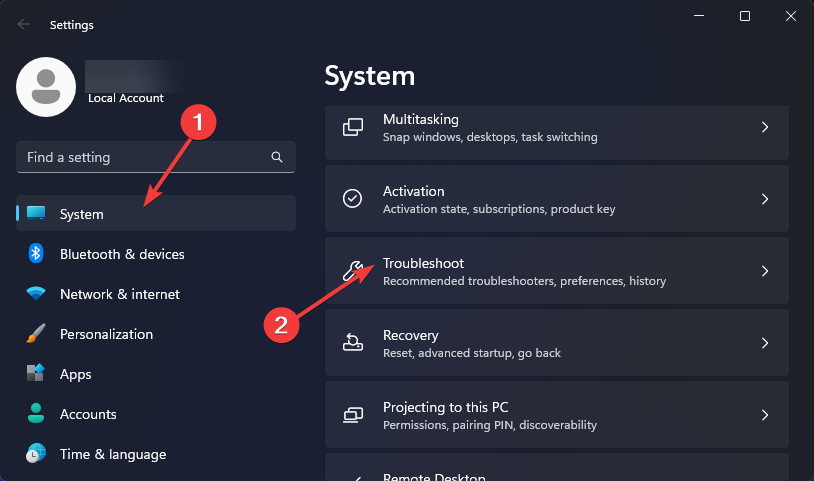
- Press the Start Menu key and select Settings.

- Click on System on the left pane, then Troubleshoot on the right pane.

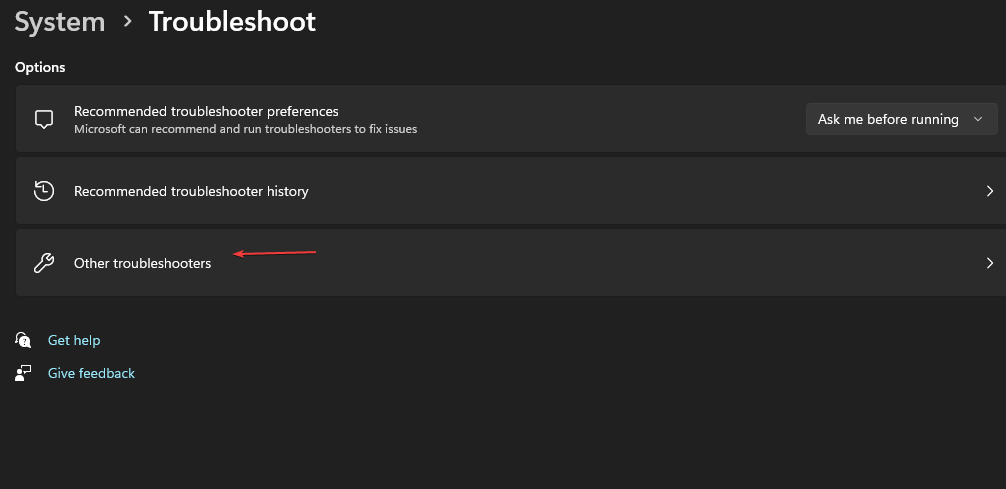
- Select Other troubleshooters.

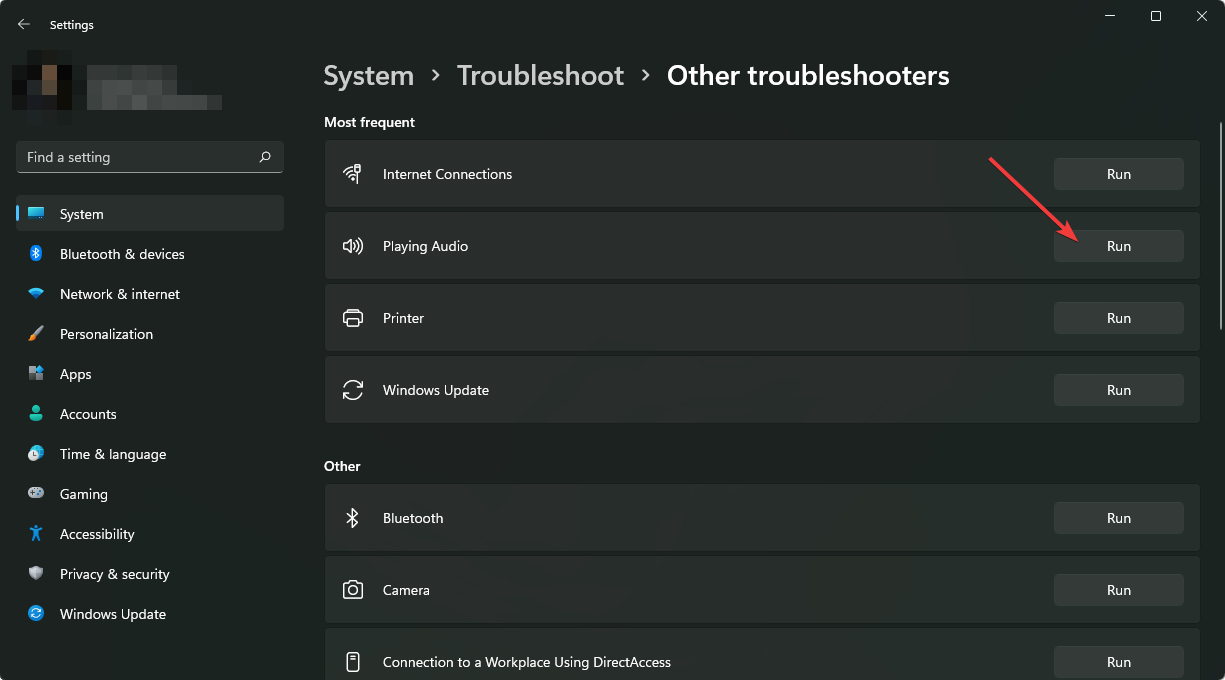
- Locate the Playing Audio troubleshooter, and click on the Run button next to it.


If the troubleshooter reveals everything is working fine, try testing out your audio devices. If possible, try them on other PCs too if available and play audio from different applications. This can help you narrow down the issue to either hardware or software issues.
4. Rollback previous audio driver
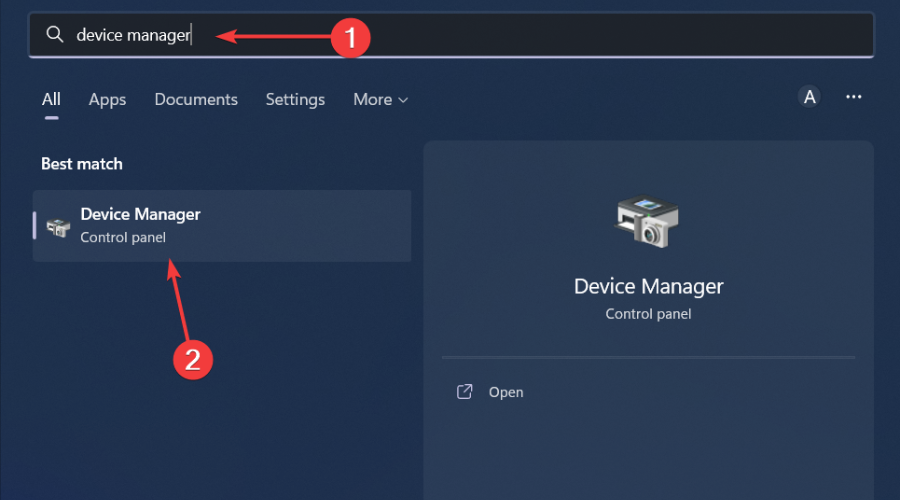
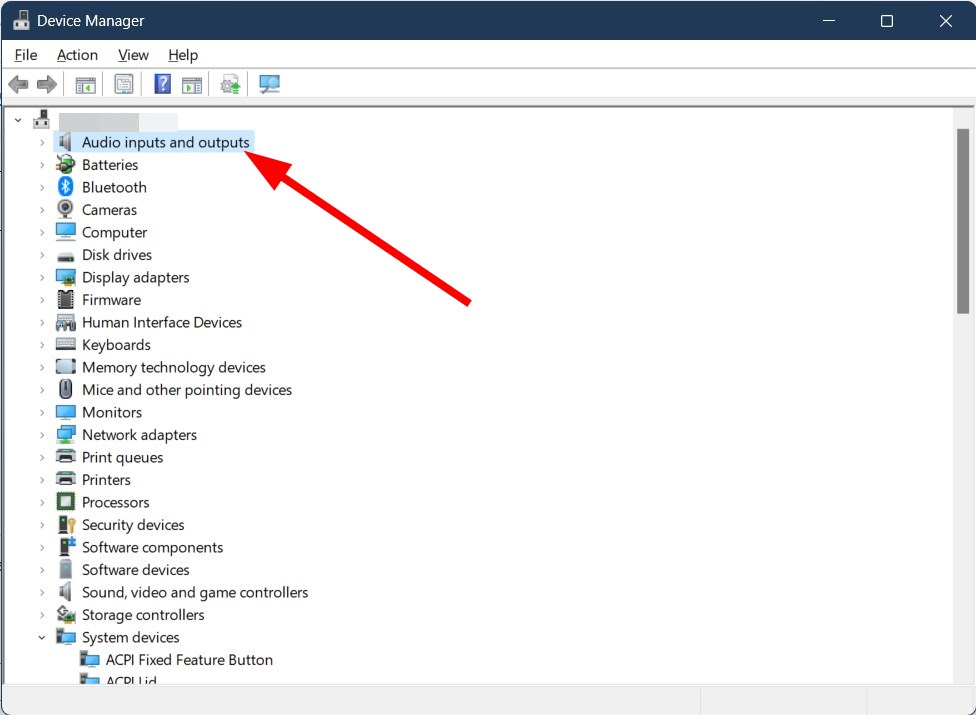
- Hit the Windows key, type Device Manager, and click Open.
- Expand the Audio inputs and outputs section.

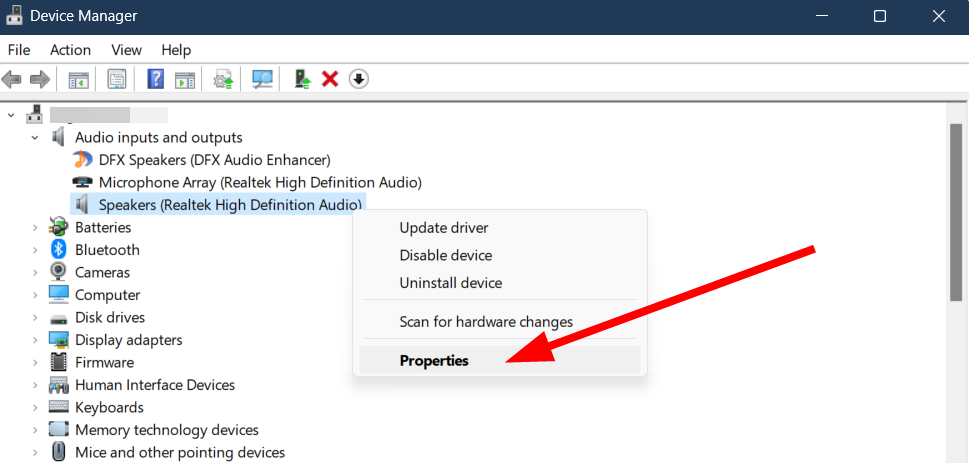
- Right-click on your audio driver and select Properties.

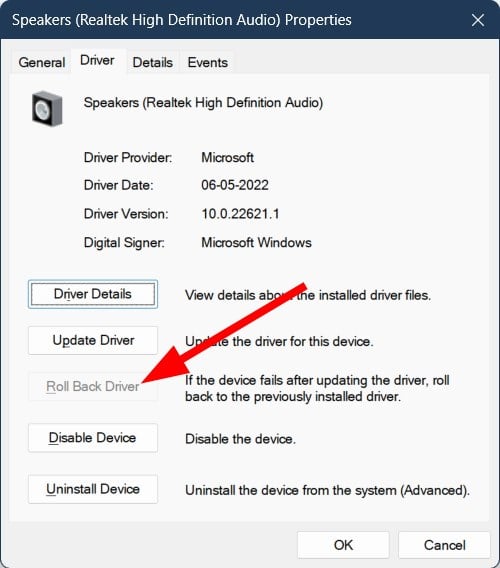
- Hit the Roll Back Driver button.

5. Reinstall audio drivers
- Hit the Windows key, type Device Manager in the search bar, and click Open.
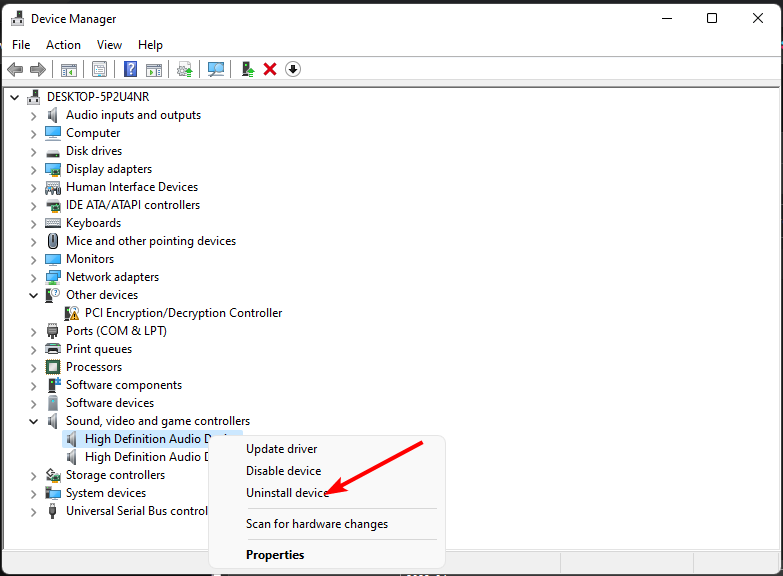
- Navigate to Sound, video, and game controllers to expand, right-click on your audio device, and select Uninstall device.

- Confirm on Uninstall.
- Restart your device, and the drivers will automatically reinstall themselves.
6. Update audio drivers
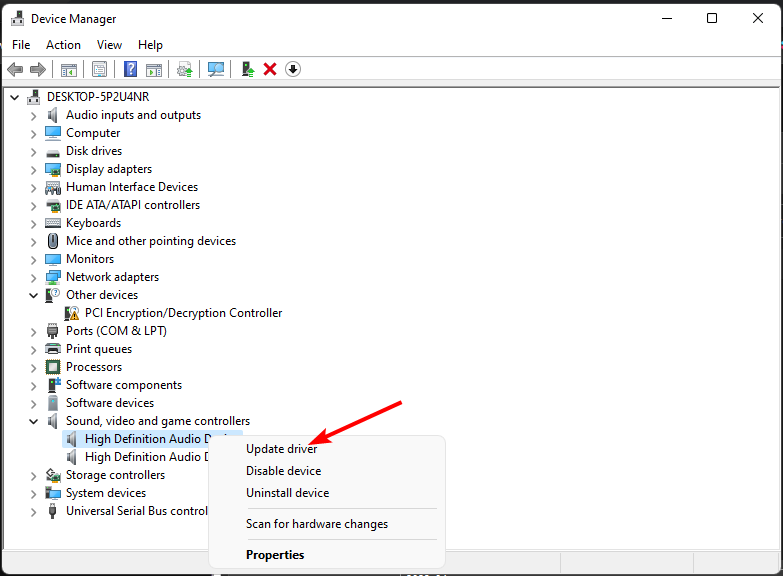
- Hit the Windows key, type Device Manager in the search bar, and click Open.
- Navigate to Sound, video, and game controllers to expand, right-click on your audio device, and select Update driver.
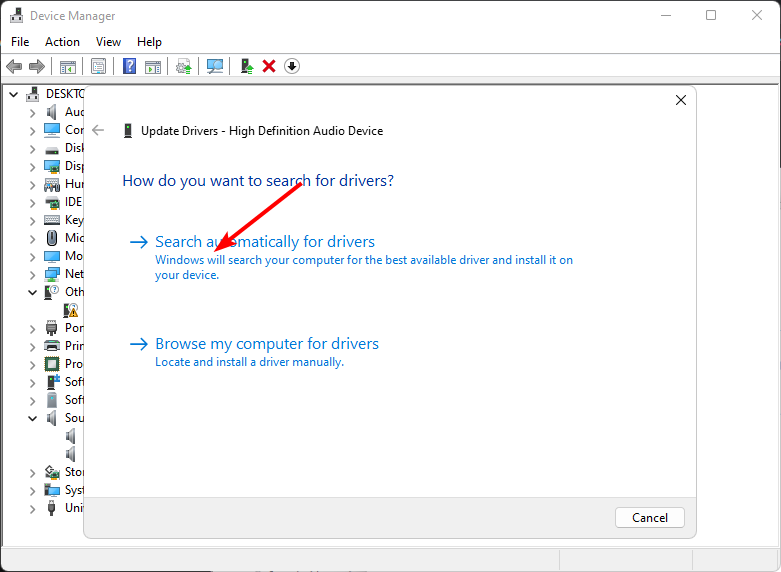
- Select Search automatically for drivers.

- Restart your PC and try reconnecting.
7. Enable audio for the line-in connection
- Click the Cortana button on the taskbar, and then enter audio devices in the search box.
- Select Manage audio devices to open the window below.

- Click the Playback tab, select Speakers (or another external audio device), and press the Properties button.
- Next, select the Levels tab, and then you can check the Line in option to enable line-in connection sound.

- You can then connect your audio input and see if it works.


Enabling the Line In input option brings in another audio input source. This can be useful if you want to test whether the issue of the Realtek Audio Console connecter not retasking is present on all audio devices.
Also, note that enabling the line-in option may not be available on every device. If this option is missing, no need for alarm. It just means your sound card does not support it.
Finally, if you’ve tried all the above troubleshooting steps but still no luck, reach out to Realtek for additional support.
You can also consider other audio management software as the Realtek Audio Manager won’t open at times or fails to detect your Bluetooth headphones.
USB-to-headphone jack adapters should also suffice especially, in cases where you’re looking for audio reliability.
That’s all we had for your Realtek Audio Console connector failing at retasking. For any additional thoughts or comments, do leave a comment down below.


User forum
0 messages