How to Fix the Red Screen of Death on Windows 10 & 11 [10 Proven Methods]
Quickly Fix a PC crashing with red screen

The Red Screen of Death (RSOD) in Windows 10 or 11 is a critical system error that typically points to serious hardware conflicts, faulty drivers, or firmware-level issues. Unlike the Blue Screen, this one often locks your system completely. Follow the methods below to resolve it.
How can I fix the Red Screen of Death errors on Windows 10 & 11
Table of contents
- How can I fix the Red Screen of Death errors on Windows 10 & 11
- 1. Use a repair tool
- 2. Remove the overclocking settings
- 3. Update your BIOS/UEFI
- 4. Update your graphic card driver
- 5. Check for hardware malfunctions
- 6. Remove recently installed software
- 7. Reinstall AMD drivers without Catalyst Control Center
- 8. Recover the atikmdag.sys file
- 9. Change the settings.ini file
- 10. Underclock your graphic card
- What does a red screen of death mean?
1. Use a repair tool
Using a third-party repair tool can be the best and fastest solution to solve the RSoD error.
Here’s how to use it:
- On a working PC, download and install EaseUS Partition Master.
- Launch the program and create a WinPE bootable USB using the “Bootable Media” feature.
- Insert the USB into the affected PC and boot from it (use BIOS/UEFI boot menu).
- Once EaseUS loads, select the system drive and run Boot Repair.
- Follow the on-screen instructions and restart your PC normally.
If your Windows 11 PC shows a Red Screen of Death and won’t boot properly, try EaseUS Partition Master’s Boot Repair tool. It helps restore startup functionality without wiping your files.
This method works best when system files or boot records have become corrupted, but the hardware is intact.
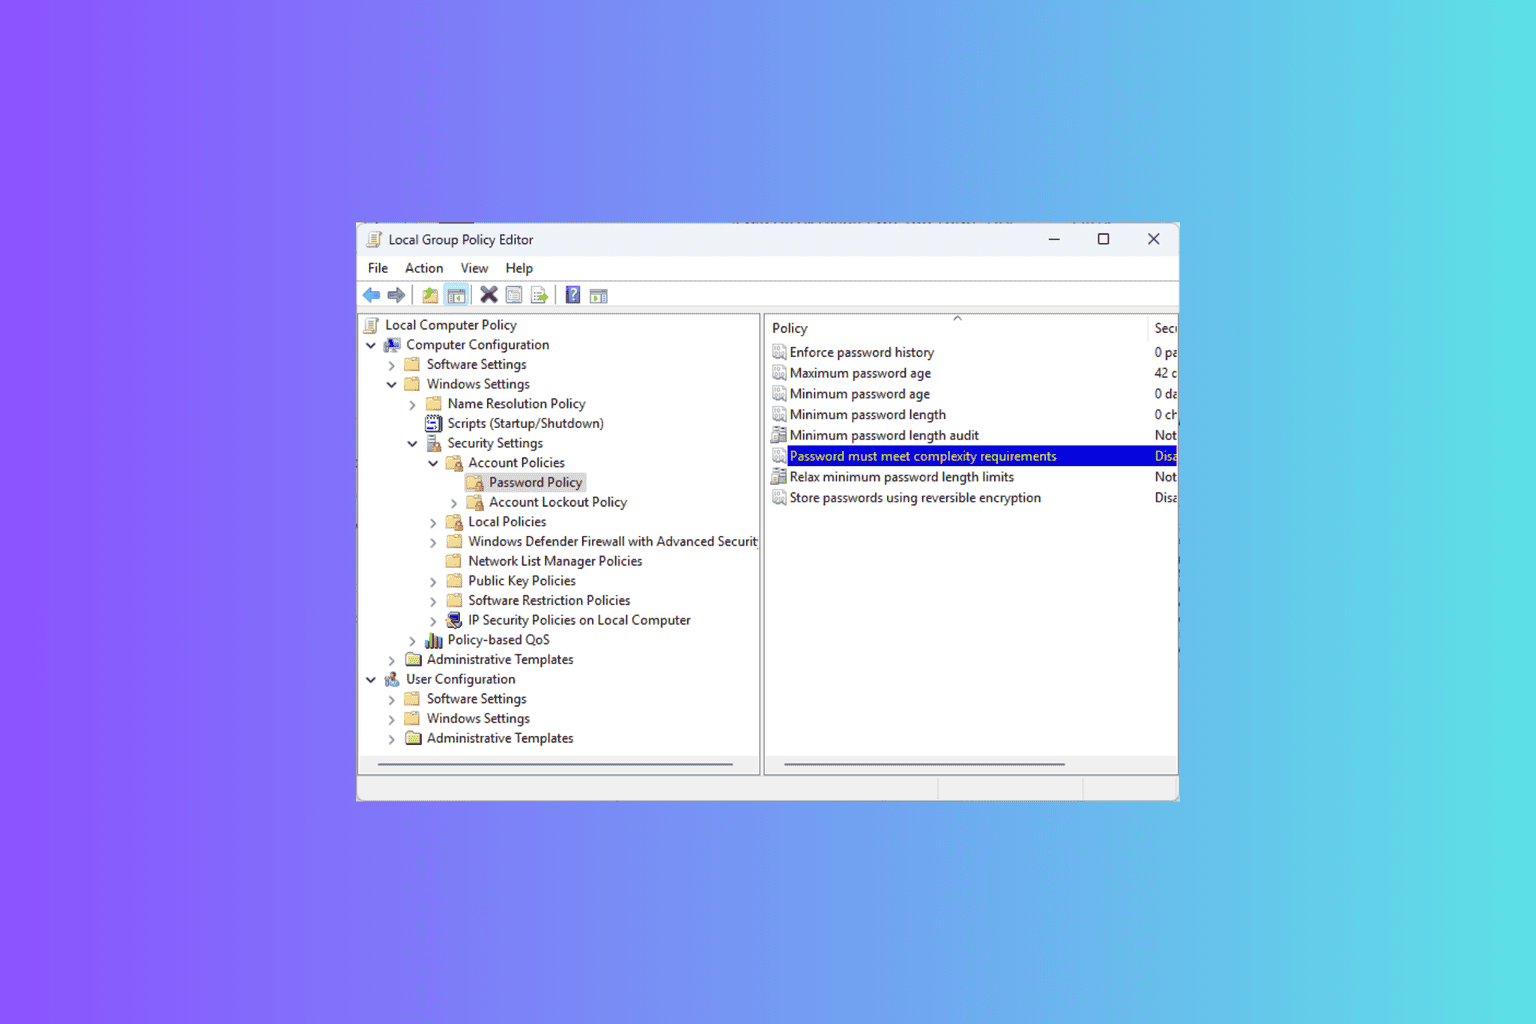
2. Remove the overclocking settings
Overclocking often pushes hardware beyond stable limits, which can trigger the Red Screen of Death (RSOD). To rule it out, reset your CPU, GPU, or RAM to factory defaults.
1. Enter BIOS/UEFI
- Restart your PC and repeatedly press
Del,F2, orEsc(depends on your motherboard) to access BIOS.
2. Reset to Default/Optimized Settings
- In the BIOS menu, look for an option like:
- Load Optimized Defaults
- Load Setup Defaults
- Select it and confirm to reset all settings.
3. Disable XMP or DOCP
- Go to the AI Tweaker or Overclocking section.
- Set XMP, DOCP, or EXPO profiles to Disabled.
- This disables memory overclocking.
4. Save and Exit
- Press
F10or select Save & Exit Setup. - Confirm and restart your PC.
5. Optional: Use Manufacturer Tools
- If you overclocked using software (e.g. MSI Afterburner, Intel XTU, AMD Ryzen Master), open the app and click Reset to Default or uninstall it.
3. Update your BIOS/UEFI
1. Check Current BIOS Version
- Press
Win + R, typemsinfo32, and hit Enter. - Note the BIOS Version/Date listed in the System Summary.
2. Identify Your Motherboard
- If it’s not listed in System Information, use tools like CPU-Z to find your motherboard brand and model.
3. Download the Latest BIOS
- Visit your motherboard manufacturer’s official website (e.g., ASUS, MSI, Gigabyte).
- Go to the Support or Downloads page.
- Select your model and download the latest BIOS/UEFI update file.
4. Create a USB Flash Drive
- Format a USB stick to FAT32.
- Copy the BIOS update file to it (usually a
.CAPor.BINfile).
5. Enter BIOS and Flash
- Restart your PC and enter BIOS (usually
DelorF2at startup). - Locate the EZ Flash, M-Flash, or Q-Flash utility (name varies by brand).
- Select the update file from the USB stick and follow the on-screen prompts.
6. Wait Without Interruptions
- The process will take a few minutes. Do not turn off your PC or remove power during the update.
7. Reboot and Load Defaults
- Once updated, BIOS may reset to default. Enter BIOS again and load optimized defaults before exiting.
Caution: A failed BIOS update can brick your motherboard. Always use an official BIOS file and follow your manufacturer’s instructions exactly.
If you need more in-depth assistance, check our dedicated guide on how to update BIOS.
4. Update your graphic card driver
- In the Search bar type Device Manager and select it from the list of results.
- Find the Display adapters section and expand it. Right-click your device in the Display adapters section and choose Uninstall from the list.

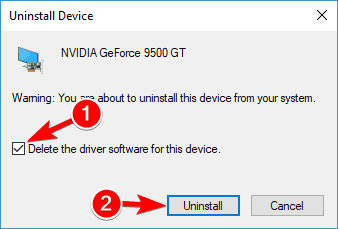
- Check Delete the driver software for this device and click on Uninstall.
- After the current driver has been removed, restart your computer.
To fix RSOD and ensure system stability, update your graphics card drivers. If you use a desktop, go to your GPU manufacturer’s site and download the latest drivers. For laptops, get them directly from your laptop brand’s support page.
Manual updates can cause issues if you install incompatible drivers. To avoid that, use PC HelpSoft Driver Updater. It scans your system, finds outdated or faulty drivers, and updates them automatically, no risk of installing the wrong version.
5. Check for hardware malfunctions
Sometimes a red screen can be caused by faulty hardware, and users have reported that a faulty graphics card can cause this problem.
If your computer is under warranty, it wouldn’t be a bad idea to take it to the repair shop to have it checked for hardware malfunctions.
Few users have reported that a red screen was caused due to a faulty graphic card, and after replacing the problematic card, everything went back to normal.
There are also reports that CD/DVD readers may cause this issue in some rare cases, so you might want to temporarily remove your CD/DVD reader.
6. Remove recently installed software
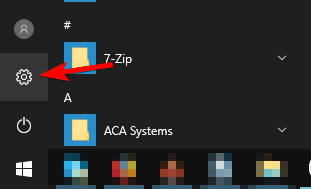
- Click the Start button and choose Settings.
- Click on Apps.

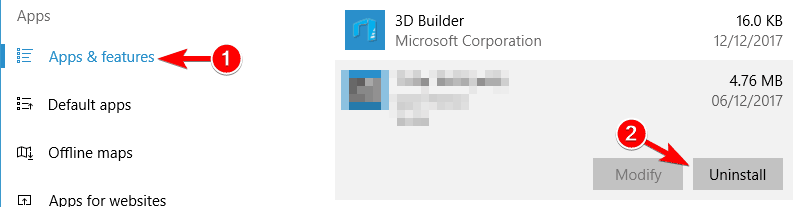
- In the left pane choose Apps & features. Find the recently installed software on the list, click it, and then click the Uninstall button.
Sometimes in order to fix this problem, you need to remove all files associated with the software you uninstalled. The fastest and most effective way to do that is to use an uninstaller application.
If you need an uninstaller app, we strongly recommend you try the following software solution. It’s extremely simple to use thanks to its clean and friendly user interface.
Hence, you can find many uninstaller solutions that remove problematic apps from your PC, but you should choose from the best uninstaller software to fix this issue properly.
7. Reinstall AMD drivers without Catalyst Control Center
- Remove your currently installed graphic card driver.
- Download the latest AMD drivers.
- Run the setup and extract files to a specific folder on your computer (remember where you extract these files because you’ll need them later).
- If the setup automatically starts, cancel it.
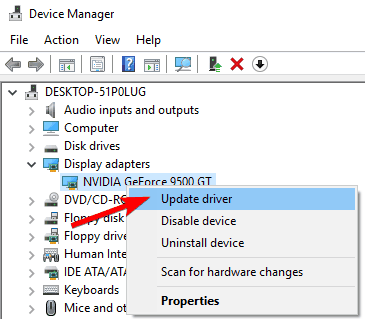
- Open Device Manager and expand the Display adapters section. Find your graphics adapter and right-click it. Choose Update driver.
- Choose to Browse my computer for driver software.

- Find the folder where AMD drivers are extracted and click Next to install the drivers but make sure that the Include subfolders option is checked.

- Restart your PC.
For a faster process, you can also rely on the software recommended in the solution above.
8. Recover the atikmdag.sys file
- Open the AMD driver folder and find atikmdag.sy_ file. Copy it to your Desktop.
- Search for cmd and click on Run as administrator to run Command Prompt.

- In Command Prompt, change your current folder to Desktop. You can do that by typing the following line and pressing Enter on your keyboard:
chdir Desktop
- Type the following and press Enter to run it:
EXPAND.EXE atikmdag.sy_ atikmdag.sys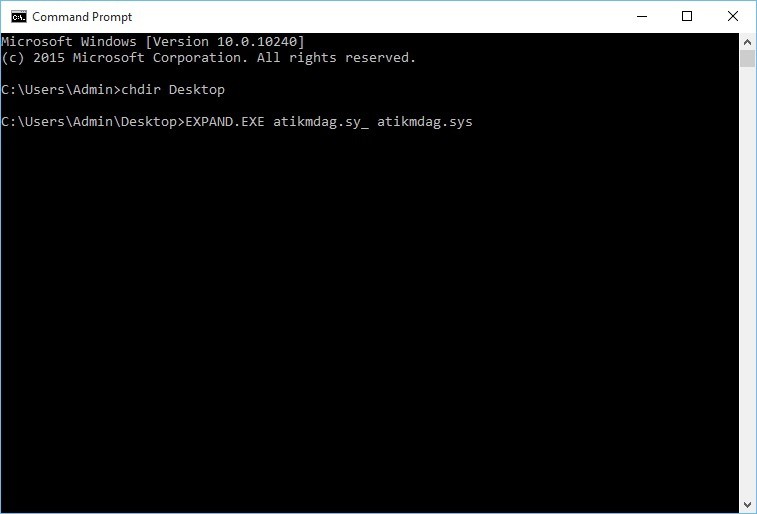
- Go to the following folder and find atikmdag.sys: C:WindowsSystem32Drivers
- Rename the file to atikmdag.sys.old.
- Now move the atikmdag.sys file from your Desktop to C:WindowsSystem32Drivers
- Restart your PC.
9. Change the settings.ini file
- Open Documents, go to the BFBC2 folder, and find the settings.ini file.
- Find the following line:
- DxVersion=auto
and change it to: - DxVersion=9
- DxVersion=auto
- Save the changes, and try to run the game again.
Note: Users report that the red screen affects Battlefield: Bad Company 2, and in order to fix this issue, you need to change the game’s settings.ini file.
10. Underclock your graphic card
Sometimes underclocking your device can fix the red screen issues on Windows 10. Few users have reported that lowering the original takt rate on AMD 7870X graphic card has fixed the red screen issues for them.
Once again, if you don’t know how to underclock your graphic card, ask a professional to do it for you.
What does a red screen of death mean?
A red screen is an unusual problem that can occur on Windows 10. Speaking of red screen issues, users reported the following problems as well:
- Windows 10 red screen startup – Sometimes red screen can appear right on system startup. This issue might be caused by third-party software or by outdated drivers.
- Blank red screen Windows 10 – This is most likely caused by overclocking, so be sure to remove all overclock settings.
- Windows 10 red screen loading – Your PC can get stuck while loading on a red screen. This is an unusual problem, but you might be able to fix it using one of our solutions.
- Red screen on laptop – Can appear on desktop PCs as well as laptops. If you have this issue on your laptop, the problem might be with your graphics card.
- Red screen Windows 10 with cursor, audio – This is most likely caused by your graphics card or your drivers.
- Red screen Windows 10 explorer.exe, Excel – This issue can appear while using Windows Explorer or Excel. Try reinstalling your graphics card drivers or the problematic applications.
- Red screen Windows 10 two monitors – If this happens, the cause is most likely your configuration or a graphics card driver.
- Red screen Windows 10 just flashes – If the red screen keeps flashing on your Windows PC, the problem might be caused by your overclock settings. In some cases, the issue might be faulty hardware.
- Red screen Windows 10 Nvidia – Can appear while using Nvidia graphics. Be sure to remove overclock settings and update your drivers.
Red screen issues in Windows 10 can be quite serious, and in most cases, these issues are related to your hardware, so while fixing this problem on Windows, be careful to avoid any potential damage.
If you’re dealing with a red screen on Windows 10, vertical red lines on your screen, a red screen while playing games, or even a blue tint issue on Windows 10, each of these display problems may signal different underlying causes—from driver conflicts to faulty hardware.
Some users might confuse red tint on a laptop screen with this issue, but the two aren’t related.
As always, make sure to leave your comments in the section below.
Read our disclosure page to find out how can you help Windows Report sustain the editorial team. Read more


Improve this guide


User forum
2 messages