The Remote Connection was not Made: 9 Ways to Resolve it
Check your connection and tweak your remote desktop settings
7 min. read
Updated on
Read our disclosure page to find out how can you help Windows Report sustain the editorial team. Read more
Key notes
- The connection was not made is a frequent error VPN users with Windows have to deal with.
- It prevents you from accessing the information of your remote device, even though it's connected.
- You can fix the problem quickly and effectively by disabling your firewall temporarily.
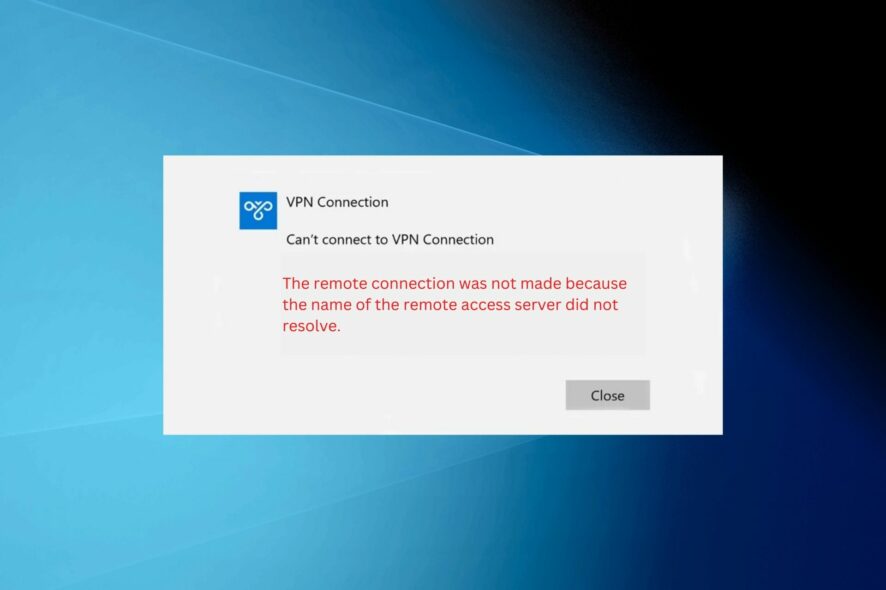
VPNs (Virtual Private Networks) are tools that make it harder for outside entities to track your browsing behavior while circumventing censorship. While many users use VPNs relatively quickly, some complain that the remote connection was not made.
This issue can be frustrating, but it is not the most difficult to solve, as we will show in this guide.
What caused The remote connection was not made because the name of the remote access server did not resolve?
Several factors can cause the remote connection was not made error message. Below are some of the notable causes:
- Issues with third-party apps: One of the first things to check is if there is no third-party app messing with your VPN. You can verify this by performing a clean boot and removing any faulty app on your PC.
- Antivirus interference: At times, the connection to the remote computer cannot be established error message can happen because your antivirus or firewall is blocking the connection. Disabling the two security features temporarily should fix the issue.
- Wrong hostname: Sometimes, you might encounter this error if you enter the wrong hostname. So, ensure that the hostname you entered is correct.
Speaking of this problem, here are some similar errors that users reported:
- The remote connection was not made because the attempted VPN tunnels failed Windows 10, Windows 11, and L2TP/IPsec: This is another variation of this problem. If you encounter this issue, try disabling your antivirus or firewall and check if that helps.
- A connection to the remote access was not made because the modem was not found: According to users, this error can appear due to your DNS, so try changing your DNS settings and check if that solves the problem.
- The remote connection was not made error 800, 868: There are various error codes that can appear alongside this message. However, you should be able to fix them using one of our solutions.
- The remote connection was denied, has timed out, was interrupted, and is reconnecting: This issue can be caused by your configuration. To fix the problem, check the configuration and see if that helps.
- The remote connection was denied because the username and password on the Mikrotik router: Make sure you entered the correct credentials.
How can I fix The remote connection was not made because the name of the remote access server did not resolve?
1. Double-check the Hostname
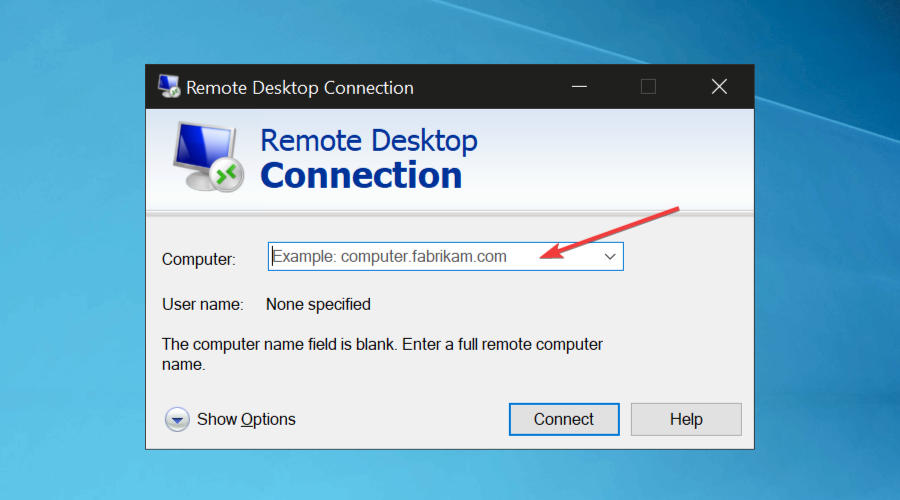
First, double-check that you’re entering the correct hostname.
The hostname is the device’s name that configures the remote access, as explained above. Check the name and make sure it matches the Hostname in your remote access connection.
Ensure there are no typos in the hostname entered to connect with VPN. Alternatively, you can establish a VPN connection with your server IP address.
2. Use a reliable VPN to create a remote connection
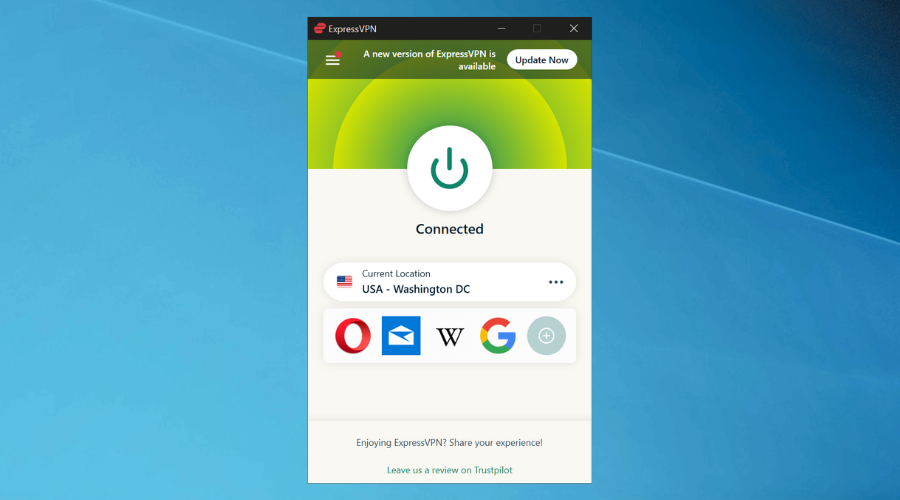
- Download and install ExpressVPN.
- Launch it from the Start Menu.
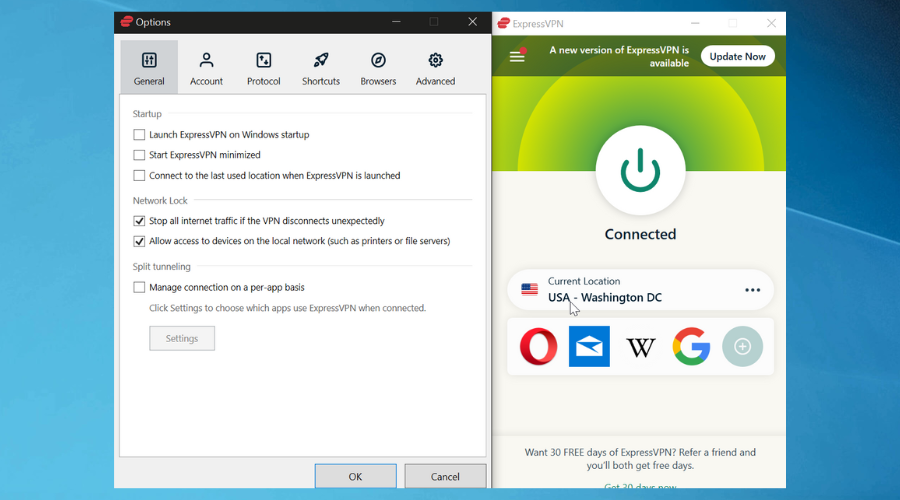
- Tweak your connection preferences.
VPNs are beneficial, and more often than not, you will eventually have to resort to using one.
Several benefits come with a good VPN.
First and foremost, they ensure your connection is private and protect sensitive data about your identity, location, and browsing activity.
Secondly, they can help boost your connection for gaming or help you access the geo-restricted content on streaming platforms.
Unfortunately, if the VPN you use is not completely up-to-date or set up faulty, you may experience errors like this Remote access connection.
VPN software is quite similar in settings, so you can follow this guide even if you use something else.
If you have a VPN that automatically connects to a server, try manually changing to a different server and see if the problem persists.

ExpressVPN
Avoid remote desktop issues by connecting using ExpressVPN’s premium servers!3. Flush the DNS and reset Winstock
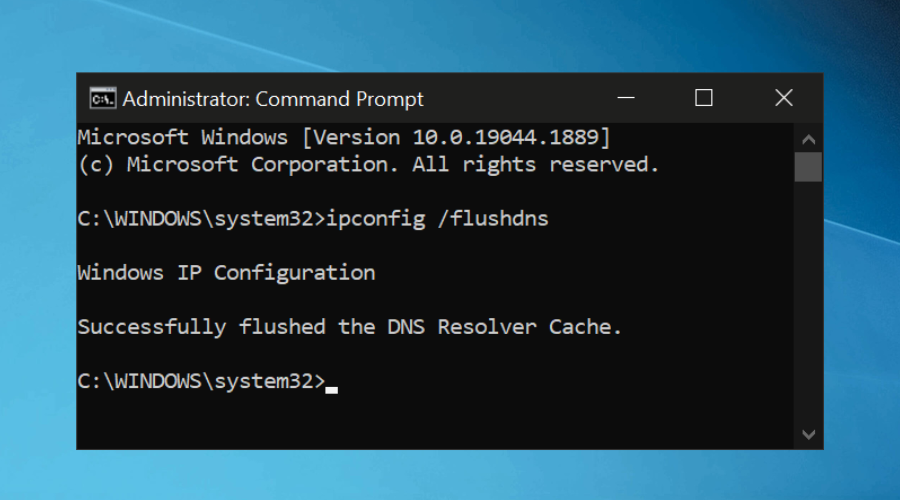
- Press the Windows key, type cmd, and select Run as administrator under Command Prompt.
- Run the following commands one by one:
ipconfig /flushdnsipconfig /registerdnsipconfig /releaseipconfig /renewnetsh winsock reset
Flushing the DNS (Domain Name System) and resetting network settings are some of the most effective fixes for this VPN error. After running these commands, check if the problem is resolved.
4. Disable your firewall
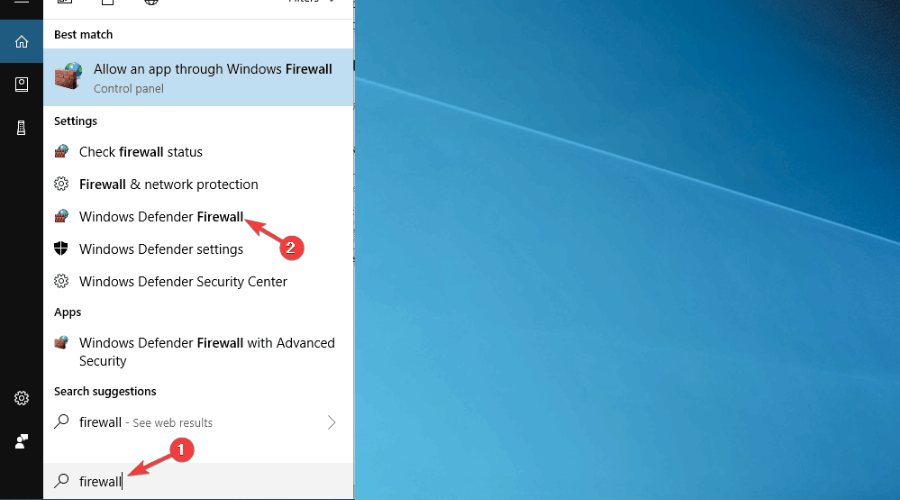
- Press the Windows key + S, type firewall, and choose Windows Defender Firewall from the list.
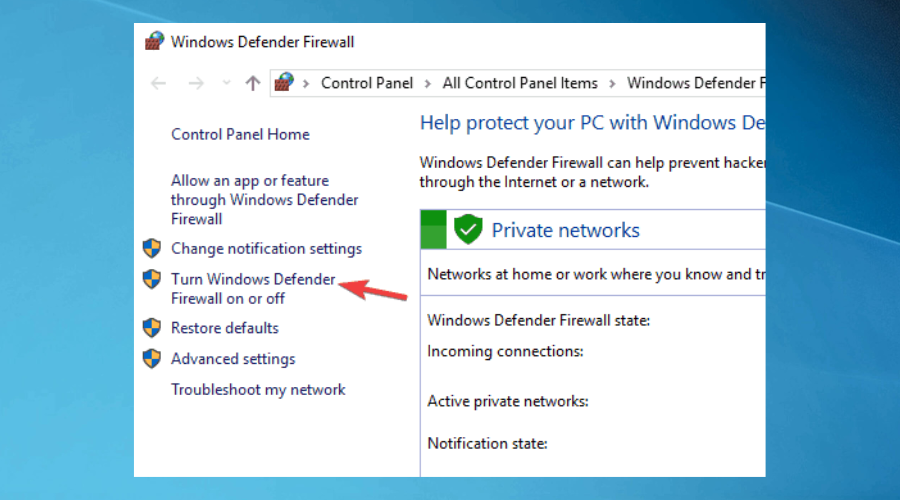
- Select Turn Windows Defender Firewall on or off in the left pane.
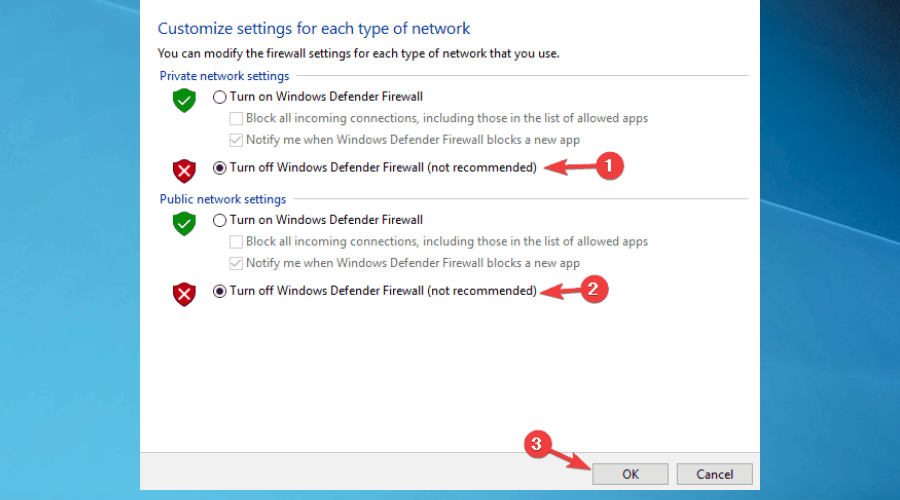
- Now, select Turn off Windows Defender Firewall (not recommended) for both Private and Public networks and click OK to save changes.
A firewall is a great security feature, but sometimes your firewall can cause The remote connection was not made error to appear. If you encounter this issue, you might have to temporarily disable your firewall.
If the problem doesn’t appear after doing this, your firewall isn’t correctly configured. Therefore, you need to enable your firewall and check your configuration to fix it.
5. Change your DNS
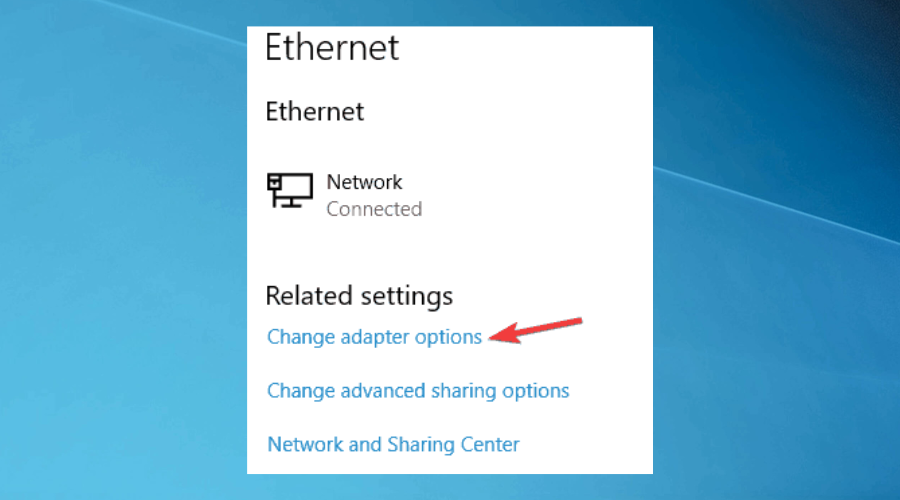
- Right-click the network icon on your Taskbar and select your network from the menu.
- Now click on the Change adapter options.
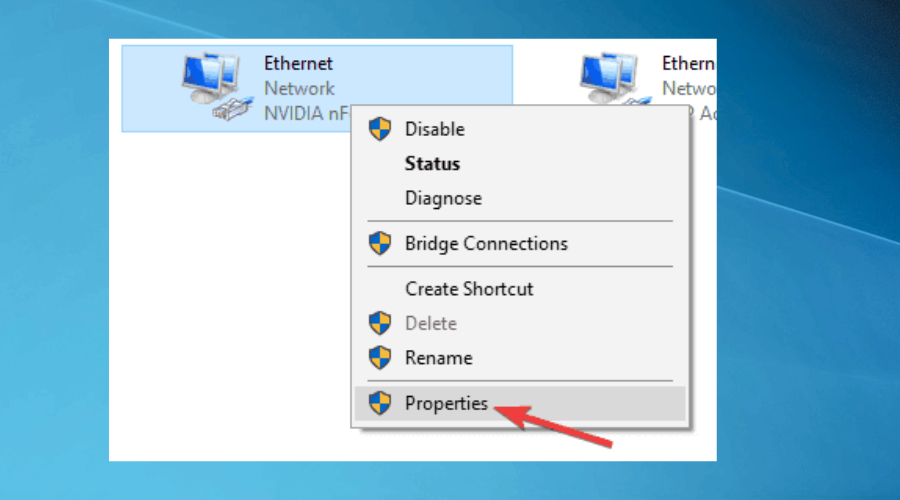
- A list of all network connections on your PC will now appear. Next, right-click your network connection and choose Properties.
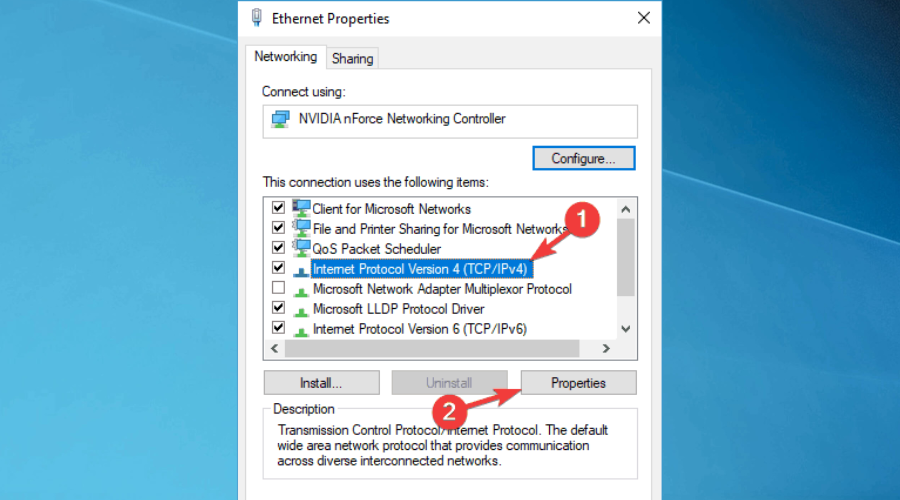
- Select Internet Protocol Version 4 (TCP/IPv4) and click Properties.
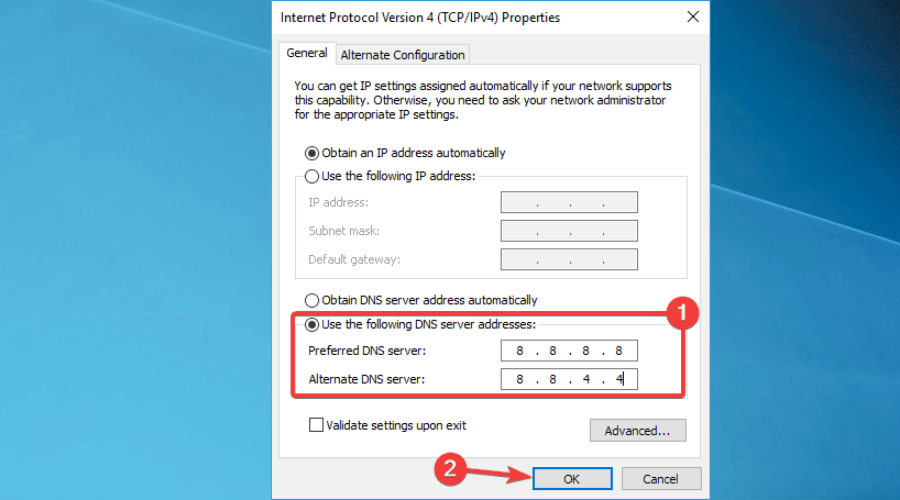
- Now select Use the following DNS server addresses and enter 8.8.8.8 as Preferred DNS server and 8.8.4.4 as Alternate DNS server.
- Now, click OK to save changes.
After doing that, you’ll use Google’s DNS, and the issue should be resolved. If you want, you can also use OpenDNS or any other DNS by using this method.
6. Restart RasMan process
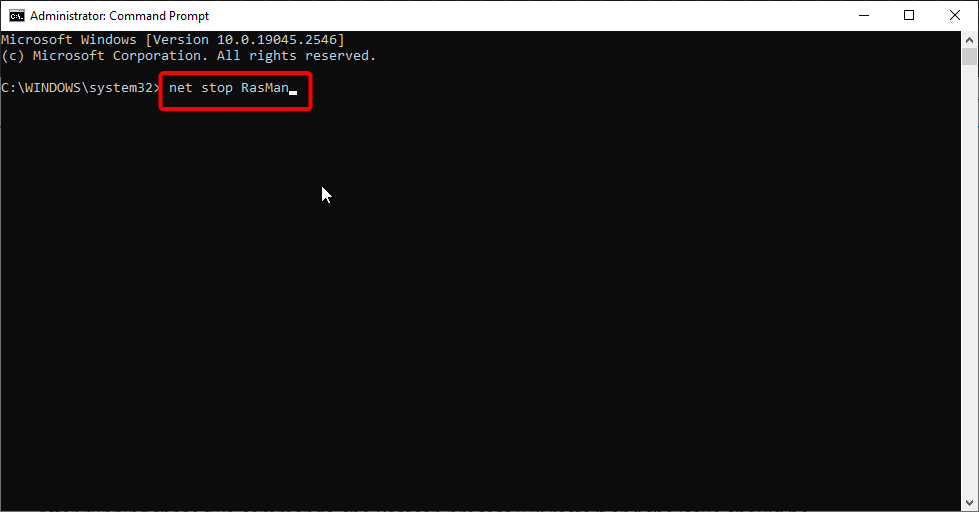
- Press the Windows key + S, type cmd, and select Run as administrator under Command Prompt.
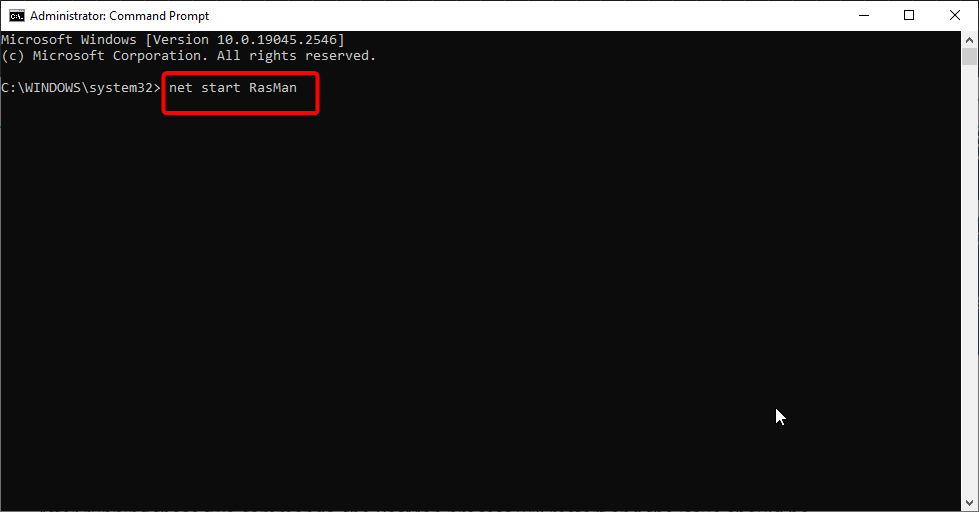
- Type the following commands and hit Enter after each:
net stop RasMannet start RasMan
Many users reported that The remote connection was not made error message can occur due to RasMan process. To fix the problem, it’s required that you restart this process.
After running these two commands, the RasMan process will restart, and the issue should be resolved entirely.
7. Disable third-party antivirus software
If you keep getting The remote connection was not made an error message the problem might be your antivirus. Third-party antivirus tools can sometimes interfere with Windows and cause this and other errors to occur.
To fix the problem, you need to disable certain antivirus features and check if that helps. For example, you might have to disable your antivirus if the issue is still temporary.
If this fixes the issue, you might have to remove the security software and use another. Many options are available so that you can find the best antivirus software for your particular needs.
8. Disable your proxy
- Press the Windows key + I to open the Settings app and select Network & Internet.
- Select Proxy from the menu on the left, and in the right pane, disable all options.
Many users use proxy to protect their privacy online, but sometimes your proxy can cause The remote connection was not made an error to appear. To fix the problem, it’s advised to disable your proxy.
9. Perform a clean boot
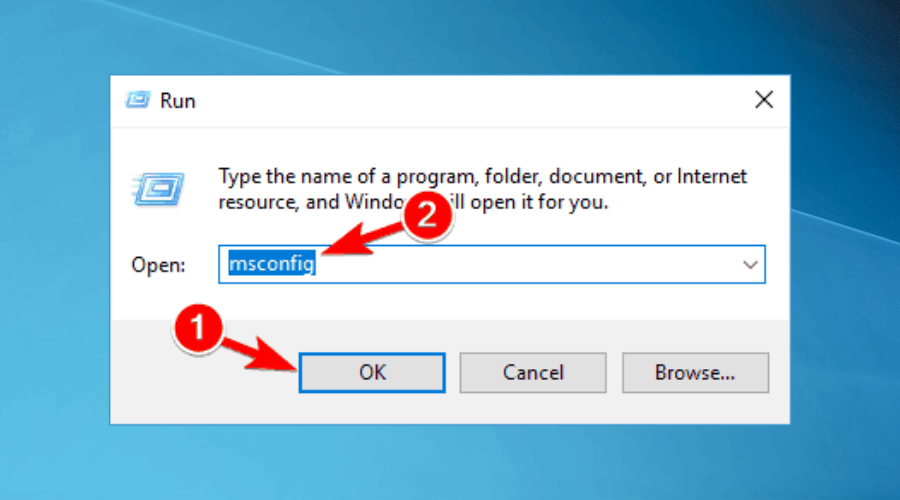
- Press the Windows key + R, type msconfig, and click OK.
- Select the Services tab, check the Hide all Microsoft services box, and click the Disable all button.
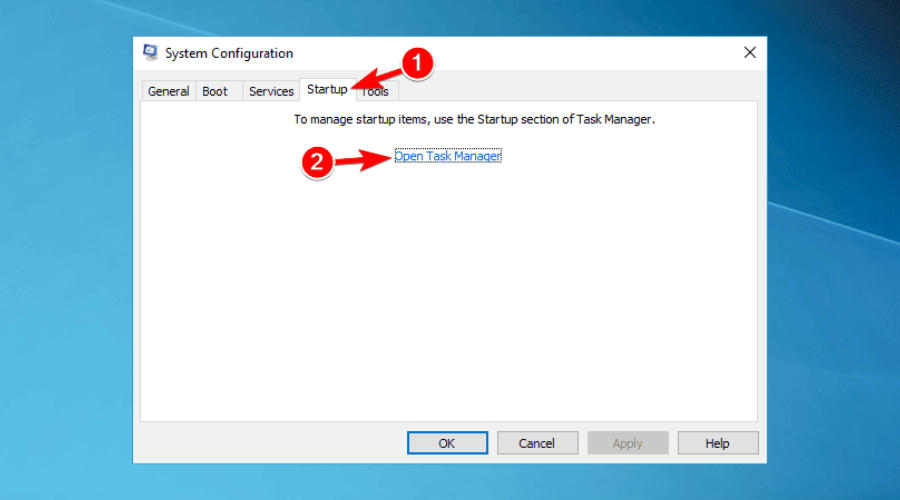
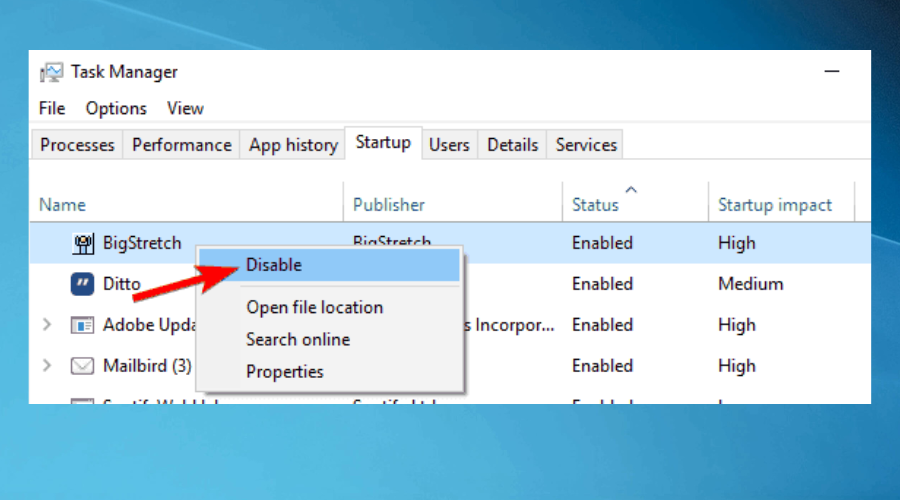
- Navigate to the Startup tab and click Open Task Manager.
- Right-click each entry on the newly opened Task Manager window and choose Disable.
- Once you disable all startup apps, go back to the System Configuration window and click Apply, followed by OK.
- Finally, restart your PC.
Sometimes third-party applications or services can interfere with Windows and cause this and other errors to appear. It would be best to start your PC in Clean boot mode to fix the problem.
Once your PC restarts, check if the problem is still there. If not, you need to enable disabled services and apps one by one until you find the cause.
Once you find the problematic application, you must remove it from your Windows 10 PC.
These are tested solutions to get back on your remote desktop connection. In addition, there are several ways you can connect from one device to another and control a PC through another PC.
You could use Windows 10’s built-in Remote Desktop feature or a third-party remote access tool such as TeamViewer.
Feel free to let us know the solution that helped you fix this issue in the comments below.






User forum
0 messages