Sedlauncher.exe has High CPU Usage? 4 Ways to Fix it
Learn how others managed to fix things in no time!
3 min. read
Updated on
Read our disclosure page to find out how can you help Windows Report sustain the editorial team. Read more
Key notes
- When you find high CPU usage on the PC, it's often the sedlauncher.exe process to blame.
- Problems arise due to misconfigured settings or the underlying service acting weirdly.
- To fix things, disable the Windows Remediation Service or delete the rempl task, amongst other solutions.
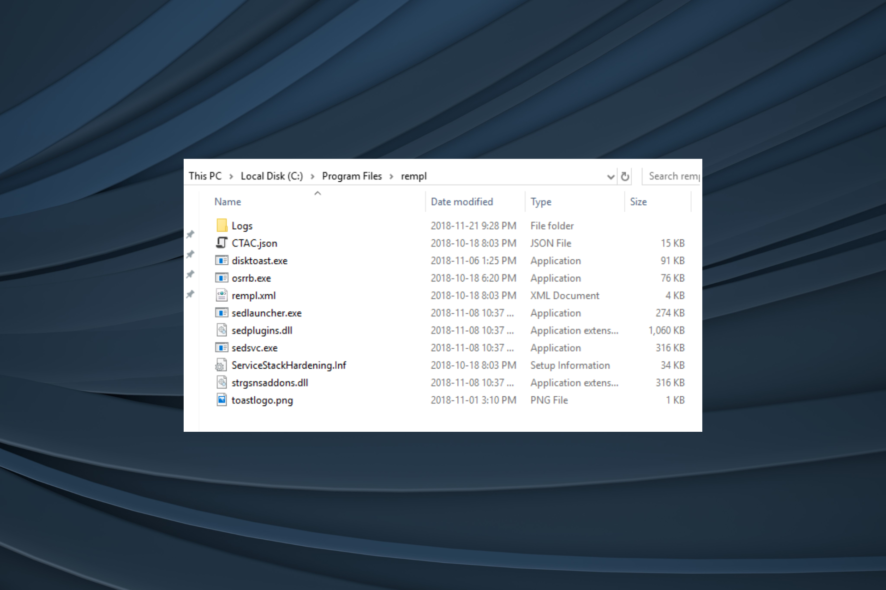
Sedlauncher.exe is part of the Windows 10 update package and was designed to improve the speeds of the Windows Update Service on the computer. But for many, sedlauncher.exe has high CPU usage.
As part of the Windows Remediation Service, the element was created with speed optimization in mind. But ever since issues appeared, many asked about what sedlauncher.exe is and ways to fix the high CPU usage caused by this process. Keep reading to find out!
How can I fix high CPU usage by sedlauncher.exe?
1. Disable the Windows Remediation Service
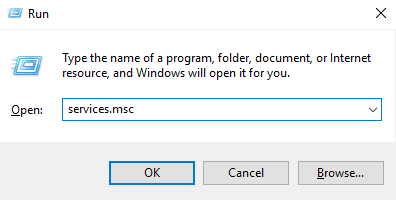
- Press Windows + R, type services.msc, and press Enter.
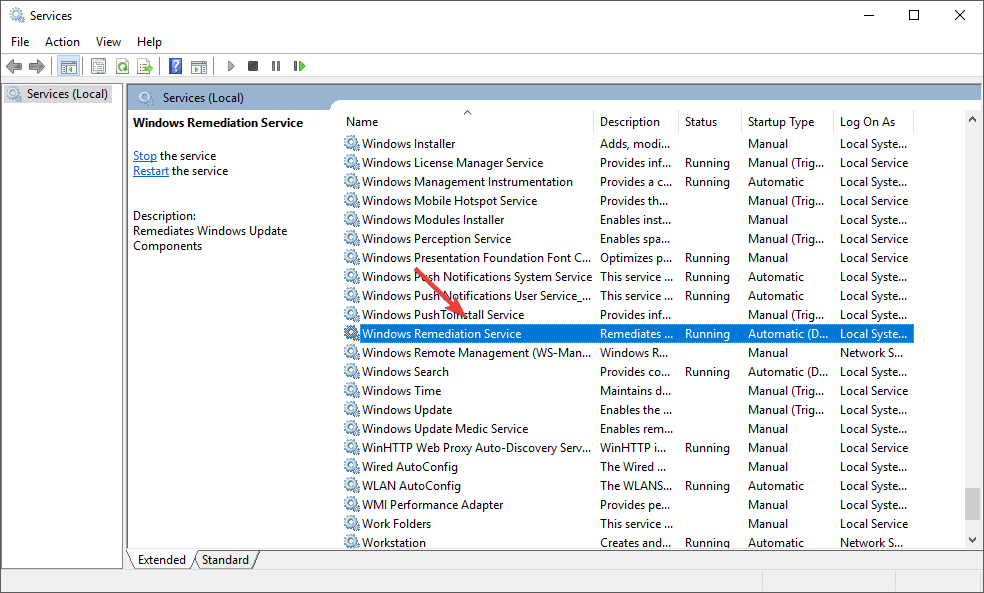
- Scroll down in the list of services, and look for Windows Remediation Service.
- Double-click it to open up the Properties window.
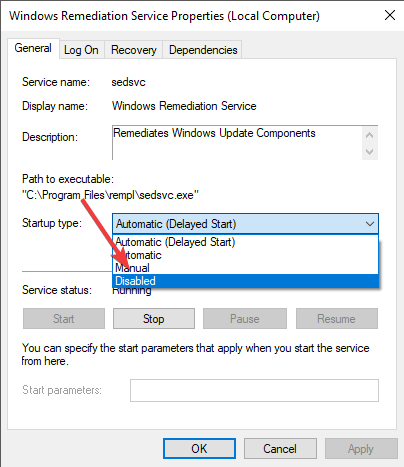
- Under Startup type, select Disabled from the dropdown menu.
- Click Apply and OK to save the changes, and then restart the computer.
2. Completely remove Windows Setup Remediations
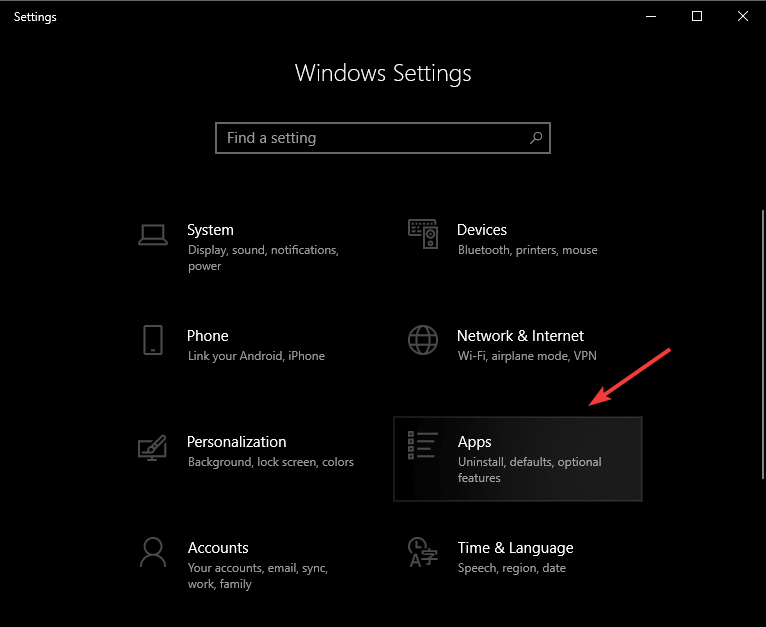
- Press Windows + I to open Settings, and click on Apps.
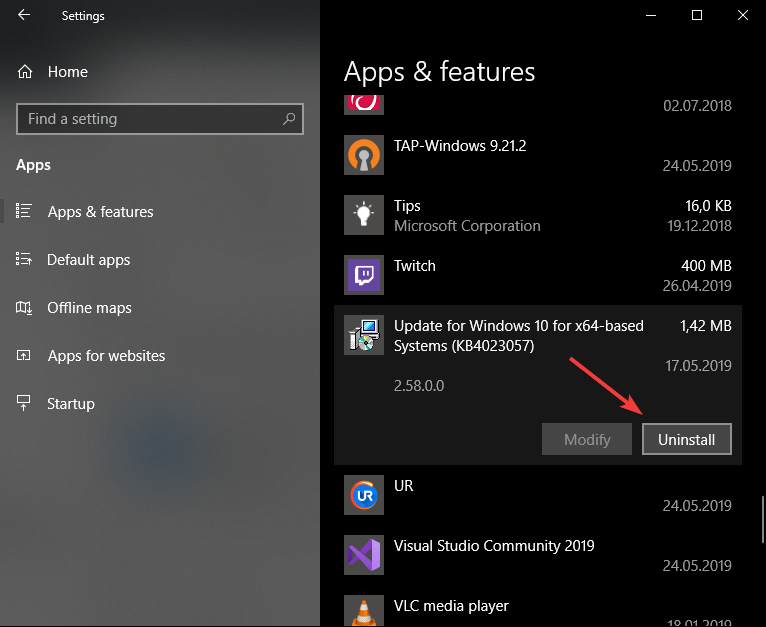
- Inside the Apps and Features list, scroll down until you find Windows Setup Remediations (x64) (KB4023057) or Update for Windows 10 for x64-based Systems (KB4023057).
- Select the entry, and then click on the Uninstall button.
Since this particular update triggered high CPU usage by sedlauncher.exe, uninstalling it should do the trick!
3. Disable the REMPL task
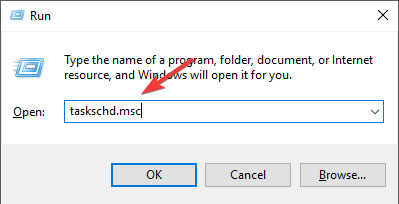
- Press Windows + R, type taskschd.msc in the text field, and press Enter.
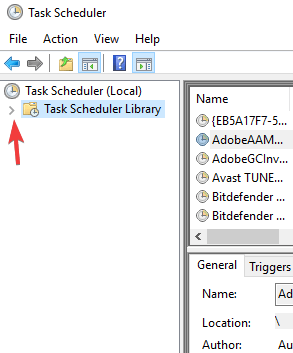
- Click on the arrow next to Task Scheduler Library to expand it.
- Select Microsoft, then double-click on Windows, and choose the rempl folder.
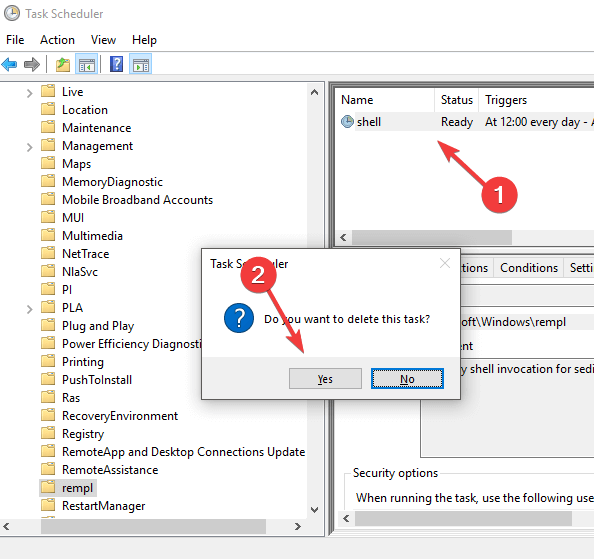
- Select the shell task on the right, press the Delete key, then click Yes to confirm.
Once done with the changes, restart the computer and verify whether the high CPU and disk usage by sedlauncher.exe is fixed.
4. Block Windows Remediation service using the firewall
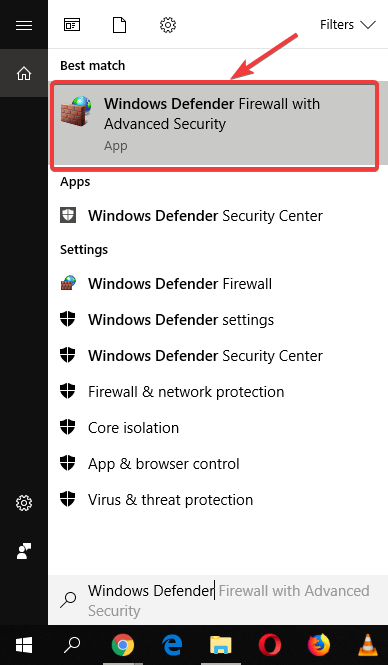
- Press Windows + S to open Search, Windows Defender Firewall, and then open it.
- Click on Advanced Settings in the left-side menu.
- Select Outbound Rules, and then click on New Rule.
- Inside the pop-up window, select Program, and then click on Next.
- Navigate to the location of the Windows Remediation Service on your hard drive:
C:\Program Files\rempl - Select the sedsvc.exe file, and click Next to finish the process.
- Enter a name for your new rule, and click Finish.
That’s it! If the previous solutions didn’t work, blocking the service using the Windows Defender Firewall should prevent high CPU usage by sedlauncher.exe.
Before you leave, check some quick tips to make Windows run faster!
Please let us know if this guide helped you solve your issue by using the comment section below.




User forum
0 messages