Short Names are Not Enabled on This Volume [Fix]
![]() 6 min. read
6 min. read
![]() Updated on
Updated on
Share this article

Improve this guide
Read our disclosure page to find out how can you help Windows Report sustain the editorial team Read more
Key notes
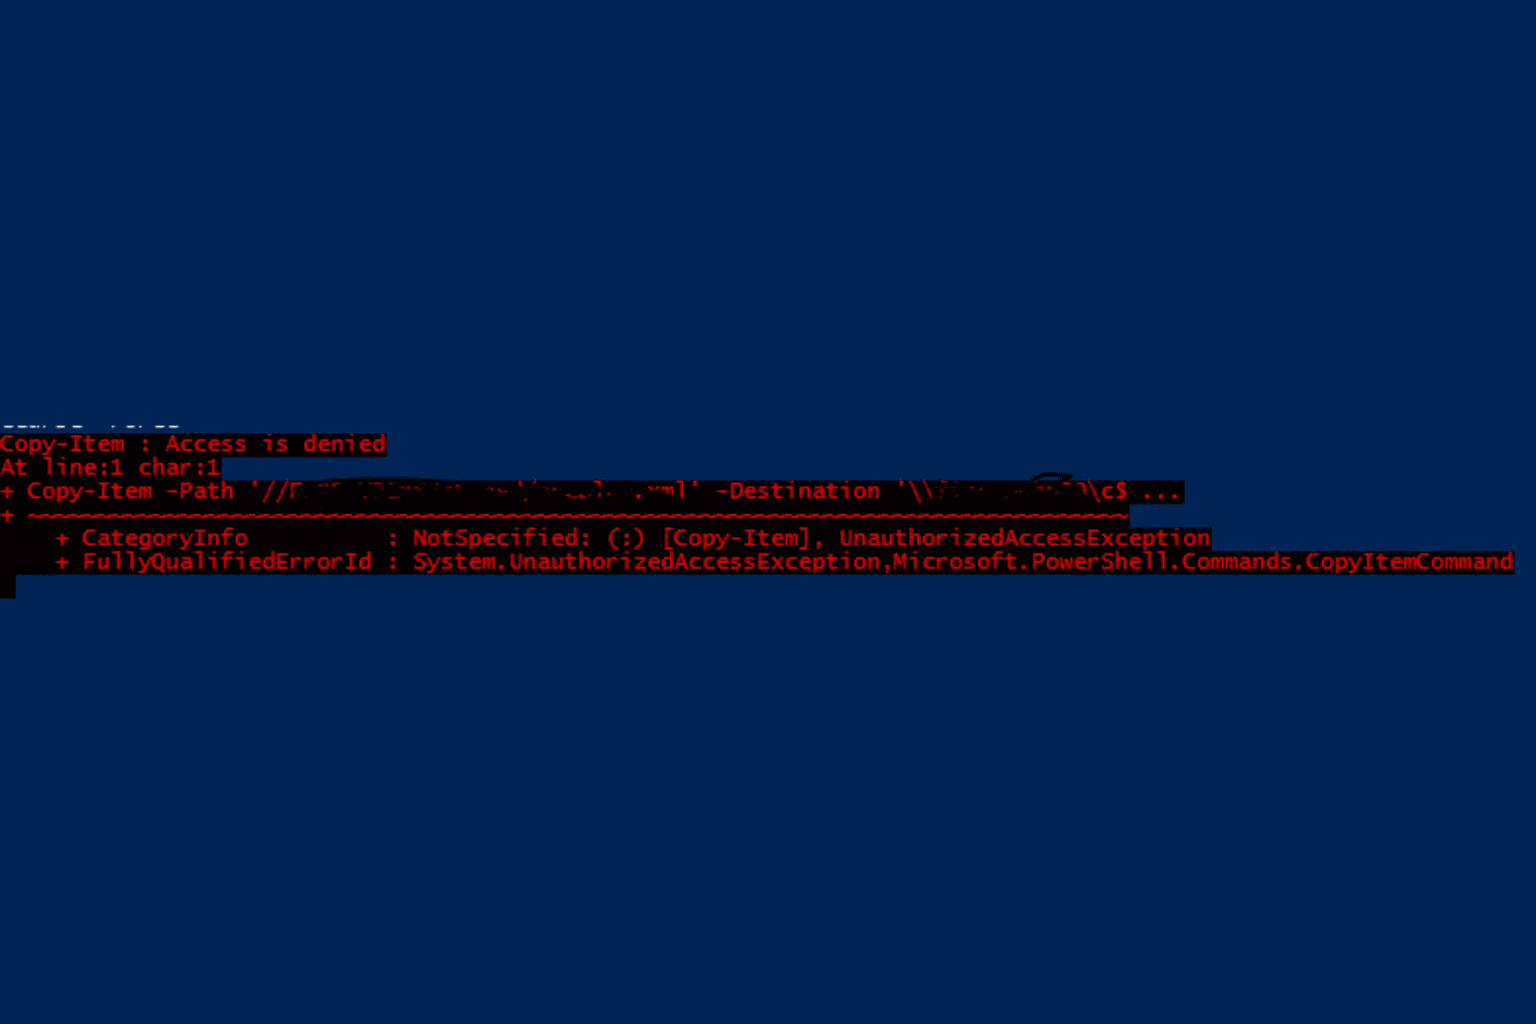
- This error comes with Short names are not enabled on this volume message, and today we’re going to show you how easily solve it.
- You may choose to use Command Prompt, as described below, and this isn't the only solution.
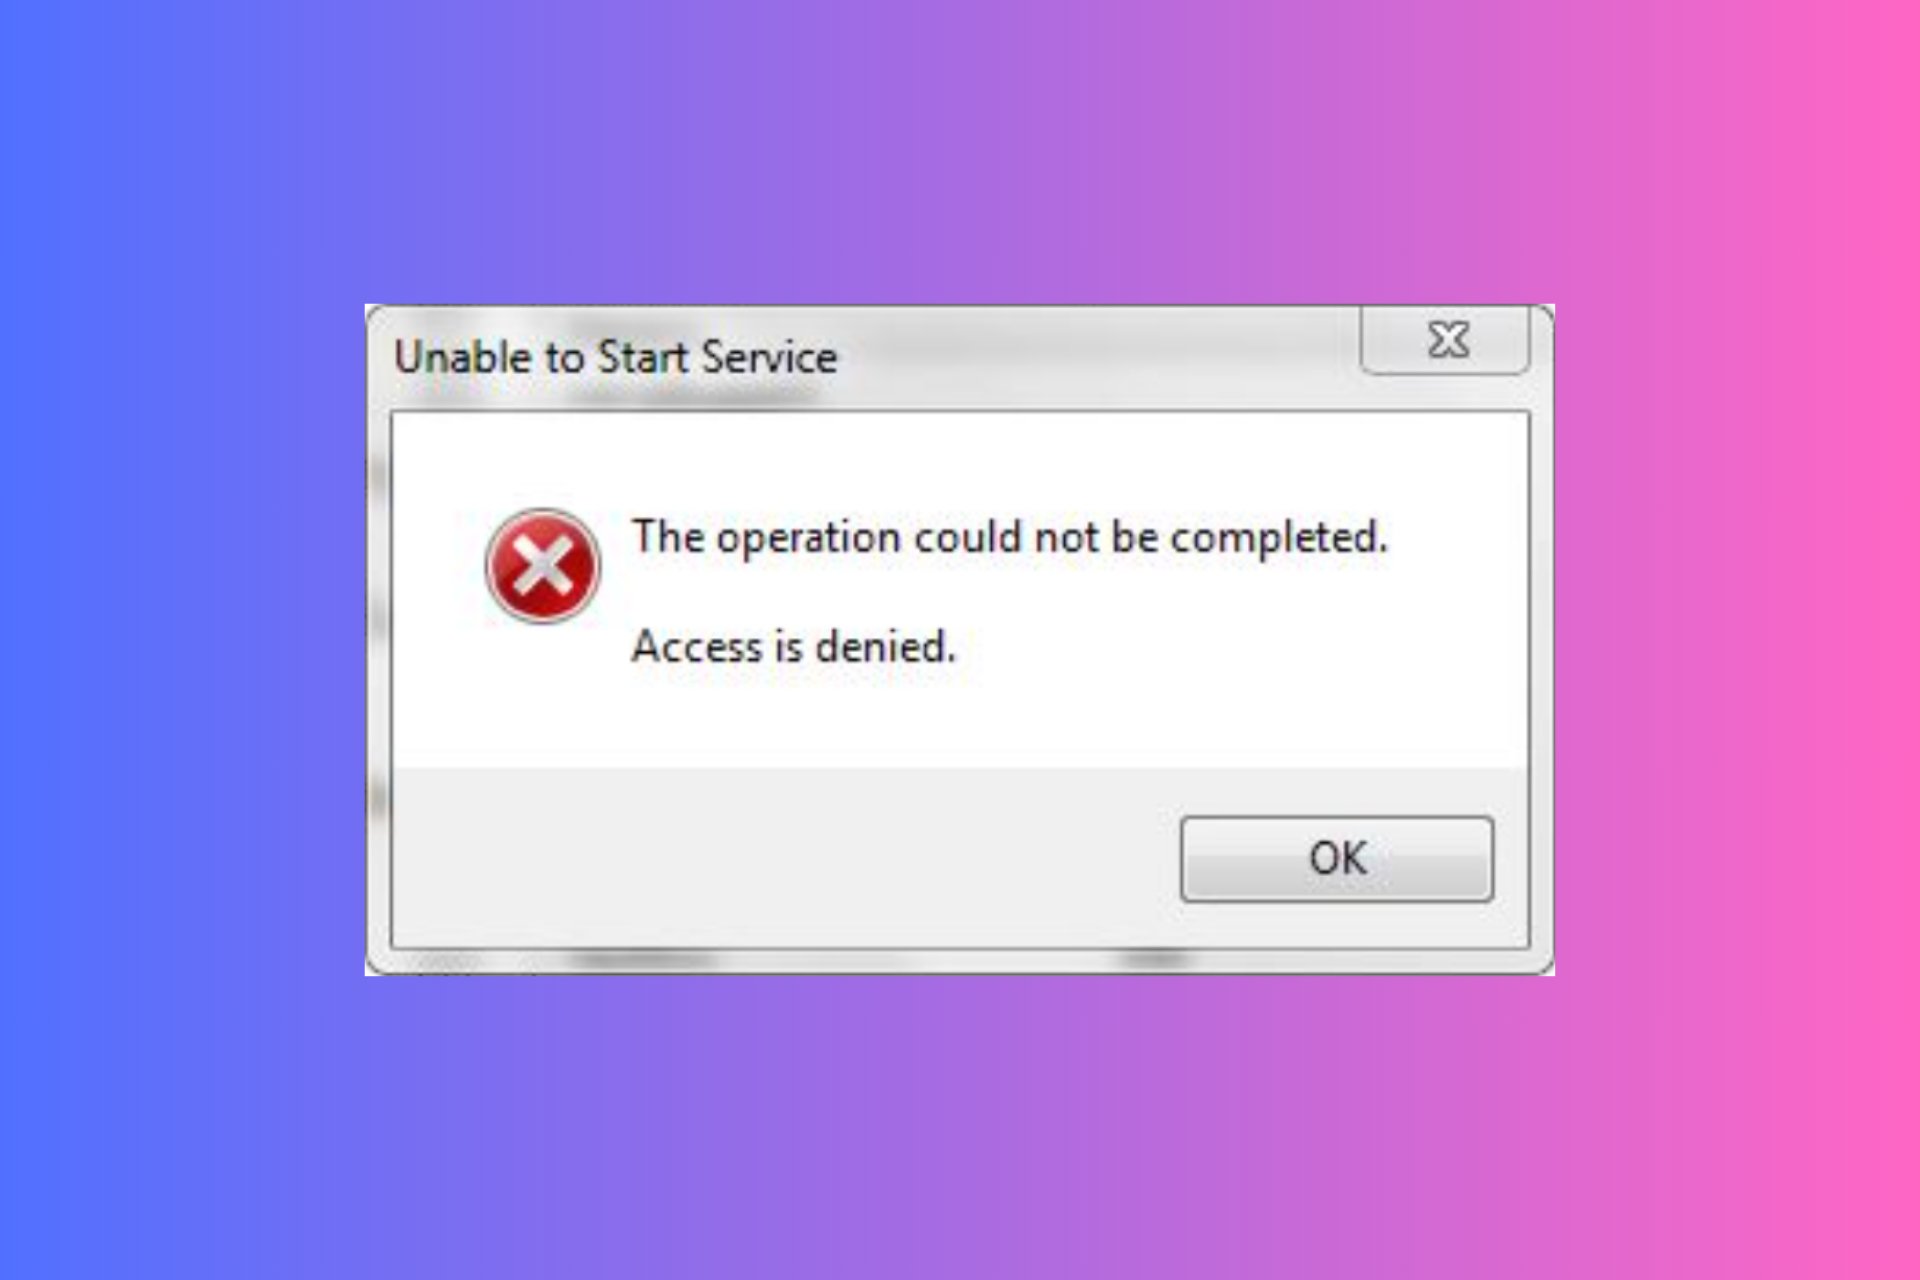
There are many system errors that can occur on your PC, and one of them is ERROR_SHORT_NAMES_NOT_ENABLED_ON_VOLUME.
This error comes with Short names are not enabled on this volume message, and today we’re going to show you how to fix it on Windows 10.
How to fix ERROR_SHORT_NAMES_NOT_ENABLED_ON_VOLUME error?
1. Install the latest updates
According to users, this error occurs when trying to access certain files. Bugs in your operating system can cause this; to fix them, we advise you to install the latest updates.
Microsoft addresses bugs and other issues via Windows updates, so if you want to keep your PC up-to-date and bug-free, be sure to install the latest updates.
Updating Windows is straightforward, and it will occur automatically in the background, meaning there’s no need for user interaction. However, sometimes due to certain problems, you might skip an important update. To be sure that your system is up to date, we strongly advise you to check for updates manually by following these steps:
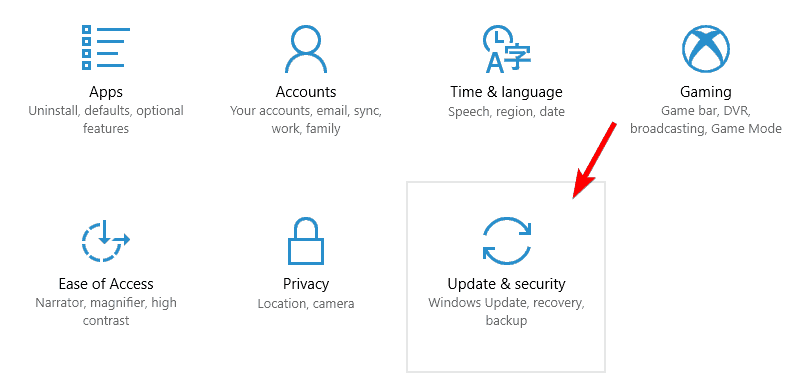
- Press Windows Key + I to open the Settings app.
- When Settings app opens, navigate to the Update & security section.

- Now click on Check for updates button.

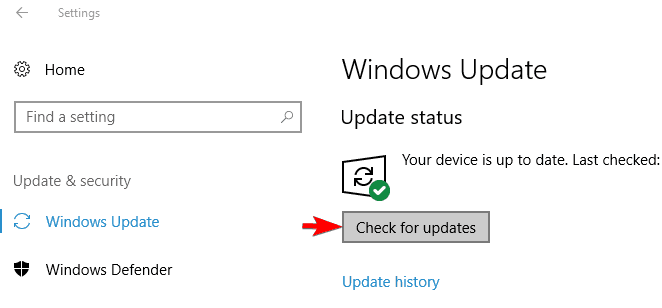
Windows will now check for updates and download them in the background. After updates are installed, check if the problem still appears.
2. Check your antivirus software
Antivirus software is necessary, but some antivirus tools can enforce certain policies that prevent you from copying or accessing files. If you’re using a third-party antivirus tool, you might want to check its security policies.
To do that, you need to check your antivirus configuration and disable features that might interfere with your system. This method might require a bit of trial and error, especially if you’re unfamiliar with your antivirus or computer security.
3. Disable or remove your antivirus
If you can’t find the problematic policy in your antivirus configuration, you might want to try disabling it entirely. Windows 10 comes with Windows Defender that works as a default antivirus, so you can disable other antivirus tools without any fear of malware. After disabling the antivirus, check if the problem still persists.
If disabling the antivirus software doesn’t solve the issue, you can also try removing your antivirus. Keep in mind that antivirus tools often leave files and registry entries that can still interfere with your system.
We suggest using a dedicated removal tool to remove all files related to your antivirus completely. Almost all antivirus companies offer these tools for their software, so be sure to download and use one for your antivirus.
If removing the antivirus solves the problem, you can try to install the latest version of your antivirus and check if the problem appears again. Alternatively, you can switch to a different antivirus software entirely.
4. Use Command Prompt
According to users, Short names are not enabled on this volume message that appears on their PC when they are trying to access files from their backup. To fix the problem, you must run a single command from Command Prompt. To do that, follow these steps:
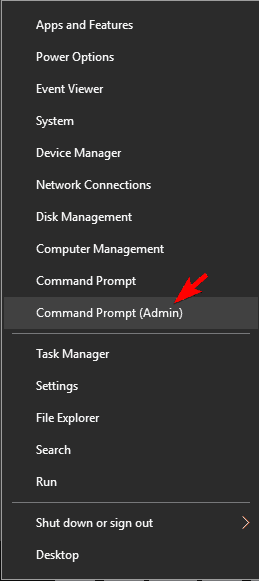
- Press Windows Key + X to open Win + X menu. Select Command Prompt (Admin) from the menu. If Command Prompt isn’t available, you can also use PowerShell.

- When Command Prompt opens, enter fsutil behavior set disable8dot3 0 and press Enter to run it.
Some users are suggesting to use a slightly different command. To fix the problem, start Command Prompt and enter fsutil 8dot3name set X: 0 command. Remember that you need to replace X with the letter of the problematic drive.
If you want, you can check which drives have 8dot3 name creation feature enabled. To do that, enter fsutil behavior query disable8dot3 X: in Command Prompt. If the drive has this feature disabled, you can enable it by using the command above.
5. Perform Clean boot
Sometimes third-party applications can interfere with your system and cause this and other system errors. To fix this problem, you need to disable all startup applications and services and check if that helps. To do that on Windows 10, do the following:
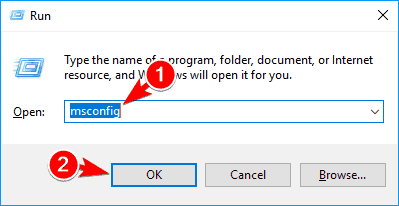
- Press Windows Key + R and enter msconfig. Press Enter or click on OK.

- System Configuration window will appear. Go to Services tab and check Hide all Microsoft services option. Now click on Disable all button to disable them.

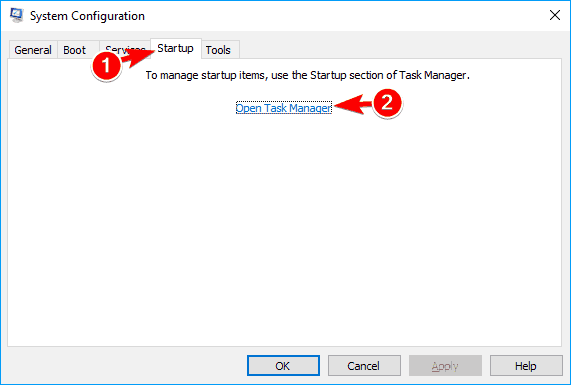
- Navigate to the Startup tab and click on Open Task Manager.
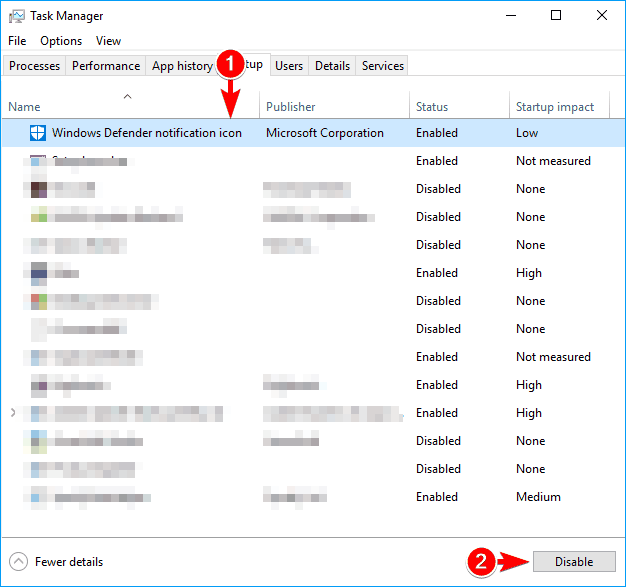
- When Task Manager starts you’ll see a list of all startup applications. Select the first entry on the list and click on Disable button. Repeat this step for all entries on the list.

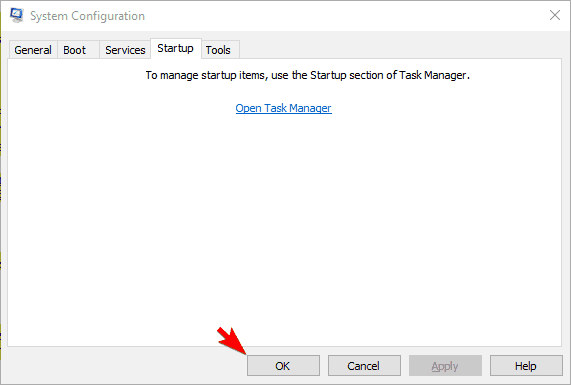
- After disabling all startup items, close Task Manager and go back to System Configuration window. Click on Apply and OK to save changes.

After doing that you need to restart your PC to apply the changes. If the problem doesn’t appear after restarting your PC, one of the startup applications is certainly causing the problem. To find the problematic application you need to repeat the same steps and enable apps and services individually or in groups.
Keep in mind that you’ll need to restart your PC every time after enabling a group of apps or services. After you find the problematic application, you can keep it disabled, remove it or update it to the latest version and check if that solves the issue.
6. Reset Windows 10
Before we start, we have to mention that this solution will delete all files and applications from your system drive, so be sure to back them up. This process also requires Windows 10 installation media, and you can create it easily with Media Creation Tool. To reset Windows 10, do the following:
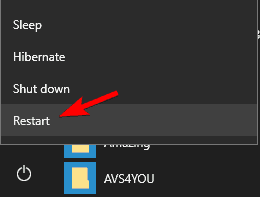
- Open the Start Menu and click on Power button. Press and hold the Shift key and click on Restart.

- Select Troubleshoot > Reset this PC > Remove everything. This step might require installation media, so be sure to have it ready.
- Select your version of Windows and choose Only the drive where Windows is installed > Just remove my files.
- Now you’ll see a list of changes that reset will perform. Once you’re ready, click Reset to start.
- Follow the instructions on the screen to complete the reset.
This is a drastic solution since it will remove all your files and apps from the system drive, so use it only if other solutions can’t fix this problem.
Short names are not enabled on this volume message can cause some problems, but in most cases, you can fix it by using Command Prompt and running certain commands from it.