How to Fix Elder Scrolls V: Skyrim’s Settings not Saving
Taking full control of the installation folder should fix this
4 min. read
Updated on
Read our disclosure page to find out how can you help Windows Report sustain the editorial team. Read more
Key notes
- If your Skyrim settings are not saving, it might be due to a lack of privilege or permission.
- One quick solution to the issue is to disable real-time protection in your antivirus software.
- Another excellent fix is to take ownership and total control of the installation folder.

Elder Scrolls V: Skyrim doesn’t always save game settings for players. Some players have said in support forums that Skyrim doesn’t save newly selected videos or control settings.
Consequently, changed settings will reset for those players when they restart the game. This can be frustrating, as you must repeat the same settings repeatedly. This guide will show you how to fix this issue effortlessly.
Why isn’t Skyrim not saving my selected settings?
Several factors can cause the Skyrim settings not saving issue. Below are some of the prevalent ones:
- Lack of privileges: Sometimes, your games require you to have administrative rights to make changes to their files. If you are not running the game as admin, it might be why your Skyrim is not saving your settings. It would be best if you corrected this by launching it as administrator and in compatibility mode.
- Antivirus interference: Your security software might also prevent your game from saving some in-game changes on your PC. The solution is to disable the software and probably switch to one of the best antiviruses for Windows PC.
- Lack of ownership: In some cases, you might not the permission the write to your game files. The fix is to take ownership and total control of the file and restart Skyrim.
How can I fix Skyrim if it is not saving settings?
1. Disable read-only for Skyrim’s INI files
- Click File Explorer’s folder icon on the Taskbar and navigate to the path (replace %USERPROFILE% with your user folder name) below:
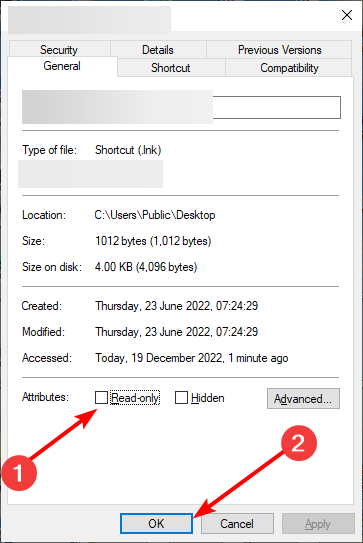
%USERPROFILE%\Documents\My Games\Skyrim - Then right-click the SkyrimPrefs.ini file and select its Properties option.
- Uncheck the selected Read-only checkbox there.
- Click the Apply button followed by OK to save settings.
- Repeat steps three to seven for the Skyrim.ini file.
If your INI folder is set to read-only, you might not be able to make changes to it. This can cause Skyrim not to save your settings. Following the steps above should correct it.
Note: You’ll need to.
2. Take ownership of Skyrim’s installation folder
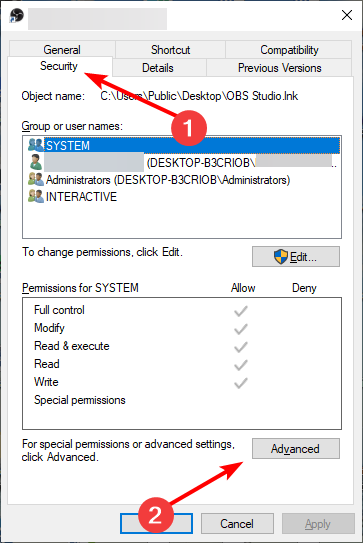
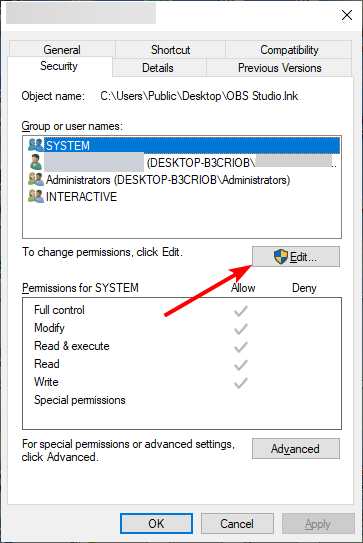
- Right-click the Skyrim installation folder and select the Properties option.
- Click the Security tab at the top.
- Now, click the Advanced button.
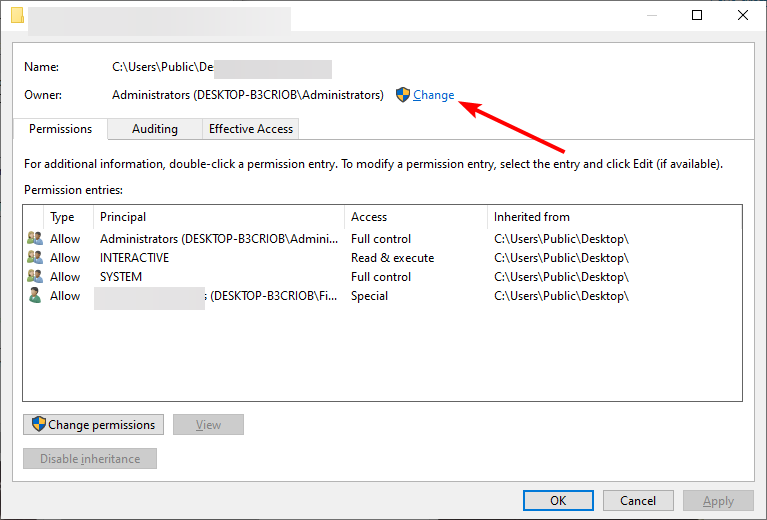
- Next, click the Change option before the Owner section.
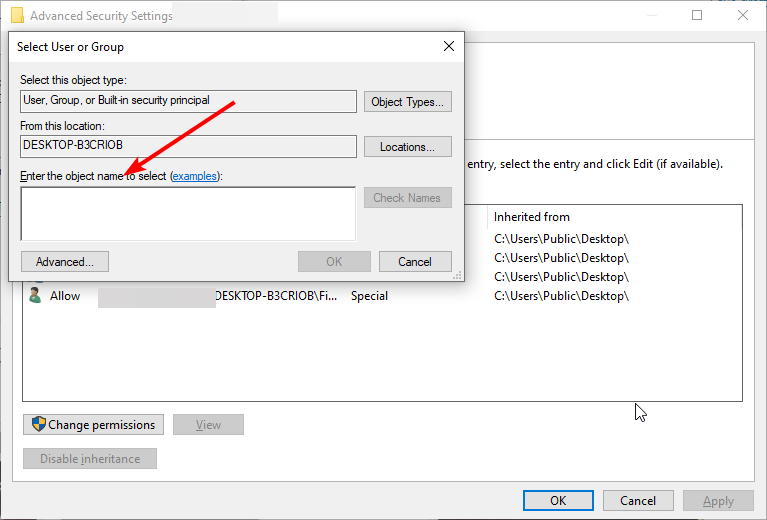
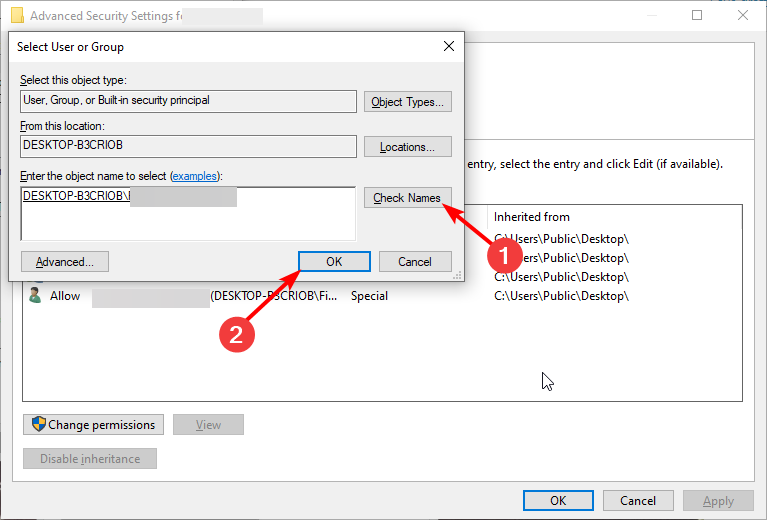
- Type your User profile name in the Enter the object name box.
- Now, click Check names, followed by OK.
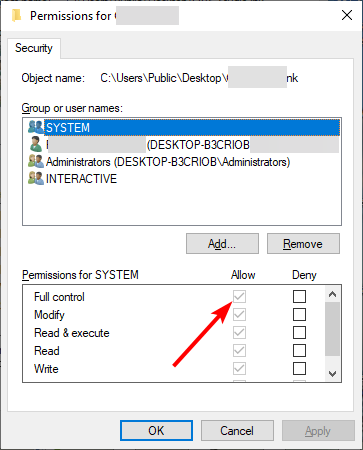
- Go back to the Properties window and click the Edit button.
- Next, check the box for Full control and click OK.
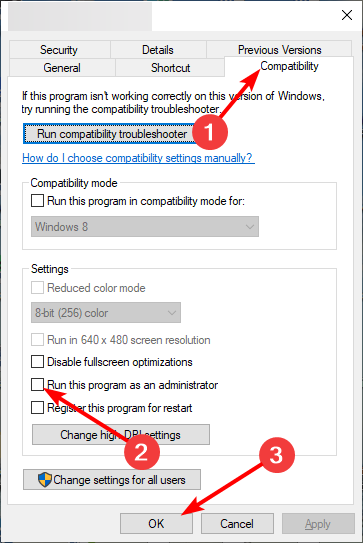
- Right-click the TESV file in the Elder Scrolls V Skyrim folder and select Properties.
- Click the Compatibility tab at the top and check the box for Run this program as administrator.
- Finally, click the Apply button, followed by OK.
To make unrestricted changes to Skyrim, you need free access to its files. Else, the game will not save your changes.
3. Disable antivirus utilities
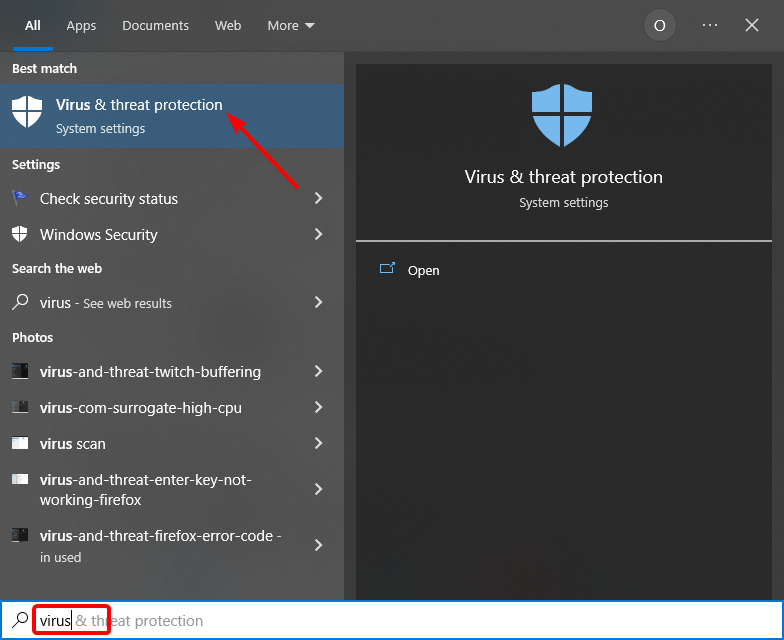
- Press the Windows key, type virus, and select Virus & threat protection.
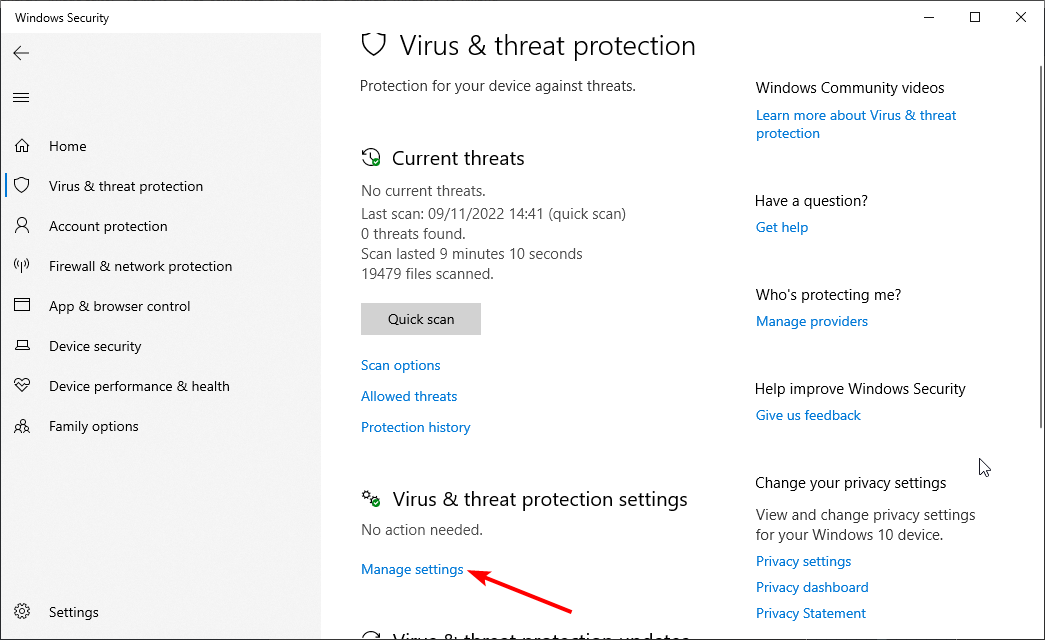
- Click Manage settings.
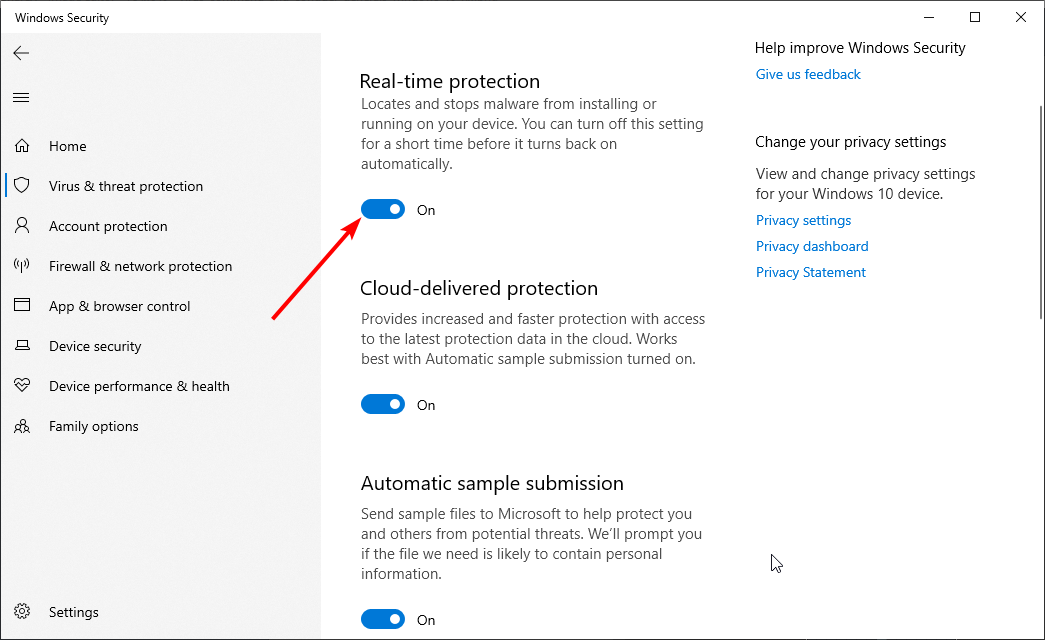
- Next, toggle off the Real-time protection option.
If you’re utilizing a third-party antivirus software, disable that utility’s shield. Right-click its system tray icon and look for and select a disable (turn off) setting of some kind.
If this fixes the problem, you should remember to enable your antivirus after saving the changes.
That is all there is to fix the Skyrim not saving settings issue. In most cases, taking ownership and complete control of the installation folder should solve the problem.
On a side note, if you are troubled by the Skyrim black screen issue on Windows 10, check our detailed guide to fix it effortlessly.
Feel free to let us know the solution that helped you fix this issue in the comments below.


User forum
0 messages