[Fixed] Sppsvc.exe High CPU Usage on Windows 10, 8 & 7
Fix sppsvc.exe high CPU usage on Windows with our quick solutions
Key notes
- Sppsvc.exe is a process that allows Windows to install and run digital licenses.
- Some users have encountered high CPU usage for sppsvc.exe which can lead to system failure if not fixed.
- Read our guide to find the best fixes for this issue.

Windows users often experience high CPU usage. This issue causes PC performance to slow down, consuming huge chunks of memory.
It is critical to take measures in fixing this issue, as it can bring fatal damage to your PC. In this guide, we will provide you with a series of fixes that should help you out.
What is Sppsvc.exe?
This process enables the download, install,ation and enforcement of digital licenses for all Windows applications and Windows. It is a part of Windows OS, if disabled, it can lead to Activation issues.
How to fix sppsvc.exe high CPU usage?
1. Run the System Maintenance troubleshooter
The System Maintenance troubleshooter can help you find unused files and remove them, which can make your PC run faster.
To access the System Maintenance troubleshooter follow these steps:
- Go to Start and open the Control Panel
- Search Troubleshooting in the Control Panel search box and then open it
- Click View all
- Double click on The System Maintenance troubleshooter and follow the on-screen instructions.

2. Run an SFC scan
Running an SFC scan could help the system find missing or corrupted files. It repairs the contaminated files as well.
To perform an SFC scan you need to follow the next steps:
- Search for the Command Prompt in the Windows search bar, right click on it and then set to Run as administrator
- Input the following command and then press Enter, afterwards wait a few minutes:
- DISM.exe /Online /Cleanup-image /Restorehealth
- To perform the SFC scan type in the following command:
- sfc /scannow
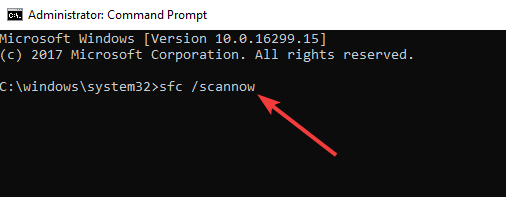
- sfc /scannow
After completing these tasks try resetting your PC.
3. Try stopping the Software Protection service
To do so, you must:
- Open the Run box by pressing R + Windows buttons on your keyboard and type in the command services.msc
- Right click on Software Protection, then go to All tasks and click Stop.

4. Update your Windows PC
Make sure your Windows OS is up to date and you’re running the latest patches/updates.
To update your Operating System, all you have to do is follow these steps:
- Press I + Windows button on your keyboard and click Updates & Security > Windows Update
- Select Check for Updates > install the available updates

- Restart your computer and check if the issue still persists

5. Try to restart the sppsvc.exe process
Disable sppsvc.exe and then check if it is still open in the Task Manager. If it is still running, your OS might be infected with a virus.
To disable sppsvc.exe do the following steps:
- Press R + Windows button on your keyboard
- Type regedit, then press Enter
- Go to HKLM\SYSTEM\CurrentControlSet\Services\sppsvc in the left pane
- Click on the sppsvc folder, then double-click on Start. Change the Value data to 4 and press OK
- Restart Windows and check if your CPU usage improved
If the process is still open in the Task Manager, do a system scan with an anti-malware.
If you don’t find the process open, enable it to see if it is using too much CPU.
6. Try to perform a clean boot
First of all, you need to boot your system in Safe Mode. Check then if you still have a high CPU usage.
If the system works fine in Safe Mode, you should try a clean boot.
To do so, you must:
- Press the Windows button on your keyboard and type msconfig
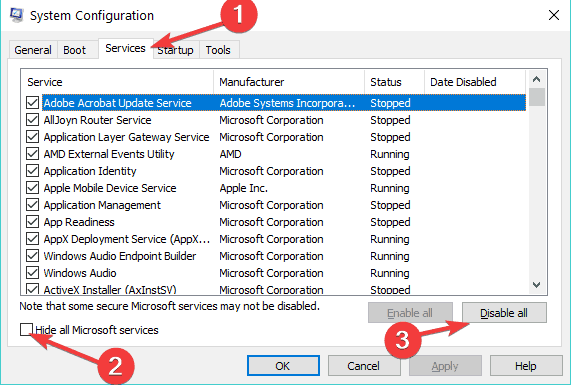
- Click on System Configuration and go to Services
- Check the Hide all Microsoft services and click on Disable all
- Switch to the Startup tab and then Open Task Manager
- Disable all the startup items
- Close the Task Manager and press OK for the System Configuration info
- Restart your computer. If it does not work, you should try and enable the services one by one to see which is the one causing the problem
If you can now track the program that is causing the issue. Try reinstalling it and check if this worked.
We hope that our solutions came in handy. If you have other fixes that you would like to share with us, please list them in the comment section below.
RELATED STORIES TO CHECK OUT:
Read our disclosure page to find out how can you help Windows Report sustain the editorial team. Read more


Improve this guide


User forum
0 messages